Ship:Mutsuki
No edit summary |
Pockington (talk | contribs) added missing information on launch day |
||
| Line 21: | Line 21: | ||
| style="color:inherit;" | • Hit Points || style="color:inherit;" | 9500 || style="color:inherit;" | 11300 | | style="color:inherit;" | • Hit Points || style="color:inherit;" | 9500 || style="color:inherit;" | 11300 | ||
|- | |- | ||
| style="color:inherit;" | • Torpedo protection damage reduction (%) || colspan="2" style="color:inherit;" | | | style="color:inherit;" | • Torpedo protection damage reduction (%) || colspan="2" style="color:inherit;" | 0 | ||
|} | |} | ||
</div> | </div> | ||
| Line 47: | Line 47: | ||
| style="color:inherit;" | • Turning circle radius (m) || style="color:inherit;" | 550 || style="color:inherit;" | 550 | | style="color:inherit;" | • Turning circle radius (m) || style="color:inherit;" | 550 || style="color:inherit;" | 550 | ||
|- | |- | ||
| style="color:inherit;" | • Rudder-shift time (sec) || style="color:inherit;" | | | style="color:inherit;" | • Rudder-shift time (sec) || style="color:inherit;" | 3.2 || style="color:inherit;" | 2.1 | ||
|} | |} | ||
</div> | </div> | ||
| Line 146: | Line 146: | ||
<div style="border: 2px solid rgba(212,175,55,0.8); border-radius: 3px; margin-bottom: 1em; overflow: hidden;"> | <div style="border: 2px solid rgba(212,175,55,0.8); border-radius: 3px; margin-bottom: 1em; overflow: hidden;"> | ||
{| class="wikitable" style="margin:0; color:inherit; width:100%" | {| class="wikitable" style="margin:0; color:inherit; width:100%" | ||
! style="background-color:#1a3244; color:#ffffff; font-weight:bold;" | TORPEDO LAUNCHERS !! style="background-color:#1a3244; color:#ffffff; font-weight:bold;" | | ! style="background-color:#1a3244; color:#ffffff; font-weight:bold;" | TORPEDO LAUNCHERS !! style="background-color:#1a3244; color:#ffffff; font-weight:bold;" | Type8 mod. 3 | ||
|- | |- | ||
| style="color:inherit;" | • | | style="color:inherit;" | • Torpedo tubes (launchers × tubes) || style="color:inherit;" | 2 × 3 | ||
|- | |- | ||
| style="color:inherit;" | • Torpedo name || style="color:inherit;" | | | style="color:inherit;" | • Torpedo name || style="color:inherit;" | Type8 mod. 3 | ||
|- | |- | ||
| style="color:inherit;" | • Reload time (sec) || style="color:inherit;" | 65 | | style="color:inherit;" | • Reload time (sec) || style="color:inherit;" | 65 | ||
|- | |- | ||
| style="color:inherit;" | • 180° turn time (sec) || style="color:inherit;" | 7.2 | | style="color:inherit;" | • 180° turn time (sec) || style="color:inherit;" | 7.2 | ||
|- | |- | ||
| style="color:inherit;" | • Damage || style="color:inherit;" | | | style="color:inherit;" | • Damage || style="color:inherit;" | 14,600 | ||
|- | |- | ||
| style="color:inherit;" | • Range (km) || style="color:inherit;" | 0 | | style="color:inherit;" | • Range (km) || style="color:inherit;" | 8.0 | ||
|- | |- | ||
| style="color:inherit;" | • Speed (kt) || style="color:inherit;" | 63 | | style="color:inherit;" | • Speed (kt) || style="color:inherit;" | 63 | ||
| Line 164: | Line 164: | ||
| style="color:inherit;" | • Detectability (km) || style="color:inherit;" | 1.6 | | style="color:inherit;" | • Detectability (km) || style="color:inherit;" | 1.6 | ||
|- | |- | ||
| style="color:inherit;" | • Flooding chance (%) || style="color:inherit;" | | | style="color:inherit;" | • Flooding chance (%) || style="color:inherit;" | 240 | ||
|} | |} | ||
</div> | </div> | ||
| Line 175: | Line 175: | ||
{| class="wikitable" style="margin:0 0 0.8em 0; width:100%; color:inherit;" | {| class="wikitable" style="margin:0 0 0.8em 0; width:100%; color:inherit;" | ||
! style="background-color:#1a3244; color:#ffffff; font-weight:bold;" | AA ARMAMENT !! style="background-color:#1a3244; color:#ffffff; font-weight:bold;" | MOUNTS × BARRELS | ! style="background-color:#1a3244; color:#ffffff; font-weight:bold;" | AA ARMAMENT !! style="background-color:#1a3244; color:#ffffff; font-weight:bold;" | MOUNTS × BARRELS | ||
|- | |||
| style="color:inherit;" | 120 mm || style="color:inherit;" | 2 × 1 | |||
|- | |- | ||
| style="color:inherit;" | 25 mm || style="color:inherit;" | 6 × 2 | | style="color:inherit;" | 25 mm || style="color:inherit;" | 6 × 2 | ||
| Line 184: | Line 186: | ||
|- | |- | ||
| style="color:inherit;" | Mid-range || style="color:inherit;" | 52.5 || style="color:inherit;" | 95% || style="color:inherit;" | 2.5 | | style="color:inherit;" | Mid-range || style="color:inherit;" | 52.5 || style="color:inherit;" | 95% || style="color:inherit;" | 2.5 | ||
|- | |||
| style="color:inherit;" | Long-range || style="color:inherit;" | 10.5 || style="color:inherit;" | 100% || style="color:inherit;" | 5.8 | |||
|} | |||
'''Damage by shell explosions''' | |||
{| class="wikitable" style="margin:0 0 0.8em 0; width:100%; color:inherit;" | |||
! style="background-color:#1a3244; color:#ffffff; font-weight:bold;" | EXPLOSIONS / SALVO !! style="background-color:#1a3244; color:#ffffff; font-weight:bold;" | DAMAGE !! style="background-color:#1a3244; color:#ffffff; font-weight:bold;" | HIT CHANCE !! style="background-color:#1a3244; color:#ffffff; font-weight:bold;" | ACTION ZONE (km) | |||
|- | |||
| style="color:inherit;" | 1 || style="color:inherit;" | 1050 || style="color:inherit;" | 100% || style="color:inherit;" | 3.5–5.8 | |||
|} | |} | ||
| Line 190: | Line 201: | ||
{| class="wikitable" style="margin:0 0 0.8em 0; width:100%; color:inherit;" | {| class="wikitable" style="margin:0 0 0.8em 0; width:100%; color:inherit;" | ||
! style="background-color:#1a3244; color:#ffffff; font-weight:bold;" | AA ARMAMENT !! style="background-color:#1a3244; color:#ffffff; font-weight:bold;" | MOUNTS × BARRELS | ! style="background-color:#1a3244; color:#ffffff; font-weight:bold;" | AA ARMAMENT !! style="background-color:#1a3244; color:#ffffff; font-weight:bold;" | MOUNTS × BARRELS | ||
|- | |||
| style="color:inherit;" | 120 mm || style="color:inherit;" | 2 × 1 | |||
|- | |- | ||
| style="color:inherit;" | 25 mm || style="color:inherit;" | 6 × 3 + 4 × 1 | | style="color:inherit;" | 25 mm || style="color:inherit;" | 6 × 3 + 4 × 1 | ||
| Line 199: | Line 212: | ||
|- | |- | ||
| style="color:inherit;" | Mid-range || style="color:inherit;" | 87.5 || style="color:inherit;" | 95% || style="color:inherit;" | 2.5 | | style="color:inherit;" | Mid-range || style="color:inherit;" | 87.5 || style="color:inherit;" | 95% || style="color:inherit;" | 2.5 | ||
|- | |||
| style="color:inherit;" | Long-range || style="color:inherit;" | 10.5 || style="color:inherit;" | 100% || style="color:inherit;" | 5.8 | |||
|} | |||
'''Damage by shell explosions''' | |||
{| class="wikitable" style="margin:0 0 0.8em 0; width:100%; color:inherit;" | |||
! style="background-color:#1a3244; color:#ffffff; font-weight:bold;" | EXPLOSIONS / SALVO !! style="background-color:#1a3244; color:#ffffff; font-weight:bold;" | DAMAGE !! style="background-color:#1a3244; color:#ffffff; font-weight:bold;" | HIT CHANCE !! style="background-color:#1a3244; color:#ffffff; font-weight:bold;" | ACTION ZONE (km) | |||
|- | |||
| style="color:inherit;" | 1 || style="color:inherit;" | 1050 || style="color:inherit;" | 100% || style="color:inherit;" | 3.5–5.8 | |||
|} | |} | ||
``` | |||
</div> | </div> | ||
</div></div></div> | </div></div></div> | ||
| Line 211: | Line 234: | ||
| style="color:inherit;" | • Number of charges || style="color:inherit;" | 2 | | style="color:inherit;" | • Number of charges || style="color:inherit;" | 2 | ||
|- | |- | ||
| style="color:inherit;" | • Bombs per charge || style="color:inherit;" | | | style="color:inherit;" | • Bombs per charge || style="color:inherit;" | 4 | ||
|- | |- | ||
| style="color:inherit;" | • Reload time (sec) || style="color:inherit;" | 40.0 | | style="color:inherit;" | • Reload time (sec) || style="color:inherit;" | 40.0 | ||
Latest revision as of 15:04, 9 July 2026

V
1,380,000
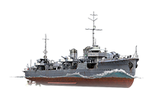
Mutsuki — Japan Tech Tree Tier V Destroyer.
The "enhanced Kamikaze"-class destroyers were the last Japanese destroyers to have a torpedo launcher positioned ahead of the bow superstructure. Twelve destroyers were built between 1924 and 1927, and all were lost during World War II. Mutsuki, which entered service in March 1926, participated in the Sino-Japanese War. During World War II, she participated in the Battle of Wake Island and the landings on the Solomon Islands and New Guinea. On August 24, 1942, the ship was sunk near the Solomon Islands after being hit by an aerial bomb.
Pros
- Low detectability
- Long torpedo range
Cons
- Low gun traverse speed
- Low HP
Ship Stats
Hull Information
Main Battery
Torpedoes
AA Defense
Depth Charges
Compatible Upgrades
| Slot 1 |
 |
 |

| ||
|---|---|---|---|---|---|
| Slot 2 |
 |
 |

| ||
| Slot 3 |
 |
 |
 |
 |

|
Consumables
- Slot 1: Damage Control Party
 (5.0s action, 40.0s cooldown)
 - Slot 2: Smoke Generator
 (3 charges, 20.0s action, 160.0s cooldown)
 - Slot 3: Engine Boost
 (3 charges, 120.0s action, 120.0s cooldown)
Gallery
WoWs Gallery

Historical Gallery
Categories:
