Ship:AL Tashkent
No edit summary |
No edit summary |
||
| Line 151: | Line 151: | ||
<div style="border: 2px solid rgba(212,175,55,0.8); border-radius: 3px; margin-bottom: 1em; overflow: hidden;"> | <div style="border: 2px solid rgba(212,175,55,0.8); border-radius: 3px; margin-bottom: 1em; overflow: hidden;"> | ||
{| class="wikitable" style="margin:0; color:inherit; width:100%" | {| class="wikitable" style="margin:0; color:inherit; width:100%" | ||
! style="background-color:#1a3244; color:#ffffff; font-weight:bold;" | TORPEDO LAUNCHERS !! style="background-color:#1a3244; color:#ffffff; font-weight:bold;" | | ! style="background-color:#1a3244; color:#ffffff; font-weight:bold;" | TORPEDO LAUNCHERS !! style="background-color:#1a3244; color:#ffffff; font-weight:bold;" | 53-39 mod. 2 !! style="background-color:#1a3244; color:#ffffff; font-weight:bold;" | ⚠ 53-36 mod. 2 / 53-39 mod.2 (verify) | ||
|- | |- | ||
| style="color:inherit;" | • | | style="color:inherit;" | • Torpedo tubes (launchers × tubes) || style="color:inherit;" | 3 × 3 || style="color:inherit;" | 3 × 3 | ||
|- | |- | ||
| style="color:inherit;" | • Torpedo name || style="color:inherit;" | | | style="color:inherit;" | • Torpedo name || style="color:inherit;" | 53-39 mod. 2 || style="color:inherit;" | ⚠ 53-36 mod. 2 / 53-39 mod.2 (verify) | ||
|- | |- | ||
| style="color:inherit;" | • Reload time (sec) || style="color:inherit;" | 69 | | style="color:inherit;" | • Reload time (sec) || style="color:inherit;" | 69 || style="color:inherit;" | 117 | ||
|- | |- | ||
| style="color:inherit;" | • 180° turn time (sec) || style="color:inherit;" | 7.2 || style="color:inherit;" | 7.2 | | style="color:inherit;" | • 180° turn time (sec) || style="color:inherit;" | 7.2 || style="color:inherit;" | 7.2 | ||
|- | |- | ||
| style="color:inherit;" | • Damage || style="color:inherit;" | | | style="color:inherit;" | • Damage || style="color:inherit;" | 15,100 || style="color:inherit;" | 14,400 | ||
|- | |- | ||
| style="color:inherit;" | • Range (km) || style="color:inherit;" | 0 | | style="color:inherit;" | • Range (km) || style="color:inherit;" | 8.0 || style="color:inherit;" | 10.0 | ||
|- | |- | ||
| style="color:inherit;" | • Speed (kt) || style="color:inherit;" | 60 || style="color:inherit;" | 55 | | style="color:inherit;" | • Speed (kt) || style="color:inherit;" | 60 || style="color:inherit;" | 55 | ||
| Line 169: | Line 169: | ||
| style="color:inherit;" | • Detectability (km) || style="color:inherit;" | 1.2 || style="color:inherit;" | 1.1 | | style="color:inherit;" | • Detectability (km) || style="color:inherit;" | 1.2 || style="color:inherit;" | 1.1 | ||
|- | |- | ||
| style="color:inherit;" | • Flooding chance (%) || style="color:inherit;" | | | style="color:inherit;" | • Flooding chance (%) || style="color:inherit;" | 250 || style="color:inherit;" | 240 | ||
|} | |} | ||
</div> | </div> | ||
| Line 178: | Line 178: | ||
{| class="wikitable" style="margin:0 0 0.8em 0; width:100%; color:inherit;" | {| class="wikitable" style="margin:0 0 0.8em 0; width:100%; color:inherit;" | ||
! style="background-color:#1a3244; color:#ffffff; font-weight:bold;" | AA ARMAMENT !! style="background-color:#1a3244; color:#ffffff; font-weight:bold;" | MOUNTS × BARRELS | ! style="background-color:#1a3244; color:#ffffff; font-weight:bold;" | AA ARMAMENT !! style="background-color:#1a3244; color:#ffffff; font-weight:bold;" | MOUNTS × BARRELS | ||
|- | |||
| style="color:inherit;" | 130 mm || style="color:inherit;" | 3 × 2 | |||
|- | |- | ||
| style="color:inherit;" | 37 mm || style="color:inherit;" | 6 × 2 | | style="color:inherit;" | 37 mm || style="color:inherit;" | 6 × 2 | ||
| Line 191: | Line 193: | ||
|- | |- | ||
| style="color:inherit;" | Mid-range || style="color:inherit;" | 115.5 || style="color:inherit;" | 100% || style="color:inherit;" | 3.5 | | style="color:inherit;" | Mid-range || style="color:inherit;" | 115.5 || style="color:inherit;" | 100% || style="color:inherit;" | 3.5 | ||
|- | |||
| style="color:inherit;" | Long-range || style="color:inherit;" | 52.5 || style="color:inherit;" | 100% || style="color:inherit;" | 6.0 | |||
|} | |} | ||
'''Damage by shell explosions''' | |||
{| class="wikitable" style="margin:0 0 0.8em 0; width:100%; color:inherit;" | |||
! style="background-color:#1a3244; color:#ffffff; font-weight:bold;" | EXPLOSIONS / SALVO !! style="background-color:#1a3244; color:#ffffff; font-weight:bold;" | DAMAGE !! style="background-color:#1a3244; color:#ffffff; font-weight:bold;" | HIT CHANCE !! style="background-color:#1a3244; color:#ffffff; font-weight:bold;" | ACTION ZONE (km) | |||
|- | |||
| style="color:inherit;" | 2 || style="color:inherit;" | 460 || style="color:inherit;" | 100% || style="color:inherit;" | 3.5–6.0 | |||
|} | |||
</div> | </div> | ||
</div></div></div> | </div></div></div> | ||
Latest revision as of 23:38, 8 July 2026

IX
21,500 doubloons
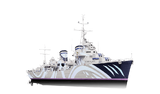
AL Tashkent — U.S.S.R. Premium Tier IX Destroyer.
A destroyer built in the Sardegna Empire and representing the Northern Parliament. She is nicknamed the "Blue Cruiser" due to her large Sardegna-style hull. Tashkent boasts one of the highest speeds among destroyers. She is kind at heart, even if she often appears grumpy. From the Azur Lane game.
Pros
- Repair Party consumable available.
- High top speed.
- Strong main battery firepower.
- Smoke Generator consumable available.
Cons
- High detectability.
- Large hull size makes it an easy target.
Ship Stats
Hull Information
Main Battery
Torpedoes
AA Defense
Depth Charges
Compatible Upgrades
| Slot 1 |
 |
 |

| ||
|---|---|---|---|---|---|
| Slot 2 |
 |
 |

| ||
| Slot 3 |
 |
 |
 |
 |

|
| Slot 4 |
 |
 |
 |

| |
| Slot 5 |
 |
 |
 |

| |
| Slot 6 |
 |
 |

|
Consumables
- Slot 1: Damage Control Party
 (5.0s action, 40.0s cooldown)
 - Slot 2: Repair Party
 (3 charges, 28.0s action, 80.0s cooldown, 109 hp/s) or Smoke Generator
  (4 charges, 30.0s action, 120.0s cooldown)
 - Slot 3: Engine Boost
 (3 charges, 120.0s action, 120.0s cooldown)

