Ship:Farragut
m Page repair |
Pockington (talk | contribs) added missing information on launch day |
||
| Line 46: | Line 46: | ||
| style="color:inherit;" | • Turning circle radius (m) || style="color:inherit;" | 560 || style="color:inherit;" | 560 | | style="color:inherit;" | • Turning circle radius (m) || style="color:inherit;" | 560 || style="color:inherit;" | 560 | ||
|- | |- | ||
| style="color:inherit;" | • Rudder-shift time (sec) || style="color:inherit;" | | | style="color:inherit;" | • Rudder-shift time (sec) || style="color:inherit;" | 4.0 || style="color:inherit;" | 2.7 | ||
|} | |} | ||
</div> | </div> | ||
| Line 69: | Line 69: | ||
! style="background-color:#1a3244; color:#ffffff; font-weight:bold;" | MAIN BATTERY !! style="background-color:#1a3244; color:#ffffff; font-weight:bold;" | Mk6 mod. 1 !! style="background-color:#1a3244; color:#ffffff; font-weight:bold;" | Mk6 mod. 2 | ! style="background-color:#1a3244; color:#ffffff; font-weight:bold;" | MAIN BATTERY !! style="background-color:#1a3244; color:#ffffff; font-weight:bold;" | Mk6 mod. 1 !! style="background-color:#1a3244; color:#ffffff; font-weight:bold;" | Mk6 mod. 2 | ||
|- | |- | ||
| style="color:inherit;" | • Arrangement || colspan="2" style="color:inherit;" | 5×1 | | style="color:inherit;" | • Arrangement || colspan="2" style="color:inherit;" | 5×1 127mm | ||
|- | |- | ||
| style="color:inherit;" | • Firing range (km) || style="color:inherit;" | 11.45 || style="color:inherit;" | 12.6 | | style="color:inherit;" | • Firing range (km) || style="color:inherit;" | 11.45 || style="color:inherit;" | 12.6 | ||
| Line 177: | Line 177: | ||
{| class="wikitable" style="margin:0 0 0.8em 0; width:100%; color:inherit;" | {| class="wikitable" style="margin:0 0 0.8em 0; width:100%; color:inherit;" | ||
! style="background-color:#1a3244; color:#ffffff; font-weight:bold;" | AA ARMAMENT !! style="background-color:#1a3244; color:#ffffff; font-weight:bold;" | MOUNTS × BARRELS | ! style="background-color:#1a3244; color:#ffffff; font-weight:bold;" | AA ARMAMENT !! style="background-color:#1a3244; color:#ffffff; font-weight:bold;" | MOUNTS × BARRELS | ||
|- | |||
| style="color:inherit;" | 127 mm || style="color:inherit;" | 5 × 1 | |||
|- | |- | ||
| style="color:inherit;" | 13 mm || style="color:inherit;" | 4 × 1 | | style="color:inherit;" | 13 mm || style="color:inherit;" | 4 × 1 | ||
| Line 186: | Line 188: | ||
|- | |- | ||
| style="color:inherit;" | Short-range || style="color:inherit;" | 45.5 || style="color:inherit;" | 95% || style="color:inherit;" | 1.5 | | style="color:inherit;" | Short-range || style="color:inherit;" | 45.5 || style="color:inherit;" | 95% || style="color:inherit;" | 1.5 | ||
|- | |||
| style="color:inherit;" | Long-range || style="color:inherit;" | 52.5 || style="color:inherit;" | 100% || style="color:inherit;" | 5.8 | |||
|} | |||
'''Damage by shell explosions''' | |||
{| class="wikitable" style="margin:0 0 0.8em 0; width:100%; color:inherit;" | |||
! style="background-color:#1a3244; color:#ffffff; font-weight:bold;" | EXPLOSIONS / SALVO !! style="background-color:#1a3244; color:#ffffff; font-weight:bold;" | DAMAGE !! style="background-color:#1a3244; color:#ffffff; font-weight:bold;" | HIT CHANCE !! style="background-color:#1a3244; color:#ffffff; font-weight:bold;" | ACTION ZONE (km) | |||
|- | |||
| style="color:inherit;" | 1 || style="color:inherit;" | 1190 || style="color:inherit;" | 100% || style="color:inherit;" | 3.5–5.8 | |||
|} | |} | ||
| Line 192: | Line 203: | ||
{| class="wikitable" style="margin:0 0 0.8em 0; width:100%; color:inherit;" | {| class="wikitable" style="margin:0 0 0.8em 0; width:100%; color:inherit;" | ||
! style="background-color:#1a3244; color:#ffffff; font-weight:bold;" | AA ARMAMENT !! style="background-color:#1a3244; color:#ffffff; font-weight:bold;" | MOUNTS × BARRELS | ! style="background-color:#1a3244; color:#ffffff; font-weight:bold;" | AA ARMAMENT !! style="background-color:#1a3244; color:#ffffff; font-weight:bold;" | MOUNTS × BARRELS | ||
|- | |||
| style="color:inherit;" | 127 mm || style="color:inherit;" | 5 × 1 | |||
|- | |- | ||
| style="color:inherit;" | 20 mm || style="color:inherit;" | 2 × 1 | | style="color:inherit;" | 20 mm || style="color:inherit;" | 2 × 1 | ||
| Line 205: | Line 218: | ||
|- | |- | ||
| style="color:inherit;" | Mid-range || style="color:inherit;" | 21 || style="color:inherit;" | 95% || style="color:inherit;" | 2.0 | | style="color:inherit;" | Mid-range || style="color:inherit;" | 21 || style="color:inherit;" | 95% || style="color:inherit;" | 2.0 | ||
|- | |||
| style="color:inherit;" | Long-range || style="color:inherit;" | 52.5 || style="color:inherit;" | 100% || style="color:inherit;" | 5.8 | |||
|} | |||
'''Damage by shell explosions''' | |||
{| class="wikitable" style="margin:0 0 0.8em 0; width:100%; color:inherit;" | |||
! style="background-color:#1a3244; color:#ffffff; font-weight:bold;" | EXPLOSIONS / SALVO !! style="background-color:#1a3244; color:#ffffff; font-weight:bold;" | DAMAGE !! style="background-color:#1a3244; color:#ffffff; font-weight:bold;" | HIT CHANCE !! style="background-color:#1a3244; color:#ffffff; font-weight:bold;" | ACTION ZONE (km) | |||
|- | |||
| style="color:inherit;" | 1 || style="color:inherit;" | 1190 || style="color:inherit;" | 100% || style="color:inherit;" | 3.5–5.8 | |||
|} | |} | ||
</div> | </div> | ||
| Line 217: | Line 239: | ||
| style="color:inherit;" | • Number of charges || style="color:inherit;" | 2 | | style="color:inherit;" | • Number of charges || style="color:inherit;" | 2 | ||
|- | |- | ||
| style="color:inherit;" | • Bombs per charge || style="color:inherit;" | | | style="color:inherit;" | • Bombs per charge || style="color:inherit;" | 6 | ||
|- | |- | ||
| style="color:inherit;" | • Reload time (sec) || style="color:inherit;" | 40.0 | | style="color:inherit;" | • Reload time (sec) || style="color:inherit;" | 40.0 | ||
Latest revision as of 21:27, 9 July 2026

VI
3,120,000
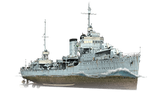
Farragut — U.S.A. Tech Tree Tier VI Destroyer.
After the signing of the London Naval Treaty, development began on a new ship class. It was based on the experience of operating smooth-decked destroyers and the study of German ships. The Farragut class received a transom stern, a forecastle-based turret, and a more cost-effective power unit. USS Farragut participated in repelling the attacks on Pearl Harbor, in the Battle of the Coral Sea, and the Solomon Islands campaign. She also escorted convoys to Kiska Island and escorted carrier groups. Over the course of World War II, the ship was awarded 14 battle stars.
Pros
- Large torpedo count per salvo
- Enhanced Smoke Generator consumable available (increased smoke screen dispersion time)
Cons
- Shooting accurately over long ranges is challenging
- Short-range torpedoes
Ship Stats
Hull Information
Main Battery
Torpedoes
AA Defense
Depth Charges
Compatible Upgrades
| Slot 1 |
 |
 |

| ||
|---|---|---|---|---|---|
| Slot 2 |
 |
 |
 |

| |
| Slot 3 |
 |
 |
 |
 |

|
| Slot 4 |
 |
 |
 |

|
Consumables
- Slot 1: Damage Control Party
 (5.0s action, 40.0s cooldown)
 - Slot 2: Smoke Generator
 (3 charges, 30.0s action, 160.0s cooldown)
 - Slot 3: Engine Boost
 (3 charges, 120.0s action, 120.0s cooldown) or Defensive AA Fire
  (4 charges, 40.0s action, 80.0s cooldown)
Gallery
WoWs Gallery


Historical Gallery
Categories:
