Ship:Benson
m Page repair |
Pockington (talk | contribs) added missing information on launch day |
||
| Line 47: | Line 47: | ||
| style="color:inherit;" | • Turning circle radius (m) || style="color:inherit;" | 570 || style="color:inherit;" | 570 | | style="color:inherit;" | • Turning circle radius (m) || style="color:inherit;" | 570 || style="color:inherit;" | 570 | ||
|- | |- | ||
| style="color:inherit;" | • Rudder-shift time (sec) || style="color:inherit;" | | | style="color:inherit;" | • Rudder-shift time (sec) || style="color:inherit;" | 4.0 || style="color:inherit;" | 2.7 | ||
|} | |} | ||
</div> | </div> | ||
| Line 178: | Line 178: | ||
{| class="wikitable" style="margin:0 0 0.8em 0; width:100%; color:inherit;" | {| class="wikitable" style="margin:0 0 0.8em 0; width:100%; color:inherit;" | ||
! style="background-color:#1a3244; color:#ffffff; font-weight:bold;" | AA ARMAMENT !! style="background-color:#1a3244; color:#ffffff; font-weight:bold;" | MOUNTS × BARRELS | ! style="background-color:#1a3244; color:#ffffff; font-weight:bold;" | AA ARMAMENT !! style="background-color:#1a3244; color:#ffffff; font-weight:bold;" | MOUNTS × BARRELS | ||
|- | |||
| style="color:inherit;" | 127 mm || style="color:inherit;" | 5 × 1 | |||
|- | |- | ||
| style="color:inherit;" | 13 mm || style="color:inherit;" | 6 × 1 | | style="color:inherit;" | 13 mm || style="color:inherit;" | 6 × 1 | ||
| Line 187: | Line 189: | ||
|- | |- | ||
| style="color:inherit;" | Short-range || style="color:inherit;" | 66.5 || style="color:inherit;" | 95% || style="color:inherit;" | 1.5 | | style="color:inherit;" | Short-range || style="color:inherit;" | 66.5 || style="color:inherit;" | 95% || style="color:inherit;" | 1.5 | ||
|- | |||
| style="color:inherit;" | Long-range || style="color:inherit;" | 66.5 || style="color:inherit;" | 100% || style="color:inherit;" | 5.8 | |||
|} | |||
'''Damage by shell explosions''' | |||
{| class="wikitable" style="margin:0 0 0.8em 0; width:100%; color:inherit;" | |||
! style="background-color:#1a3244; color:#ffffff; font-weight:bold;" | EXPLOSIONS / SALVO !! style="background-color:#1a3244; color:#ffffff; font-weight:bold;" | DAMAGE !! style="background-color:#1a3244; color:#ffffff; font-weight:bold;" | HIT CHANCE !! style="background-color:#1a3244; color:#ffffff; font-weight:bold;" | ACTION ZONE (km) | |||
|- | |||
| style="color:inherit;" | 3 || style="color:inherit;" | 1400 || style="color:inherit;" | 100% || style="color:inherit;" | 3.5–5.8 | |||
|} | |} | ||
| Line 193: | Line 204: | ||
{| class="wikitable" style="margin:0 0 0.8em 0; width:100%; color:inherit;" | {| class="wikitable" style="margin:0 0 0.8em 0; width:100%; color:inherit;" | ||
! style="background-color:#1a3244; color:#ffffff; font-weight:bold;" | AA ARMAMENT !! style="background-color:#1a3244; color:#ffffff; font-weight:bold;" | MOUNTS × BARRELS | ! style="background-color:#1a3244; color:#ffffff; font-weight:bold;" | AA ARMAMENT !! style="background-color:#1a3244; color:#ffffff; font-weight:bold;" | MOUNTS × BARRELS | ||
|- | |||
| style="color:inherit;" | 127 mm || style="color:inherit;" | 5 × 1 | |||
|- | |- | ||
| style="color:inherit;" | 20 mm || style="color:inherit;" | 4 × 1 | | style="color:inherit;" | 20 mm || style="color:inherit;" | 4 × 1 | ||
| Line 206: | Line 219: | ||
|- | |- | ||
| style="color:inherit;" | Mid-range || style="color:inherit;" | 38.5 || style="color:inherit;" | 95% || style="color:inherit;" | 2.0 | | style="color:inherit;" | Mid-range || style="color:inherit;" | 38.5 || style="color:inherit;" | 95% || style="color:inherit;" | 2.0 | ||
|- | |||
| style="color:inherit;" | Long-range || style="color:inherit;" | 84 || style="color:inherit;" | 100% || style="color:inherit;" | 5.8 | |||
|} | |||
'''Damage by shell explosions''' | |||
{| class="wikitable" style="margin:0 0 0.8em 0; width:100%; color:inherit;" | |||
! style="background-color:#1a3244; color:#ffffff; font-weight:bold;" | EXPLOSIONS / SALVO !! style="background-color:#1a3244; color:#ffffff; font-weight:bold;" | DAMAGE !! style="background-color:#1a3244; color:#ffffff; font-weight:bold;" | HIT CHANCE !! style="background-color:#1a3244; color:#ffffff; font-weight:bold;" | ACTION ZONE (km) | |||
|- | |||
| style="color:inherit;" | 4 || style="color:inherit;" | 1470 || style="color:inherit;" | 100% || style="color:inherit;" | 3.5–5.8 | |||
|} | |} | ||
</div> | </div> | ||
| Line 218: | Line 240: | ||
| style="color:inherit;" | • Number of charges || style="color:inherit;" | 2 | | style="color:inherit;" | • Number of charges || style="color:inherit;" | 2 | ||
|- | |- | ||
| style="color:inherit;" | • Bombs per charge || style="color:inherit;" | | | style="color:inherit;" | • Bombs per charge || style="color:inherit;" | 10 | ||
|- | |- | ||
| style="color:inherit;" | • Reload time (sec) || style="color:inherit;" | 40.0 | | style="color:inherit;" | • Reload time (sec) || style="color:inherit;" | 40.0 | ||
Latest revision as of 21:47, 9 July 2026

VIII
9,040,000
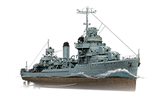
Benson — U.S.A. Tech Tree Tier VIII Destroyer.
The new destroyers were planned as an improved Sims class with an échelon arrangement of the propulsion unit. Based on the experience with previous classes, it was decided to rearrange all torpedo tubes along the centerline, reduce their number to two, and replace the quadruple-tube torpedo launchers with quintuple-tube launchers. During World War II, USS Benson escorted convoys in the Atlantic and Mediterranean, and she supported landings in Sicily and Italy. Later, she accompanied aircraft carriers in the Pacific. Over the course of the war, she was awarded four battle stars.
Pros
- Low detectability
- Enhanced Smoke Generator consumable available
- High rate of fire of main battery armaments
Cons
- Defensive AA Fire consumable available
- Shooting accurately over long ranges is challenging
Ship Stats
Hull Information
Main Battery
Torpedoes
AA Defense
Depth Charges
Compatible Upgrades
| Slot 1 |
 |
 |

| ||
|---|---|---|---|---|---|
| Slot 2 |
 |
 |
 |

| |
| Slot 3 |
 |
 |
 |
 |

|
| Slot 4 |
 |
 |
 |

| |
| Slot 5 |
 |
 |
 |

|
Consumables
- Slot 1: Damage Control Party
 (5.0s action, 40.0s cooldown)
 - Slot 2: Smoke Generator
 (3 charges, 30.0s action, 160.0s cooldown)
 - Slot 3: Engine Boost
 (3 charges, 120.0s action, 120.0s cooldown) or Defensive AA Fire
  (4 charges, 40.0s action, 80.0s cooldown)
Gallery
WoWs Gallery


Historical Gallery
Categories:
