Ship:Hsienyang
No edit summary |
Pockington (talk | contribs) corrected info |
||
| Line 49: | Line 49: | ||
| style="color:inherit;" | • Turning circle radius (m) || style="color:inherit;" | 570 || style="color:inherit;" | 570 | | style="color:inherit;" | • Turning circle radius (m) || style="color:inherit;" | 570 || style="color:inherit;" | 570 | ||
|- | |- | ||
| style="color:inherit;" | • Rudder-shift time (sec) || style="color:inherit;" | | | style="color:inherit;" | • Rudder-shift time (sec) || style="color:inherit;" | 4.9 || style="color:inherit;" | 3.5 | ||
|} | |} | ||
</div> | </div> | ||
| Line 154: | Line 154: | ||
| style="color:inherit;" | • Torpedo tubes (launchers × tubes) || style="color:inherit;" | 2 × 5 || style="color:inherit;" | 2 × 5 | | style="color:inherit;" | • Torpedo tubes (launchers × tubes) || style="color:inherit;" | 2 × 5 || style="color:inherit;" | 2 × 5 | ||
|- | |- | ||
| style="color:inherit;" | • Torpedo name || style="color:inherit;" | | | style="color:inherit;" | • Torpedo name || style="color:inherit;" | 533 mm Mk IX* || style="color:inherit;" | / Mk15 mod. 3 | ||
|- | |- | ||
| style="color:inherit;" | • Reload time (sec) || style="color:inherit;" | 120 || style="color:inherit;" | 117 | | style="color:inherit;" | • Reload time (sec) || style="color:inherit;" | 120 || style="color:inherit;" | 117 | ||
| Line 180: | Line 180: | ||
{| class="wikitable" style="margin:0 0 0.8em 0; width:100%; color:inherit;" | {| class="wikitable" style="margin:0 0 0.8em 0; width:100%; color:inherit;" | ||
! style="background-color:#1a3244; color:#ffffff; font-weight:bold;" | AA ARMAMENT !! style="background-color:#1a3244; color:#ffffff; font-weight:bold;" | MOUNTS × BARRELS | ! style="background-color:#1a3244; color:#ffffff; font-weight:bold;" | AA ARMAMENT !! style="background-color:#1a3244; color:#ffffff; font-weight:bold;" | MOUNTS × BARRELS | ||
|- | |||
| style="color:inherit;" | 127 mm || style="color:inherit;" | 4 × 1 | |||
|- | |- | ||
| style="color:inherit;" | 20 mm || style="color:inherit;" | 2 × 2 + 6 × 1 | | style="color:inherit;" | 20 mm || style="color:inherit;" | 2 × 2 + 6 × 1 | ||
| Line 189: | Line 191: | ||
|- | |- | ||
| style="color:inherit;" | Short-range || style="color:inherit;" | 94.5 || style="color:inherit;" | 95% || style="color:inherit;" | 2.0 | | style="color:inherit;" | Short-range || style="color:inherit;" | 94.5 || style="color:inherit;" | 95% || style="color:inherit;" | 2.0 | ||
|- | |||
| style="color:inherit;" | Long-range || style="color:inherit;" | 70 || style="color:inherit;" | 100% || style="color:inherit;" | 5.8 | |||
|} | |||
'''Damage by shell explosions''' | |||
{| class="wikitable" style="margin:0 0 0.8em 0; width:100%; color:inherit;" | |||
! style="background-color:#1a3244; color:#ffffff; font-weight:bold;" | EXPLOSIONS / SALVO !! style="background-color:#1a3244; color:#ffffff; font-weight:bold;" | DAMAGE !! style="background-color:#1a3244; color:#ffffff; font-weight:bold;" | HIT CHANCE !! style="background-color:#1a3244; color:#ffffff; font-weight:bold;" | ACTION ZONE (km) | |||
|- | |||
| style="color:inherit;" | 3 || style="color:inherit;" | 1470 || style="color:inherit;" | 100% || style="color:inherit;" | 3.5–5.8 | |||
|} | |} | ||
| Line 195: | Line 206: | ||
{| class="wikitable" style="margin:0 0 0.8em 0; width:100%; color:inherit;" | {| class="wikitable" style="margin:0 0 0.8em 0; width:100%; color:inherit;" | ||
! style="background-color:#1a3244; color:#ffffff; font-weight:bold;" | AA ARMAMENT !! style="background-color:#1a3244; color:#ffffff; font-weight:bold;" | MOUNTS × BARRELS | ! style="background-color:#1a3244; color:#ffffff; font-weight:bold;" | AA ARMAMENT !! style="background-color:#1a3244; color:#ffffff; font-weight:bold;" | MOUNTS × BARRELS | ||
|- | |||
| style="color:inherit;" | 127 mm || style="color:inherit;" | 4 × 1 | |||
|- | |- | ||
| style="color:inherit;" | 40 mm || style="color:inherit;" | 2 × 4 | | style="color:inherit;" | 40 mm || style="color:inherit;" | 2 × 4 | ||
| Line 208: | Line 221: | ||
|- | |- | ||
| style="color:inherit;" | Mid-range || style="color:inherit;" | 70 || style="color:inherit;" | 100% || style="color:inherit;" | 3.5 | | style="color:inherit;" | Mid-range || style="color:inherit;" | 70 || style="color:inherit;" | 100% || style="color:inherit;" | 3.5 | ||
|- | |||
| style="color:inherit;" | Long-range || style="color:inherit;" | 63 || style="color:inherit;" | 100% || style="color:inherit;" | 5.8 | |||
|} | |||
'''Damage by shell explosions''' | |||
{| class="wikitable" style="margin:0 0 0.8em 0; width:100%; color:inherit;" | |||
! style="background-color:#1a3244; color:#ffffff; font-weight:bold;" | EXPLOSIONS / SALVO !! style="background-color:#1a3244; color:#ffffff; font-weight:bold;" | DAMAGE !! style="background-color:#1a3244; color:#ffffff; font-weight:bold;" | HIT CHANCE !! style="background-color:#1a3244; color:#ffffff; font-weight:bold;" | ACTION ZONE (km) | |||
|- | |||
| style="color:inherit;" | 3 || style="color:inherit;" | 1470 || style="color:inherit;" | 100% || style="color:inherit;" | 3.5–5.8 | |||
|} | |} | ||
</div> | </div> | ||
| Line 220: | Line 242: | ||
| style="color:inherit;" | • Number of charges || style="color:inherit;" | 2 | | style="color:inherit;" | • Number of charges || style="color:inherit;" | 2 | ||
|- | |- | ||
| style="color:inherit;" | • Bombs per charge || style="color:inherit;" | | | style="color:inherit;" | • Bombs per charge || style="color:inherit;" | 14 | ||
|- | |- | ||
| style="color:inherit;" | • Reload time (sec) || style="color:inherit;" | 40.0 | | style="color:inherit;" | • Reload time (sec) || style="color:inherit;" | 40.0 | ||
| Line 235: | Line 257: | ||
{{Ship Consumables Section|consumables= | {{Ship Consumables Section|consumables= | ||
* '''Slot 1:''' {{Damage Control Party}} (5.0s action, 40.0s cooldown) | * '''Slot 1:''' {{Damage Control Party}} (5.0s action, 40.0s cooldown) | ||
* '''Slot 2:''' {{Smoke Generator}} (5 charges, 30.0s action, 100.0s cooldown) | * '''Slot 2:''' {{Smoke Generator}} (5 charges, 30.0s action, 100.0s cooldown) '''Or''' {{Surveillance Radar}} (7.5km, 3 charges, 20.0s action, 120.0s cooldown) | ||
* '''Slot 3:''' {{Engine Boost}} (3 charges, 120.0s action, 120.0s cooldown) | * '''Slot 3:''' {{Engine Boost}} (3 charges, 120.0s action, 120.0s cooldown) | ||
* '''Slot 4:''' {{Torpedo Reload Booster}} (2 charges, 1.0s action, 300.0s cooldown) | * '''Slot 4:''' {{Torpedo Reload Booster}} (2 charges, 1.0s action, 300.0s cooldown) | ||
Latest revision as of 00:33, 11 July 2026

VIII
8,800,000
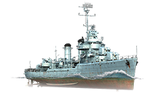
Hsienyang — Pan-Asia Tech Tree Tier VIII Destroyer.
The Gleaves-class USS Rodman was laid down at the shipyards of the Federal Shipbuilding Company in December 1940. During World War II, she participated in patrol and escort operations in the North Atlantic, provided support for the landings in North Africa, and accompanied President Franklin Roosevelt to the Tehran Conference. In 1944, she provided cover during landings of the Allied forces in Normandy, then served in the Mediterranean and the Pacific. During the war, she received five battle stars. In 1955, USS Rodman was sold to the Republic of China Navy and named Hsienyang. In 1956, she collided with other ships twice, which earned her the nickname Ram.
Pros
- High rate of fire.
- Enhanced smoke generator consumables.(reduced reload times).
- Surveillance radar consumables are available for mounting instead of smoke.
- Torpedo reload booster available.
Cons
- Shooting accurately over long ranges is challenging. (Long shell flight time makes it difficult to take an optimal target lead.)
- Can hit only cruisers, battleships, and aircraft carriers.
Ship Stats
Hull Information
Main Battery
Torpedoes
AA Defense
Depth Charges
Compatible Upgrades
| Slot 1 |
 |
 |

| ||
|---|---|---|---|---|---|
| Slot 2 |
 |
 |
 |

| |
| Slot 3 |
 |
 |
 |
 |

|
| Slot 4 |
 |
 |
 |

| |
| Slot 5 |
 |
 |
 |

|
Consumables
- Slot 1: Damage Control Party
 (5.0s action, 40.0s cooldown)
 - Slot 2: Smoke Generator
 (5 charges, 30.0s action, 100.0s cooldown) Or Surveillance Radar
  (7.5km, 3 charges, 20.0s action, 120.0s cooldown)
 - Slot 3: Engine Boost
 (3 charges, 120.0s action, 120.0s cooldown)
 - Slot 4: Torpedo Reload Booster
 (2 charges, 1.0s action, 300.0s cooldown)
Gallery
WoWs Gallery

Historical Gallery
Categories:
