User:Crewgles
No edit summary |
No edit summary |
||
| Line 1: | Line 1: | ||
{{#vardefine:ship_name| | {{#vardefine:ship_name|Shiratsuyu}} | ||
__NOTOC____NOEDITSECTION__ | __NOTOC____NOEDITSECTION__ | ||
<div class="b-description gw-frame-1"><div class="b-description-img b-description-img__indent b-description-img__single"><div style="width:160px; height:102px; opacity:.5; border-radius:2px; position:absolute; left:0; top:0; z-index:1; -webkit-transition:all 0.2s ease-out 0.1s; transition:all 0.2s ease-out 0.1s;">[[File: | <div class="b-description gw-frame-1"><div class="b-description-img b-description-img__indent b-description-img__single"><div style="width:160px; height:102px; opacity:.5; border-radius:2px; position:absolute; left:0; top:0; z-index:1; -webkit-transition:all 0.2s ease-out 0.1s; transition:all 0.2s ease-out 0.1s;">[[File:Wows_anno_flag_japan.png|160px]]</div><div class="l-description-img_class"><span class="b-description-img_type b-description-img_type__Destroyer b-description-img_type__Destroyer-Tech Tree"></span><span class="b-description-img_class">VII</span></div><div class="b-description-img_vehicle">[[File:Ship_PJSD207_Shiratsuyu.png|160px|link=|left]]</div><div class="l-description-img_price"><span class="b-description-img_price b-description-img_price__gold"><span title="''{{#var:ship_name}}'' was first released for sale on DD Month YYYY.">5,100,000</span></span></div></div><p>[[Ship:{{#var:ship_name}}|{{#var:ship_name}}]] — Japan Tech Tree Tier VII [[Ship:Destroyer|Destroyer]].</p><p>The Shiratsuyu-class destroyers were an upgraded version of the Hatsuharu class. They featured a deeper draft and were equipped with two quadruple-tube torpedo launchers. The lead ship of the class was laid down in November 1933 and entered service in 1936. She escorted convoys in the Western Pacific, as well as participated in the Battle of Midway, the campaigns on the Solomon and Marshall Islands, the First Battle of Guadalcanal, and the Battle of Empress Augusta Bay.</p><p> </p></div> | ||
===Pros=== | ===Pros=== | ||
* | * Pro 1 | ||
* | * Pro 2 | ||
===Cons=== | ===Cons=== | ||
* | * Con 1 | ||
* | * Con 2 | ||
| Line 18: | Line 17: | ||
<div style="border: 2px solid rgba(212,175,55,0.8); border-radius: 3px; margin-bottom: 1em; overflow: hidden;"> | <div style="border: 2px solid rgba(212,175,55,0.8); border-radius: 3px; margin-bottom: 1em; overflow: hidden;"> | ||
{| class="wikitable" style="margin:0; color:inherit; width:100%" | {| class="wikitable" style="margin:0; color:inherit; width:100%" | ||
! style="background-color:#1a3244; color:#ffffff; font-weight:bold;" | SURVIVABILITY !! style="background-color:#1a3244; color:#ffffff; font-weight:bold;" | | ! style="background-color:#1a3244; color:#ffffff; font-weight:bold;" | SURVIVABILITY !! style="background-color:#1a3244; color:#ffffff; font-weight:bold;" | Shiratsuyu (A) !! style="background-color:#1a3244; color:#ffffff; font-weight:bold;" | Shiratsuyu (B) | ||
|- | |- | ||
| style="color:inherit;" | • Hit Points || style="color:inherit;" | | | style="color:inherit;" | • Hit Points || style="color:inherit;" | 11600 || style="color:inherit;" | 12800 | ||
|- | |- | ||
| style="color:inherit;" | • Torpedo protection damage reduction (%) || style="color:inherit;" | | | style="color:inherit;" | • Torpedo protection damage reduction (%) || colspan="2" style="color:inherit;" | — | ||
|} | |} | ||
</div> | </div> | ||
| Line 30: | Line 29: | ||
! style="background-color:#1a3244; color:#ffffff; font-weight:bold;" | ARMOR DETAIL !! style="background-color:#1a3244; color:#ffffff; font-weight:bold;" | | ! style="background-color:#1a3244; color:#ffffff; font-weight:bold;" | ARMOR DETAIL !! style="background-color:#1a3244; color:#ffffff; font-weight:bold;" | | ||
|- | |- | ||
| style="color:inherit;" | • Belt (mm) || style="color:inherit;" | | | style="color:inherit;" | • Belt (mm) || style="color:inherit;" | — | ||
|- | |- | ||
| style="color:inherit;" | • Deck (mm) || style="color:inherit;" | | | style="color:inherit;" | • Deck (mm) || style="color:inherit;" | — | ||
|- | |- | ||
| style="color:inherit;" | • Superstructure (mm) || style="color:inherit;" | | | style="color:inherit;" | • Superstructure (mm) || style="color:inherit;" | — | ||
|- | |- | ||
| style="color:inherit;" | • Extremities (mm) || style="color:inherit;" | | | style="color:inherit;" | • Extremities (mm) || style="color:inherit;" | — | ||
|} | |} | ||
</div> | </div> | ||
| Line 42: | Line 41: | ||
<div style="border: 2px solid rgba(212,175,55,0.8); border-radius: 3px; margin-bottom: 1em; overflow: hidden;"> | <div style="border: 2px solid rgba(212,175,55,0.8); border-radius: 3px; margin-bottom: 1em; overflow: hidden;"> | ||
{| class="wikitable" style="margin:0; color:inherit; width:100%" | {| class="wikitable" style="margin:0; color:inherit; width:100%" | ||
! style="background-color:#1a3244; color:#ffffff; font-weight:bold;" | MANEUVERABILITY !! style="background-color:#1a3244; color:#ffffff; font-weight:bold;" | | ! style="background-color:#1a3244; color:#ffffff; font-weight:bold;" | MANEUVERABILITY !! style="background-color:#1a3244; color:#ffffff; font-weight:bold;" | Shiratsuyu (A) !! style="background-color:#1a3244; color:#ffffff; font-weight:bold;" | Shiratsuyu (B) | ||
|- | |- | ||
| style="color:inherit;" | • Maximum speed (kt) || style="color:inherit;" | | | style="color:inherit;" | • Maximum speed (kt) || style="color:inherit;" | 34.0 || style="color:inherit;" | 34.0 | ||
|- | |- | ||
| style="color:inherit;" | • Turning circle radius (m) || style="color:inherit;" | | | style="color:inherit;" | • Turning circle radius (m) || style="color:inherit;" | 581 || style="color:inherit;" | 581 | ||
|- | |- | ||
| style="color:inherit;" | • Rudder-shift time (sec) || style="color:inherit;" | | | style="color:inherit;" | • Rudder-shift time (sec) || style="color:inherit;" | 5.7 || style="color:inherit;" | 4.1 | ||
|} | |} | ||
</div> | </div> | ||
| Line 54: | Line 53: | ||
<div style="border: 2px solid rgba(212,175,55,0.8); border-radius: 3px; margin-bottom: 1em; overflow: hidden;"> | <div style="border: 2px solid rgba(212,175,55,0.8); border-radius: 3px; margin-bottom: 1em; overflow: hidden;"> | ||
{| class="wikitable" style="margin:0; color:inherit; width:100%" | {| class="wikitable" style="margin:0; color:inherit; width:100%" | ||
! style="background-color:#1a3244; color:#ffffff; font-weight:bold;" | CONCEALMENT !! style="background-color:#1a3244; color:#ffffff; font-weight:bold;" | | ! style="background-color:#1a3244; color:#ffffff; font-weight:bold;" | CONCEALMENT !! style="background-color:#1a3244; color:#ffffff; font-weight:bold;" | Shiratsuyu (A) !! style="background-color:#1a3244; color:#ffffff; font-weight:bold;" | Shiratsuyu (B) | ||
|- | |- | ||
| style="color:inherit;" | • Detectability by sea (km) || style="color:inherit;" | | | style="color:inherit;" | • Detectability by sea (km) || style="color:inherit;" | 6.46 || style="color:inherit;" | 6.46 | ||
|- | |- | ||
| style="color:inherit;" | • Detectability by air (km) || style="color:inherit;" | | | style="color:inherit;" | • Detectability by air (km) || style="color:inherit;" | 2.78 || style="color:inherit;" | 2.78 | ||
|- | |- | ||
| style="color:inherit;" | • Detectability after firing main guns in smoke (km) || style="color:inherit;" | | | style="color:inherit;" | • Detectability after firing main guns in smoke (km) || colspan="2" style="color:inherit;" | 2.49 | ||
|- | |- | ||
| style="color:inherit;" | • Detectability by depths (km) || style="color:inherit;" | | | style="color:inherit;" | • Detectability by depths (km) || style="color:inherit;" | 2.78 || style="color:inherit;" | 2.78 | ||
|} | |} | ||
</div> | </div> | ||
| Line 69: | Line 68: | ||
<div class="b-popup"><div class="b-popup_head js-tech-nav_head"><div><h2>Main Battery</h2></div><span class="b-tech-nav_arrow"></span></div><div class="b-popup_content" style="display: none;"><div><div style="border: 2px solid rgba(212,175,55,0.8); border-radius: 3px; margin-bottom: 1em; overflow: hidden;"> | <div class="b-popup"><div class="b-popup_head js-tech-nav_head"><div><h2>Main Battery</h2></div><span class="b-tech-nav_arrow"></span></div><div class="b-popup_content" style="display: none;"><div><div style="border: 2px solid rgba(212,175,55,0.8); border-radius: 3px; margin-bottom: 1em; overflow: hidden;"> | ||
{| class="wikitable" style="margin:0; color:inherit; width:100%" | {| class="wikitable" style="margin:0; color:inherit; width:100%" | ||
! style="background-color:#1a3244; color:#ffffff; font-weight:bold;" | MAIN BATTERY !! style="background-color:#1a3244; color:#ffffff; font-weight:bold;" | | ! style="background-color:#1a3244; color:#ffffff; font-weight:bold;" | MAIN BATTERY !! style="background-color:#1a3244; color:#ffffff; font-weight:bold;" | Type7 mod. 1 !! style="background-color:#1a3244; color:#ffffff; font-weight:bold;" | Type7 mod. 2 | ||
|- | |- | ||
| style="color:inherit;" | • Arrangement || style="color:inherit;" | 3×2 | | style="color:inherit;" | • Arrangement || colspan="2" style="color:inherit;" | 3×2 127mm | ||
|- | |- | ||
| style="color:inherit;" | • Firing range (km) || style="color:inherit;" | | | style="color:inherit;" | • Firing range (km) || style="color:inherit;" | 10.0 || style="color:inherit;" | 11.0 | ||
|- | |- | ||
| style="color:inherit;" | • Reload time (sec) || style="color:inherit;" | | | style="color:inherit;" | • Reload time (sec) || colspan="2" style="color:inherit;" | 7.5 | ||
|- | |- | ||
| style="color:inherit;" | • Rate of fire (shots/min) || style="color:inherit;" | | | style="color:inherit;" | • Rate of fire (shots/min) || colspan="2" style="color:inherit;" | 8 | ||
|- | |- | ||
| style="color:inherit;" | • 180° turn time (sec) || style="color:inherit;" | 30.0 | | style="color:inherit;" | • 180° turn time (sec) || colspan="2" style="color:inherit;" | 30.0 | ||
|} | |} | ||
</div> | </div> | ||
| Line 87: | Line 86: | ||
! style="background-color:#1a3244; color:#ffffff; font-weight:bold;" | DISPERSION !! style="background-color:#1a3244; color:#ffffff; font-weight:bold;" | | ! style="background-color:#1a3244; color:#ffffff; font-weight:bold;" | DISPERSION !! style="background-color:#1a3244; color:#ffffff; font-weight:bold;" | | ||
|- | |- | ||
| style="color:inherit;" | • Dispersion type || style="color:inherit;" | | | style="color:inherit;" | • Dispersion type || style="color:inherit;" | Standard DD dispersion | ||
|- | |- | ||
| style="color:inherit;" | • Dispersion formula || style="color:inherit;" | Dispersion (m) = | | style="color:inherit;" | • Dispersion formula || style="color:inherit;" | Dispersion (m) = 7.5 × range(km) + 15 | ||
|- | |- | ||
| style="color:inherit;" | • Sigma || style="color:inherit;" | 2.0 | | style="color:inherit;" | • Sigma || style="color:inherit;" | 2.0 | ||
|- | |- | ||
| style="color:inherit;" | • Maximum dispersion (m) || style="color:inherit;" | | | style="color:inherit;" | • Maximum dispersion (m) || style="color:inherit;" | 90 | ||
|- | |- | ||
| style="color:inherit;" | • Dispersion at 5 km || style="color:inherit;" | | | style="color:inherit;" | • Dispersion at 5 km || style="color:inherit;" | 52 | ||
|- | |- | ||
| style="color:inherit;" | • Dispersion at 10 km || style="color:inherit;" | | | style="color:inherit;" | • Dispersion at 10 km || style="color:inherit;" | 90 | ||
|} | |} | ||
</div> | </div> | ||
| Line 109: | Line 104: | ||
! style="background-color:#1a3244; color:#ffffff; font-weight:bold;" | HE SHELL !! style="background-color:#1a3244; color:#ffffff; font-weight:bold;" | | ! style="background-color:#1a3244; color:#ffffff; font-weight:bold;" | HE SHELL !! style="background-color:#1a3244; color:#ffffff; font-weight:bold;" | | ||
|- | |- | ||
| style="color:inherit;" | • Name || style="color:inherit;" | | | style="color:inherit;" | • Name || style="color:inherit;" | 127 mm HE Type1 | ||
|- | |- | ||
| style="color:inherit;" | • Maximum damage || style="color:inherit;" | | | style="color:inherit;" | • Maximum damage || style="color:inherit;" | 2150 | ||
|- | |- | ||
| style="color:inherit;" | • Fire chance (%) || style="color:inherit;" | | | style="color:inherit;" | • Fire chance (%) || style="color:inherit;" | 9.0% | ||
|- | |- | ||
| style="color:inherit;" | • Shell velocity (m/s) || style="color:inherit;" | | | style="color:inherit;" | • Shell velocity (m/s) || style="color:inherit;" | 915 | ||
|- | |- | ||
| style="color:inherit;" | • Shell weight (kg) || style="color:inherit;" | | | style="color:inherit;" | • Shell weight (kg) || style="color:inherit;" | 23 | ||
|- | |- | ||
| style="color:inherit;" | • Penetration (mm) || style="color:inherit;" | | | style="color:inherit;" | • Penetration (mm) || style="color:inherit;" | 21 | ||
|} | |} | ||
</div> | </div> | ||
| Line 128: | Line 123: | ||
! style="background-color:#1a3244; color:#ffffff; font-weight:bold;" | AP SHELL !! style="background-color:#1a3244; color:#ffffff; font-weight:bold;" | | ! style="background-color:#1a3244; color:#ffffff; font-weight:bold;" | AP SHELL !! style="background-color:#1a3244; color:#ffffff; font-weight:bold;" | | ||
|- | |- | ||
| style="color:inherit;" | • Name || style="color:inherit;" | | | style="color:inherit;" | • Name || style="color:inherit;" | 127 mm AP Type0 | ||
|- | |- | ||
| style="color:inherit;" | • Maximum damage || style="color:inherit;" | | | style="color:inherit;" | • Maximum damage || style="color:inherit;" | 2200 | ||
|- | |- | ||
| style="color:inherit;" | • Shell velocity (m/s) || style="color:inherit;" | | | style="color:inherit;" | • Shell velocity (m/s) || style="color:inherit;" | 915 | ||
|- | |- | ||
| style="color:inherit;" | • Shell weight (kg) || style="color:inherit;" | | | style="color:inherit;" | • Shell weight (kg) || style="color:inherit;" | 23 | ||
|- | |- | ||
| style="color:inherit;" | • Fuse time (sec) || style="color:inherit;" | 0. | | style="color:inherit;" | • Fuse time (sec) || style="color:inherit;" | 0.01 | ||
|- | |- | ||
| style="color:inherit;" | • Ricochet start (°) || style="color:inherit;" | 45 | | style="color:inherit;" | • Ricochet start (°) || style="color:inherit;" | 45 | ||
| Line 142: | Line 137: | ||
| style="color:inherit;" | • Always ricochet (°) || style="color:inherit;" | 60 | | style="color:inherit;" | • Always ricochet (°) || style="color:inherit;" | 60 | ||
|- | |- | ||
| style="color:inherit;" | • Normalisation (°) || style="color:inherit;" | | | style="color:inherit;" | • Normalisation (°) || style="color:inherit;" | 10 | ||
|- | |- | ||
| style="color:inherit;" | • Arming threshold (mm) || style="color:inherit;" | | | style="color:inherit;" | • Arming threshold (mm) || style="color:inherit;" | 21 | ||
|} | |} | ||
</div> | </div> | ||
| Line 151: | Line 146: | ||
<div style="border: 2px solid rgba(212,175,55,0.8); border-radius: 3px; margin-bottom: 1em; overflow: hidden;"> | <div style="border: 2px solid rgba(212,175,55,0.8); border-radius: 3px; margin-bottom: 1em; overflow: hidden;"> | ||
{| class="wikitable" style="margin:0; color:inherit; width:100%" | {| class="wikitable" style="margin:0; color:inherit; width:100%" | ||
! style="background-color:#1a3244; color:#ffffff; font-weight:bold;" | TORPEDO LAUNCHERS !! style="background-color:#1a3244; color:#ffffff; font-weight:bold;" | | ! style="background-color:#1a3244; color:#ffffff; font-weight:bold;" | TORPEDO LAUNCHERS !! style="background-color:#1a3244; color:#ffffff; font-weight:bold;" | PJPT017 !! style="background-color:#1a3244; color:#ffffff; font-weight:bold;" | PJPT018 | ||
|- | |- | ||
| style="color:inherit;" | • Number of launchers || style="color:inherit;" | 1 | | style="color:inherit;" | • Number of launchers || style="color:inherit;" | 1 || style="color:inherit;" | 1 | ||
|- | |- | ||
| style="color:inherit;" | • Torpedo name || style="color:inherit;" | | | style="color:inherit;" | • Torpedo name || style="color:inherit;" | PJPT017 || style="color:inherit;" | PJPT018 | ||
|- | |- | ||
| style="color:inherit;" | • Reload time (sec) || style="color:inherit;" | | | style="color:inherit;" | • Reload time (sec) || style="color:inherit;" | 94.0 || style="color:inherit;" | 94.0 | ||
|- | |- | ||
| style="color:inherit;" | • 180° turn time (sec) || style="color:inherit;" | 7.2 | | style="color:inherit;" | • 180° turn time (sec) || style="color:inherit;" | 7.2 || style="color:inherit;" | 7.2 | ||
|- | |- | ||
| style="color:inherit;" | • Damage || style="color:inherit;" | | | style="color:inherit;" | • Damage || style="color:inherit;" | 44900 || style="color:inherit;" | 47800 | ||
|- | |- | ||
| style="color:inherit;" | • Range (km) || style="color:inherit;" | 0.3 | | style="color:inherit;" | • Range (km) || style="color:inherit;" | 0.3 || style="color:inherit;" | 0.3 | ||
|- | |- | ||
| style="color:inherit;" | • Speed (kt) || style="color:inherit;" | 62 | | style="color:inherit;" | • Speed (kt) || style="color:inherit;" | 59 || style="color:inherit;" | 62 | ||
|- | |- | ||
| style="color:inherit;" | • Detectability (km) || style="color:inherit;" | 1. | | style="color:inherit;" | • Detectability (km) || style="color:inherit;" | 1.5 || style="color:inherit;" | 1.6 | ||
|- | |- | ||
| style="color:inherit;" | • Flooding chance (%) || style="color:inherit;" | 2. | | style="color:inherit;" | • Flooding chance (%) || style="color:inherit;" | 2.69% || style="color:inherit;" | 2.87% | ||
|} | |} | ||
</div> | </div> | ||
</div></div></div> | </div></div></div> | ||
<div class="b-popup"><div class="b-popup_head js-tech-nav_head"><div><h2> | <div class="b-popup"><div class="b-popup_head js-tech-nav_head"><div><h2>AA Defense</h2></div><span class="b-tech-nav_arrow"></span></div><div class="b-popup_content" style="display: none;"><div> | ||
<div style="border: 2px solid rgba(212,175,55,0.8); border-radius: 3px; margin-bottom: 1em; overflow: hidden;"> | <div style="border: 2px solid rgba(212,175,55,0.8); border-radius: 3px; margin-bottom: 1em; overflow: hidden;"> | ||
{| class="wikitable" style="margin:0; color:inherit; | '''Shiratsuyu (A)''' | ||
! style="background-color:#1a3244; color:#ffffff; font-weight:bold;" | | |||
{| class="wikitable" style="margin:0 0 0.8em 0; width:100%; color:inherit;" | |||
! style="background-color:#1a3244; color:#ffffff; font-weight:bold;" | AA ARMAMENT !! style="background-color:#1a3244; color:#ffffff; font-weight:bold;" | MOUNTS × BARRELS | |||
|- | |- | ||
| style="color:inherit;" | | | style="color:inherit;" | 25 mm || style="color:inherit;" | 4 × 1 | ||
|} | |} | ||
'''Continuous damage''' — average DPS within each action zone | |||
{| class="wikitable" style="margin:0 0 0.8em 0; width:100%; color:inherit;" | |||
! style="background-color:#1a3244; color:#ffffff; font-weight:bold;" | | ! style="background-color:#1a3244; color:#ffffff; font-weight:bold;" | RANGE !! style="background-color:#1a3244; color:#ffffff; font-weight:bold;" | DPS !! style="background-color:#1a3244; color:#ffffff; font-weight:bold;" | HIT CHANCE !! style="background-color:#1a3244; color:#ffffff; font-weight:bold;" | ACTION ZONE (km) | ||
|- | |- | ||
| style="color:inherit;" | | | style="color:inherit;" | Mid-range || style="color:inherit;" | 14 || style="color:inherit;" | 95% || style="color:inherit;" | 2.5 | ||
| | |||
| style="color:inherit;" | | |||
|} | |} | ||
'''Shiratsuyu (B)''' | |||
{| class="wikitable" style="margin:0 0 0.8em 0; width:100%; color:inherit;" | {| class="wikitable" style="margin:0 0 0.8em 0; width:100%; color:inherit;" | ||
! style="background-color:#1a3244; color:#ffffff; font-weight:bold;" | AA ARMAMENT !! style="background-color:#1a3244; color:#ffffff; font-weight:bold;" | MOUNTS × BARRELS | ! style="background-color:#1a3244; color:#ffffff; font-weight:bold;" | AA ARMAMENT !! style="background-color:#1a3244; color:#ffffff; font-weight:bold;" | MOUNTS × BARRELS | ||
|- | |- | ||
| style="color:inherit;" | | | style="color:inherit;" | 25 mm || style="color:inherit;" | 2 × 3 + 8 × 2 + 4 × 1 | ||
|} | |} | ||
| Line 248: | Line 198: | ||
! style="background-color:#1a3244; color:#ffffff; font-weight:bold;" | RANGE !! style="background-color:#1a3244; color:#ffffff; font-weight:bold;" | DPS !! style="background-color:#1a3244; color:#ffffff; font-weight:bold;" | HIT CHANCE !! style="background-color:#1a3244; color:#ffffff; font-weight:bold;" | ACTION ZONE (km) | ! style="background-color:#1a3244; color:#ffffff; font-weight:bold;" | RANGE !! style="background-color:#1a3244; color:#ffffff; font-weight:bold;" | DPS !! style="background-color:#1a3244; color:#ffffff; font-weight:bold;" | HIT CHANCE !! style="background-color:#1a3244; color:#ffffff; font-weight:bold;" | ACTION ZONE (km) | ||
|- | |- | ||
| style="color:inherit;" | | | style="color:inherit;" | Mid-range || style="color:inherit;" | 119 || style="color:inherit;" | 95% || style="color:inherit;" | 2.5 | ||
|} | |||
</div> | |||
</div></div></div> | |||
<div class="b-popup"><div class="b-popup_head js-tech-nav_head"><div><h2>Depth Charges</h2></div><span class="b-tech-nav_arrow"></span></div><div class="b-popup_content" style="display: none;"><div> | |||
<div style="border: 2px solid rgba(212,175,55,0.8); border-radius: 3px; margin-bottom: 1em; overflow: hidden;"> | |||
{| class="wikitable" style="margin:0; color:inherit; width:100%" | |||
! style="background-color:#1a3244; color:#ffffff; font-weight:bold;" | DEPTH CHARGES !! style="background-color:#1a3244; color:#ffffff; font-weight:bold;" | | |||
|- | |- | ||
| style="color:inherit;" | | | style="color:inherit;" | • Max damage || style="color:inherit;" | 4600 | ||
|- | |- | ||
| style="color:inherit;" | | | style="color:inherit;" | • Number of charges || style="color:inherit;" | 2 | ||
| | |- | ||
| style="color:inherit;" | • Bombs per charge || style="color:inherit;" | 2 | |||
|- | |- | ||
| style="color:inherit;" | | | style="color:inherit;" | • Reload time (sec) || style="color:inherit;" | 40.0 | ||
|} | |} | ||
</div> | </div> | ||
| Line 266: | Line 220: | ||
<!-- Add the ship code here to populate the upgrade table --> | <!-- Add the ship code here to populate the upgrade table --> | ||
{{Ship Upgrades Section|code= | {{Ship Upgrades Section|code=PJSD207_Shiratsuyu}} | ||
<!-- Consumables have to be tagged individually on a slot by slot basis --> | <!-- Consumables have to be tagged individually on a slot by slot basis --> | ||
{{Ship Consumables Section|consumables= | {{Ship Consumables Section|consumables= | ||
* '''Slot 1:''' {{Damage Control Party}} ( | * '''Slot 1:''' {{Damage Control Party}} (5.0s action, 40.0s cooldown) | ||
* '''Slot 2:''' {{ | * '''Slot 2:''' {{Smoke Generator}} (3 charges, 20.0s action, 160.0s cooldown) '''or''' {{Torpedo Reload Booster}} (3 charges, 1.0s action, 160.0s cooldown) | ||
* '''Slot 3:''' {{Engine Boost}} (3 charges, 120.0s action, 120.0s cooldown) | |||
* '''Slot | |||
}} | }} | ||
| Line 282: | Line 234: | ||
<div class="b-popup"><div class="b-popup_head js-tech-nav_head"><div><h2>WoWs Gallery</h2></div><span class="b-tech-nav_arrow"></span></div><div class="b-popup_content" style="display: none;"><div> | <div class="b-popup"><div class="b-popup_head js-tech-nav_head"><div><h2>WoWs Gallery</h2></div><span class="b-tech-nav_arrow"></span></div><div class="b-popup_content" style="display: none;"><div> | ||
<gallery> | |||
</gallery> | |||
</div></div></div> | |||
<div class="b-popup"><div class="b-popup_head js-tech-nav_head"><div><h2>Historical Gallery</h2></div><span class="b-tech-nav_arrow"></span></div><div class="b-popup_content" style="display: none;"><div> | |||
<gallery> | |||
</gallery> | |||
</div></div></div> | |||
[[Category:Ships of | [[Category:Ships of Japan]] | ||
[[Category: | [[Category:Destroyers]] | ||
[[Category:Tier | [[Category:Tier VII ships]] | ||
<!-- DO NOT DELETE THIS LINE. DO NOT INSERT ANYTHING BELOW THIS LINE --> | <!-- DO NOT DELETE THIS LINE. DO NOT INSERT ANYTHING BELOW THIS LINE --> | ||
Revision as of 12:25, 9 July 2026

VII
5,100,000
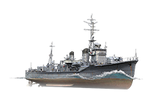
Shiratsuyu — Japan Tech Tree Tier VII Destroyer.
The Shiratsuyu-class destroyers were an upgraded version of the Hatsuharu class. They featured a deeper draft and were equipped with two quadruple-tube torpedo launchers. The lead ship of the class was laid down in November 1933 and entered service in 1936. She escorted convoys in the Western Pacific, as well as participated in the Battle of Midway, the campaigns on the Solomon and Marshall Islands, the First Battle of Guadalcanal, and the Battle of Empress Augusta Bay.
Pros
- Pro 1
- Pro 2
Cons
- Con 1
- Con 2
Ship Stats
Hull Information
Main Battery
Torpedoes
AA Defense
Depth Charges
Compatible Upgrades
| Slot 1 |
 |
 |

| ||
|---|---|---|---|---|---|
| Slot 2 |
 |
 |

| ||
| Slot 3 |
 |
 |
 |
 |

|
| Slot 4 |
 |
 |
 |

|
Consumables
- Slot 1: Damage Control Party
 (5.0s action, 40.0s cooldown)
 - Slot 2: Smoke Generator
 (3 charges, 20.0s action, 160.0s cooldown) or Torpedo Reload Booster
  (3 charges, 1.0s action, 160.0s cooldown)
 - Slot 3: Engine Boost
 (3 charges, 120.0s action, 120.0s cooldown)
Gallery
WoWs Gallery
Historical Gallery
Categories:
