User:Crewgles
No edit summary |
No edit summary |
||
| Line 1: | Line 1: | ||
{{#vardefine:ship_name|Willem de Eerste}} | |||
{{#vardefine:ship_name| | |||
__NOTOC____NOEDITSECTION__ | __NOTOC____NOEDITSECTION__ | ||
<div class="b-description gw-frame-1"><div class="b-description-img b-description-img__indent b-description-img__single"><div style="width:160px; height:102px; opacity:.5; border-radius:2px; position:absolute; left:0; top:0; z-index:1; -webkit-transition:all 0.2s ease-out 0.1s; transition:all 0.2s ease-out 0.1s;">[[File: | <div class="b-description gw-frame-1"><div class="b-description-img b-description-img__indent b-description-img__single"><div style="width:160px; height:102px; opacity:.5; border-radius:2px; position:absolute; left:0; top:0; z-index:1; -webkit-transition:all 0.2s ease-out 0.1s; transition:all 0.2s ease-out 0.1s;">[[File:Wows_anno_flag_netherlands.png|160px]]</div><div class="l-description-img_class"><span class="b-description-img_type b-description-img_type__Battleship b-description-img_type__Battleship-Special"></span><span class="b-description-img_class">X</span></div><div class="b-description-img_vehicle">[[File:Ship_PHSB710_Willem_de_Eerste.png|160px|link=|left]]</div><div class="l-description-img_price"><span class="b-description-img_price b-description-img_price__gold"><span title="''{{#var:ship_name}}'' was first released for sale on 11 June 2025.">31,000 doubloons</span></span></div></div><p>[[Ship:{{#var:ship_name}}|{{#var:ship_name}}]] — Netherlands Special Tier X [[Ship:Battleship|Battleship]].</p><p>A battlecruiser—a further development of the G3 design—that could hypothetically have been built in Britain in the 1920s and later modernized in the late 1930s. The ship could have been transferred to the allied Netherlands during World War II to strengthen the nation's navy.</p><p> </p></div> | ||
===Pros=== | ===Pros=== | ||
* | * Airstrike armament available | ||
* | * Low detectability | ||
===Cons=== | ===Cons=== | ||
* | * Low level of protection against HE shells | ||
* | * Small HP pool | ||
| Line 25: | Line 19: | ||
! style="background-color:#1a3244; color:#ffffff; font-weight:bold;" | SURVIVABILITY !! style="background-color:#1a3244; color:#ffffff; font-weight:bold;" | | ! style="background-color:#1a3244; color:#ffffff; font-weight:bold;" | SURVIVABILITY !! style="background-color:#1a3244; color:#ffffff; font-weight:bold;" | | ||
|- | |- | ||
| style="color:inherit;" | • Hit Points || style="color:inherit;" | | | style="color:inherit;" | • Hit Points || style="color:inherit;" | 75300 | ||
|- | |- | ||
| style="color:inherit;" | • Torpedo protection damage reduction (%) || style="color:inherit;" | | | style="color:inherit;" | • Torpedo protection damage reduction (%) || style="color:inherit;" | 23 | ||
|} | |} | ||
</div> | </div> | ||
| Line 35: | Line 29: | ||
! style="background-color:#1a3244; color:#ffffff; font-weight:bold;" | ARMOR DETAIL !! style="background-color:#1a3244; color:#ffffff; font-weight:bold;" | | ! style="background-color:#1a3244; color:#ffffff; font-weight:bold;" | ARMOR DETAIL !! style="background-color:#1a3244; color:#ffffff; font-weight:bold;" | | ||
|- | |- | ||
| style="color:inherit;" | • Belt (mm) || style="color:inherit;" | | | style="color:inherit;" | • Belt (mm) || style="color:inherit;" | 32 | ||
|- | |- | ||
| style="color:inherit;" | • Deck (mm) || style="color:inherit;" | | | style="color:inherit;" | • Deck (mm) || style="color:inherit;" | 32 | ||
|- | |- | ||
| style="color:inherit;" | • Superstructure (mm) || style="color:inherit;" | 19 | | style="color:inherit;" | • Superstructure (mm) || style="color:inherit;" | 19 | ||
|- | |- | ||
| style="color:inherit;" | • Extremities (mm) || style="color:inherit;" | | | style="color:inherit;" | • Extremities (mm) || style="color:inherit;" | 32 | ||
|} | |} | ||
</div> | </div> | ||
| Line 49: | Line 43: | ||
! style="background-color:#1a3244; color:#ffffff; font-weight:bold;" | MANEUVERABILITY !! style="background-color:#1a3244; color:#ffffff; font-weight:bold;" | | ! style="background-color:#1a3244; color:#ffffff; font-weight:bold;" | MANEUVERABILITY !! style="background-color:#1a3244; color:#ffffff; font-weight:bold;" | | ||
|- | |- | ||
| style="color:inherit;" | • Maximum speed (kt) || style="color:inherit;" | | | style="color:inherit;" | • Maximum speed (kt) || style="color:inherit;" | 32.0 | ||
|- | |- | ||
| style="color:inherit;" | • Turning circle radius (m) || style="color:inherit;" | | | style="color:inherit;" | • Turning circle radius (m) || style="color:inherit;" | 910 | ||
|- | |- | ||
| style="color:inherit;" | • Rudder-shift time (sec) || style="color:inherit;" | 16. | | style="color:inherit;" | • Rudder-shift time (sec) || style="color:inherit;" | 16.6 | ||
|} | |} | ||
</div> | </div> | ||
| Line 61: | Line 55: | ||
! style="background-color:#1a3244; color:#ffffff; font-weight:bold;" | CONCEALMENT !! style="background-color:#1a3244; color:#ffffff; font-weight:bold;" | | ! style="background-color:#1a3244; color:#ffffff; font-weight:bold;" | CONCEALMENT !! style="background-color:#1a3244; color:#ffffff; font-weight:bold;" | | ||
|- | |- | ||
| style="color:inherit;" | • Detectability by sea (km) || style="color:inherit;" | | | style="color:inherit;" | • Detectability by sea (km) || style="color:inherit;" | 15.03 | ||
|- | |- | ||
| style="color:inherit;" | • Detectability by air (km) || style="color:inherit;" | 10.0 | | style="color:inherit;" | • Detectability by air (km) || style="color:inherit;" | 10.0 | ||
|- | |- | ||
| style="color:inherit;" | • Detectability after firing main guns in smoke (km) || style="color:inherit;" | | | style="color:inherit;" | • Detectability after firing main guns in smoke (km) || style="color:inherit;" | 15.34 | ||
|- | |- | ||
| style="color:inherit;" | • Detectability by depths (km) || style="color:inherit;" | 10.0 | | style="color:inherit;" | • Detectability by depths (km) || style="color:inherit;" | 10.0 | ||
| Line 76: | Line 70: | ||
! style="background-color:#1a3244; color:#ffffff; font-weight:bold;" | MAIN BATTERY !! style="background-color:#1a3244; color:#ffffff; font-weight:bold;" | | ! style="background-color:#1a3244; color:#ffffff; font-weight:bold;" | MAIN BATTERY !! style="background-color:#1a3244; color:#ffffff; font-weight:bold;" | | ||
|- | |- | ||
| style="color:inherit;" | • Arrangement || style="color:inherit;" | | | style="color:inherit;" | • Arrangement || style="color:inherit;" | 3×3 419mm | ||
|- | |- | ||
| style="color:inherit;" | • Firing range (km) || style="color:inherit;" | | | style="color:inherit;" | • Firing range (km) || style="color:inherit;" | 22.2 | ||
|- | |- | ||
| style="color:inherit;" | • Reload time (sec) || style="color:inherit;" | 28.0 | | style="color:inherit;" | • Reload time (sec) || style="color:inherit;" | 28.0 | ||
| Line 92: | Line 86: | ||
! style="background-color:#1a3244; color:#ffffff; font-weight:bold;" | DISPERSION !! style="background-color:#1a3244; color:#ffffff; font-weight:bold;" | | ! style="background-color:#1a3244; color:#ffffff; font-weight:bold;" | DISPERSION !! style="background-color:#1a3244; color:#ffffff; font-weight:bold;" | | ||
|- | |- | ||
| style="color:inherit;" | • Dispersion type || style="color:inherit;" | | | style="color:inherit;" | • Dispersion type || style="color:inherit;" | Standard BB dispersion | ||
|- | |- | ||
| style="color:inherit;" | • Dispersion formula || style="color:inherit;" | Dispersion (m) = | | style="color:inherit;" | • Dispersion formula || style="color:inherit;" | Dispersion (m) = 10 × range(km) + 60 | ||
|- | |- | ||
| style="color:inherit;" | • Sigma || style="color:inherit;" | 2. | | style="color:inherit;" | • Sigma || style="color:inherit;" | 2.1 | ||
|- | |- | ||
| style="color:inherit;" | • Maximum dispersion (m) || style="color:inherit;" | | | style="color:inherit;" | • Maximum dispersion (m) || style="color:inherit;" | 282 | ||
|- | |- | ||
| style="color:inherit;" | • Dispersion at 5 km || style="color:inherit;" | | | style="color:inherit;" | • Dispersion at 5 km || style="color:inherit;" | 110 | ||
|- | |- | ||
| style="color:inherit;" | • Dispersion at 10 km || style="color:inherit;" | | | style="color:inherit;" | • Dispersion at 10 km || style="color:inherit;" | 160 | ||
|- | |- | ||
| style="color:inherit;" | • Dispersion at 15 km || style="color:inherit;" | | | style="color:inherit;" | • Dispersion at 15 km || style="color:inherit;" | 210 | ||
|- | |- | ||
| style="color:inherit;" | • Dispersion at | | style="color:inherit;" | • Dispersion at 20 km || style="color:inherit;" | 260 | ||
|- | |||
| style="color:inherit;" | • Dispersion at 22.2 km || style="color:inherit;" | 282 | |||
|} | |} | ||
</div> | </div> | ||
| Line 114: | Line 110: | ||
! style="background-color:#1a3244; color:#ffffff; font-weight:bold;" | HE SHELL !! style="background-color:#1a3244; color:#ffffff; font-weight:bold;" | | ! style="background-color:#1a3244; color:#ffffff; font-weight:bold;" | HE SHELL !! style="background-color:#1a3244; color:#ffffff; font-weight:bold;" | | ||
|- | |- | ||
| style="color:inherit;" | • Name || style="color:inherit;" | | | style="color:inherit;" | • Name || style="color:inherit;" | 419 mm HE Mk Ia | ||
|- | |- | ||
| style="color:inherit;" | • Maximum damage || style="color:inherit;" | | | style="color:inherit;" | • Maximum damage || style="color:inherit;" | 6150 | ||
|- | |- | ||
| style="color:inherit;" | • Fire chance (%) || style="color:inherit;" | | | style="color:inherit;" | • Fire chance (%) || style="color:inherit;" | 47.0% | ||
|- | |- | ||
| style="color:inherit;" | • Shell velocity (m/s) || style="color:inherit;" | | | style="color:inherit;" | • Shell velocity (m/s) || style="color:inherit;" | 792 | ||
|- | |- | ||
| style="color:inherit;" | • Shell weight (kg) || style="color:inherit;" | | | style="color:inherit;" | • Shell weight (kg) || style="color:inherit;" | 995 | ||
|- | |- | ||
| style="color:inherit;" | • Penetration (mm) || style="color:inherit;" | | | style="color:inherit;" | • Penetration (mm) || style="color:inherit;" | 70 | ||
|} | |} | ||
</div> | </div> | ||
| Line 133: | Line 129: | ||
! style="background-color:#1a3244; color:#ffffff; font-weight:bold;" | AP SHELL !! style="background-color:#1a3244; color:#ffffff; font-weight:bold;" | | ! style="background-color:#1a3244; color:#ffffff; font-weight:bold;" | AP SHELL !! style="background-color:#1a3244; color:#ffffff; font-weight:bold;" | | ||
|- | |- | ||
| style="color:inherit;" | • Name || style="color:inherit;" | | | style="color:inherit;" | • Name || style="color:inherit;" | 419 mm AP Mk V | ||
|- | |- | ||
| style="color:inherit;" | • Maximum damage || style="color:inherit;" | | | style="color:inherit;" | • Maximum damage || style="color:inherit;" | 13700 | ||
|- | |- | ||
| style="color:inherit;" | • Shell velocity (m/s) || style="color:inherit;" | | | style="color:inherit;" | • Shell velocity (m/s) || style="color:inherit;" | 747 | ||
|- | |- | ||
| style="color:inherit;" | • Shell weight (kg) || style="color:inherit;" | | | style="color:inherit;" | • Shell weight (kg) || style="color:inherit;" | 1287 | ||
|- | |- | ||
| style="color:inherit;" | • Fuse time (sec) || style="color:inherit;" | 0.033 | | style="color:inherit;" | • Fuse time (sec) || style="color:inherit;" | 0.033 | ||
| Line 149: | Line 145: | ||
| style="color:inherit;" | • Normalisation (°) || style="color:inherit;" | 6 | | style="color:inherit;" | • Normalisation (°) || style="color:inherit;" | 6 | ||
|- | |- | ||
| style="color:inherit;" | • Arming threshold (mm) || style="color:inherit;" | | | style="color:inherit;" | • Arming threshold (mm) || style="color:inherit;" | 70 | ||
|} | |} | ||
</div> | </div> | ||
</div></div></div> | </div></div></div> | ||
<div class="b-popup"><div class="b-popup_head js-tech-nav_head"><div><h2> | <div class="b-popup"><div class="b-popup_head js-tech-nav_head"><div><h2>Secondary Battery</h2></div><span class="b-tech-nav_arrow"></span></div><div class="b-popup_content" style="display: none;"><div> | ||
<div style="border: 2px solid rgba(212,175,55,0.8); border-radius: 3px; margin-bottom: 1em; overflow: hidden;"> | <div style="border: 2px solid rgba(212,175,55,0.8); border-radius: 3px; margin-bottom: 1em; overflow: hidden;"> | ||
{| class="wikitable" style="margin:0; color:inherit; width:100%" | {| class="wikitable" style="margin:0; color:inherit; width:100%" | ||
! style="background-color:#1a3244; color:#ffffff; font-weight:bold;" | | ! style="background-color:#1a3244; color:#ffffff; font-weight:bold;" | SECONDARY BATTERY !! style="background-color:#1a3244; color:#ffffff; font-weight:bold;" | | ||
|- | |- | ||
| style="color:inherit;" | • | | style="color:inherit;" | • Secondary battery range (km) || style="color:inherit;" | 7.3 | ||
|} | |||
</div> | |||
<div style="border: 2px solid rgba(212,175,55,0.8); border-radius: 3px; margin-bottom: 1em; overflow: hidden;"> | |||
{| class="wikitable" style="margin:0; color:inherit; width:100%" | |||
! style="background-color:#1a3244; color:#ffffff; font-weight:bold;" | SECONDARY ARMAMENT 1 !! style="background-color:#1a3244; color:#ffffff; font-weight:bold;" | | |||
|- | |- | ||
| style="color:inherit;" | • | | style="color:inherit;" | • Shell type || style="color:inherit;" | HE | ||
|- | |- | ||
| style="color:inherit;" | • | | style="color:inherit;" | • Name || style="color:inherit;" | 133 mm HE Mk IC | ||
|- | |- | ||
| style="color:inherit;" | • | | style="color:inherit;" | • Arrangement || style="color:inherit;" | 6x2 133mm | ||
|- | |- | ||
| style="color:inherit;" | • | | style="color:inherit;" | • Rate of fire (shots/min) || style="color:inherit;" | 9.0 | ||
|- | |- | ||
| style="color:inherit;" | • | | style="color:inherit;" | • Maximum damage || style="color:inherit;" | 1900 | ||
|- | |- | ||
| style="color:inherit;" | • | | style="color:inherit;" | • Shell velocity (m/s) || style="color:inherit;" | 792 | ||
|- | |- | ||
| style="color:inherit;" | • | | style="color:inherit;" | • Penetration (mm) || style="color:inherit;" | 22 | ||
|- | |- | ||
| style="color:inherit;" | • | | style="color:inherit;" | • Fire chance (%) || style="color:inherit;" | 8.0% | ||
|} | |} | ||
</div> | </div> | ||
<div style="border: 2px solid rgba(212,175,55,0.8); border-radius: 3px; margin-bottom: 1em; overflow: hidden;"> | <div style="border: 2px solid rgba(212,175,55,0.8); border-radius: 3px; margin-bottom: 1em; overflow: hidden;"> | ||
{| class="wikitable" style="margin:0; color:inherit; width:100%" | {| class="wikitable" style="margin:0; color:inherit; width:100%" | ||
! style="background-color:#1a3244; color:#ffffff; font-weight:bold;" | SECONDARY | ! style="background-color:#1a3244; color:#ffffff; font-weight:bold;" | SECONDARY ARMAMENT 2 !! style="background-color:#1a3244; color:#ffffff; font-weight:bold;" | | ||
|- | |||
| style="color:inherit;" | • Shell type || style="color:inherit;" | HE | |||
|- | |||
| style="color:inherit;" | • Name || style="color:inherit;" | 113 mm HE 5crh | |||
|- | |||
| style="color:inherit;" | • Arrangement || style="color:inherit;" | 8x2 113mm | |||
|- | |||
| style="color:inherit;" | • Rate of fire (shots/min) || style="color:inherit;" | 12.0 | |||
|- | |||
| style="color:inherit;" | • Maximum damage || style="color:inherit;" | 1700 | |||
|- | |||
| style="color:inherit;" | • Shell velocity (m/s) || style="color:inherit;" | 746 | |||
|- | |||
| style="color:inherit;" | • Penetration (mm) || style="color:inherit;" | 19 | |||
|- | |- | ||
| style="color:inherit;" | • | | style="color:inherit;" | • Fire chance (%) || style="color:inherit;" | 8.0% | ||
|} | |} | ||
</div> | </div> | ||
</div></div></div> | |||
<div class="b-popup"><div class="b-popup_head js-tech-nav_head"><div><h2>Airstrike</h2></div><span class="b-tech-nav_arrow"></span></div><div class="b-popup_content" style="display: none;"><div> | |||
<div style="border: 2px solid rgba(212,175,55,0.8); border-radius: 3px; margin-bottom: 1em; overflow: hidden;"> | <div style="border: 2px solid rgba(212,175,55,0.8); border-radius: 3px; margin-bottom: 1em; overflow: hidden;"> | ||
{| class="wikitable" style="margin:0; color:inherit; width:100%" | {| class="wikitable" style="margin:0; color:inherit; width:100%" | ||
! style="background-color:#1a3244; color:#ffffff; font-weight:bold;" | | ! style="background-color:#1a3244; color:#ffffff; font-weight:bold;" | AIRSTRIKE (HE BOMBS) !! style="background-color:#1a3244; color:#ffffff; font-weight:bold;" | | ||
|- | |- | ||
| style="color:inherit;" | • | | style="color:inherit;" | • Range (km) || style="color:inherit;" | 15 | ||
|- | |- | ||
| style="color:inherit;" | • | | style="color:inherit;" | • Minimum range (km) || style="color:inherit;" | 1.5 | ||
|- | |- | ||
| style="color:inherit;" | • | | style="color:inherit;" | • Reload time (sec) || style="color:inherit;" | 120.0 | ||
|- | |- | ||
| style="color:inherit;" | • | | style="color:inherit;" | • Number of aircraft || style="color:inherit;" | 12 | ||
|- | |- | ||
| style="color:inherit;" | • | | style="color:inherit;" | • Bombs in payload || style="color:inherit;" | 6 | ||
|- | |- | ||
| style="color:inherit;" | • | | style="color:inherit;" | • Damage || style="color:inherit;" | 8500 | ||
|- | |- | ||
| style="color:inherit;" | • Fire chance (%) || style="color:inherit;" | | | style="color:inherit;" | • Fire chance (%) || style="color:inherit;" | 48.0% | ||
|} | |} | ||
</div> | </div> | ||
<div style="border: 2px solid rgba(212,175,55,0.8); border-radius: 3px; margin-bottom: 1em; overflow: hidden;"> | <div style="border: 2px solid rgba(212,175,55,0.8); border-radius: 3px; margin-bottom: 1em; overflow: hidden;"> | ||
| Line 219: | Line 229: | ||
! style="background-color:#1a3244; color:#ffffff; font-weight:bold;" | ASW AIRSTRIKE (DEPTH CHARGES) !! style="background-color:#1a3244; color:#ffffff; font-weight:bold;" | | ! style="background-color:#1a3244; color:#ffffff; font-weight:bold;" | ASW AIRSTRIKE (DEPTH CHARGES) !! style="background-color:#1a3244; color:#ffffff; font-weight:bold;" | | ||
|- | |- | ||
| style="color:inherit;" | • Range (km) || style="color:inherit;" | | | style="color:inherit;" | • Range (km) || style="color:inherit;" | 15 | ||
|- | |- | ||
| style="color:inherit;" | • Minimum range (km) || style="color:inherit;" | | | style="color:inherit;" | • Minimum range (km) || style="color:inherit;" | 1.5 | ||
|- | |- | ||
| style="color:inherit;" | • Reload time (sec) || style="color:inherit;" | | | style="color:inherit;" | • Reload time (sec) || style="color:inherit;" | 120.0 | ||
|- | |- | ||
| style="color:inherit;" | • Number of aircraft || style="color:inherit;" | 1 | | style="color:inherit;" | • Number of aircraft || style="color:inherit;" | 1 | ||
|- | |- | ||
| style="color:inherit;" | • Depth charges in payload || style="color:inherit;" | | | style="color:inherit;" | • Depth charges in payload || style="color:inherit;" | 3 | ||
|- | |- | ||
| style="color:inherit;" | • Damage || style="color:inherit;" | | | style="color:inherit;" | • Damage || style="color:inherit;" | 3000 | ||
|- | |- | ||
| style="color:inherit;" | • Deployment || style="color:inherit;" | Manual | | style="color:inherit;" | • Deployment || style="color:inherit;" | Manual | ||
| Line 240: | Line 250: | ||
! style="background-color:#1a3244; color:#ffffff; font-weight:bold;" | AA ARMAMENT !! style="background-color:#1a3244; color:#ffffff; font-weight:bold;" | MOUNTS × BARRELS | ! style="background-color:#1a3244; color:#ffffff; font-weight:bold;" | AA ARMAMENT !! style="background-color:#1a3244; color:#ffffff; font-weight:bold;" | MOUNTS × BARRELS | ||
|- | |- | ||
| style="color:inherit;" | | | style="color:inherit;" | 133 mm || style="color:inherit;" | 6 × 2 | ||
|- | |- | ||
| style="color:inherit;" | | | style="color:inherit;" | 113 mm || style="color:inherit;" | 8 × 2 | ||
|- | |- | ||
| style="color:inherit;" | | | style="color:inherit;" | 40 mm || style="color:inherit;" | 16 × 1 | ||
|} | |} | ||
| Line 253: | Line 261: | ||
! style="background-color:#1a3244; color:#ffffff; font-weight:bold;" | RANGE !! style="background-color:#1a3244; color:#ffffff; font-weight:bold;" | DPS !! style="background-color:#1a3244; color:#ffffff; font-weight:bold;" | HIT CHANCE !! style="background-color:#1a3244; color:#ffffff; font-weight:bold;" | ACTION ZONE (km) | ! style="background-color:#1a3244; color:#ffffff; font-weight:bold;" | RANGE !! style="background-color:#1a3244; color:#ffffff; font-weight:bold;" | DPS !! style="background-color:#1a3244; color:#ffffff; font-weight:bold;" | HIT CHANCE !! style="background-color:#1a3244; color:#ffffff; font-weight:bold;" | ACTION ZONE (km) | ||
|- | |- | ||
| style="color:inherit;" | Mid-range || style="color:inherit;" | 700 || style="color:inherit;" | 75% || style="color:inherit;" | 3.5 | |||
| style="color:inherit;" | Mid-range || style="color:inherit;" | | |||
|- | |- | ||
| style="color:inherit;" | Long-range || style="color:inherit;" | | | style="color:inherit;" | Long-range || style="color:inherit;" | 136.5 || style="color:inherit;" | 75% || style="color:inherit;" | 6.0 | ||
|} | |} | ||
| Line 264: | Line 270: | ||
! style="background-color:#1a3244; color:#ffffff; font-weight:bold;" | EXPLOSIONS / SALVO !! style="background-color:#1a3244; color:#ffffff; font-weight:bold;" | DAMAGE !! style="background-color:#1a3244; color:#ffffff; font-weight:bold;" | HIT CHANCE !! style="background-color:#1a3244; color:#ffffff; font-weight:bold;" | ACTION ZONE (km) | ! style="background-color:#1a3244; color:#ffffff; font-weight:bold;" | EXPLOSIONS / SALVO !! style="background-color:#1a3244; color:#ffffff; font-weight:bold;" | DAMAGE !! style="background-color:#1a3244; color:#ffffff; font-weight:bold;" | HIT CHANCE !! style="background-color:#1a3244; color:#ffffff; font-weight:bold;" | ACTION ZONE (km) | ||
|- | |- | ||
| style="color:inherit;" | | | style="color:inherit;" | 4 || style="color:inherit;" | 1540 || style="color:inherit;" | 75% || style="color:inherit;" | 3.5–6.0 | ||
|} | |} | ||
</div> | </div> | ||
| Line 271: | Line 277: | ||
<!-- Add the ship code here to populate the upgrade table --> | <!-- Add the ship code here to populate the upgrade table --> | ||
{{Ship Upgrades Section|code= | {{Ship Upgrades Section|code=PHSB710_Willem_de_Eerste}} | ||
| Line 277: | Line 283: | ||
{{Ship Consumables Section|consumables= | {{Ship Consumables Section|consumables= | ||
* '''Slot 1:''' {{Damage Control Party}} (15.0s action, 80.0s cooldown) | * '''Slot 1:''' {{Damage Control Party}} (15.0s action, 80.0s cooldown) | ||
* '''Slot 2:''' {{Repair Party}} ( | * '''Slot 2:''' {{Repair Party}} (4 charges, 28.0s action, 80.0s cooldown, 376.5 hp/s) | ||
* '''Slot 3:''' {{Engine Boost}} (3 charges | * '''Slot 3:''' {{Engine Boost}} (3 charges, 120.0s action, 120.0s cooldown) | ||
}} | }} | ||
| Line 287: | Line 291: | ||
<div class="b-popup"><div class="b-popup_head js-tech-nav_head"><div><h2>WoWs Gallery</h2></div><span class="b-tech-nav_arrow"></span></div><div class="b-popup_content" style="display: none;"><div> | <div class="b-popup"><div class="b-popup_head js-tech-nav_head"><div><h2>WoWs Gallery</h2></div><span class="b-tech-nav_arrow"></span></div><div class="b-popup_content" style="display: none;"><div> | ||
[[File: | [[File:ShipWillemDeEerste.png|thumb]] | ||
[[Category:Ships of | [[Category:Ships of Netherlands]] | ||
[[Category:Battleships]] | [[Category:Battleships]] | ||
[[Category:Tier X ships]] | [[Category:Tier X ships]] | ||
<!-- DO NOT DELETE THIS LINE. DO NOT INSERT ANYTHING BELOW THIS LINE --> | <!-- DO NOT DELETE THIS LINE. DO NOT INSERT ANYTHING BELOW THIS LINE --> | ||
Revision as of 20:01, 11 July 2026

X
31,000 doubloons
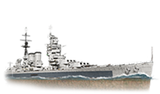
Willem de Eerste — Netherlands Special Tier X Battleship.
A battlecruiser—a further development of the G3 design—that could hypothetically have been built in Britain in the 1920s and later modernized in the late 1930s. The ship could have been transferred to the allied Netherlands during World War II to strengthen the nation's navy.
Pros
- Airstrike armament available
- Low detectability
Cons
- Low level of protection against HE shells
- Small HP pool
Ship Stats
Hull Information
Main Battery
Secondary Battery
Airstrike
AA Defense
Compatible Upgrades
| Slot 1 |
 |
 |

| |
|---|---|---|---|---|
| Slot 2 |
 |
 |

| |
| Slot 3 |
 |
 |
 |

|
| Slot 4 |
 |
 |
 |

|
| Slot 5 |
 |
 |

| |
| Slot 6 |
 |
 |

|
Consumables
- Slot 1: Damage Control Party
 (15.0s action, 80.0s cooldown)
 - Slot 2: Repair Party
 (4 charges, 28.0s action, 80.0s cooldown, 376.5 hp/s)
 - Slot 3: Engine Boost
 (3 charges, 120.0s action, 120.0s cooldown)
Gallery
WoWs Gallery

Categories:
