Ship:Malta
imported>Ahskance:na m Protected "Ship:Malta" ([Edit=Allow only administrators] (indefinite) [Move=Allow only administrators] (indefinite)) [cascading] |
Automated stats update via wiki pipeline |
||
| Line 1: | Line 1: | ||
{{#vardefine:ship_name|Malta}} | |||
__NOTOC____NOEDITSECTION__ | |||
{{ | |||
| | <div class="b-description gw-frame-1"><div class="b-description-img b-description-img__indent b-description-img__single"><div style="width:160px; height:102px; opacity:.5; border-radius:2px; position:absolute; left:0; top:0; z-index:1; -webkit-transition:all 0.2s ease-out 0.1s; transition:all 0.2s ease-out 0.1s;">[[File:Wows_anno_flag_uk.png|160px]]</div><div class="l-description-img_class"><span class="b-description-img_type b-description-img_type__Aircraft Carrier b-description-img_type__Aircraft Carrier-Special"></span><span class="b-description-img_class">X</span></div><div class="b-description-img_vehicle">[[File:Ship_PBSA510_Malta.png|160px|link=|left]]</div><div class="l-description-img_price"><span class="b-description-img_price b-description-img_price__gold"><span title="''{{#var:ship_name}}'' was first released for sale on DD Month YYYY.">26,000 doubloons</span></span></div></div><p>[[Ship:{{#var:ship_name}}|{{#var:ship_name}}]] — U.K. Special Tier X [[Ship:Aircraft Carrier|Aircraft Carrier]].</p><p>1942 sparked an idea to build an aircraft carrier whose size would be limited only by the dock dimensions. In late 1942, work on Project X1 commenced—a ship with a displacement of 56,800 tons. The main disputes arose around the hangar, as previous ships were built with an entirely closed hangar. However, the U.S. aircraft carriers' operating experience showed that it's necessary to warm up aircraft engines in the hangar to carry out a massive launch of the air group. The choice fell on a project with an open hangar and two aircraft lifts on the port side. All works were stopped with the end of World War II.</p><p> </p></div> | ||
===Pros=== | |||
* Pro 1 | |||
* Pro 2 | |||
===Cons=== | |||
* Con 1 | |||
* Con 2 | |||
==Ship Stats== | |||
<div class="b-popup"><div class="b-popup_head js-tech-nav_head"><div><h2>Hull Information</h2></div><span class="b-tech-nav_arrow"></span></div><div class="b-popup_content" style="display: none;"><div> | |||
<div style="border: 2px solid rgba(212,175,55,0.8); border-radius: 3px; margin-bottom: 1em; overflow: hidden;"> | |||
{| class="wikitable" style="margin:0; color:inherit; width:100%" | |||
! style="background-color:#1a3244; color:#ffffff; font-weight:bold;" | SURVIVABILITY !! style="background-color:#1a3244; color:#ffffff; font-weight:bold;" | | |||
|- | |||
| style="color:inherit;" | • Hit Points || style="color:inherit;" | 66600 | |||
|- | |||
| style="color:inherit;" | • Torpedo protection damage reduction (%) || style="color:inherit;" | — | |||
|} | |||
</div> | |||
<div style="border: 2px solid rgba(212,175,55,0.8); border-radius: 3px; margin-bottom: 1em; overflow: hidden;"> | |||
{| class="wikitable" style="margin:0; color:inherit; width:100%" | |||
! style="background-color:#1a3244; color:#ffffff; font-weight:bold;" | ARMOR DETAIL !! style="background-color:#1a3244; color:#ffffff; font-weight:bold;" | | |||
|- | |||
| style="color:inherit;" | • Belt (mm) || style="color:inherit;" | — | |||
|- | |||
| style="color:inherit;" | • Deck (mm) || style="color:inherit;" | — | |||
|- | |||
| style="color:inherit;" | • Superstructure (mm) || style="color:inherit;" | — | |||
|- | |||
| style="color:inherit;" | • Extremities (mm) || style="color:inherit;" | — | |||
|} | |||
</div> | |||
<div style="border: 2px solid rgba(212,175,55,0.8); border-radius: 3px; margin-bottom: 1em; overflow: hidden;"> | |||
{| class="wikitable" style="margin:0; color:inherit; width:100%" | |||
! style="background-color:#1a3244; color:#ffffff; font-weight:bold;" | MANEUVERABILITY !! style="background-color:#1a3244; color:#ffffff; font-weight:bold;" | | |||
|- | |||
| style="color:inherit;" | • Maximum speed (kt) || style="color:inherit;" | 33.6 | |||
|- | |||
| style="color:inherit;" | • Turning circle radius (m) || style="color:inherit;" | 1220 | |||
|- | |||
| style="color:inherit;" | • Rudder-shift time (sec) || style="color:inherit;" | 22.1 | |||
|} | |||
</div> | |||
<div style="border: 2px solid rgba(212,175,55,0.8); border-radius: 3px; margin-bottom: 1em; overflow: hidden;"> | |||
{| class="wikitable" style="margin:0; color:inherit; width:100%" | |||
! style="background-color:#1a3244; color:#ffffff; font-weight:bold;" | CONCEALMENT !! style="background-color:#1a3244; color:#ffffff; font-weight:bold;" | | |||
|- | |||
| style="color:inherit;" | • Detectability by sea (km) || style="color:inherit;" | 15.19 | |||
|- | |||
| style="color:inherit;" | • Detectability by air (km) || style="color:inherit;" | 10.0 | |||
|- | |||
| style="color:inherit;" | • Detectability after firing main guns in smoke (km) || style="color:inherit;" | — | |||
|- | |||
| style="color:inherit;" | • Detectability by depths (km) || style="color:inherit;" | 10.0 | |||
|} | |||
</div> | |||
</div></div></div> | |||
<div class="b-popup"><div class="b-popup_head js-tech-nav_head"><div><h2>Secondary Battery</h2></div><span class="b-tech-nav_arrow"></span></div><div class="b-popup_content" style="display: none;"><div> | |||
<div style="border: 2px solid rgba(212,175,55,0.8); border-radius: 3px; margin-bottom: 1em; overflow: hidden;"> | |||
{| class="wikitable" style="margin:0; color:inherit; width:100%" | |||
! style="background-color:#1a3244; color:#ffffff; font-weight:bold;" | SECONDARY BATTERY !! style="background-color:#1a3244; color:#ffffff; font-weight:bold;" | Automatic !! style="background-color:#1a3244; color:#ffffff; font-weight:bold;" | Manual control | |||
|- | |||
| style="color:inherit;" | • Secondary battery range (km) || style="color:inherit;" | 5.0 || style="color:inherit;" | 9.0 | |||
|} | |||
</div> | |||
<div style="border: 2px solid rgba(212,175,55,0.8); border-radius: 3px; margin-bottom: 1em; overflow: hidden;"> | |||
{| class="wikitable" style="margin:0; color:inherit; width:100%" | |||
! style="background-color:#1a3244; color:#ffffff; font-weight:bold;" | SECONDARY ARMAMENT 1 !! style="background-color:#1a3244; color:#ffffff; font-weight:bold;" | Automatic !! style="background-color:#1a3244; color:#ffffff; font-weight:bold;" | Manual control | |||
|- | |||
| style="color:inherit;" | • Shell type || colspan="2" style="color:inherit;" | HE | |||
|- | |||
| style="color:inherit;" | • Name || colspan="2" style="color:inherit;" | 113 mm HE Mk XVI | |||
|- | |||
| style="color:inherit;" | • Arrangement || colspan="2" style="color:inherit;" | 2x113mm | |||
|- | |||
| style="color:inherit;" | • Rate of fire (shots/min) || style="color:inherit;" | 12.0 || style="color:inherit;" | 9.0 | |||
|- | |||
| style="color:inherit;" | • Maximum damage || colspan="2" style="color:inherit;" | 1600 | |||
|- | |||
| style="color:inherit;" | • Shell velocity (m/s) || colspan="2" style="color:inherit;" | 746 | |||
|- | |||
| style="color:inherit;" | • Penetration (mm) || colspan="2" style="color:inherit;" | 19 | |||
|- | |||
| style="color:inherit;" | • Fire chance (%) || colspan="2" style="color:inherit;" | 7.0% | |||
|} | |||
</div> | |||
<div style="border: 2px solid rgba(212,175,55,0.8); border-radius: 3px; margin-bottom: 1em; overflow: hidden;"> | |||
{| class="wikitable" style="margin:0; color:inherit; width:100%" | |||
! style="background-color:#1a3244; color:#ffffff; font-weight:bold;" | SECONDARY ARMAMENT 2 !! style="background-color:#1a3244; color:#ffffff; font-weight:bold;" | Automatic !! style="background-color:#1a3244; color:#ffffff; font-weight:bold;" | Manual control | |||
|- | |||
| style="color:inherit;" | • Shell type || colspan="2" style="color:inherit;" | HE | |||
|- | |||
| style="color:inherit;" | • Name || colspan="2" style="color:inherit;" | PBGS091_4_5in_45_Mk5_twin_R | |||
|- | |||
| style="color:inherit;" | • Arrangement || colspan="2" style="color:inherit;" | 2x113mm | |||
|- | |||
| style="color:inherit;" | • Rate of fire (shots/min) || style="color:inherit;" | 12.0 || style="color:inherit;" | 9.0 | |||
|- | |||
| style="color:inherit;" | • Maximum damage || colspan="2" style="color:inherit;" | 1600 | |||
|- | |||
| style="color:inherit;" | • Shell velocity (m/s) || colspan="2" style="color:inherit;" | 746 | |||
|- | |||
| style="color:inherit;" | • Penetration (mm) || colspan="2" style="color:inherit;" | 19 | |||
|- | |||
| style="color:inherit;" | • Fire chance (%) || colspan="2" style="color:inherit;" | 7.0% | |||
|} | |||
</div> | |||
</div></div></div> | |||
<div class="b-popup"><div class="b-popup_head js-tech-nav_head"><div><h2>Airstrike</h2></div><span class="b-tech-nav_arrow"></span></div><div class="b-popup_content" style="display: none;"><div> | |||
| | <div style="border: 2px solid rgba(212,175,55,0.8); border-radius: 3px; margin-bottom: 1em; overflow: hidden;"> | ||
{| class="wikitable" style="margin:0; color:inherit; width:100%" | |||
! style="background-color:#1a3244; color:#ffffff; font-weight:bold;" | ASW AIRSTRIKE (DEPTH CHARGES) !! style="background-color:#1a3244; color:#ffffff; font-weight:bold;" | | |||
|- | |||
| style="color:inherit;" | • Range (km) || style="color:inherit;" | 8 | |||
|- | |||
| style="color:inherit;" | • Minimum range (km) || style="color:inherit;" | 0.5 | |||
|- | |||
| style="color:inherit;" | • Reload time (sec) || style="color:inherit;" | 25.0 | |||
|- | |||
| style="color:inherit;" | • Number of aircraft || style="color:inherit;" | 1 | |||
|- | |||
| style="color:inherit;" | • Depth charges in payload || style="color:inherit;" | 1 | |||
|- | |||
| style="color:inherit;" | • Damage || style="color:inherit;" | 4900 | |||
|- | |||
| style="color:inherit;" | • Deployment || style="color:inherit;" | Automatic | |||
|} | |||
</div> | |||
</div></div></div> | |||
<div class="b-popup"><div class="b-popup_head js-tech-nav_head"><div><h2>AA Defense</h2></div><span class="b-tech-nav_arrow"></span></div><div class="b-popup_content" style="display: none;"><div> | |||
<div style="border: 2px solid rgba(212,175,55,0.8); border-radius: 3px; margin-bottom: 1em; overflow: hidden;"> | |||
{| class="wikitable" style="margin:0 0 0.8em 0; width:100%; color:inherit;" | |||
! style="background-color:#1a3244; color:#ffffff; font-weight:bold;" | AA ARMAMENT !! style="background-color:#1a3244; color:#ffffff; font-weight:bold;" | MOUNTS × BARRELS | |||
|- | |||
| style="color:inherit;" | 113 mm || style="color:inherit;" | 8 × 2 | |||
|- | |||
| style="color:inherit;" | 40 mm || style="color:inherit;" | 9 × 6 | |||
|} | |||
| | '''Continuous damage''' — average DPS within each action zone | ||
{| class="wikitable" style="margin:0 0 0.8em 0; width:100%; color:inherit;" | |||
! style="background-color:#1a3244; color:#ffffff; font-weight:bold;" | RANGE !! style="background-color:#1a3244; color:#ffffff; font-weight:bold;" | DPS !! style="background-color:#1a3244; color:#ffffff; font-weight:bold;" | HIT CHANCE !! style="background-color:#1a3244; color:#ffffff; font-weight:bold;" | ACTION ZONE (km) | |||
|- | |||
| style="color:inherit;" | Mid-range || style="color:inherit;" | 311.5 || style="color:inherit;" | 100% || style="color:inherit;" | 3.5 | |||
|- | |||
| style="color:inherit;" | Long-range || style="color:inherit;" | 143.5 || style="color:inherit;" | 100% || style="color:inherit;" | 5.8 | |||
|} | |||
| | '''Damage by shell explosions''' | ||
{| class="wikitable" style="margin:0 0 0.8em 0; width:100%; color:inherit;" | |||
! style="background-color:#1a3244; color:#ffffff; font-weight:bold;" | EXPLOSIONS / SALVO !! style="background-color:#1a3244; color:#ffffff; font-weight:bold;" | DAMAGE !! style="background-color:#1a3244; color:#ffffff; font-weight:bold;" | HIT CHANCE !! style="background-color:#1a3244; color:#ffffff; font-weight:bold;" | ACTION ZONE (km) | |||
|- | |||
| style="color:inherit;" | 6 || style="color:inherit;" | 1540 || style="color:inherit;" | 100% || style="color:inherit;" | 3.5–5.8 | |||
|} | |||
</div> | |||
</div></div></div> | |||
<div class="b-popup"><div class="b-popup_head js-tech-nav_head"><div><h2>Aircraft</h2></div><span class="b-tech-nav_arrow"></span></div><div class="b-popup_content" style="display: none;"><div> | |||
<div style="border: 2px solid rgba(212,175,55,0.8); border-radius: 3px; margin-bottom: 1em; overflow: hidden;"> | |||
{| class="wikitable" style="margin:0; color:inherit; width:100%" | |||
! style="background-color:#1a3244; color:#ffffff; font-weight:bold;" | ROCKET PLANES !! style="background-color:#1a3244; color:#ffffff; font-weight:bold;" | | |||
|- | |||
| style="color:inherit;" | • Hit points || style="color:inherit;" | 2190 | |||
|- | |||
| style="color:inherit;" | • Cruise speed (kt) || style="color:inherit;" | 137 | |||
|- | |||
| style="color:inherit;" | • Squadrons || style="color:inherit;" | 1 | |||
|- | |||
| style="color:inherit;" | • Per squadron || style="color:inherit;" | 12 | |||
|- | |||
| style="color:inherit;" | • Plane regeneration time (sec) || style="color:inherit;" | 64.0 | |||
|- | |||
| style="color:inherit;" | • Ammo name || style="color:inherit;" | PBPR112_MALTA_STOCK | |||
|- | |||
| style="color:inherit;" | • Ammo type || style="color:inherit;" | ROCKET | |||
|- | |||
| style="color:inherit;" | • Rockets in payload || style="color:inherit;" | 10 | |||
|- | |||
| style="color:inherit;" | • Damage per rocket || style="color:inherit;" | 2350 | |||
|- | |||
| style="color:inherit;" | • Preparation time (sec) || style="color:inherit;" | 5.0 | |||
|} | |||
</div> | |||
| | <div style="border: 2px solid rgba(212,175,55,0.8); border-radius: 3px; margin-bottom: 1em; overflow: hidden;"> | ||
{| class="wikitable" style="margin:0; color:inherit; width:100%" | |||
! style="background-color:#1a3244; color:#ffffff; font-weight:bold;" | TORPEDO BOMBERS !! style="background-color:#1a3244; color:#ffffff; font-weight:bold;" | | |||
|- | |||
| style="color:inherit;" | • Hit points || style="color:inherit;" | 2250 | |||
|- | |||
| style="color:inherit;" | • Speed (kt) || style="color:inherit;" | 136 | |||
|- | |||
| style="color:inherit;" | • Squadron size || style="color:inherit;" | 12 | |||
|- | |||
| style="color:inherit;" | • Size of attacking flight || style="color:inherit;" | 4 | |||
|- | |||
| style="color:inherit;" | • Aircraft on deck || style="color:inherit;" | 18 | |||
|- | |||
| style="color:inherit;" | • Preparation time (sec) || style="color:inherit;" | 10.0 | |||
|- | |||
| style="color:inherit;" | • Detectability (km) || style="color:inherit;" | 10.0 | |||
|- | |||
| style="color:inherit;" | • Torpedo name || style="color:inherit;" | PBPT112_MALTA_STOCK | |||
|- | |||
| style="color:inherit;" | • Torpedoes in payload || style="color:inherit;" | 1 | |||
|- | |||
| style="color:inherit;" | • Torpedo damage || style="color:inherit;" | 17500 | |||
|- | |||
| style="color:inherit;" | • Flood chance (%) || style="color:inherit;" | 0.6% | |||
|- | |||
| style="color:inherit;" | • Torpedo speed (kt) || style="color:inherit;" | 35 | |||
|- | |||
| style="color:inherit;" | • Arming distance (m) || style="color:inherit;" | 100 | |||
|- | |||
| style="color:inherit;" | • Torpedo range (km) || style="color:inherit;" | 0.1 | |||
|- | |||
| style="color:inherit;" | • Squadrons || style="color:inherit;" | 1 | |||
|} | |||
</div> | |||
| | <div style="border: 2px solid rgba(212,175,55,0.8); border-radius: 3px; margin-bottom: 1em; overflow: hidden;"> | ||
{| class="wikitable" style="margin:0; color:inherit; width:100%" | |||
! style="background-color:#1a3244; color:#ffffff; font-weight:bold;" | DIVE BOMBERS !! style="background-color:#1a3244; color:#ffffff; font-weight:bold;" | | |||
|- | |||
| style="color:inherit;" | • Hit points || style="color:inherit;" | 2320 | |||
|- | |||
| style="color:inherit;" | • Speed (kt) || style="color:inherit;" | 134 | |||
|- | |||
| style="color:inherit;" | • Squadron size || style="color:inherit;" | 15 | |||
|- | |||
| | | style="color:inherit;" | • Size of attacking flight || style="color:inherit;" | 5 | ||
|- | |||
| style="color:inherit;" | • Aircraft on deck || style="color:inherit;" | 23 | |||
|- | |||
| style="color:inherit;" | • Preparation time (sec) || style="color:inherit;" | 9.0 | |||
|- | |||
| style="color:inherit;" | • Detectability (km) || style="color:inherit;" | 10.0 | |||
|- | |||
| style="color:inherit;" | • Bomb name || style="color:inherit;" | PBPB112_MALTA_STOCK | |||
|- | |||
| style="color:inherit;" | • Bomb type || style="color:inherit;" | BOMB | |||
|- | |||
| style="color:inherit;" | • Bombs in payload || style="color:inherit;" | 3 | |||
|- | |||
| style="color:inherit;" | • Bomb damage || style="color:inherit;" | 4300 | |||
|- | |||
| style="color:inherit;" | • Squadrons || style="color:inherit;" | 1 | |||
|} | |||
</div> | |||
</div></div></div> | |||
< | |||
<!-- Add the ship code here to populate the upgrade table --> | |||
| | {{Ship Upgrades Section|code=PBSA510_Malta}} | ||
<!-- Consumables have to be tagged individually on a slot by slot basis --> | |||
| | {{Ship Consumables Section|consumables= | ||
* '''Slot 1:''' {{Damage Control Party}} (30.0s action, 70.0s cooldown) | |||
* '''Slot 2:''' {{Patrol Fighter}} (4 charges, 600.0s action, 40.0s cooldown) | |||
}} | }} | ||
==Gallery== | |||
< | <div class="b-popup"><div class="b-popup_head js-tech-nav_head"><div><h2>WoWs Gallery</h2></div><span class="b-tech-nav_arrow"></span></div><div class="b-popup_content" style="display: none;"><div> | ||
<gallery> | |||
</gallery> | </gallery> | ||
</div></div></div> | |||
<div class="b-popup"><div class="b-popup_head js-tech-nav_head"><div><h2>Historical Gallery</h2></div><span class="b-tech-nav_arrow"></span></div><div class="b-popup_content" style="display: none;"><div> | |||
<div class=" | |||
<h2> | |||
</div> | |||
< | |||
<gallery> | |||
</gallery> | </gallery> | ||
</div></div></div> | |||
[[Category:Ships of U.K.]] | |||
[[Category:Aircraft Carriers]] | |||
[[Category:Tier X ships]] | |||
<!-- DO NOT DELETE THIS LINE. DO NOT INSERT ANYTHING BELOW THIS LINE --> | |||
Revision as of 03:40, 30 June 2026

X
26,000 doubloons
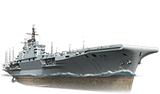
Malta — U.K. Special Tier X Aircraft Carrier.
1942 sparked an idea to build an aircraft carrier whose size would be limited only by the dock dimensions. In late 1942, work on Project X1 commenced—a ship with a displacement of 56,800 tons. The main disputes arose around the hangar, as previous ships were built with an entirely closed hangar. However, the U.S. aircraft carriers' operating experience showed that it's necessary to warm up aircraft engines in the hangar to carry out a massive launch of the air group. The choice fell on a project with an open hangar and two aircraft lifts on the port side. All works were stopped with the end of World War II.
Pros
- Pro 1
- Pro 2
Cons
- Con 1
- Con 2
Ship Stats
Hull Information
Secondary Battery
Airstrike
AA Defense
Aircraft
Compatible Upgrades
| Slot 1 |
 |
 |

| ||
|---|---|---|---|---|---|
| Slot 2 |
 |

| |||
| Slot 3 |
 |
 |
 |

| |
| Slot 4 |
 |
 |
 |
 |

|
| Slot 5 |
 |
 |

| ||
| Slot 6 |
 |
 |

|
Consumables
- Slot 1: Damage Control Party
 (30.0s action, 70.0s cooldown)
 - Slot 2: Patrol Fighter
 (4 charges, 600.0s action, 40.0s cooldown)
Gallery
WoWs Gallery
Historical Gallery
Categories:
