|
|
| Line 1: |
Line 1: |
| <!-- DO NOT EDIT OR DELETE LINES WITH COMMENTS (it's look like as this or next line)
| | {{#vardefine:ship_name|Hood}} |
| -->{{WoWs_Ship
| | __NOTOC____NOEDITSECTION__ |
| |Promo=<!-- in case of gift or promo ship write conditions to get it. (optional)-->
| |
|
| |
|
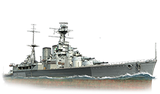
| |Anno=<!-- you can write below short description for the ship. it will replace default once. --> | | <div class="b-description gw-frame-1"><div class="b-description-img b-description-img__indent b-description-img__single"><div style="width:160px; height:102px; opacity:.5; border-radius:2px; position:absolute; left:0; top:0; z-index:1; -webkit-transition:all 0.2s ease-out 0.1s; transition:all 0.2s ease-out 0.1s;">[[File:Wows_anno_flag_uk.png|160px]]</div><div class="l-description-img_class"><span class="b-description-img_type b-description-img_type__Battleship b-description-img_type__Battleship-Premium"></span><span class="b-description-img_class">VII</span></div><div class="b-description-img_vehicle">[[File:Ship_PBSB507_Hood.png|160px|link=|left]]</div><div class="l-description-img_price"><span class="b-description-img_price b-description-img_price__gold"><span title="''{{#var:ship_name}}'' was first released for sale on DD Month YYYY.">7,500 doubloons</span></span></div></div><p>[[Ship:{{#var:ship_name}}|{{#var:ship_name}}]] — U.K. Premium Tier VII [[Ship:Battleship|Battleship]].</p><p>In 1915, development commenced on a new battlecruiser with enhanced sea endurance for the North Sea. After three British cruisers were sunk in the Battle of Jutland, the project was revised to strengthen the armor. Hood entered the Atlantic Fleet in May 1920, becoming the mightiest ship in the world. During World War II, she was the flagship of Force H in Gibraltar. Between 1940 and 1941, the ship carried out patrol missions in the Atlantic and escorted convoys. On May 24, 1941, Hood encountered Bismarck and Prinz Eugen, came under heavy fire, and sank after her magazine detonated.</p><p> </p></div> |
| A fast battlecruiser that had long remained the largest and one of the most powerful ships in the Royal Navy. The ship was built based on the experience gained during World War I. Unlike later period battleships, she had weak horizontal armor protection. In the beginning of World War II, the ship's outdated secondary armament was demounted and replaced by enhanced AA guns.<br><br> ''Hood'' first went on sale on 18 May 2017.
| |
| <!-- {{Model3DViewer|29c59f902ace48f583dc109dc9d044ef}}--> | |
|
| |
|
| |Performance={{AA Sidebar Warning Insert}}
| | ===Pros=== |
| HMS ''{{#var:ship_name}}'' is a Tier VII British battleship that features high speed, accurate guns, and a unique consumable.
| | * Pro 1 |
| | * Pro 2 |
|
| |
|
| Armament-wise, ''Hood'' has the same 15-inch/42 caliber guns as ''[[Warspite]]'', with faster turret traverse and better range. Unfortunately for ''Hood'', these particular guns — while potent at Tier VI — start to feel a bit underwhelming at Tier VII as other ships gain larger and/or faster-firing main battery armaments. However, almost uniquely among battleships HMS ''Hood'' (as well as HMS ''Duke of York'') has improved auto-bounce angles on their shells, similar to those of USS ''Des Moines''.
| | ===Cons=== |
| | * Con 1 |
| | * Con 2 |
|
| |
|
| Her armor scheme is notably lacking compared to her contemporaries at Tier VII as well, but her speed allows her to dictate the terms of an engagement against most other battleships she is likely to face. However the armor scheme has unique strengths. Most outer plates are 50 mm, making ''{{#var:ship_name}}'' fairly immune to HE spam. In addition she can bounce shells of any caliber when angled. So when angled, ''{{#var:ship_name}}'' is one of the most tanky ships in the game.
| |
|
| |
|
| As a battlecruiser, ''Hood'' is significantly faster than many of the better-armored battleships at her tier and has a decent rudder shift speed, granting her the ability to dart around the battlefield with relative ease. ''Hood'' also has access to the {{Defensive AA Fire}} consumable, a rarity among battleships. This is certainly helpful as her AA defenses are rather lacking - her outermost AA aura can be devastatingly effective, but her middle and innermost auras are pathetically weak and will not fend off plane strikes.
| | ==Ship Stats== |
| | <div class="b-popup"><div class="b-popup_head js-tech-nav_head"><div><h2>Hull Information</h2></div><span class="b-tech-nav_arrow"></span></div><div class="b-popup_content" style="display: none;"><div> |
| | <div style="border: 2px solid rgba(212,175,55,0.8); border-radius: 3px; margin-bottom: 1em; overflow: hidden;"> |
| | {| class="wikitable" style="margin:0; color:inherit; width:100%" |
| | ! style="background-color:#1a3244; color:#ffffff; font-weight:bold;" | SURVIVABILITY !! style="background-color:#1a3244; color:#ffffff; font-weight:bold;" | |
| | |- |
| | | style="color:inherit;" | • Hit Points || style="color:inherit;" | 67700 |
| | |- |
| | | style="color:inherit;" | • Torpedo protection damage reduction (%) || style="color:inherit;" | — |
| | |} |
| | </div> |
|
| |
|
| HMS ''Hood'' is a solid Tier VII battleship for captains who prefer to flex their ship's speed and maneuverability to set the terms of an engagement rather than slug it out at close range. She is on surface a fairly ordinary ship, but has some unique traits and quirks.
| | <div style="border: 2px solid rgba(212,175,55,0.8); border-radius: 3px; margin-bottom: 1em; overflow: hidden;"> |
| | {| class="wikitable" style="margin:0; color:inherit; width:100%" |
| | ! style="background-color:#1a3244; color:#ffffff; font-weight:bold;" | ARMOR DETAIL !! style="background-color:#1a3244; color:#ffffff; font-weight:bold;" | |
| | |- |
| | | style="color:inherit;" | • Belt (mm) || style="color:inherit;" | — |
| | |- |
| | | style="color:inherit;" | • Deck (mm) || style="color:inherit;" | — |
| | |- |
| | | style="color:inherit;" | • Superstructure (mm) || style="color:inherit;" | — |
| | |- |
| | | style="color:inherit;" | • Extremities (mm) || style="color:inherit;" | — |
| | |} |
| | </div> |
|
| |
|
| |Pros=<!-- write list of positive points below. use * as in ordinary wiki-list. -->
| | <div style="border: 2px solid rgba(212,175,55,0.8); border-radius: 3px; margin-bottom: 1em; overflow: hidden;"> |
| * Largest health pool in tier/class
| | {| class="wikitable" style="margin:0; color:inherit; width:100%" |
| * Citadel sits at the waterline and has additional turtleback protection
| | ! style="background-color:#1a3244; color:#ffffff; font-weight:bold;" | MANEUVERABILITY !! style="background-color:#1a3244; color:#ffffff; font-weight:bold;" | |
| * Very tanky when angled
| | |- |
| * Good main battery traverse speed and accuracy
| | | style="color:inherit;" | • Maximum speed (kt) || style="color:inherit;" | 32.0 |
| * Uses normal fuse timers unlike tech tree British battleships, AP shells are effective against heavily armored ships
| | |- |
| * Improved penetration/auto bounce angles on AP shells.
| | | style="color:inherit;" | • Turning circle radius (m) || style="color:inherit;" | 910 |
| * Good outer (flak burst) AA defenses
| | |- |
| * Access to the {{Defensive AA Fire}} consumable
| | | style="color:inherit;" | • Rudder-shift time (sec) || style="color:inherit;" | 17.5 |
| * Excellent top speed of 32 knots
| | |} |
| * Very good rudder shift time for a battleship
| | </div> |
|
| |
|
| |Cons=<!-- write list of negative points below. use * as in ordinary wiki-list. --> | | <div style="border: 2px solid rgba(212,175,55,0.8); border-radius: 3px; margin-bottom: 1em; overflow: hidden;"> |
| * Fairly weak armor, as befitting a battlecruiser, when not angled.
| | {| class="wikitable" style="margin:0; color:inherit; width:100%" |
| * Massive superstructure can be easily damaged and set on fire
| | ! style="background-color:#1a3244; color:#ffffff; font-weight:bold;" | CONCEALMENT !! style="background-color:#1a3244; color:#ffffff; font-weight:bold;" | |
| * Only eight guns with a standard reload speed of 30 seconds, low DPM
| | |- |
| * Standard HE shells that lack improved fire chance and penetration
| | | style="color:inherit;" | • Detectability by sea (km) || style="color:inherit;" | 15.71 |
| * Weak middle and inner AA auras
| | |- |
| * Large turn radius, bleeds a lot of speed during hard turns
| | | style="color:inherit;" | • Detectability by air (km) || style="color:inherit;" | 10.0 |
| | |- |
| | | style="color:inherit;" | • Detectability after firing main guns in smoke (km) || style="color:inherit;" | 14.89 |
| | |- |
| | | style="color:inherit;" | • Detectability by depths (km) || style="color:inherit;" | 10.0 |
| | |} |
| | </div> |
|
| |
|
| |Research=As a premium ship, ''Hood'' has no module upgrades to research. | | </div></div></div> |
| | <div class="b-popup"><div class="b-popup_head js-tech-nav_head"><div><h2>Main Battery</h2></div><span class="b-tech-nav_arrow"></span></div><div class="b-popup_content" style="display: none;"><div><div style="border: 2px solid rgba(212,175,55,0.8); border-radius: 3px; margin-bottom: 1em; overflow: hidden;"> |
| | {| class="wikitable" style="margin:0; color:inherit; width:100%" |
| | ! style="background-color:#1a3244; color:#ffffff; font-weight:bold;" | MAIN BATTERY !! style="background-color:#1a3244; color:#ffffff; font-weight:bold;" | |
| | |- |
| | | style="color:inherit;" | • Arrangement || style="color:inherit;" | 4×2 381mm |
| | |- |
| | | style="color:inherit;" | • Firing range (km) || style="color:inherit;" | 18.57 |
| | |- |
| | | style="color:inherit;" | • Reload time (sec) || style="color:inherit;" | 30.0 |
| | |- |
| | | style="color:inherit;" | • Rate of fire (shots/min) || style="color:inherit;" | 2 |
| | |- |
| | | style="color:inherit;" | • 180° turn time (sec) || style="color:inherit;" | 36.0 |
| | |} |
| | </div> |
|
| |
|
| |OptimalConfiguration=<!-- write some general text about selection of optimal configuration below (optional)--> | | <div style="border: 2px solid rgba(212,175,55,0.8); border-radius: 3px; margin-bottom: 1em; overflow: hidden;"> |
| | {| class="wikitable" style="margin:0; color:inherit; width:100%" |
| | ! style="background-color:#1a3244; color:#ffffff; font-weight:bold;" | DISPERSION !! style="background-color:#1a3244; color:#ffffff; font-weight:bold;" | |
| | |- |
| | | style="color:inherit;" | • Dispersion type || style="color:inherit;" | — |
| | |- |
| | | style="color:inherit;" | • Dispersion formula || style="color:inherit;" | — |
| | |- |
| | | style="color:inherit;" | • Sigma || style="color:inherit;" | 1.9 |
| | |- |
| | | style="color:inherit;" | • Maximum dispersion (m) || style="color:inherit;" | 242 |
| | |} |
| | </div> |
|
| |
|
| |Upgrades=<!-- write text about best upgrades below --> | | <div style="border: 2px solid rgba(212,175,55,0.8); border-radius: 3px; margin-bottom: 1em; overflow: hidden;"> |
| The recommended upgrades for ''{{#var:ship_name}}'' are as follows:
| | {| class="wikitable" style="margin:0; color:inherit; width:100%" |
| * '''Slot 1:''' {{Main Armaments Modification 1}}
| | ! style="background-color:#1a3244; color:#ffffff; font-weight:bold;" | HE SHELL !! style="background-color:#1a3244; color:#ffffff; font-weight:bold;" | |
| * '''Slot 2:''' {{Damage Control System Modification 1}}
| | |- |
| * '''Slot 3:''' {{Aiming Systems Modification 1}}
| | | style="color:inherit;" | • Name || style="color:inherit;" | 381 mm HE Mk VIIIb |
| * '''Slot 4:''' {{Damage Control System Modification 2}}
| | |- |
| | | style="color:inherit;" | • Maximum damage || style="color:inherit;" | 5300 |
| | |- |
| | | style="color:inherit;" | • Fire chance (%) || style="color:inherit;" | 34.0% |
| | |- |
| | | style="color:inherit;" | • Shell velocity (m/s) || style="color:inherit;" | 731.5 |
| | |- |
| | | style="color:inherit;" | • Shell weight (kg) || style="color:inherit;" | 879 |
| | |- |
| | | style="color:inherit;" | • Penetration (mm) || style="color:inherit;" | 64 |
| | |} |
| | </div> |
|
| |
|
| |CommanderSkills=<!-- write text about best set of Commander Skills below -->
| |
|
| |
|
| {{Commander Skills 3 BB | | <div style="border: 2px solid rgba(212,175,55,0.8); border-radius: 3px; margin-bottom: 1em; overflow: hidden;"> |
| | rating11 = 2 <!-- Gun Feeder --> | | {| class="wikitable" style="margin:0; color:inherit; width:100%" |
| | rating12 = <!-- Demolition Expert --> | | ! style="background-color:#1a3244; color:#ffffff; font-weight:bold;" | AP SHELL !! style="background-color:#1a3244; color:#ffffff; font-weight:bold;" | |
| | rating13 = <!-- Consumables Specialist --> | | |- |
| | rating14 = 2 <!-- Emergency Repair Specialist --> | | | style="color:inherit;" | • Name || style="color:inherit;" | 381 mm AP Mk XIIIa |
| | rating15 = <!-- Incoming Fire Alert -->
| | |- |
| | rating16 = <!-- Preventive Maintenance --> | | | style="color:inherit;" | • Maximum damage || style="color:inherit;" | 11400 |
| | |- |
| | | style="color:inherit;" | • Shell velocity (m/s) || style="color:inherit;" | 731.5 |
| | |- |
| | | style="color:inherit;" | • Shell weight (kg) || style="color:inherit;" | 879 |
| | |- |
| | | style="color:inherit;" | • Fuse time (sec) || style="color:inherit;" | 0.033 |
| | |- |
| | | style="color:inherit;" | • Ricochet start (°) || style="color:inherit;" | 60 |
| | |- |
| | | style="color:inherit;" | • Always ricochet (°) || style="color:inherit;" | 67.5 |
| | |- |
| | | style="color:inherit;" | • Normalisation (°) || style="color:inherit;" | 6 |
| | |- |
| | | style="color:inherit;" | • Arming threshold (mm) || style="color:inherit;" | 64 |
| | |} |
| | </div> |
| | </div></div></div> |
| | <div class="b-popup"><div class="b-popup_head js-tech-nav_head"><div><h2>Secondary Battery</h2></div><span class="b-tech-nav_arrow"></span></div><div class="b-popup_content" style="display: none;"><div> |
| | <div style="border: 2px solid rgba(212,175,55,0.8); border-radius: 3px; margin-bottom: 1em; overflow: hidden;"> |
| | {| class="wikitable" style="margin:0; color:inherit; width:100%" |
| | ! style="background-color:#1a3244; color:#ffffff; font-weight:bold;" | SECONDARY BATTERY !! style="background-color:#1a3244; color:#ffffff; font-weight:bold;" | |
| | |- |
| | | style="color:inherit;" | • Secondary battery range (km) || style="color:inherit;" | 5.6 |
| | |} |
| | </div> |
|
| |
|
| | rating21 = 2 <!-- Grease the Gears -->
| | <div style="border: 2px solid rgba(212,175,55,0.8); border-radius: 3px; margin-bottom: 1em; overflow: hidden;"> |
| | rating22 = <!-- Inertial Fuse for HE Shells --> | | {| class="wikitable" style="margin:0; color:inherit; width:100%" |
| | rating23 = <!-- Brisk --> | | ! style="background-color:#1a3244; color:#ffffff; font-weight:bold;" | SECONDARY ARMAMENT 1 !! style="background-color:#1a3244; color:#ffffff; font-weight:bold;" | |
| | rating24 = <!-- Vigilance --> | | |- |
| | rating25 = 2 <!-- Priority Target --> | | | style="color:inherit;" | • Shell type || style="color:inherit;" | HE |
| | rating26 = <!-- AA Defense and ASW Expert--> | | |- |
| | | style="color:inherit;" | • Name || style="color:inherit;" | 102 mm HE 35 lb |
| | |- |
| | | style="color:inherit;" | • Arrangement || style="color:inherit;" | 2x102mm |
| | |- |
| | | style="color:inherit;" | • Rate of fire (shots/min) || style="color:inherit;" | 20.0 |
| | |- |
| | | style="color:inherit;" | • Maximum damage || style="color:inherit;" | 1500 |
| | |- |
| | | style="color:inherit;" | • Shell velocity (m/s) || style="color:inherit;" | 811 |
| | |- |
| | | style="color:inherit;" | • Penetration (mm) || style="color:inherit;" | 17 |
| | |- |
| | | style="color:inherit;" | • Fire chance (%) || style="color:inherit;" | 6.0% |
| | |} |
| | </div> |
|
| |
|
| | rating31 = <!-- Super-Heavy AP Shells -->
| |
| | rating32 = <!-- Long-Range Secondary Battery Shells -->
| |
| | rating33 = 2 <!-- Adrenaline Rush -->
| |
| | rating34 = <!-- Basics of Survivability -->
| |
| | rating35 = <!-- Improved Repair Party Readiness -->
| |
| | rating36 = <!-- Focus Fire Training -->
| |
|
| |
|
| | rating41 = 2 <!-- Furious -->
| |
| | rating42 = <!-- Improved Secondary Battery Aiming -->
| |
| | rating43 = <!-- Close Quarters Combat -->
| |
| | rating44 = 2 <!-- Emergency Repair Expert -->
| |
| | rating45 = 2 <!-- Concealment Expert -->
| |
| | rating46 = <!-- Fire Prevention Expert -->
| |
| }}
| |
|
| |
|
| |Consumables=<!-- write text about selection of Consumables below -->
| | </div></div></div> |
| ''{{#var:ship_name}}'' equips the following consumables:
| | <div class="b-popup"><div class="b-popup_head js-tech-nav_head"><div><h2>Airstrike</h2></div><span class="b-tech-nav_arrow"></span></div><div class="b-popup_content" style="display: none;"><div> |
| * '''Slot 1:''' {{Damage Control Party}}
| |
| * '''Slot 2:''' {{Repair Party}} – - 4 charges
| |
| * '''Slot 3:''' {{Defensive AA Fire}} – - 4 charges
| |
|
| |
|
| |Camouflage=<!-- write text about useful camouflage below --> | | <div style="border: 2px solid rgba(212,175,55,0.8); border-radius: 3px; margin-bottom: 1em; overflow: hidden;"> |
| |Camouflage={{Prem Ship Camo Insert|shiptier=7}} | | {| class="wikitable" style="margin:0; color:inherit; width:100%" |
| | ! style="background-color:#1a3244; color:#ffffff; font-weight:bold;" | ASW AIRSTRIKE (DEPTH CHARGES) !! style="background-color:#1a3244; color:#ffffff; font-weight:bold;" | |
| | |- |
| | | style="color:inherit;" | • Range (km) || style="color:inherit;" | 9 |
| | |- |
| | | style="color:inherit;" | • Minimum range (km) || style="color:inherit;" | 0.5 |
| | |- |
| | | style="color:inherit;" | • Reload time (sec) || style="color:inherit;" | 25.0 |
| | |- |
| | | style="color:inherit;" | • Number of aircraft || style="color:inherit;" | 1 |
| | |- |
| | | style="color:inherit;" | • Depth charges in payload || style="color:inherit;" | 1 |
| | |- |
| | | style="color:inherit;" | • Damage || style="color:inherit;" | 3400 |
| | |- |
| | | style="color:inherit;" | • Deployment || style="color:inherit;" | Manual |
| | |} |
| | </div> |
| | </div></div></div> |
| | <div class="b-popup"><div class="b-popup_head js-tech-nav_head"><div><h2>AA Defense</h2></div><span class="b-tech-nav_arrow"></span></div><div class="b-popup_content" style="display: none;"><div> |
| | <div style="border: 2px solid rgba(212,175,55,0.8); border-radius: 3px; margin-bottom: 1em; overflow: hidden;"> |
| | {| class="wikitable" style="margin:0 0 0.8em 0; width:100%; color:inherit;" |
| | ! style="background-color:#1a3244; color:#ffffff; font-weight:bold;" | AA ARMAMENT !! style="background-color:#1a3244; color:#ffffff; font-weight:bold;" | MOUNTS × BARRELS |
| | |- |
| | | style="color:inherit;" | 178 mm || style="color:inherit;" | 5 × 20 |
| | |- |
| | | style="color:inherit;" | 102 mm || style="color:inherit;" | 7 × 2 |
| | |- |
| | | style="color:inherit;" | 40 mm || style="color:inherit;" | 3 × 8 |
| | |- |
| | | style="color:inherit;" | 13 mm || style="color:inherit;" | 4 × 4 |
| | |} |
|
| |
|
| |Signals=<!-- write text about best set of signals below --> | | '''Continuous damage''' — average DPS within each action zone |
| ''Hood'' is able to mount 8 signal flags simultaneously. India Delta ({{India Delta|Size=18px}}) is recommended to improve the ship’s survivability by increasing the amount of health recovered when the repair party consumable is used. India Yankee ({{India Yankee|Size=18px}}) and Juliet Yankee Bissotwo ({{Juliet Yankee Bissotwo|Size=18px}}) also improve survivability by decreasing the time to repair fires and flooding respectively. November Foxtrot ({{November Foxtrot|Size=18px}}) is also highly recommended to reduce the cooldown time on the ship’s consumables. Lastly, Sierra Mike ({{Sierra Mike|Size=18px}}) can be mounted to increase ''Hood's'' already fast speed.
| | {| class="wikitable" style="margin:0 0 0.8em 0; width:100%; color:inherit;" |
| | ! style="background-color:#1a3244; color:#ffffff; font-weight:bold;" | RANGE !! style="background-color:#1a3244; color:#ffffff; font-weight:bold;" | DPS !! style="background-color:#1a3244; color:#ffffff; font-weight:bold;" | HIT CHANCE !! style="background-color:#1a3244; color:#ffffff; font-weight:bold;" | ACTION ZONE (km) |
| | |- |
| | | style="color:inherit;" | Short-range || style="color:inherit;" | 17.5 || style="color:inherit;" | 70% || style="color:inherit;" | 1.5 |
| | |- |
| | | style="color:inherit;" | Mid-range || style="color:inherit;" | 112 || style="color:inherit;" | 75% || style="color:inherit;" | 2.5 |
| | |- |
| | | style="color:inherit;" | Long-range || style="color:inherit;" | 154 || style="color:inherit;" | 75% || style="color:inherit;" | 5.8 |
| | |} |
|
| |
|
| {{Signal Flags | | '''Damage by shell explosions''' |
| | November Echo Setteseven = 2 | | {| class="wikitable" style="margin:0 0 0.8em 0; width:100%; color:inherit;" |
| | Mike Yankee Soxisix = | | ! style="background-color:#1a3244; color:#ffffff; font-weight:bold;" | EXPLOSIONS / SALVO !! style="background-color:#1a3244; color:#ffffff; font-weight:bold;" | DAMAGE !! style="background-color:#1a3244; color:#ffffff; font-weight:bold;" | HIT CHANCE !! style="background-color:#1a3244; color:#ffffff; font-weight:bold;" | ACTION ZONE (km) |
| | India X-Ray = | | |- |
| | Juliet Whiskey Unaone = | | | style="color:inherit;" | 3 || style="color:inherit;" | 800 || style="color:inherit;" | 75% || style="color:inherit;" | 3.5–5.8 |
| | Victor Lima = | | |} |
| | Hotel Yankee = | | </div> |
| | | </div></div></div> |
| | November Foxtrot = 3 | |
| | Sierra Mike = 2 | |
| | India Delta = 3 | |
| | Juliet Yankee Bissotwo = 1 | |
| | India Yankee = 3 | |
| | Juliet Charlie = 1 | |
|
| |
|
| | X-Ray Papa Unaone = 0
| |
| | Sierra Bravo = 1
| |
|
| |
|
| }} | | <!-- Add the ship code here to populate the upgrade table --> |
| | {{Ship Upgrades Section|code=PBSB507_Hood}} |
|
| |
|
| |Gallery=<!-- write below list of files with description (if necessary) separated with | --><gallery>
| |
| File:HoodPort.png|''Hood'' as she appears in port.
| |
| File:HoodAA.png|''Hood'' creates a fireworks show.
| |
| File:HoodBroadside.jpg|''Hood'' firing her main battery to port off the stern quarter.
| |
| File:HoodNC.png|''Hood'' underway.
| |
| File:HoodHit.png|''Hood'' takes a hit while engaging enemy aircraft.
| |
| File:PCEE095_Hood_flag.png|[[Ship:Flags#List_of_Ship_Flags|Flag]] of ''Hood''. Given to players who purchased a special bundle containing ''Hood''.
| |
| </gallery>
| |
|
| |
|
| |History=<!-- write text below -->
| | <!-- Consumables have to be tagged individually on a slot by slot basis --> |
| <div class="thumb tright">
| | {{Ship Consumables Section|consumables= |
| {{AnnoWiki|content= | | * '''Slot 1:''' {{Damage Control Party}} (15.0s action, 80.0s cooldown) |
| <h2>HMS ''{{#var:ship_name}}'', 1941</h2>
| | * '''Slot 2:''' {{Repair Party}} (4 charges, 28.0s action, 80.0s cooldown, 338.5 hp/s) |
| <h3>Construction</h3>
| | * '''Slot 3:''' {{Defensive AA Fire}} (4 charges, 40.0s action, 80.0s cooldown) |
| :Builder: John Brown & Co.; Clydebank, Scotland
| |
| :Laid down: 1 September 1916 | |
| :Launched: 22 August 1918
| |
| :Commissioned: 15 May 1920
| |
| ----
| |
| ===Specifications===
| |
| :45,693 tons displacement, standard
| |
| :48,360 tons displacement, deep load
| |
| :262.3m length
| |
| :31.8m beam
| |
| :9.8m draft
| |
| ----
| |
| ====Machinery====
| |
| :24 Yarrow oil-fired boilers, 4 Brown-Curtis turbines
| |
| :144,000 shaft horsepower
| |
| ----
| |
| ====Performance====
| |
| :32 knots (1920); 29 knots (1941)
| |
| :5,332 nautical miles at 20 knots
| |
| ----
| |
| ====Armor====
| |
| :Main belt: 152-305mm
| |
| :Decks: 38-76mm
| |
| :Bulkheads: 102-127mm
| |
| :Barbettes: 127-305mm
| |
| :Turrets: 279-381mm
| |
| :Conning tower: 229-279mm
| |
| ----
| |
| ====Armament====
| |
| =====Main=====
| |
| :8 (4 x 2) 381mm/42 BL Mk I
| |
| =====Secondary=====
| |
| :14 (7 x 2) 102mm QF Mk XVI
| |
| =====Anti-Aircraft=====
| |
| :24 (3 x 8) 40mm QF 2pdr
| |
| :16 (4 x 4) 12.7mm Vickers Mk III | |
| =====Torpedoes=====
| |
| :4 (2 x 2) 533mm fixed mounts
| |
| ----
| |
| ====Complement====
| |
| :1,423 men (1941)
| |
| }} | | }} |
| </div>
| |
| [[File:HMS_Hood_in_1918_1.jpg|none|thumb|x350px|link=|HMS ''Hood'' at anchor, location unknown, circa 1918.]]
| |
|
| |
|
| ====Design====
| |
| The inception of what was to become HMS ''Hood'' began as a request to the Director of Naval Construction to design a class of ships that would succeed the ''[[Queen Elizabeth]]''-class super dreadnoughts and would incorporate the latest design of underwater torpedo protection. After a few proposed designs, an intervention by Admiral of the Fleet John Jellicoe — First Sea Lord of the Royal Navy — argued a change of the design to that of a battlecruiser in order to provide a response to the new ''Mackensen''-class battlecruisers being constructed by the Imperial German Navy at the time. After a second round of design proposals that prioritized speed over protection, design “No. 2” as it was known, became selected as the plan for the ''Admiral''-class battlecruisers we know today.
| |
|
| |
|
| HMS ''Hood'' was planned at 860 feet in length: a long ship by design, as there was an emphasis on hull elongation in order to reduce the draft of the ship. The goal was to improve underwater integrity and to increase her freeboard, with the intent of making her a more stable artillery platform. Additionally, she incorporated the new design of anti-torpedo blisters approved by the Admiralty. A two-layer system — an outer layer filled with air, and inner layer filled with crushing tubes — was utilized in order to both absorb and spread out the shock of explosions. For additional torpedo protection, these blisters were positioned over the fuel oil tanks, which were designed watertight and separate from the rest of the ship. As initially designed, ''Hood'' was to have eight (8) inches of sloped main belt armor and one-and-a-half (1.5) to two (2) inches of horizontal protection to match the survivability of the ''Queen Elizabeth'' class. The outcome of the Battle of Jutland necessitated a redesign of ''Hood''’s armor protection. Her belts and barbettes were increased to twelve (12) inches, and her primary decks were increased to three (3) inches of thickness.
| | ==Gallery== |
| | <div class="b-popup"><div class="b-popup_head js-tech-nav_head"><div><h2>WoWs Gallery</h2></div><span class="b-tech-nav_arrow"></span></div><div class="b-popup_content" style="display: none;"><div> |
|
| |
|
| While these choices seemed correct in order to improve her survivability, history would prove that the measures taken were not adequate. As with her predecessors, ''Hood'' still possessed deplorable protection against plunging fire; in fact, ''Hood'' did not possess an armored main deck, only multiple decks of reinforced thickness. This was adequate for shells that used a direct fuse, but not for delayed-fuse shells that came into service by the Second World War. Another inherent fault of British battlecruiser designs: the magazines were placed on top of the shell rooms, which made them a hazard if damaged. In the end, ''Hood'' became another victim of her pedigree.
| | <gallery> |
| | | </gallery> |
| True to her nature, ''Hood'' was a fast ship, rated for 32 knots at top speed. To achieve such speeds, the designers took advantage of her immense size and mounted no less than 24 Admiralty boilers that fed four multi-geared turbines. She was an innovator, being the first ship in the Royal Navy to use small-tube boilers that gave her more power for less weight. In fact, she generated 30% more power than the ''Renown'' class. At over 140,000 shaft horsepower, she was the most powerful ship in the world upon her completion, but such performance paid a price: at top speed she was horrendously fuel-inefficient, burning 70 tons of fuel per hour.
| | </div></div></div> |
| | |
| ''Hood''’s main battery was comprised of the staple of Royal Navy capital ships of the era: eight (8) 15-inch Mark I rifles in four twin-gun Mark II turrets, arranged in super-firing pairs fore and aft. The Mark II turrets were an improved mount; they could elevate the barrels up to +30° in order to increase range. The 15-inch Mark I rifles themselves were a direct enlargement of the earlier 13.5-inch Mark V guns. The change in armament reflected a change in priority: the 15-inch guns traded shell velocity for shell weight, under the belief that penetration would not be compromised due to increased hitting power.
| |
| | |
| HMS ''Hood'', the lead – and only – ship of the ''Admiral''-class battlecruisers was laid down 1 September 1916 at John Brown & Co. Shipyards in Clydebank, Scotland. (She was originally laid down on 31 May 1916, but the Battle of Jutland that same day saw her construction suspended as the design for the battlecruisers was up-armored.) She was launched 22 August 1918, and commissioned into the Royal Navy on 15 May 1920. What was revealed was a beautiful amalgamation of old and new: she still retained a tripod mast and hand-operated secondary guns, but also incorporated novelties like a fully enclosed bridge, and fire-control from elevated directors. She also brought back the clipper-bow, something not seen on Royal Navy ships since the 1860s.
| |
| | |
| ====Service====
| |
| Shortly after commissioning, HMS ''Hood'' became the flagship of the Battlecruiser Squadron of the Atlantic Fleet. Much of ''Hood''’s service during the 1920’s was goodwill visits, regular patrols and circumnavigations. ''Hood'' became the poster ship of the Royal Navy, dubbed “The Mighty ''Hood''”, sailing around the world as the embodiment of British pride and power. She participated in a circumnavigation from east to west via the Panama Canal alongside the battlecruiser HMS ''Repulse'' and several ''[[Danae]]''-class cruisers starting in November 1923, returning home 10 months later after having visited South Africa, India, Australia, New Zealand, Canada, the United States, and several smaller colonies en route. While in Australia in 1924, she escorted the battlecruiser HMAS ''Australia'' out to where she was to be scuttled in compliance with the Washington Naval Treaty. After visiting Lisbon, Portugal, in 1925 to participate in Vasco da Gama celebrations, ''Hood'' spent the rest of the decade largely performing winter training and exercises in the Mediterranean.
| |
| | |
| ''Hood''’s first major refit occurred from 1929 to 1931, resuming her role as flagship of the Battlecruiser Squadron afterwards. Her squadron made a Caribbean cruise in 1932, followed by a brief refit, and then another brief refit in 1934. The first major damage ''Hood'' sustained was from an accidental ramming from the battlecruiser HMS ''Renown'' in early 1935, resulting in the destruction of her left outer propeller and an 18-inch dent. Following repairs, she was the center of attention at King George V’s Silver Jubilee Fleet Review in August 1935. She was attached to the Mediterranean fleet shortly afterwards, stationed in Gibraltar at the outbreak of the Second Italo-Abyssinian War, later being formally transferred to the Mediterranean Fleet after the beginning of the Spanish Civil War. ''Hood''’s last refit was in 1937, but while her constant service made her the most battle-worthy fast capital ship in the Royal Navy, her material condition had degraded, and by the mid to late 1930’s she was in bad need of a lengthy overhaul. Her next big modernization was planned for 1941 to bring her up to date with the other modernized World War I-era capital ships, but the outbreak of World War II in 1939 made it impossible to remove her from service.
| |
|
| |
|
| Shortly before the outbreak of World War II, ''Hood'' was assigned to the Home Fleet’s Battlecruiser Squadron, and after the war broke out later that year, she vigorously patrolled the seas around Iceland and the Faroe Islands to protect convoys and intercept German merchant raiders and blockade runners. ''Hood''’s first major combat sortie was her participation in Operation Catapult in 1940: the destruction of the Vichy French fleet at Mers-el-Kébir. Joining Force H as the flagship alongside the aircraft carrier HMS ''Ark Royal'', the results of ''Hood''’s fire upon the French warships is not entirely known, but it is confirmed that she damaged the French battleship ''[[Dunkerque]]'' enough to force her to beach herself. ''Hood'' was later relieved by ''Renown'' as the flagship of Force H, after returning to Scapa Flow. ''Hood'' was later positioned at Rosyth alongside the battleships HMS ''[[Nelson]]'' and HMS ''Rodney'', to be in the prime position to intercept a German invasion fleet. Hood sortied from Rosyth twice in 1940, once in late October to intercept the German ''panzerschiffe Admiral Scheer'', and on Christmas Eve to locate the heavy cruiser ''[[Admiral Hipper]]'', but she failed to find either ship.
| | <div class="b-popup"><div class="b-popup_head js-tech-nav_head"><div><h2>Historical Gallery</h2></div><span class="b-tech-nav_arrow"></span></div><div class="b-popup_content" style="display: none;"><div> |
|
| |
|
| In January 1941, ''Hood'' received what was to be her last refit. Even after this refit she was still in poor condition, but the Royal Navy couldn’t afford to keep in the drydocks for too long until more of the new ''[[King George V]]''-class battleships came into service. ''Hood'' was ordered to intercept the German battleships ''[[Scharnhorst]]'' and ''[[Gneisenau]]'' upon completion of her refit, but again was unsuccessful in finding the pair. She patrolled the Bay of Biscay to prevent a breakout from the German ships anchored in Brest, before moving to the Norwegian Sea in April following false reports that the German battleship ''[[Bismarck]]'' had sailed from Germany. ''Hood'' had returned to Scapa Flow by early May, again poised to receive the order to sail again.
| | <gallery> |
| | |
| On 24 May 1941, that order came. The day before, the heavy cruisers HMS ''Norfolk'' and HMS ''Suffolk'' sighted the German warships ''Bismarck'' and ''[[Prinz Eugen]]'' in the Denmark Strait between Greenland and Iceland. ''Hood'' — together with the newly-commissioned battleship HMS ''Prince of Wales'' — steamed to intercept the pair of German warships before they could break through to the open Atlantic. ''Hood'' and ''Prince of Wales'' sighted ''Bismarck'' and ''Prinz Eugen'' at 05:37, but the Germans were already aware of their presence. ''Hood''’s fight during the conflict that came to be known at the Battle of the Denmark Strait lasted less than an hour. The British ships opened fire on the German duo, with the Germans returning fire shortly afterwards, both ships focusing on ''Hood''. ''Prinz Eugen'' likely scored the first hit on ''Hood'', striking amidships and starting a large fire from the ready-use ammunition and rockets for her AA guns and UP mountings. At 06:00, Hood turned to bring her full broadside to bear on the Germans, before being struck by ''Bismarck''’s fifth salvo from a range of approximately 16,650 meters. Shortly after, a enormous jet of flame erupted from the vicinity of the mainmast, before ''Hood'' catastrophically exploded with a loss of 1,415 men; there were a mere 3 survivors. One of ''Bismarck''’s shells most likely had penetrated her upper armoured belt and set off a magazine explosion in ''Hood''’s after magazines. ''Prince of Wales'', now outnumbered and struggling to fight from a mix of mechanical failures and sustained damage, was forced to withdraw, while ''Bismarck'' — not undamaged herself — attempted to retreat to German-occupied France. In the duel against infamous ''Bismarck'' and her escort ''Prinz Eugen'', the pride and joy of the Royal Navy was lost with nearly all hands, including her captain, Ralph Kerr, and Vice-Admiral Lancelot Holland.
| |
| | |
| The blow to British morale caused by the loss of ''Hood'' was significant: the most well-known ship of the Royal Navy had been destroyed in mere minutes with virtually no survivors. Enraged by her loss, Prime Minister Winston Churchill ordered the British Admiralty to find and destroy ''Bismarck'' at all costs. “I don’t care how you do it,” he said, “[but] you must sink the ''Bismarck''.” Three days later, the Royal Navy fulfilled Churchill's wishes; too late, unfortunately, to save ill-fated HMS ''Hood''.
| |
| | |
| ===Historical Inaccuracies===
| |
| * ''Hood'' is represented in game by her mid-1941 self, as sunk. Not represented are her earlier pre-WWII conditions, armed with 5.5-inch (140 mm) secondary guns.
| |
| * ''Hood'' was officially classified as a battlecruiser, though her specifications are closer to those of battleships.
| |
| * ''Hood'' had a top speed of 32.07kn normally, but by 1941, this was only 28.8kn as her engines were in dire need of an overhaul.
| |
| * The unrotated projectiles (UP) were unreliable and ineffective in operation; aircraft could avoid the wires and winds could blow the projectiles back onto the ship which fired them. There are no records of UPs shooting down any aircraft.
| |
| * The Mk.II turret for the 15"/42 Mk.I gun had a traverse rate of 2 degrees per second, but in game this is buffed to 5 degrees per second.
| |
| * ''Hood'' was armed with 4x2 533mm above-water beam-firing torpedo tubes. The doors for these tubes are modeled, as are the welded-shut doors for an additional 4x2 533mm tubes further forward that were planned but never installed, but the doors are closed and the torpedoes are not part of her armament.
| |
| * ''Hood''’s premium camouflage color scheme is a two-tone grey; she was actually painted in overall dark grey for most of her career. The two-tone scheme she wears in-game is a variant of that worn by HMS ''Repulse''.
| |
| * ''Hood'' has another alternate permanent camouflage, named ''The Last Conquest'', which is awarded to players who completed Mission 5 of [[The Hunt for Bismarck]] campaign. This gives the ship a bright medium blue hull with red turret roofs similar to ''[[Arizona]]'''s. The description of ''The Last Conquest'' claims that ''Hood'' "looked like this when she started her pursuit of the Bismarck group on 22 May 1941". ''Hood'' was actually in overall AP507B Admiralty Dark Grey (Home Fleet) when she began her pursuit and retained this colour when she was sunk.
| |
| | |
| |HistoricalGallery=<!-- write below list of files with description (if necessary) separated with | --><gallery>
| |
| File:Hoodkeel.jpg|HMS ''Hood''’s keel being laid down, September 1916.
| |
| File:Hoodlaunch.jpg|''Hood'' being launched into the waters of Clydebank, 22 August 1918.
| |
| File:Hoodtrials.jpg|''Hood'' undergoing speed trials, spring 1920.
| |
| File:WNBR_15-42_mk1_Hood_guns_pic.jpg|Close-up of A and B turrets.
| |
| File:HMS Hood (1921) profile drawing.png|Profile drawing of ''Hood'' as she appeared in 1921, in Atlantic Fleet dark grey.
| |
| File:Hood, 1920-1923.jpg|''Hood'', photo taken between 1920-1923.
| |
| File:HMS Hood in Sydney Harbour.jpeg|''Hood'' in Sydney Harbor shortly after arriving with the other ships of the Special Service Squadron, 9 April 1924.
| |
| File:Hood_unk_b.jpg|''Hood'' in Australia, 1924.
| |
| File:HMS Hood h60450.jpg|Aerial view of ''Hood'' in 1924. The two forward gun turrets are visible with their prominent rangefinders projecting from the rear of the turret. Behind the turret is the conning tower surmounted by the main fire-control director with its own rangefinder. The secondary director is mounted on top of the spotting top on the tripod foremast.
| |
| File:Ship.bsu.by_download_book_640642.jpg|''Hood'' during her circumnavigation tour, 1924.
| |
| File:Hood Hawaii 1924.jpg|''Hood'' in Hawaii, 1924. Note the full coverage of decks by awnings.
| |
| File:Hood3.jpg|''Hood'' in the Panama Canal Zone, 1924.
| |
| File:Hood 1924.jpg|''Hood'' in US waters, 1924.
| |
| File:HMS Hood Aft guns 1926 USNHC 57184.jpg|Close-up of ''Hood's'' aft 15-inch Mark I guns in 1926.
| |
| File:Hood5.jpg|''Hood'' in 1930 or 1931. Note the seaplane on the aft-mounted catapult.
| |
| File:Hood Seaplane 1930-31.jpg|Stern view of ''Hood'', 1930 or 1931.
| |
| File:Hood Seaplane 1930-31 Broadside.jpg|Broadside view of ''Hood'', 1930 or 1931.
| |
| File:Graf Spee at Spithead.jpg|Future enemies at peace. ''Hood'' (background), ''Resolution'' (center), and the German pocket battleship ''[[Admiral Graf Spee]]'' (foreground), anchored at Portsmouth for King George VI's Coronation, May 1937.
| |
| File:Crew1940t.jpg|Last picture of ''Hood''’s entire crew, 1940.
| |
| File:HOOD023.jpg|Last photograph of ''Hood'' as seen from ''Prince of Wales'', 24 May 1941.
| |
| File:Hood Explosion.jpg|The explosion aboard ''Hood'' as photographed from ''[[Prinz Eugen]]''. ''Hood'' is right-center, horizon. ''Prince of Wales'' is left-center, horizon.
| |
| File:Hood Explosion1.jpg|Immediately after the explosion aboard ''Hood'', again photographed from ''Prinz Eugen''. The large cloud of smoke right-center horizon is from ''Hood'', the dense cloud left-center horizon is from ''Prince of Wales''.
| |
| File:HMS Hood vs HMS Renown propeller nugget.jpg|Privately owned propeller fragment from the wreckage of HMS ''Hood''.
| |
| </gallery> | | </gallery> |
| | </div></div></div> |
|
| |
|
| |Video=<!-- put below video clips with using template VideoYT. You can use html-tags for formatting. -->
| | [[Category:Ships of U.K.]] |
| {{VideoYT|OUlSooynOxc}}
| | [[Category:Battleships]] |
| {{VideoYT|DJErKECmFQU}}
| | [[Category:Tier VII ships]] |
| {{VideoYT|0e2lbvL5TTI}}
| | [[Category:Premium ships]]<!-- DO NOT DELETE THIS LINE. DO NOT INSERT ANYTHING BELOW THIS LINE --> |
| {{VideoYT|XsN3R8y4agU}}
| |
| {{VideoYT|fL1UjHS3DIo}}
| |
| | |
| |Ref= <!-- write below -->
| |
| # [https://en.wikipedia.org/wiki/HMS_Hood HMS ''Hood'' - Wikipedia]
| |
| # [https://worldofwarships.com/en/news/history/armada-hood/ Armada: Hood - 06/21/2019 - News - World of Warships]
| |
| # [https://worldofwarships.com/en/news/lolz/a-peek-under-the-blank/ "Where the Hood at?" - News - World of Warships]
| |
| # [https://www.youtube.com/watch?v=OUlSooynOxc Armada: HMS Hood - May 18, 2017 - World of Warships Official Channel - YouTube]
| |
| # [https://www.youtube.com/watch?v=DJErKECmFQU Armada in 90 seconds: Hood - Jun 21, 2019 - World of Warships Official Channel - YouTube]
| |
| # [https://worldofwarships.com/en/news/general-news/dry-dock-hood/ Dry Dock: HMS Hood - News - World of Warships]
| |
| # [https://www.youtube.com/watch?v=0e2lbvL5TTI Dry Dock: HMS Hood - World of Warships Official Channel - YouTube]
| |
| # [https://www.youtube.com/watch?v=O7YbHH4sh_s Timelapse- HMS Hood - World of Warships Official Channel - YouTube]
| |
| # Taylor, B., Schmid, T. (2005). Battlecruiser HMS Hood: an illustrated biography. London, UK: Chatham Publishing
| |
| # Konstam, A., Bryan, T. (2003). British Battlecruisers: 1939-45. Oxford, UK: Osprey Publishing, Ltd.
| |
| # Chesneau, R., Gardiner, R. (1980) Conway’s All the World’s Fighting Ships: 1922-1946. Conway Maritime Press.
| |
| # https://www.hmshood.com/history/timeline4.htm
| |
| # https://www.militaryfactory.com/ships/detail.asp?ship_id=HMS-Hood-51
| |
| | |
| {{WoWS Ship Changelog Insert|1=
| |
| *Available for testing by supertesters in the game starting from Update 0.6.4.
| |
| *Update 0.6.5:
| |
| **Went on sale in the Premium store.
| |
| *Update 0.6.6:
| |
| **Fixed display of the emblem on the main battery turret when applying camouflage.
| |
| *Update 0.6.10:
| |
| **Available for purchase in the game client.
| |
| *Update 0.6.12:
| |
| **Detectability when firing main guns in smoke changed to 14.89 km.
| |
| *Update 0.6.15:
| |
| **Minor fixes to ship textures and geometry.
| |
| **A bonus was added to the "Type 10" permanent camouflage: a -10% discount to the cost of post-battle service.
| |
| **For the permanent camouflages "From the Bottom of the Ocean", "The Last Campaign", the discount on ship maintenance was increased from -5 to -10%.
| |
| *Update 0.7.1:
| |
| **Fixed the geometry of the armor in the Port to closely match the visual model. (Hit points of the casemate, aft end, superstructures and the bow were redistributed while keeping the overall HP the same). These changes have a negligible effect on the ship’s performance.
| |
| *Update 0.7.2:
| |
| **Minor fixes to the geometry and textures of the ship.
| |
| *Update 0.7.9:
| |
| **Became unavailable in the game client for purchase with doubloons.
| |
| *Update 0.7.11:
| |
| **Became available in the game client for purchase for doubloons.
| |
| *Update 0.7.12:
| |
| **In the Camouflages window in the Appearance tab, the following permanent camouflages are no longer available for purchase with doubloons: "Type 14", "From the Bottom of the Ocean" and "The last Campaign" (as they were moved to the Arsenal).
| |
| *Update 0.8.0:
| |
| **Sigma increased from 1.8 to 1.9.
| |
| **AP shell fuse delay increased from 0.015 to 0.033 s.
| |
| **Minor fixes to geometry and textures.
| |
| *Update 0.8.1:
| |
| **Fixed the description of the AA defenses.
| |
| *Update 0.10.0:
| |
| **The firing range of the secondary battery was increased to 5.6 km.
| |
| *Update 0.11.1:
| |
| **Minor corrections to geometry and textures of the ship.
| |
| }}
| |
| | |
| }}<!-- DO NOT DELETE THIS LINE. DO NOT INSERT ANYTHING BELOW THIS LINE -->
| |



 (15.0s action, 80.0s cooldown)
 (4 charges, 28.0s action, 80.0s cooldown, 338.5 hp/s)
 (4 charges, 40.0s action, 80.0s cooldown)