|
|
| Line 1: |
Line 1: |
| <!-- DO NOT EDIT OR DELETE LINES WITH COMMENTS (it's look like as this or next line) -->
| | {{#vardefine:ship_name|Devonshire}} |
| <!-- Add |Ship=code for manual override -->
| | __NOTOC____NOEDITSECTION__ |
| {{WoWs_Ship | |
| |Promo=<!-- in case of gift or promo ship write conditions to get it. (optional)-->
| |
|
| |
|
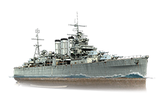
| |Anno=<!-- you can write below short description for the ship. it will replace default once. --> | | <div class="b-description gw-frame-1"><div class="b-description-img b-description-img__indent b-description-img__single"><div style="width:160px; height:102px; opacity:.5; border-radius:2px; position:absolute; left:0; top:0; z-index:1; -webkit-transition:all 0.2s ease-out 0.1s; transition:all 0.2s ease-out 0.1s;">[[File:Wows_anno_flag_uk.png|160px]]</div><div class="l-description-img_class"><span class="b-description-img_type b-description-img_type__Cruiser b-description-img_type__Cruiser-Tech Tree"></span><span class="b-description-img_class">VI</span></div><div class="b-description-img_vehicle">[[File:Ship_PBSC206_Devonshire.png|160px|link=|left]]</div><div class="l-description-img_price"><span class="b-description-img_price b-description-img_price__gold"><span title="''{{#var:ship_name}}'' was first released for sale on DD Month YYYY.">3,300,000</span></span></div></div><p>[[Ship:{{#var:ship_name}}|{{#var:ship_name}}]] — U.K. Tech Tree Tier VI [[Ship:Cruiser|Cruiser]].</p><p>As part of the development of cruisers for protecting trade routes, five projects were presented in 1923. All ships built under the chosen project had barely any armor. As a result, some of the cruisers received a full-fledged armored belt between 1936 and 1941. HMS Devonshire was laid down in 1926. With the outbreak of World War II, she served in the Home Fleet and participated in the hunt for German raiders and the Norwegian campaign, evacuating the Norwegian king. In 1942, the ship covered the landing of Allied troops in Madagascar and later escorted convoys to Australia.</p><p> </p></div> |
|
| |
|
| |Performance=<!-- write text about performance in battles below -->
| | ===Pros=== |
| <!--
| | * Pro 1 |
| PERFORMANCE SECTION GUIDELINES
| | * Pro 2 |
| 1. Write a brief intro paragraph of 1-3 sentences.
| |
| 2. Write 1-3 paragraphs of "meat". Talk about what the ship does well, what it doesn't, how it compares to same tier ships of the same type, how it compares to the previous ship in the tech tree, whatever. Try to avoid quoting vital statistics to players unless it is really relevant (i.e. concealment); they can see those in the sidebar on the right and don't need them read back.
| |
| 3. Write a brief summary paragraph of 1-3 sentences highlighting the key takeaways from the paragraphs above.
| |
| -->
| |
| {{AA Sidebar Warning Insert}}
| |
| <h4>The Ship</h4>
| |
| Tier VI cruiser ''Devonshire'' represents a major step up from the preceding UK cruisers. She gains slightly larger guns and a more conventional layout when compared to ''[[Hawkins]]''. Despite these improvements she retains a relatively short firing range which can make it difficult to deal damage without placing herself in danger.
| |
| ''Devonshire'' carries a standard cruiser {{Damage Control Party}}, with a 5 second action time and a 60 second cooldown. She has the choice between mounting {{Defensive AA Fire}} or {{Hydroacoustic Search}} consumables. The Hydroacoustic Search is active for 100 seconds and will detect enemy ships at 4km and torpedoes at 3km. Her Defensive AA Fire provides a 50% boost to continuous DPS and gives a 400% increase to her flak burst damage for 80 seconds. The stand out among ''Devonshire's'' consumables is her {{Repair Party}}. A Repair Party is an uncommon consumable for a Tier VI cruiser, and ''Devonshire'' has an improved version which can repair up to 50% of citadel damage received as well as the standard 50% of penetration damage and all fire and flood damage.
| |
| Her top speed is a rather slow 31.3 knots, so ''Devonshire'' is unlikely to outpace many enemies in a chase. To add to her speed woes, ''Devonshire'' lacks the improved acceleration and energy retention of the British light cruisers. Her 7.8 second rudder shift and 710m turning circle are both average for her tier. Although her speed and agility are nothing special, her concealment somewhat compensates for this. With the <u>Concealment Expert</u> skill her detection range drops to 10.1km, allowing her to compete with many lighter armed ships.
| |
|
| |
| <h4>Armor</h4>
| |
| ''Devonshire's'' armor is standard for a Tier VI cruiser. Her 16mm of bow and stern plating is sufficient to bounce 203mm AP rounds from cruisers but it will be overmatched by battleship guns. Her citadel sits low down, towards the waterline and the sides are well armored for a Tier VI cruiser. However it sits against the external belt and is also thinly armored on the deck above. Battleship fire from long range can penetrate the thinner casemate armor and pass through the citadel roof. At shorter ranges her 25mm side armor is enough to prevent overmatch from battleships armed with guns smaller than 356mm when properly angled.
| |
|
| |
| <h4>Armament</h4>
| |
| ''Devonshire's'' main battery consists of eight 203mm guns mounted in four twin turrets. These weapons have a short range, just 12.7km stock and 14km when upgraded. She has to get closer to enemy ships in order to shoot, and 14km is well within accurate gunnery range for most battleships she will face. Her relatively slow 14 second reload means that she will struggle to match the damage output of almost all of her peers. While her range and reload are slower than average, her turrets traverse quickly - 22.5 seconds for a 180° rotation means her guns can turn as quickly as many cruisers armed with 152mm main guns.
| |
|
| |
| Her AP rounds lack the punch of those found on most other Tier VI 203mm guns, with 20mm less penetration than ''[[Pensacola]]'' and 200 less damage per shell than ''[[Aoba]]'' and ''[[Trento]]''. However, they will still cause serious damage if players are able to fire into broadside cruisers or the upper belt of many battleships.
| |
| Her HE shells are strong, equivalent to those found on ''Aoba'', with the same damage of 3300 and 17% fire chance per shell. This allows her to set up to 5.8 fires per minute. While this lags behind ships armed with 152mm guns, it is partially offset by the higher damage per salvo from the larger guns and is higher than the other 203mm armed ships at her tier.
| |
| ''Devonshire'' also carries two quadruple torpedo launchers, one on each side, which can provide a powerful deterrent to prevent enemy ships from pushing in close. She can launch her torpedoes in a narrow spread or individually, which provides more flexibility than most other ships. Other than the single launch capability, her torpedoes are unremarkable. Their 8km range and 61 knot speed are fairly typical for a Tier VI cruiser and DEVONSHIRE cannot launch them from stealth. The damage per torpedo and flood chance are slightly higher than is typical for her tier, although not noticeably so. They can be a useful option when operating around islands, but her torpedoes will not be a primary weapon.
| |
|
| |
| <h4>Anti-Aircraft & Anti-Submarine</h4>
| |
| ''Devonshire's'' anti-aircraft firepower puts out some impressive DPM numbers, but on closer inspection her AA firepower is largely focused around short range weapons. With her medium range AA only reaching out to 2.5km, it is only really suitable for self-defense and it will not seriously deter enemy CVs from attacking.
| |
|
| |
|
| ''Devonshire's'' anti-submarine attack consists of an airstrike with a 6km range. This has one aircraft which will drop a single bomb with a potential 3400 damage if a direct hit is scored. It has a 30 second reload time between uses.
| | ===Cons=== |
|
| | * Con 1 |
|
| | * Con 2 |
| <h4>Battle Performance</h4>
| |
| When she is top tier on smaller maps, ''Devonshire's'' lack of range is not a serious drawback. Her armor and healing capacity allow her to be aggressive and actively target many opponents, although care must be taken around the larger guns of some battleships. Her AP rounds are capable of overmatching most Tier V cruiser plating, while her own armor will protect ''Devonshire'' against return fire from cruisers if she is sufficiently angled. Her improved heal allows her to stay fighting for an extended time as long as players take care not to expose themselves to crossfire from multiple enemy ships.
| |
|
| |
|
| When ''Devonshire'' is bottom tier, players will need to be more cautious. While her guns can still deal damage to broadside cruisers, she will find herself unable to overmatch higher tier cruisers. Her short main battery range leaves ''Devonshire'' well within range of her opponents and she can be overmatched by many battleships within her matchmaking spread. If she is spotted by an enemy destroyer, ''Devonshire'' can often find herself under fire from enemy ships but lacking the range to return fire. Operating around cover will help players to get within range without exposing themselves to excessive enemy fire.
| |
|
| |
|
| | ==Ship Stats== |
| | <div class="b-popup"><div class="b-popup_head js-tech-nav_head"><div><h2>Hull Information</h2></div><span class="b-tech-nav_arrow"></span></div><div class="b-popup_content" style="display: none;"><div> |
| | <div style="border: 2px solid rgba(212,175,55,0.8); border-radius: 3px; margin-bottom: 1em; overflow: hidden;"> |
| | {| class="wikitable" style="margin:0; color:inherit; width:100%" |
| | ! style="background-color:#1a3244; color:#ffffff; font-weight:bold;" | SURVIVABILITY !! style="background-color:#1a3244; color:#ffffff; font-weight:bold;" | Devonshire (A) !! style="background-color:#1a3244; color:#ffffff; font-weight:bold;" | Devonshire (B) |
| | |- |
| | | style="color:inherit;" | • Hit Points || style="color:inherit;" | 28600 || style="color:inherit;" | 34400 |
| | |- |
| | | style="color:inherit;" | • Torpedo protection damage reduction (%) || colspan="2" style="color:inherit;" | — |
| | |} |
| | </div> |
|
| |
|
| | <div style="border: 2px solid rgba(212,175,55,0.8); border-radius: 3px; margin-bottom: 1em; overflow: hidden;"> |
| | {| class="wikitable" style="margin:0; color:inherit; width:100%" |
| | ! style="background-color:#1a3244; color:#ffffff; font-weight:bold;" | ARMOR DETAIL !! style="background-color:#1a3244; color:#ffffff; font-weight:bold;" | |
| | |- |
| | | style="color:inherit;" | • Belt (mm) || style="color:inherit;" | — |
| | |- |
| | | style="color:inherit;" | • Deck (mm) || style="color:inherit;" | — |
| | |- |
| | | style="color:inherit;" | • Superstructure (mm) || style="color:inherit;" | — |
| | |- |
| | | style="color:inherit;" | • Extremities (mm) || style="color:inherit;" | — |
| | |} |
| | </div> |
|
| |
|
| | <div style="border: 2px solid rgba(212,175,55,0.8); border-radius: 3px; margin-bottom: 1em; overflow: hidden;"> |
| | {| class="wikitable" style="margin:0; color:inherit; width:100%" |
| | ! style="background-color:#1a3244; color:#ffffff; font-weight:bold;" | MANEUVERABILITY !! style="background-color:#1a3244; color:#ffffff; font-weight:bold;" | Devonshire (A) !! style="background-color:#1a3244; color:#ffffff; font-weight:bold;" | Devonshire (B) |
| | |- |
| | | style="color:inherit;" | • Maximum speed (kt) || style="color:inherit;" | 31.2 || style="color:inherit;" | 31.2 |
| | |- |
| | | style="color:inherit;" | • Turning circle radius (m) || style="color:inherit;" | 710 || style="color:inherit;" | 710 |
| | |- |
| | | style="color:inherit;" | • Rudder-shift time (sec) || style="color:inherit;" | 14.3 || style="color:inherit;" | 10.2 |
| | |} |
| | </div> |
|
| |
|
| |Pros=<!-- write list of positive points below. use * as in ordinary wiki-list. --> | | <div style="border: 2px solid rgba(212,175,55,0.8); border-radius: 3px; margin-bottom: 1em; overflow: hidden;"> |
| * Good AA for her tier
| | {| class="wikitable" style="margin:0; color:inherit; width:100%" |
| * British {{Repair Party}} consumable
| | ! style="background-color:#1a3244; color:#ffffff; font-weight:bold;" | CONCEALMENT !! style="background-color:#1a3244; color:#ffffff; font-weight:bold;" | Devonshire (A) !! style="background-color:#1a3244; color:#ffffff; font-weight:bold;" | Devonshire (B) |
| * Good concealement
| | |- |
| * Choice of {{Defensive AA Fire}} or {{Hydroacoustic Search}} consumables
| | | style="color:inherit;" | • Detectability by sea (km) || style="color:inherit;" | 11.17 || style="color:inherit;" | 11.17 |
| * Good firing arcs and good turret traverse for a heavy cruiser
| | |- |
| * The 25 mm side armor can bounce some battleship AP
| | | style="color:inherit;" | • Detectability by air (km) || style="color:inherit;" | 6.6 || style="color:inherit;" | 6.6 |
| | |- |
| | | style="color:inherit;" | • Detectability after firing main guns in smoke (km) || colspan="2" style="color:inherit;" | 6.41 |
| | |- |
| | | style="color:inherit;" | • Detectability by depths (km) || style="color:inherit;" | 6.6 || style="color:inherit;" | 6.6 |
| | |} |
| | </div> |
|
| |
|
| |Cons=<!-- write list of negative points below. use * as in ordinary wiki-list. --> | | </div></div></div> |
| * Short range of the main batteries
| | <div class="b-popup"><div class="b-popup_head js-tech-nav_head"><div><h2>Main Battery</h2></div><span class="b-tech-nav_arrow"></span></div><div class="b-popup_content" style="display: none;"><div><div style="border: 2px solid rgba(212,175,55,0.8); border-radius: 3px; margin-bottom: 1em; overflow: hidden;"> |
| * AP lacks the punch of other nations
| | {| class="wikitable" style="margin:0; color:inherit; width:100%" |
| * Slow reload for a cruiser
| | ! style="background-color:#1a3244; color:#ffffff; font-weight:bold;" | MAIN BATTERY !! style="background-color:#1a3244; color:#ffffff; font-weight:bold;" | Mk VI mod. 1 !! style="background-color:#1a3244; color:#ffffff; font-weight:bold;" | Mk VI mod. 2 |
| * High freebord makes her an easy target
| | |- |
| | | style="color:inherit;" | • Arrangement || colspan="2" style="color:inherit;" | 4×2 203mm |
| | |- |
| | | style="color:inherit;" | • Firing range (km) || style="color:inherit;" | 12.73 || style="color:inherit;" | 14.0 |
| | |- |
| | | style="color:inherit;" | • Reload time (sec) || colspan="2" style="color:inherit;" | 14.0 |
| | |- |
| | | style="color:inherit;" | • Rate of fire (shots/min) || colspan="2" style="color:inherit;" | 4.3 |
| | |- |
| | | style="color:inherit;" | • 180° turn time (sec) || colspan="2" style="color:inherit;" | 22.5 |
| | |} |
| | </div> |
|
| |
|
| |Research=<!-- write text about priority sequence of research below --> | | <div style="border: 2px solid rgba(212,175,55,0.8); border-radius: 3px; margin-bottom: 1em; overflow: hidden;"> |
| Availability of researchable upgrades for ''{{#var:ship_name}}'' is as follows:
| | {| class="wikitable" style="margin:0; color:inherit; width:100%" |
| * '''Gun Fire Control System:''' Upgrade to Mk6 mod. 2 for an extra 10% range on the main battery.
| | ! style="background-color:#1a3244; color:#ffffff; font-weight:bold;" | DISPERSION !! style="background-color:#1a3244; color:#ffffff; font-weight:bold;" | |
| * '''Hull:''' Upgrade to Hull (B) for more hit points, better AA and faster rudder shift time. Research of this module unlocks progression to ''[[Surrey]]''.
| | |- |
| | | style="color:inherit;" | • Dispersion type || style="color:inherit;" | Standard CA/CL dispersion |
| | |- |
| | | style="color:inherit;" | • Dispersion formula || style="color:inherit;" | Dispersion (m) = 6.9 × range(km) + 33 |
| | |- |
| | | style="color:inherit;" | • Sigma || style="color:inherit;" | 2.0 |
| | |- |
| | | style="color:inherit;" | • Maximum dispersion (m) || style="color:inherit;" | 120 |
| | |- |
| | | style="color:inherit;" | • Dispersion at 5 km || style="color:inherit;" | 68 |
| | |- |
| | | style="color:inherit;" | • Dispersion at 10 km || style="color:inherit;" | 102 |
| | |- |
| | | style="color:inherit;" | • Dispersion at 12.73 km || style="color:inherit;" | 121 |
| | |} |
| | </div> |
|
| |
|
| | <div style="border: 2px solid rgba(212,175,55,0.8); border-radius: 3px; margin-bottom: 1em; overflow: hidden;"> |
| | {| class="wikitable" style="margin:0; color:inherit; width:100%" |
| | ! style="background-color:#1a3244; color:#ffffff; font-weight:bold;" | HE SHELL !! style="background-color:#1a3244; color:#ffffff; font-weight:bold;" | |
| | |- |
| | | style="color:inherit;" | • Name || style="color:inherit;" | 203 mm HE 256 lb |
| | |- |
| | | style="color:inherit;" | • Maximum damage || style="color:inherit;" | 3300 |
| | |- |
| | | style="color:inherit;" | • Fire chance (%) || style="color:inherit;" | 17.0% |
| | |- |
| | | style="color:inherit;" | • Shell velocity (m/s) || style="color:inherit;" | 814 |
| | |- |
| | | style="color:inherit;" | • Shell weight (kg) || style="color:inherit;" | 116.1 |
| | |- |
| | | style="color:inherit;" | • Penetration (mm) || style="color:inherit;" | 34 |
| | |} |
| | </div> |
|
| |
|
| |OptimalConfiguration=<!-- write some general text about selection of optimal configuration below (optional)-->
| |
|
| |
|
| |Upgrades=<!-- write text about best upgrades below, add * after upgrade link to designate that another upgrade may be viable --> | | <div style="border: 2px solid rgba(212,175,55,0.8); border-radius: 3px; margin-bottom: 1em; overflow: hidden;"> |
| The recommended upgrades for ''{{#var:ship_name}}'' are as follows:
| | {| class="wikitable" style="margin:0; color:inherit; width:100%" |
| * '''Slot 1''': {{Main Armaments Modification 1}}
| | ! style="background-color:#1a3244; color:#ffffff; font-weight:bold;" | AP SHELL !! style="background-color:#1a3244; color:#ffffff; font-weight:bold;" | |
| * '''Slot 2''': {{Damage Control System Modification 1}}
| | |- |
| * '''Slot 3''': {{Aiming Systems Modification 1}}
| | | style="color:inherit;" | • Name || style="color:inherit;" | 203 mm AP 256 lb |
| * '''Slot 4''': {{Steering Gears Modification 1}}
| | |- |
| | | style="color:inherit;" | • Maximum damage || style="color:inherit;" | 4500 |
| | |- |
| | | style="color:inherit;" | • Shell velocity (m/s) || style="color:inherit;" | 814 |
| | |- |
| | | style="color:inherit;" | • Shell weight (kg) || style="color:inherit;" | 116.1 |
| | |- |
| | | style="color:inherit;" | • Fuse time (sec) || style="color:inherit;" | 0.033 |
| | |- |
| | | style="color:inherit;" | • Ricochet start (°) || style="color:inherit;" | 45 |
| | |- |
| | | style="color:inherit;" | • Always ricochet (°) || style="color:inherit;" | 60 |
| | |- |
| | | style="color:inherit;" | • Normalisation (°) || style="color:inherit;" | 7 |
| | |- |
| | | style="color:inherit;" | • Arming threshold (mm) || style="color:inherit;" | 34 |
| | |} |
| | </div> |
| | </div></div></div> |
| | <div class="b-popup"><div class="b-popup_head js-tech-nav_head"><div><h2>Torpedoes</h2></div><span class="b-tech-nav_arrow"></span></div><div class="b-popup_content" style="display: none;"><div> |
| | <div style="border: 2px solid rgba(212,175,55,0.8); border-radius: 3px; margin-bottom: 1em; overflow: hidden;"> |
| | {| class="wikitable" style="margin:0; color:inherit; width:100%" |
| | ! style="background-color:#1a3244; color:#ffffff; font-weight:bold;" | TORPEDO LAUNCHERS !! style="background-color:#1a3244; color:#ffffff; font-weight:bold;" | |
| | |- |
| | | style="color:inherit;" | • Number of launchers || style="color:inherit;" | 2 |
| | |- |
| | | style="color:inherit;" | • Torpedo name || style="color:inherit;" | PBPT007 |
| | |- |
| | | style="color:inherit;" | • Reload time (sec) || style="color:inherit;" | 96.0 |
| | |- |
| | | style="color:inherit;" | • 180° turn time (sec) || style="color:inherit;" | 7.2 |
| | |- |
| | | style="color:inherit;" | • Damage || style="color:inherit;" | 43000 |
| | |- |
| | | style="color:inherit;" | • Range (km) || style="color:inherit;" | 0.3 |
| | |- |
| | | style="color:inherit;" | • Speed (kt) || style="color:inherit;" | 61 |
| | |- |
| | | style="color:inherit;" | • Detectability (km) || style="color:inherit;" | 1.3 |
| | |- |
| | | style="color:inherit;" | • Flooding chance (%) || style="color:inherit;" | 2.57% |
| | |} |
| | </div> |
|
| |
|
| |CommanderSkills=<!-- write text about best set of Commander Skills below --> | | </div></div></div> |
| | <div class="b-popup"><div class="b-popup_head js-tech-nav_head"><div><h2>Secondary Battery</h2></div><span class="b-tech-nav_arrow"></span></div><div class="b-popup_content" style="display: none;"><div> |
| | <div style="border: 2px solid rgba(212,175,55,0.8); border-radius: 3px; margin-bottom: 1em; overflow: hidden;"> |
| | {| class="wikitable" style="margin:0; color:inherit; width:100%" |
| | ! style="background-color:#1a3244; color:#ffffff; font-weight:bold;" | SECONDARY BATTERY !! style="background-color:#1a3244; color:#ffffff; font-weight:bold;" | |
| | |- |
| | | style="color:inherit;" | • Secondary battery range (km) || style="color:inherit;" | 5.0 |
| | |} |
| | </div> |
|
| |
|
| {{Commander Skills 3 CR
| | <div style="border: 2px solid rgba(212,175,55,0.8); border-radius: 3px; margin-bottom: 1em; overflow: hidden;"> |
| <!-- Ratings 1,2,3 are legit. Others are ignored.--> | | {| class="wikitable" style="margin:0; color:inherit; width:100%" |
| | rating11 = 2 <!-- Grease the Gears --> | | ! style="background-color:#1a3244; color:#ffffff; font-weight:bold;" | SECONDARY ARMAMENT 1 !! style="background-color:#1a3244; color:#ffffff; font-weight:bold;" | |
| | rating12 = 1 <!-- Swift Fish --> | | |- |
| | rating13 = 1 <!-- Consumables Specialist --> | | | style="color:inherit;" | • Shell type || style="color:inherit;" | HE |
| | rating14 = 2 <!-- Gun Feeder --> | | |- |
| | rating15 = 1 <!-- Incoming Fire Alert --> | | | style="color:inherit;" | • Name || style="color:inherit;" | 102 mm HE 35 lb |
| | rating16 = 1 <!-- Last Stand --> | | |- |
| | | style="color:inherit;" | • Arrangement || style="color:inherit;" | 2x102mm |
| | |- |
| | | style="color:inherit;" | • Rate of fire (shots/min) || style="color:inherit;" | 20.0 |
| | |- |
| | | style="color:inherit;" | • Maximum damage || style="color:inherit;" | 1500 |
| | |- |
| | | style="color:inherit;" | • Shell velocity (m/s) || style="color:inherit;" | 811 |
| | |- |
| | | style="color:inherit;" | • Penetration (mm) || style="color:inherit;" | 17 |
| | |- |
| | | style="color:inherit;" | • Fire chance (%) || style="color:inherit;" | 6.0% |
| | |} |
| | </div> |
|
| |
|
| | rating21 = 1 <!-- Pyrotechnician -->
| |
| | rating22 = 1 <!-- Fill the Tubes -->
| |
| | rating23 = <!-- Consumables Enhancements -->
| |
| | rating24 = <!-- Eye in the Sky -->
| |
| | rating25 = 2 <!-- Priority Target -->
| |
| | rating26 = 1 <!-- Expert AA Marksman -->
| |
|
| |
|
| | rating31 = 2 <!-- Heavy HE and SAP Shells -->
| |
| | rating32 = 1 <!-- Enhanced Torpedo Explosive Charge -->
| |
| | rating33 = 3 <!-- Adrenaline Rush -->
| |
| | rating34 = 1 <!-- Heavy AP Shells -->
| |
| | rating35 = 2 <!-- Superintendent -->
| |
| | rating36 = 1 <!-- Survivability Expert -->
| |
|
| |
|
| | rating41 = 2 <!-- Top Grade Gunner -->
| | </div></div></div> |
| | rating42 = 1 <!-- Outnumbered -->
| | <div class="b-popup"><div class="b-popup_head js-tech-nav_head"><div><h2>Airstrike</h2></div><span class="b-tech-nav_arrow"></span></div><div class="b-popup_content" style="display: none;"><div> |
| | rating43 = 1 <!-- Radio Location -->
| |
| | rating44 = <!-- Inertial Fuse for HE Shells -->
| |
| | rating45 = 3 <!-- Concealment Expert -->
| |
| | rating46 = 1 <!-- AA Gunner -->
| |
| }}
| |
|
| |
|
| |Consumables=<!-- write text about selection of Consumables below --> | | <div style="border: 2px solid rgba(212,175,55,0.8); border-radius: 3px; margin-bottom: 1em; overflow: hidden;"> |
| ''{{#var:ship_name}}'' can equip the following consumables:
| | {| class="wikitable" style="margin:0; color:inherit; width:100%" |
| * '''Slot 1:''' {{Damage Control Party}}
| | ! style="background-color:#1a3244; color:#ffffff; font-weight:bold;" | ASW AIRSTRIKE (DEPTH CHARGES) !! style="background-color:#1a3244; color:#ffffff; font-weight:bold;" | |
| * '''Slot 2:''' {{Repair Party}} - 3 charges
| | |- |
| * '''Slot 3:''' {{Defensive AA Fire}} '''or''' {{Hydroacoustic Search}} - 3 charges each
| | | style="color:inherit;" | • Range (km) || style="color:inherit;" | 6 |
| | |- |
| | | style="color:inherit;" | • Minimum range (km) || style="color:inherit;" | 0.5 |
| | |- |
| | | style="color:inherit;" | • Reload time (sec) || style="color:inherit;" | 20.0 |
| | |- |
| | | style="color:inherit;" | • Number of aircraft || style="color:inherit;" | 1 |
| | |- |
| | | style="color:inherit;" | • Depth charges in payload || style="color:inherit;" | 1 |
| | |- |
| | | style="color:inherit;" | • Damage || style="color:inherit;" | 2900 |
| | |- |
| | | style="color:inherit;" | • Deployment || style="color:inherit;" | Manual |
| | |} |
| | </div> |
| | </div></div></div> |
| | <div class="b-popup"><div class="b-popup_head js-tech-nav_head"><div><h2>AA Defense</h2></div><span class="b-tech-nav_arrow"></span></div><div class="b-popup_content" style="display: none;"><div> |
| | <div style="border: 2px solid rgba(212,175,55,0.8); border-radius: 3px; margin-bottom: 1em; overflow: hidden;"> |
| | '''Devonshire (A)''' |
|
| |
|
| |Camouflage=<!-- write text about useful camouflage below --> | | {| class="wikitable" style="margin:0 0 0.8em 0; width:100%; color:inherit;" |
| | ! style="background-color:#1a3244; color:#ffffff; font-weight:bold;" | AA ARMAMENT !! style="background-color:#1a3244; color:#ffffff; font-weight:bold;" | MOUNTS × BARRELS |
| | |- |
| | | style="color:inherit;" | 102 mm || style="color:inherit;" | 4 × 2 |
| | |- |
| | | style="color:inherit;" | 40 mm || style="color:inherit;" | 4 × 4 |
| | |- |
| | | style="color:inherit;" | 20 mm || style="color:inherit;" | 12 × 1 |
| | |} |
|
| |
|
| {{TT Ship Camo Insert|shiptier=6}} | | '''Continuous damage''' — average DPS within each action zone |
| | {| class="wikitable" style="margin:0 0 0.8em 0; width:100%; color:inherit;" |
| | ! style="background-color:#1a3244; color:#ffffff; font-weight:bold;" | RANGE !! style="background-color:#1a3244; color:#ffffff; font-weight:bold;" | DPS !! style="background-color:#1a3244; color:#ffffff; font-weight:bold;" | HIT CHANCE !! style="background-color:#1a3244; color:#ffffff; font-weight:bold;" | ACTION ZONE (km) |
| | |- |
| | | style="color:inherit;" | Short-range || style="color:inherit;" | 112 || style="color:inherit;" | 85% || style="color:inherit;" | 2.0 |
| | |- |
| | | style="color:inherit;" | Mid-range || style="color:inherit;" | 112 || style="color:inherit;" | 90% || style="color:inherit;" | 2.5 |
| | |- |
| | | style="color:inherit;" | Long-range || style="color:inherit;" | 52.5 || style="color:inherit;" | 90% || style="color:inherit;" | 5.8 |
| | |} |
|
| |
|
| |Signals=<!-- write text about best set of signals below --> | | '''Damage by shell explosions''' |
| | {| class="wikitable" style="margin:0 0 0.8em 0; width:100%; color:inherit;" |
| | ! style="background-color:#1a3244; color:#ffffff; font-weight:bold;" | EXPLOSIONS / SALVO !! style="background-color:#1a3244; color:#ffffff; font-weight:bold;" | DAMAGE !! style="background-color:#1a3244; color:#ffffff; font-weight:bold;" | HIT CHANCE !! style="background-color:#1a3244; color:#ffffff; font-weight:bold;" | ACTION ZONE (km) |
| | |- |
| | | style="color:inherit;" | 2 || style="color:inherit;" | 320 || style="color:inherit;" | 90% || style="color:inherit;" | 3.5–5.8 |
| | |} |
|
| |
|
| {{Signal Flags
| | '''Devonshire (B)''' |
| | November Echo Setteseven = 1
| |
| | Mike Yankee Soxisix =
| |
| | India X-Ray = 2
| |
| | Juliet Whiskey Unaone =
| |
| | Victor Lima = 2
| |
| | Hotel Yankee =
| |
|
| |
|
| | November Foxtrot = 3 | | {| class="wikitable" style="margin:0 0 0.8em 0; width:100%; color:inherit;" |
| | Sierra Mike = 3 | | ! style="background-color:#1a3244; color:#ffffff; font-weight:bold;" | AA ARMAMENT !! style="background-color:#1a3244; color:#ffffff; font-weight:bold;" | MOUNTS × BARRELS |
| | India Delta = 2 | | |- |
| | Juliet Yankee Bissotwo = | | | style="color:inherit;" | 102 mm || style="color:inherit;" | 4 × 2 |
| | India Yankee = | | |- |
| | Juliet Charlie = | | | style="color:inherit;" | 40 mm || style="color:inherit;" | 4 × 8 |
| | |- |
| | | style="color:inherit;" | 20 mm || style="color:inherit;" | 10 × 2 + 2 × 1 |
| | |} |
|
| |
|
| | X-Ray Papa Unaone = | | '''Continuous damage''' — average DPS within each action zone |
| | Sierra Bravo = 2 | | {| class="wikitable" style="margin:0 0 0.8em 0; width:100%; color:inherit;" |
| | ! style="background-color:#1a3244; color:#ffffff; font-weight:bold;" | RANGE !! style="background-color:#1a3244; color:#ffffff; font-weight:bold;" | DPS !! style="background-color:#1a3244; color:#ffffff; font-weight:bold;" | HIT CHANCE !! style="background-color:#1a3244; color:#ffffff; font-weight:bold;" | ACTION ZONE (km) |
| | |- |
| | | style="color:inherit;" | Short-range || style="color:inherit;" | 164.5 || style="color:inherit;" | 85% || style="color:inherit;" | 2.0 |
| | |- |
| | | style="color:inherit;" | Mid-range || style="color:inherit;" | 161 || style="color:inherit;" | 90% || style="color:inherit;" | 2.5 |
| | |- |
| | | style="color:inherit;" | Long-range || style="color:inherit;" | 52.5 || style="color:inherit;" | 90% || style="color:inherit;" | 5.8 |
| | |} |
|
| |
|
| | Zulu = | | '''Damage by shell explosions''' |
| | India Bravo Terrathree = | | {| class="wikitable" style="margin:0 0 0.8em 0; width:100%; color:inherit;" |
| | Equal Speed Charlie London = | | ! style="background-color:#1a3244; color:#ffffff; font-weight:bold;" | EXPLOSIONS / SALVO !! style="background-color:#1a3244; color:#ffffff; font-weight:bold;" | DAMAGE !! style="background-color:#1a3244; color:#ffffff; font-weight:bold;" | HIT CHANCE !! style="background-color:#1a3244; color:#ffffff; font-weight:bold;" | ACTION ZONE (km) |
| | Zulu Hotel = | | |- |
| | Papa Papa = | | | style="color:inherit;" | 2 || style="color:inherit;" | 320 || style="color:inherit;" | 90% || style="color:inherit;" | 3.5–5.8 |
| | |} |
| | </div> |
| | </div></div></div> |
|
| |
|
| | Wyvern =
| |
| | Red Dragon =
| |
| | Dragon Flag =
| |
| | Ouroboros =
| |
| | Hydra =
| |
| | Basilisk =
| |
|
| |
|
| | Leviathan =
| | <!-- Add the ship code here to populate the upgrade table --> |
| | Scylla = | | {{Ship Upgrades Section|code=PBSC206_Devonshire}} |
| }} | |
|
| |
|
| |Gallery=<!-- write below list of files with description (if necessary) separated with | --><gallery>
| |
|
| |
|
| </gallery> | | <!-- Consumables have to be tagged individually on a slot by slot basis --> |
| | {{Ship Consumables Section|consumables= |
| | * '''Slot 1:''' {{Damage Control Party}} (5.0s action, 60.0s cooldown) |
| | * '''Slot 2:''' {{Repair Party}} (3 charges, 28.0s action, 80.0s cooldown, 143 hp/s) |
| | * '''Slot 3:''' {{Defensive AA Fire}} (3 charges, 40.0s action, 80.0s cooldown) '''or''' {{Hydroacoustic Search}} (3 charges, 100.0s action, 120.0s cooldown) |
| | }} |
|
| |
|
| |History=<!-- write text below -->
| |
|
| |
|
| <div class="thumb tright"> | | ==Gallery== |
| {{AnnoWiki|content=
| | <div class="b-popup"><div class="b-popup_head js-tech-nav_head"><div><h2>WoWs Gallery</h2></div><span class="b-tech-nav_arrow"></span></div><div class="b-popup_content" style="display: none;"><div> |
| <h2>''Devonshire''</h2> | |
| ===Construction=== | |
| :Builder: Devonport Dockyard, Plymouth, UK
| |
| :Laid down: 16 March 1926
| |
| :Launched: 22 October 1927
| |
| :Commissioned: 18 March 1929
| |
| ---- | |
| ===Specifications=== | |
| :9850 tons displacement, standard
| |
| :192.8m length
| |
| :20.1m beam
| |
| :6.3m draft (mean)
| |
| ---- | |
| ====Machinery==== | |
| :4 shafts, Parsons geared steam turbines, 8 Admiralty 3-drum boilers | |
|
| |
|
| ----
| | <gallery> |
| ====Performance====
| | </gallery> |
| :32.25 knots at 80,000 shaft horsepower
| | </div></div></div> |
| :12,500nm range at 12 knots
| |
| ----
| |
| ====Armor====
| |
| :Main belt: 25mm
| |
| :Decks: 34.9 to mm main deck
| |
| :Turrets: 25mm
| |
| ----
| |
| ====Armament====
| |
| =====Main=====
| |
| :8 (4x2) 203mm rifles
| |
| =====Secondary=====
| |
| :8 (4xs) 102mm dual purpose rifles
| |
| =====Torpedoes=====
| |
| :8 (2x4) 533mm torpedo tubes
| |
| ----
| |
| }}</div><br>
| |
| | |
| <h4>HMS Devonshire</h4> | |
| | |
| HMS ''Devonshire'' was a County-class heavy cruiser of the London subclass built for the Royal Navy in the late 1920s. The County class were the first post-war cruisers constructed for the Royal Navy and were designed within the limits of the Washington Naval Treaty of 1922. Thirteen County Class ships were built for the Royal Navy and Royal Australian Navy in ''Kent'', ''London'', and ''Norfolk'' subclasses, with slight changes and improvements between the ships. They were the only 10,000-ton 8-inch gun (or "A") cruisers that the Royal Navy built, as focus turned to building a larger number of smaller cruisers to allow more ships within tonnage limitations.
| |
| | |
| The Washington Naval Treaty was intended to prevent a new naval arms race, limiting cruisers to a maximum gun size of 8 inches and a maximum displacement of 10,000 tons. These limitations caused challenges in designing and building new ships. With world-wide trade routes to protect, the Royal Navy needed a ship both with a long range, and that was capable of operating independently. These requirements meant that machinery and weapons took priority, with any remaining available displacement given to protection, leaving the ships with relatively little armour. The London subclass were the second group of County Class ships built. They were 0.84m longer than the original ''Kent'' sub-class, which resulted in a slight increase in top speed.
| |
| | |
| | |
| <h4>Construction and early career</h4>
| |
|
| |
|
| ''Devonshire'' was ordered from Devonport Dockyard on 12 October 1925 and laid down on 16 March 1926. She was launched on 22 October 1927 and was the 7th ship to bear the name. Following her completion on 18 March 1929, she was assigned to the Mediterranean Fleet. In July 1929, she suffered a misfire during gunnery training which killed 17 men and seriously injured 3 more, requiring a return to the UK for repairs. ''Devonshire'' operated off the coast of Spain during the Spanish Civil War at the end of the conflict, with the surrender of the island of Minorca to the Nationalists signed aboard her.
| | <div class="b-popup"><div class="b-popup_head js-tech-nav_head"><div><h2>Historical Gallery</h2></div><span class="b-tech-nav_arrow"></span></div><div class="b-popup_content" style="display: none;"><div> |
| | |
| [[File:DevonshireCrest.png|right|frame|x250px|link=|]]
| |
| | |
| <h4>Second World War</h4>
| |
| | |
| At the outbreak of war, ''Devonshire'' was in the Mediterranean, enforcing the blockade of Germany. She was ordered to return to the UK in November 1939, where she would take part in patrols and convoy duties. These included taking part in an unsuccessful search for ''Gneisenau'' and ''Scharnhorst'', after the German ships had sunk the armed merchant cruiser ''Rawalpindi''.
| |
| | |
| <h4>Norwegian Campaign</h4>
| |
| | |
| As part of Allied plans to disrupt German supplies of iron ore from Sweden, ''Devonshire'' was assigned to carry troops to Norway, however the German invasion pre-empted Allied plans. ''Devonshire'' was ordered to unload the troops and then she set sail with HMS ''Berwick'', ''York'', and ''Glasgow'' to join the French cruiser ''Emile Bertain'', and search for German ships suspected to be at sea. ''Devonshire'' spent the first part of the Norwegian Campaign escorting troop ships and searching for German ships along the Norwegian coastline, and sustained some minor damage from air attack.
| |
| | |
| As the campaign turned against the Allies in late April, ''Devonshire'' assisted in the evacuation of British and French troops from Norway. On the 7th of June, she was detached from the fleet and sailed to Tromsø, where she evacuated King Haakon VII of Norway and various other government officials. During her return to the UK, she passed within 50 miles of the battle between ''Scharnhorst'' and ''Gneisenau'' and the British aircraft carrier ''Glorious''. Although ''Devonshire'' received the distress call from ''Glorious'', it was decided that the priority was to take King Haakon to safety, and so ''Devonshire'' maintained radio silence.
| |
| | |
| <h4>Operation Menace</h4> | |
| | |
| In August 1940, ''Devonshire'' was assigned to Force M as part of Operation Menace, a naval attack in support of an invasion of Dakar by Free French forces. She set sail with HMS ''Barham'', ''Fiji'', and a screen of destroyers as Force M on 31 August. Prior to the landings, ''Devonshire'' was dispatched with the 1st Cruiser Squadron in an unsuccessful attempt to prevent the Vichy French cruisers ''Montcalm'', ''Georges Leygues'', and ''Gloire'' from reaching Dakar. ''Devonshire'' took part in the attack on Dakar, along with ''Cumberland'', ''Australia'', and the battleships ''Resolution'' and ''Barham''. The Allied invasion was called off after ''Resolution'' was damaged by the Vichy submarine ''Beveziers'', and ''Barham'' was damaged by fire from Vichy shore batteries and the battleship ''[[Richelieu]]''.
| |
| | |
| For the rest of 1940 she was based at Freetown, in support of further Free French operations and trade protection duties. In October 1940 she supported Free French landings at Duala in the French Cameroons. In November she took part in the Free French invasion of Gabon, where her Walrus aircraft assisted in attacking the Vichy French submarine ''Poncelet'', leading to the submarine being scuttled.
| |
| | |
| <h4>1941</h4>
| |
| | |
| ''Devonshire'' remained in the South Atlantic and took part in the unsuccessful hunt for the German raider ''Kormoran'' before returning to the UK for a refit where she gained radar and increased AA defences. She took part in carrier raids against Kirkenes, Tromsø, and Petsamo in Norway and Finland, and was part of the distant cover force for Operation Dervish: the first of the Arctic Convoys to the Soviet Union. Following this, she was deployed for trade protection duties in the Atlantic. On 2 November 1941, she was part of a force which captured a Vichy French convoy in the South Atlantic. On 22 November, she sank the German raider ''Atlantis'' near Ascension Island.
| |
| | |
| <h4>1942-43</h4> | |
| | |
| [[File:HMS Devonshire Freetown.jpeg|right|frame|x250px|link=|HMS Devonshire at anchor, Freetown, 1942.]]
| |
| | |
| ''Devonshire'' was nominated for repair and refit in the USA, which took place between January and March of 1942. During this time, she was adopted by the town of Torquay in Devon as part of a Warships Week savings campaign. Following her refit she was assigned to the Eastern Fleet and took part in Operation Ironclad, an invasion of the Vichy French island of Madagascar in order to prevent possible Japanese use of the island as a base. Following this, she was involved in trade protection patrols and convoy escort duties in the Indian Ocean, until she was returned to the UK for another refit in April 1943.
| |
| Between May 1943 and March 1944 she underwent an extensive refit, where her AA defences were further upgraded and her "X" turret, catapult and spotter aircraft were removed, to allow more short range AA guns to be fitted.
| |
| | |
| <h4>1944</h4>
| |
| | |
| ''Devonshire'' returned to service in April 1944, and spent the rest of the war escorting carrier strikes against German Forces in Norway. With the end of the war, ''Devonshire'' sailed to Oslo, and then to Copenhagen. From there she escorted the remaining German cruisers ''[[Prinz Eugen]]'' and ''[[Nürnberg]]'' back to Wilhelmshaven. Following this, she returned to the UK and was fitted out for troop transport duties, after which she was used to transport returning personnel and former PoWs from the Far East back to the UK, along with returning Australian service personnel home.
| |
| | |
| <h4>Post War</h4> | |
| | |
| In 1947, she was converted to a cadet training ship, a role she carried out until 1953. She was sold for scrap and broken up in December 1954.
| |
| | |
| HMS ''Devonshire'' and her successors are entitled to the following battle honours:
| |
| Ushant 1747 - Finisterre 1747 - Louisburg 1758 - Quebec 1759 - Martinique 1762 - Havana 1762 - Norway 1940 - Arctic 1941 - Diego Suarez 1942
| |
| | |
| | |
| |HistoricalGallery=<!-- write below list of files with description (if necessary) separated with | --><gallery>
| |
|
| |
|
| | <gallery> |
| </gallery> | | </gallery> |
| | </div></div></div> |
|
| |
|
| |Video=<!-- put below video clips with using template VideoYT. You can use html-tags for formatting. -->
| | [[Category:Ships of U.K.]] |
| | | [[Category:Cruisers]] |
| |Ref= <!-- write below -->
| | [[Category:Tier VI ships]] |
| <references/>
| | <!-- DO NOT DELETE THIS LINE. DO NOT INSERT ANYTHING BELOW THIS LINE --> |
| # [https://en.wikipedia.org/wiki/HMS_Devonshire_(39) HMS ''Devonshire'' (39) - Wikipedia]
| |
| # [https://en.wikipedia.org/wiki/County-class_cruiser County-class cruiser - Wikipedia]
| |
| | |
| {{WoWS Ship Changelog Insert|1=
| |
| *Available for testing by supertesters in the game starting from Update 0.8.10.
| |
| {{WoWS Ship Testing Changes Insert|1=
| |
| *<span class="plainlinks">[https://www.reddit.com/r/WorldOfWarships/comments/dfumqi/st_british_heavy_cruisers/ Oct 10, 2019]</span>:
| |
| **Preliminary characteristics.
| |
| *<span class="plainlinks">[https://www.reddit.com/r/WorldOfWarships/comments/e3cuu2/st_changes_to_mainz_gorizia_and_british_heavy/ Nov 29, 2019]</span>:
| |
| **Main battery reload time increased from 12 to 14 s.
| |
| **HE shell parameters changed:
| |
| *** Maximum damage increased from 2,850 to 3,300.
| |
| *** Fire chance increased from 15% to 17%.
| |
| **Repair Party consumable changed:
| |
| *** Restoration of citadel damage increased from 10% to 50%.
| |
| *<span class="plainlinks">[https://www.reddit.com/r/WorldOfWarships/comments/e8rnm5/st_changes_to_indomitable_and_heavy_british/ Dec 10, 2019]</span>:
| |
| **AP shell armor penetration increased by 10% at all ranges.
| |
| **Hydroacoustic Search consumable changed:
| |
| *** Action time decreased from 180 to 100 s.
| |
| *** Ship detection range increased from 3 to 4 km.
| |
| **Defensive AA consumable added in the same slot as Hydroacoustic Search.
| |
| }}
| |
| *Update 0.9.0:
| |
| **Available from the Royal Pack or Imperial Pack in the Armory.
| |
| *Introduced into the game as a researchable ship in Update 0.9.1.
| |
| **Continuous damage in the far zone of AA defenses was decreased from 95 to 53 damage per second.
| |
| **Continuous damage in the middle AA defense zone increased from 151 to 161 damage per second.
| |
| **Continuous damage in close-range AA defense increased from 158 to 165 damage per second.
| |
| **The number of flak explosions was decreased from 4 to 2.
| |
| **Damage in flak explosions decreased from 1400 to 1120.
| |
| *Update 0.9.2:
| |
| **Armor thickness was changed: side armor increased from 19 to 25 mm.
| |
| *Update 0.9.3:
| |
| **Minor fixes to textures and ship model.
| |
| *Update 0.9.5:
| |
| **Small changes to geometry and textures.
| |
| *Update 0.10.10:
| |
| **Minor change to the secondary battery firing range (unlisted change).
| |
| }}
| |
| }}<!-- DO NOT DELETE THIS LINE. DO NOT INSERT ANYTHING BELOW THIS LINE -->
| |



 (5.0s action, 60.0s cooldown)
 (3 charges, 28.0s action, 80.0s cooldown, 143 hp/s)
 (3 charges, 40.0s action, 80.0s cooldown) or Hydroacoustic Search
  (3 charges, 100.0s action, 120.0s cooldown)