Ship:Montcalm
imported>HasteMakesWaste:na Corrected sale info |
Automated stats update via wiki pipeline |
||
| Line 1: | Line 1: | ||
{{#vardefine:ship_name|Montcalm}} | |||
__NOTOC____NOEDITSECTION__ | |||
<div class="b-description gw-frame-1"><div class="b-description-img b-description-img__indent b-description-img__single"><div style="width:160px; height:102px; opacity:.5; border-radius:2px; position:absolute; left:0; top:0; z-index:1; -webkit-transition:all 0.2s ease-out 0.1s; transition:all 0.2s ease-out 0.1s;">[[File:Wows_anno_flag_france.png|160px]]</div><div class="l-description-img_class"><span class="b-description-img_type b-description-img_type__Cruiser b-description-img_type__Cruiser-Premium"></span><span class="b-description-img_class">VI</span></div><div class="b-description-img_vehicle">[[File:Ship_PFSC716_Montcalm.png|160px|link=|left]]</div><div class="l-description-img_price"><span class="b-description-img_price b-description-img_price__gold"><span title="''{{#var:ship_name}}'' was first released for sale on DD Month YYYY.">5,500 doubloons</span></span></div></div><p>[[Ship:{{#var:ship_name}}|{{#var:ship_name}}]] — France Premium Tier VI [[Ship:Cruiser|Cruiser]].</p><p>As one of six light cruisers of the La Galissonnière class, Montcalm stood as the most modern example of her ship type in the French Navy at the onset of World War II. In the initial months of the war, she operated in the North Atlantic and took part in the Norwegian campaign. In 1943, the ship underwent modernization in the U.S. that enhanced her air defenses and radio equipment. In June 1944, Montcalm covered the Allied landings in Normandy in the Omaha sector. Later in the war, the cruiser participated in the liberation of Southern France.</p><p> </p></div> | |||
===Pros=== | |||
* Pro 1 | |||
* Pro 2 | |||
===Cons=== | |||
* Con 1 | |||
* Con 2 | |||
< | ==Ship Stats== | ||
<div class="b-popup"><div class="b-popup_head js-tech-nav_head"><div><h2>Hull Information</h2></div><span class="b-tech-nav_arrow"></span></div><div class="b-popup_content" style="display: none;"><div> | |||
<div style="border: 2px solid rgba(212,175,55,0.8); border-radius: 3px; margin-bottom: 1em; overflow: hidden;"> | |||
{| class="wikitable" style="margin:0; color:inherit; width:100%" | |||
! style="background-color:#1a3244; color:#ffffff; font-weight:bold;" | SURVIVABILITY !! style="background-color:#1a3244; color:#ffffff; font-weight:bold;" | | |||
|- | |||
| style="color:inherit;" | • Hit Points || style="color:inherit;" | 27300 | |||
|- | |||
| style="color:inherit;" | • Torpedo protection damage reduction (%) || style="color:inherit;" | — | |||
|} | |||
</div> | |||
<div style="border: 2px solid rgba(212,175,55,0.8); border-radius: 3px; margin-bottom: 1em; overflow: hidden;"> | |||
{| class="wikitable" style="margin:0; color:inherit; width:100%" | |||
! style="background-color:#1a3244; color:#ffffff; font-weight:bold;" | ARMOR DETAIL !! style="background-color:#1a3244; color:#ffffff; font-weight:bold;" | | |||
|- | |||
| style="color:inherit;" | • Belt (mm) || style="color:inherit;" | — | |||
|- | |||
| style="color:inherit;" | • Deck (mm) || style="color:inherit;" | — | |||
|- | |||
| style="color:inherit;" | • Superstructure (mm) || style="color:inherit;" | — | |||
|- | |||
| style="color:inherit;" | • Extremities (mm) || style="color:inherit;" | — | |||
|} | |||
</div> | |||
<div style="border: 2px solid rgba(212,175,55,0.8); border-radius: 3px; margin-bottom: 1em; overflow: hidden;"> | |||
{| class="wikitable" style="margin:0; color:inherit; width:100%" | |||
! style="background-color:#1a3244; color:#ffffff; font-weight:bold;" | MANEUVERABILITY !! style="background-color:#1a3244; color:#ffffff; font-weight:bold;" | | |||
|- | |||
| style="color:inherit;" | • Maximum speed (kt) || style="color:inherit;" | 31.0 | |||
|- | |||
| style="color:inherit;" | • Turning circle radius (m) || style="color:inherit;" | 650 | |||
|- | |||
| style="color:inherit;" | • Rudder-shift time (sec) || style="color:inherit;" | 10.0 | |||
|} | |||
</div> | |||
< | <div style="border: 2px solid rgba(212,175,55,0.8); border-radius: 3px; margin-bottom: 1em; overflow: hidden;"> | ||
{| class="wikitable" style="margin:0; color:inherit; width:100%" | |||
! style="background-color:#1a3244; color:#ffffff; font-weight:bold;" | CONCEALMENT !! style="background-color:#1a3244; color:#ffffff; font-weight:bold;" | | |||
|- | |||
| style="color:inherit;" | • Detectability by sea (km) || style="color:inherit;" | 12.92 | |||
|- | |||
| style="color:inherit;" | • Detectability by air (km) || style="color:inherit;" | 5.74 | |||
|- | |||
| style="color:inherit;" | • Detectability after firing main guns in smoke (km) || style="color:inherit;" | 6.72 | |||
|- | |||
| style="color:inherit;" | • Detectability by depths (km) || style="color:inherit;" | 5.74 | |||
|} | |||
</div> | |||
</div></div></div> | |||
<div class="b-popup"><div class="b-popup_head js-tech-nav_head"><div><h2>Main Battery</h2></div><span class="b-tech-nav_arrow"></span></div><div class="b-popup_content" style="display: none;"><div><div style="border: 2px solid rgba(212,175,55,0.8); border-radius: 3px; margin-bottom: 1em; overflow: hidden;"> | |||
{| class="wikitable" style="margin:0; color:inherit; width:100%" | |||
! style="background-color:#1a3244; color:#ffffff; font-weight:bold;" | MAIN BATTERY !! style="background-color:#1a3244; color:#ffffff; font-weight:bold;" | | |||
|- | |||
| style="color:inherit;" | • Arrangement || style="color:inherit;" | 3×3.0 152mm | |||
|- | |||
| style="color:inherit;" | • Firing range (km) || style="color:inherit;" | 18.0 | |||
|- | |||
| style="color:inherit;" | • Reload time (sec) || style="color:inherit;" | 8.6 | |||
|- | |||
| style="color:inherit;" | • Rate of fire (shots/min) || style="color:inherit;" | 7 | |||
|- | |||
| style="color:inherit;" | • 180° turn time (sec) || style="color:inherit;" | 15.0 | |||
|} | |||
</div> | |||
<div style="border: 2px solid rgba(212,175,55,0.8); border-radius: 3px; margin-bottom: 1em; overflow: hidden;"> | |||
{| class="wikitable" style="margin:0; color:inherit; width:100%" | |||
! style="background-color:#1a3244; color:#ffffff; font-weight:bold;" | DISPERSION !! style="background-color:#1a3244; color:#ffffff; font-weight:bold;" | | |||
|- | |||
| style="color:inherit;" | • Dispersion type || style="color:inherit;" | Standard CA/CL dispersion | |||
|- | |||
| style="color:inherit;" | • Dispersion formula || style="color:inherit;" | Dispersion (m) = 6.9 × range(km) + 33 | |||
|- | |||
| style="color:inherit;" | • Sigma || style="color:inherit;" | 2.0 | |||
|- | |||
| style="color:inherit;" | • Maximum dispersion (m) || style="color:inherit;" | 157 | |||
|- | |||
| style="color:inherit;" | • Dispersion at 5 km || style="color:inherit;" | 68 | |||
|- | |||
| style="color:inherit;" | • Dispersion at 10 km || style="color:inherit;" | 102 | |||
|- | |||
| style="color:inherit;" | • Dispersion at 15 km || style="color:inherit;" | 136 | |||
|- | |||
| style="color:inherit;" | • Dispersion at 18 km || style="color:inherit;" | 157 | |||
|} | |||
</div> | |||
<div style="border: 2px solid rgba(212,175,55,0.8); border-radius: 3px; margin-bottom: 1em; overflow: hidden;"> | |||
{| class="wikitable" style="margin:0; color:inherit; width:100%" | |||
! style="background-color:#1a3244; color:#ffffff; font-weight:bold;" | HE SHELL !! style="background-color:#1a3244; color:#ffffff; font-weight:bold;" | | |||
|- | |||
| style="color:inherit;" | • Name || style="color:inherit;" | 152 mm HE OEA Mle 1937 | |||
|- | |||
| style="color:inherit;" | • Maximum damage || style="color:inherit;" | 2200 | |||
|- | |||
| style="color:inherit;" | • Fire chance (%) || style="color:inherit;" | 12.0% | |||
|- | |||
| style="color:inherit;" | • Shell velocity (m/s) || style="color:inherit;" | 870 | |||
|- | |||
| style="color:inherit;" | • Shell weight (kg) || style="color:inherit;" | 55 | |||
|- | |||
| style="color:inherit;" | • Penetration (mm) || style="color:inherit;" | 25 | |||
|} | |||
</div> | |||
<div style="border: 2px solid rgba(212,175,55,0.8); border-radius: 3px; margin-bottom: 1em; overflow: hidden;"> | |||
{| class="wikitable" style="margin:0; color:inherit; width:100%" | |||
! style="background-color:#1a3244; color:#ffffff; font-weight:bold;" | AP SHELL !! style="background-color:#1a3244; color:#ffffff; font-weight:bold;" | | |||
|- | |||
| style="color:inherit;" | • Name || style="color:inherit;" | 152 mm AP OPfK Mle 1937 | |||
|- | |||
| style="color:inherit;" | • Maximum damage || style="color:inherit;" | 3200 | |||
|- | |||
| style="color:inherit;" | • Shell velocity (m/s) || style="color:inherit;" | 870 | |||
|- | |||
| style="color:inherit;" | • Shell weight (kg) || style="color:inherit;" | 56 | |||
|- | |||
| style="color:inherit;" | • Fuse time (sec) || style="color:inherit;" | 0.025 | |||
|- | |||
| style="color:inherit;" | • Ricochet start (°) || style="color:inherit;" | 45 | |||
|- | |||
| style="color:inherit;" | • Always ricochet (°) || style="color:inherit;" | 60 | |||
|- | |||
| style="color:inherit;" | • Normalisation (°) || style="color:inherit;" | 8.5 | |||
|- | |||
| style="color:inherit;" | • Arming threshold (mm) || style="color:inherit;" | 25 | |||
|} | |||
</div> | |||
</div></div></div> | |||
<div class="b-popup"><div class="b-popup_head js-tech-nav_head"><div><h2>Torpedoes</h2></div><span class="b-tech-nav_arrow"></span></div><div class="b-popup_content" style="display: none;"><div> | |||
<div style="border: 2px solid rgba(212,175,55,0.8); border-radius: 3px; margin-bottom: 1em; overflow: hidden;"> | |||
{| class="wikitable" style="margin:0; color:inherit; width:100%" | |||
! style="background-color:#1a3244; color:#ffffff; font-weight:bold;" | TORPEDO LAUNCHERS !! style="background-color:#1a3244; color:#ffffff; font-weight:bold;" | | |||
|- | |||
| style="color:inherit;" | • Number of launchers || style="color:inherit;" | 1 | |||
|- | |||
| style="color:inherit;" | • Torpedo name || style="color:inherit;" | PFPT513 | |||
|- | |||
| style="color:inherit;" | • Reload time (sec) || style="color:inherit;" | 60.0 | |||
|- | |||
| style="color:inherit;" | • 180° turn time (sec) || style="color:inherit;" | 7.2 | |||
|- | |||
| style="color:inherit;" | • Damage || style="color:inherit;" | 41200 | |||
|- | |||
| style="color:inherit;" | • Range (km) || style="color:inherit;" | 0.2 | |||
|- | |||
| style="color:inherit;" | • Speed (kt) || style="color:inherit;" | 60 | |||
|- | |||
| style="color:inherit;" | • Detectability (km) || style="color:inherit;" | 1.3 | |||
|- | |||
| style="color:inherit;" | • Flooding chance (%) || style="color:inherit;" | 2.46% | |||
|} | |||
</div> | |||
</div></div></div> | |||
<div class="b-popup"><div class="b-popup_head js-tech-nav_head"><div><h2>Secondary Battery</h2></div><span class="b-tech-nav_arrow"></span></div><div class="b-popup_content" style="display: none;"><div> | |||
<div style="border: 2px solid rgba(212,175,55,0.8); border-radius: 3px; margin-bottom: 1em; overflow: hidden;"> | |||
{| class="wikitable" style="margin:0; color:inherit; width:100%" | |||
! style="background-color:#1a3244; color:#ffffff; font-weight:bold;" | SECONDARY BATTERY !! style="background-color:#1a3244; color:#ffffff; font-weight:bold;" | | |||
|- | |||
| style="color:inherit;" | • Secondary battery range (km) || style="color:inherit;" | 5.6 | |||
|} | |||
</div> | |||
| | <div style="border: 2px solid rgba(212,175,55,0.8); border-radius: 3px; margin-bottom: 1em; overflow: hidden;"> | ||
{| class="wikitable" style="margin:0; color:inherit; width:100%" | |||
! style="background-color:#1a3244; color:#ffffff; font-weight:bold;" | SECONDARY ARMAMENT 1 !! style="background-color:#1a3244; color:#ffffff; font-weight:bold;" | | |||
|- | |||
| style="color:inherit;" | • Shell type || style="color:inherit;" | HE | |||
| | |- | ||
| style="color:inherit;" | • Name || style="color:inherit;" | 90 mm HE OEA Mle 1925 | |||
|- | |||
| style="color:inherit;" | • Arrangement || style="color:inherit;" | 2x90mm | |||
|- | |||
| style="color:inherit;" | • Rate of fire (shots/min) || style="color:inherit;" | 15.0 | |||
|- | |||
| style="color:inherit;" | • Maximum damage || style="color:inherit;" | 1300 | |||
|- | |||
| style="color:inherit;" | • Shell velocity (m/s) || style="color:inherit;" | 850 | |||
|- | |||
| style="color:inherit;" | • Penetration (mm) || style="color:inherit;" | 15 | |||
|- | |||
| style="color:inherit;" | • Fire chance (%) || style="color:inherit;" | 5.0% | |||
|} | |||
</div> | |||
</div></div></div> | |||
<div class="b-popup"><div class="b-popup_head js-tech-nav_head"><div><h2>Airstrike</h2></div><span class="b-tech-nav_arrow"></span></div><div class="b-popup_content" style="display: none;"><div> | |||
<div style="border: 2px solid rgba(212,175,55,0.8); border-radius: 3px; margin-bottom: 1em; overflow: hidden;"> | |||
{| class="wikitable" style="margin:0; color:inherit; width:100%" | |||
! style="background-color:#1a3244; color:#ffffff; font-weight:bold;" | ASW AIRSTRIKE (DEPTH CHARGES) !! style="background-color:#1a3244; color:#ffffff; font-weight:bold;" | | |||
|- | |||
| style="color:inherit;" | • Range (km) || style="color:inherit;" | 6 | |||
|- | |||
| style="color:inherit;" | • Minimum range (km) || style="color:inherit;" | 0.5 | |||
|- | |||
| style="color:inherit;" | • Reload time (sec) || style="color:inherit;" | 20.0 | |||
|- | |||
| style="color:inherit;" | • Number of aircraft || style="color:inherit;" | 1 | |||
|- | |||
| style="color:inherit;" | • Depth charges in payload || style="color:inherit;" | 1 | |||
|- | |||
| style="color:inherit;" | • Damage || style="color:inherit;" | 2900 | |||
|- | |||
| style="color:inherit;" | • Deployment || style="color:inherit;" | Manual | |||
|} | |||
</div> | |||
</div></div></div> | |||
<div class="b-popup"><div class="b-popup_head js-tech-nav_head"><div><h2>AA Defense</h2></div><span class="b-tech-nav_arrow"></span></div><div class="b-popup_content" style="display: none;"><div> | |||
<div style="border: 2px solid rgba(212,175,55,0.8); border-radius: 3px; margin-bottom: 1em; overflow: hidden;"> | |||
{| class="wikitable" style="margin:0 0 0.8em 0; width:100%; color:inherit;" | |||
! style="background-color:#1a3244; color:#ffffff; font-weight:bold;" | AA ARMAMENT !! style="background-color:#1a3244; color:#ffffff; font-weight:bold;" | MOUNTS × BARRELS | |||
|- | |||
| style="color:inherit;" | 90 mm || style="color:inherit;" | 4 × 2 | |||
|- | |||
| style="color:inherit;" | 40 mm || style="color:inherit;" | 6 × 4 | |||
|- | |||
| style="color:inherit;" | 20 mm || style="color:inherit;" | 16 × 1 | |||
|} | |||
| | '''Continuous damage''' — average DPS within each action zone | ||
{| class="wikitable" style="margin:0 0 0.8em 0; width:100%; color:inherit;" | |||
! style="background-color:#1a3244; color:#ffffff; font-weight:bold;" | RANGE !! style="background-color:#1a3244; color:#ffffff; font-weight:bold;" | DPS !! style="background-color:#1a3244; color:#ffffff; font-weight:bold;" | HIT CHANCE !! style="background-color:#1a3244; color:#ffffff; font-weight:bold;" | ACTION ZONE (km) | |||
|- | |||
| style="color:inherit;" | Short-range || style="color:inherit;" | 136.5 || style="color:inherit;" | 85% || style="color:inherit;" | 2.0 | |||
|- | |||
| style="color:inherit;" | Mid-range || style="color:inherit;" | 189 || style="color:inherit;" | 90% || style="color:inherit;" | 3.5 | |||
|- | |||
| style="color:inherit;" | Long-range || style="color:inherit;" | 21 || style="color:inherit;" | 90% || style="color:inherit;" | 4.6 | |||
|} | |||
'''Damage by shell explosions''' | |||
{| class="wikitable" style="margin:0 0 0.8em 0; width:100%; color:inherit;" | |||
! style="background-color:#1a3244; color:#ffffff; font-weight:bold;" | EXPLOSIONS / SALVO !! style="background-color:#1a3244; color:#ffffff; font-weight:bold;" | DAMAGE !! style="background-color:#1a3244; color:#ffffff; font-weight:bold;" | HIT CHANCE !! style="background-color:#1a3244; color:#ffffff; font-weight:bold;" | ACTION ZONE (km) | |||
|- | |||
| style="color:inherit;" | 1 || style="color:inherit;" | 140 || style="color:inherit;" | 90% || style="color:inherit;" | 3.5–4.6 | |||
|} | |||
</div> | |||
</div></div></div> | |||
<!-- Add the ship code here to populate the upgrade table --> | |||
{{Ship Upgrades Section|code=PFSC716_Montcalm}} | |||
| | |||
<!-- Consumables have to be tagged individually on a slot by slot basis --> | |||
| | {{Ship Consumables Section|consumables= | ||
* '''Slot 1:''' {{Damage Control Party}} (5.0s action, 60.0s cooldown) | |||
* '''Slot 2:''' {{Repair Party}} (2 charges, 28.0s action, 80.0s cooldown, 136.5 hp/s) | |||
* '''Slot 3:''' {{Defensive AA Fire}} (3 charges, 40.0s action, 80.0s cooldown) '''or''' {{Hydroacoustic Search}} (3 charges, 100.0s action, 120.0s cooldown) | |||
* '''Slot 4:''' {{Main Battery Reload Booster}} (4 charges, 15.0s action, 120.0s cooldown) | |||
}} | }} | ||
==Gallery== | |||
<div class="b-popup"><div class="b-popup_head js-tech-nav_head"><div><h2>WoWs Gallery</h2></div><span class="b-tech-nav_arrow"></span></div><div class="b-popup_content" style="display: none;"><div> | |||
<gallery> | |||
</gallery> | </gallery> | ||
</div></div></div> | |||
<div class="b-popup"><div class="b-popup_head js-tech-nav_head"><div><h2>Historical Gallery</h2></div><span class="b-tech-nav_arrow"></span></div><div class="b-popup_content" style="display: none;"><div> | |||
<div class=" | |||
<h2> | |||
= | |||
-- | |||
</div> | |||
<gallery> | |||
</gallery> | </gallery> | ||
</div></div></div> | |||
[[Category:Ships of France]] | |||
[[Category:Cruisers]] | |||
[[Category:Tier VI ships]] | |||
[[Category:Premium ships]]<!-- DO NOT DELETE THIS LINE. DO NOT INSERT ANYTHING BELOW THIS LINE --> | |||
Revision as of 03:48, 30 June 2026

VI
5,500 doubloons
Montcalm — France Premium Tier VI Cruiser.
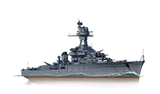
As one of six light cruisers of the La Galissonnière class, Montcalm stood as the most modern example of her ship type in the French Navy at the onset of World War II. In the initial months of the war, she operated in the North Atlantic and took part in the Norwegian campaign. In 1943, the ship underwent modernization in the U.S. that enhanced her air defenses and radio equipment. In June 1944, Montcalm covered the Allied landings in Normandy in the Omaha sector. Later in the war, the cruiser participated in the liberation of Southern France.
Pros
- Pro 1
- Pro 2
Cons
- Con 1
- Con 2
Ship Stats
Hull Information
Main Battery
Torpedoes
Secondary Battery
Airstrike
AA Defense
Compatible Upgrades
| Slot 1 |
 |
 |

| ||
|---|---|---|---|---|---|
| Slot 2 |
 |
 |

| ||
| Slot 3 |
 |
 |
 |
 |

|
| Slot 4 |
 |
 |
 |

|
Consumables
- Slot 1: Damage Control Party
 (5.0s action, 60.0s cooldown)
 - Slot 2: Repair Party
 (2 charges, 28.0s action, 80.0s cooldown, 136.5 hp/s)
 - Slot 3: Defensive AA Fire
 (3 charges, 40.0s action, 80.0s cooldown) or Hydroacoustic Search
  (3 charges, 100.0s action, 120.0s cooldown)
 - Slot 4: Main Battery Reload Booster
 (4 charges, 15.0s action, 120.0s cooldown)
