|
|
| Line 1: |
Line 1: |
| <!-- DO NOT EDIT OR DELETE LINES WITH COMMENTS (it's look like as this or next line)
| | {{#vardefine:ship_name|Tirpitz}} |
| -->{{WoWs_Ship|Promo=<!-- in case of gift or promo ship write conditions to get it. -->
| | __NOTOC____NOEDITSECTION__ |
|
| |
|
| |Anno=<!-- you can write below short description for the ship. it will replace default once. -->
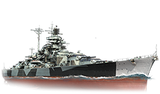
| | <div class="b-description gw-frame-1"><div class="b-description-img b-description-img__indent b-description-img__single"><div style="width:160px; height:102px; opacity:.5; border-radius:2px; position:absolute; left:0; top:0; z-index:1; -webkit-transition:all 0.2s ease-out 0.1s; transition:all 0.2s ease-out 0.1s;">[[File:Wows_anno_flag_germany.png|160px]]</div><div class="l-description-img_class"><span class="b-description-img_type b-description-img_type__Battleship b-description-img_type__Battleship-Premium"></span><span class="b-description-img_class">VIII</span></div><div class="b-description-img_vehicle">[[File:Ship_PGSB002_Tirpiz_1942.png|160px|link=|left]]</div><div class="l-description-img_price"><span class="b-description-img_price b-description-img_price__gold"><span title="''{{#var:ship_name}}'' was first released for sale on DD Month YYYY.">11,000 doubloons</span></span></div></div><p>[[Ship:{{#var:ship_name}}|{{#var:ship_name}}]] — Germany Premium Tier VIII [[Ship:Battleship|Battleship]].</p><p>The second Bismarck-class battleship, Tirpitz, was built in Wilhelmshaven. A shortage of fuel and the fear of losing another large ship after the sinking of Bismarck were the reasons why this battleship wasn't very active during the war. Tirpitz attempted to attack Arctic convoys but encountered resistance. In autumn 1944, the battleship was struck twice by 6-ton bombs that almost incapacitated her, and then she was ultimately sunk by British Lancaster-type bombers.</p><p> </p></div> |
| One of the two mightiest battleships in the German Navy. Akin to the lead ship of her class, ''Tirpitz'' had heavy ship armor, powerful artillery and a high speed. Weak horizontal armor protection was the main drawback of her design, but this was largely offset by improving her AA defense.<br><br>''{{#var:ship_name}}'' was first released for sale worldwide on 17 September 2015.<!-- <br>{{Model3DViewer|6c181b6faa524f81b6dff7c37e495856}}-->
| |
|
| |
|
| |Performance=<!-- write text about performance in battles below -->
| | ===Pros=== |
| {{AA Sidebar Warning Insert}}
| | * Pro 1 |
| Referred to as the "Derpitz" or the "Torpitz" — due to a large number of inexperienced players choosing to purchase her outright without knowledge of high tier gameplay — ''Tirpitz'' is surprisingly flexible for a battleship and can be used as either a proper battleship or as an impromptu battlecruiser. Probably the most surprising thing players will find is that her main battery load time is about 26 seconds, which can be daunting to face. She also has torpedo tubes, useful for when cruisers or battleships get in too close or when the ship is able to work its way into melee range. Her 15-inch guns are the smallest BB guns on Tier VIII battleship (tied with her sister Bismarck), and have not only a high amount of dispersion when firing at maximum to extreme range but will find trouble punching through armor designed to protect against 16-inch shells. However, the smaller caliber means that shells are less likely to overpenetrate cruisers, and when combined with the good turret traverse and reload time (for a battleship), this can make Tirpitz excellent at clearing the battlefield of enemy cruisers.
| | * Pro 2 |
|
| |
|
| Her AA suite — once considered sub-par — has gone through several rounds of improvements but is still unreliable, and will not save you from a dedicated carrier assault. As a capital ship, she will, of course, still be a priority target for enemy aircraft carriers, and thus captains must be wary of an enemy CV should they find themselves against one. At 30.7 knots, it may be easy for her to outrun her team; excellent map awareness and an eye on positioning of friendly ships is key to playing Tirpitz well, so much so that inexperienced players that fail to consider it quickly earn the ire of their teammates. Many Tirpitz captains will put too much or not enough trust in her armor, either rushing too far forward for a torpedo rush and quickly sinking from a focused enemy barrage, or staying too far back, where her guns are inaccurate, lose power, and make her vulnerable to plunging fire. The key to success with Tirpitz is proper positioning and knowing the right balance for your positioning in a given scenario. Being a German vessel, she was designed and built with the relatively short range battles of the northeast Atlantic and Baltic in mind, not the long range battles of the Pacific. Thus, her armor is a double-edged sword, very thick on the side for short range attacks, but very weak on the deck should a round manage to land and penetrate there. Similar to her cruiser counterparts in the German tech tree, her AP shells far outshine her HE shells, which leave much to be desired.
| | ===Cons=== |
| | * Con 1 |
| | * Con 2 |
|
| |
|
| With her handling characteristics, there are two primary ways to drive this ship: either joining the main wave as part of the battle line, or as the capital ship for a cruiser group that did not join the main line to form a flanking unit. One important thing to remember is that Tirpitz has fallen from its place as the top brawler at tier VIII, for a number of reasons. While still a daunting opponent, the addition of the Bismarck means you can no longer be sure of beating anything at close range. With its equal secondary armament (though no longer superior as of the range buff in update 0.6.4) and access to Hydroacoustic Search, the Bismarck is fully capable of outbrawling the Tirpitz. However, If you find yourself in a close range fight, your torpedoes can provide a valuable advantage. But if you intend to utilize a brawling playstyle, remember that you are no longer assured of victory at close range.
| |
|
| |
|
| Tirpitz is a very capable ship in the right hands, and especially inside its torpedo range, is not to be underestimated. However, it has become very difficult to play effectively. With all these things considered, team play and knowing where to be, when to be there, and using her assets effectively when you get there will carry you to victory.
| | ==Ship Stats== |
| | <div class="b-popup"><div class="b-popup_head js-tech-nav_head"><div><h2>Hull Information</h2></div><span class="b-tech-nav_arrow"></span></div><div class="b-popup_content" style="display: none;"><div> |
| | <div style="border: 2px solid rgba(212,175,55,0.8); border-radius: 3px; margin-bottom: 1em; overflow: hidden;"> |
| | {| class="wikitable" style="margin:0; color:inherit; width:100%" |
| | ! style="background-color:#1a3244; color:#ffffff; font-weight:bold;" | SURVIVABILITY !! style="background-color:#1a3244; color:#ffffff; font-weight:bold;" | |
| | |- |
| | | style="color:inherit;" | • Hit Points || style="color:inherit;" | 69300 |
| | |- |
| | | style="color:inherit;" | • Torpedo protection damage reduction (%) || style="color:inherit;" | — |
| | |} |
| | </div> |
|
| |
|
| |Pros=<!-- write list of positive points below. use * as in ordinary wiki-list. --> | | <div style="border: 2px solid rgba(212,175,55,0.8); border-radius: 3px; margin-bottom: 1em; overflow: hidden;"> |
| * Fast turret traverse and main battery reload time (26 seconds) for a battleship.
| | {| class="wikitable" style="margin:0; color:inherit; width:100%" |
| * Surprisingly nimble for a battleship of her size, with an excellent top speed (30 knots).
| | ! style="background-color:#1a3244; color:#ffffff; font-weight:bold;" | ARMOR DETAIL !! style="background-color:#1a3244; color:#ffffff; font-weight:bold;" | |
| * Has one quadruple torpedo tube on each side located near amidships.
| | |- |
| * Insanely good secondary battery.
| | | style="color:inherit;" | • Belt (mm) || style="color:inherit;" | — |
| * Reminiscent of earlier battleship gameplay: the closer she gets, the more dangerous she becomes to her enemies.
| | |- |
| * Well-protected citadel and impressive durability. ''{{#var:ship_name}}'' is among the hardest ships in the game to land citadel hits against; most AP shells will land normal penetrations and are thus easier to repair damage from.
| | | style="color:inherit;" | • Deck (mm) || style="color:inherit;" | — |
| * Lower (for her tier and class) caliber shells result in fewer overpenetrations against broadside cruisers.
| | |- |
| | | style="color:inherit;" | • Superstructure (mm) || style="color:inherit;" | — |
| | |- |
| | | style="color:inherit;" | • Extremities (mm) || style="color:inherit;" | — |
| | |} |
| | </div> |
|
| |
|
| |Cons=<!-- write list of negative points below. use * as in ordinary wiki-list. --> | | <div style="border: 2px solid rgba(212,175,55,0.8); border-radius: 3px; margin-bottom: 1em; overflow: hidden;"> |
| * 15-inch guns have trouble with angled enemy battleships (use HE against the superstructure or choose a different target).
| | {| class="wikitable" style="margin:0; color:inherit; width:100%" |
| * Only has eight (8) barrels, while every other ship at this tier has nine (9) or more of a higher caliber.
| | ! style="background-color:#1a3244; color:#ffffff; font-weight:bold;" | MANEUVERABILITY !! style="background-color:#1a3244; color:#ffffff; font-weight:bold;" | |
| * Torpedoes only have a 6.0 km range and are vulnerable to frequent incapacitations due to their location on her deck.
| | |- |
| * Anti-aircraft suite is not as strong as that of sister ship ''[[Bismarck]]''.
| | | style="color:inherit;" | • Maximum speed (kt) || style="color:inherit;" | 30.5 |
| * Weak torpedo protection, although better than ''[[North Carolina]]''.
| | |- |
| * Extremely vulnerable to fires. Superstructures can be set on fire by calibers of any size quite easily.
| | | style="color:inherit;" | • Turning circle radius (m) || style="color:inherit;" | 850 |
| * Armor scheme remains vulnerable to full penetrations by armor-piercing shells when showing the flat broadside of the ship to the enemy; may not take citadel damage, but a lot of regular penetration damage hurts just as badly.
| | |- |
| * HE main guns' shells have low damage and fire chance which makes them ineffective.
| | | style="color:inherit;" | • Rudder-shift time (sec) || style="color:inherit;" | 20.9 |
| | |} |
| | </div> |
|
| |
|
| |Research=<!-- write text about priority sequence of research below --> | | <div style="border: 2px solid rgba(212,175,55,0.8); border-radius: 3px; margin-bottom: 1em; overflow: hidden;"> |
| As a premium ship, ''Tirpitz'' doesn't have any upgrades to research.
| | {| class="wikitable" style="margin:0; color:inherit; width:100%" |
| | ! style="background-color:#1a3244; color:#ffffff; font-weight:bold;" | CONCEALMENT !! style="background-color:#1a3244; color:#ffffff; font-weight:bold;" | |
| | |- |
| | | style="color:inherit;" | • Detectability by sea (km) || style="color:inherit;" | 15.89 |
| | |- |
| | | style="color:inherit;" | • Detectability by air (km) || style="color:inherit;" | 10.0 |
| | |- |
| | | style="color:inherit;" | • Detectability after firing main guns in smoke (km) || style="color:inherit;" | 15.05 |
| | |- |
| | | style="color:inherit;" | • Detectability by depths (km) || style="color:inherit;" | 10.0 |
| | |} |
| | </div> |
|
| |
|
| |OptimalConfiguration= | | </div></div></div> |
| | <div class="b-popup"><div class="b-popup_head js-tech-nav_head"><div><h2>Main Battery</h2></div><span class="b-tech-nav_arrow"></span></div><div class="b-popup_content" style="display: none;"><div><div style="border: 2px solid rgba(212,175,55,0.8); border-radius: 3px; margin-bottom: 1em; overflow: hidden;"> |
| | {| class="wikitable" style="margin:0; color:inherit; width:100%" |
| | ! style="background-color:#1a3244; color:#ffffff; font-weight:bold;" | MAIN BATTERY !! style="background-color:#1a3244; color:#ffffff; font-weight:bold;" | |
| | |- |
| | | style="color:inherit;" | • Arrangement || style="color:inherit;" | 4×2 380mm |
| | |- |
| | | style="color:inherit;" | • Firing range (km) || style="color:inherit;" | 21.45 |
| | |- |
| | | style="color:inherit;" | • Reload time (sec) || style="color:inherit;" | 26.0 |
| | |- |
| | | style="color:inherit;" | • Rate of fire (shots/min) || style="color:inherit;" | 2.3 |
| | |- |
| | | style="color:inherit;" | • 180° turn time (sec) || style="color:inherit;" | 36.0 |
| | |} |
| | </div> |
|
| |
|
| |Upgrades=<!-- write text about best upgrades below --> | | <div style="border: 2px solid rgba(212,175,55,0.8); border-radius: 3px; margin-bottom: 1em; overflow: hidden;"> |
| ''{{#var:ship_name}}'' has access to five Upgrade Slots as a Tier VIII ship. ''{{#var:ship_name}}'' also has the option of building for Secondaries or for AA.
| | {| class="wikitable" style="margin:0; color:inherit; width:100%" |
| * '''Slot 1:''' {{Main Armaments Modification 1}} to improve her main battery and torpedo tubes survival.
| | ! style="background-color:#1a3244; color:#ffffff; font-weight:bold;" | DISPERSION !! style="background-color:#1a3244; color:#ffffff; font-weight:bold;" | |
| * '''Slot 2:''' {{Damage Control System Modification 1}} to improve her overall survival in battle.
| | |- |
| * '''Slot 3:''' {{Aiming Systems Modification 1}} to improve her main battery accuracy, {{AA Guns Modification 1}} for an AA build, or {{Secondary Battery Modification 1}} for a secondary build. Please take note that {{Torpedo Tubes Modification 1}} is STRICTLY unrecommended.
| | | style="color:inherit;" | • Dispersion type || style="color:inherit;" | Standard BB dispersion |
| * '''Slot 4:''' {{Damage Control System Modification 2}} to further improve her overall survival. {{Steering Gears Modification 1}} is also an option to improve her maneuverability.
| | |- |
| * '''Slot 5:''' {{Concealment System Modification 1}} to reduce her detection range. {{Torpedo Lookout System}} is also a viable choice if torpedoes are a recurring threat.
| | | style="color:inherit;" | • Dispersion formula || style="color:inherit;" | Dispersion (m) = 10 × range(km) + 60 |
| | |- |
| | | style="color:inherit;" | • Sigma || style="color:inherit;" | 1.8 |
| | |- |
| | | style="color:inherit;" | • Maximum dispersion (m) || style="color:inherit;" | 274 |
| | |- |
| | | style="color:inherit;" | • Dispersion at 5 km || style="color:inherit;" | 110 |
| | |- |
| | | style="color:inherit;" | • Dispersion at 10 km || style="color:inherit;" | 160 |
| | |- |
| | | style="color:inherit;" | • Dispersion at 15 km || style="color:inherit;" | 210 |
| | |- |
| | | style="color:inherit;" | • Dispersion at 20 km || style="color:inherit;" | 260 |
| | |- |
| | | style="color:inherit;" | • Dispersion at 21.45 km || style="color:inherit;" | 274 |
| | |} |
| | </div> |
|
| |
|
| |CommanderSkills=
| | <div style="border: 2px solid rgba(212,175,55,0.8); border-radius: 3px; margin-bottom: 1em; overflow: hidden;"> |
| '''Secondary Battery Build:''' Following along with the theme of maximizing the punishment dished out by ''Tirpitz''’s secondaries, captains should invest in Basic Firing Training, Expert Marskman, Superintendent, and Advanced Firing Training. Manual Control for Secondary Armament is a strong skill in this build, but it only allows the ship's secondaries to fire at a single target at a time. Some captains will prefer this skill; others will not. Extra skill points should be invested in either Basics of Survivability, High Alert, or Vigilance, as desired.
| | {| class="wikitable" style="margin:0; color:inherit; width:100%" |
| | ! style="background-color:#1a3244; color:#ffffff; font-weight:bold;" | HE SHELL !! style="background-color:#1a3244; color:#ffffff; font-weight:bold;" | |
| | |- |
| | | style="color:inherit;" | • Name || style="color:inherit;" | 380 mm Spr.Gr. L/4.6 |
| | |- |
| | | style="color:inherit;" | • Maximum damage || style="color:inherit;" | 4400 |
| | |- |
| | | style="color:inherit;" | • Fire chance (%) || style="color:inherit;" | 34.0% |
| | |- |
| | | style="color:inherit;" | • Shell velocity (m/s) || style="color:inherit;" | 820 |
| | |- |
| | | style="color:inherit;" | • Shell weight (kg) || style="color:inherit;" | 800 |
| | |- |
| | | style="color:inherit;" | • Penetration (mm) || style="color:inherit;" | 95 |
| | |} |
| | </div> |
|
| |
|
| '''Anti-Aircraft Build:''' Similar to the secondary-focused build, Basic Firing Training, Expert Marskman, Superintendent, and Advanced Firing Training form the core of the commander skills. Captains then double up on Level 4 skills and pick up Manual Fire Control for AA Armament. German long-range AA batteries are all in excess of 85mm, allowing them to make good use of the skill and dish out extreme punishment to enemy aircraft.
| |
|
| |
|
| {{Commander Skills 3 BB | | <div style="border: 2px solid rgba(212,175,55,0.8); border-radius: 3px; margin-bottom: 1em; overflow: hidden;"> |
| <!-- Ratings 1,2,3 are legit. Others are ignored.-->
| | {| class="wikitable" style="margin:0; color:inherit; width:100%" |
| | rating11 = <!-- Gun Feeder --> | | ! style="background-color:#1a3244; color:#ffffff; font-weight:bold;" | AP SHELL !! style="background-color:#1a3244; color:#ffffff; font-weight:bold;" | |
| | rating12 = 2 <!-- Pyrotechnician --> | | |- |
| | rating13 = <!-- Consumables Specialist -->
| | | style="color:inherit;" | • Name || style="color:inherit;" | 380 mm P.Spr.Gr. L/4.4 |
| | rating14 = <!-- Emergency Repair Specialist --> | | |- |
| | rating15 = <!-- Incoming Fire Alert --> | | | style="color:inherit;" | • Maximum damage || style="color:inherit;" | 11600 |
| | rating16 = <!-- Preventive Maintenance --> | | |- |
| | | style="color:inherit;" | • Shell velocity (m/s) || style="color:inherit;" | 820 |
| | |- |
| | | style="color:inherit;" | • Shell weight (kg) || style="color:inherit;" | 800 |
| | |- |
| | | style="color:inherit;" | • Fuse time (sec) || style="color:inherit;" | 0.033 |
| | |- |
| | | style="color:inherit;" | • Ricochet start (°) || style="color:inherit;" | 45 |
| | |- |
| | | style="color:inherit;" | • Always ricochet (°) || style="color:inherit;" | 60 |
| | |- |
| | | style="color:inherit;" | • Normalisation (°) || style="color:inherit;" | 6 |
| | |- |
| | | style="color:inherit;" | • Arming threshold (mm) || style="color:inherit;" | 63 |
| | |} |
| | </div> |
| | </div></div></div> |
| | <div class="b-popup"><div class="b-popup_head js-tech-nav_head"><div><h2>Torpedoes</h2></div><span class="b-tech-nav_arrow"></span></div><div class="b-popup_content" style="display: none;"><div> |
| | <div style="border: 2px solid rgba(212,175,55,0.8); border-radius: 3px; margin-bottom: 1em; overflow: hidden;"> |
| | {| class="wikitable" style="margin:0; color:inherit; width:100%" |
| | ! style="background-color:#1a3244; color:#ffffff; font-weight:bold;" | TORPEDO LAUNCHERS !! style="background-color:#1a3244; color:#ffffff; font-weight:bold;" | |
| | |- |
| | | style="color:inherit;" | • Number of launchers || style="color:inherit;" | 1 |
| | |- |
| | | style="color:inherit;" | • Torpedo name || style="color:inherit;" | PGPT001 |
| | |- |
| | | style="color:inherit;" | • Reload time (sec) || style="color:inherit;" | 90.0 |
| | |- |
| | | style="color:inherit;" | • 180° turn time (sec) || style="color:inherit;" | 7.2 |
| | |- |
| | | style="color:inherit;" | • Damage || style="color:inherit;" | 38100 |
| | |- |
| | | style="color:inherit;" | • Range (km) || style="color:inherit;" | 0.2 |
| | |- |
| | | style="color:inherit;" | • Speed (kt) || style="color:inherit;" | 64 |
| | |- |
| | | style="color:inherit;" | • Detectability (km) || style="color:inherit;" | 1.3 |
| | |- |
| | | style="color:inherit;" | • Flooding chance (%) || style="color:inherit;" | 2.27% |
| | |} |
| | </div> |
|
| |
|
| | rating21 = 2 <!-- Grease the Gears -->
| | </div></div></div> |
| | rating22 = 2 <!-- Inertial Fuse for HE Shells -->
| | <div class="b-popup"><div class="b-popup_head js-tech-nav_head"><div><h2>Secondary Battery</h2></div><span class="b-tech-nav_arrow"></span></div><div class="b-popup_content" style="display: none;"><div> |
| | rating23 = <!-- Consumables Enhancements -->
| | <div style="border: 2px solid rgba(212,175,55,0.8); border-radius: 3px; margin-bottom: 1em; overflow: hidden;"> |
| | rating24 = <!-- Vigilance --> | | {| class="wikitable" style="margin:0; color:inherit; width:100%" |
| | rating25 = <!-- Priority Target --> | | ! style="background-color:#1a3244; color:#ffffff; font-weight:bold;" | SECONDARY BATTERY !! style="background-color:#1a3244; color:#ffffff; font-weight:bold;" | |
| | rating26 = <!-- AA Gunner --> | | |- |
| | | style="color:inherit;" | • Secondary battery range (km) || style="color:inherit;" | 7.6 |
| | |} |
| | </div> |
|
| |
|
| | rating31 = <!-- Super-Heavy AP Shells -->
| | <div style="border: 2px solid rgba(212,175,55,0.8); border-radius: 3px; margin-bottom: 1em; overflow: hidden;"> |
| | rating32 = 2 <!-- Long-Range Secondary Battery Shells --> | | {| class="wikitable" style="margin:0; color:inherit; width:100%" |
| | rating33 = 3 <!-- Adrenaline Rush --> | | ! style="background-color:#1a3244; color:#ffffff; font-weight:bold;" | SECONDARY ARMAMENT 1 !! style="background-color:#1a3244; color:#ffffff; font-weight:bold;" | |
| | rating34 = <!-- Basics of Survivability --> | | |- |
| | rating35 = <!-- Enhanced Anti-Torpedo Protection --> | | | style="color:inherit;" | • Shell type || style="color:inherit;" | HE |
| | rating36 = <!-- Expert AA Marksman --> | | |- |
| | | style="color:inherit;" | • Name || style="color:inherit;" | 150 mm Spr.Gr. L/4.5 |
| | |- |
| | | style="color:inherit;" | • Arrangement || style="color:inherit;" | 2x150mm |
| | |- |
| | | style="color:inherit;" | • Rate of fire (shots/min) || style="color:inherit;" | 8.0 |
| | |- |
| | | style="color:inherit;" | • Maximum damage || style="color:inherit;" | 1700 |
| | |- |
| | | style="color:inherit;" | • Shell velocity (m/s) || style="color:inherit;" | 875 |
| | |- |
| | | style="color:inherit;" | • Penetration (mm) || style="color:inherit;" | 38 |
| | |- |
| | | style="color:inherit;" | • Fire chance (%) || style="color:inherit;" | 8.0% |
| | |} |
| | </div> |
|
| |
|
| | rating41 = <!-- Swift in Silence -->
| | <div style="border: 2px solid rgba(212,175,55,0.8); border-radius: 3px; margin-bottom: 1em; overflow: hidden;"> |
| | rating42 = 2 <!-- Improved Secondary Battery Aiming --> | | {| class="wikitable" style="margin:0; color:inherit; width:100%" |
| | rating43 = 2 <!-- Close Quarters Combat --> | | ! style="background-color:#1a3244; color:#ffffff; font-weight:bold;" | SECONDARY ARMAMENT 2 !! style="background-color:#1a3244; color:#ffffff; font-weight:bold;" | |
| | rating44 = 2 <!-- Emergency Repair Expert --> | | |- |
| | rating45 = <!-- Concealment Expert --> | | | style="color:inherit;" | • Shell type || style="color:inherit;" | HE |
| | rating46 = 3 <!-- Fire Prevention Expert --> | | |- |
| }} | | | style="color:inherit;" | • Name || style="color:inherit;" | 105 mm Spr.Gr. Kz. |
| | |- |
| | | style="color:inherit;" | • Arrangement || style="color:inherit;" | 2x105mm |
| | |- |
| | | style="color:inherit;" | • Rate of fire (shots/min) || style="color:inherit;" | 17.9 |
| | |- |
| | | style="color:inherit;" | • Maximum damage || style="color:inherit;" | 1200 |
| | |- |
| | | style="color:inherit;" | • Shell velocity (m/s) || style="color:inherit;" | 900 |
| | |- |
| | | style="color:inherit;" | • Penetration (mm) || style="color:inherit;" | 26 |
| | |- |
| | | style="color:inherit;" | • Fire chance (%) || style="color:inherit;" | 5.0% |
| | |} |
| | </div> |
|
| |
|
| | <div style="border: 2px solid rgba(212,175,55,0.8); border-radius: 3px; margin-bottom: 1em; overflow: hidden;"> |
| | {| class="wikitable" style="margin:0; color:inherit; width:100%" |
| | ! style="background-color:#1a3244; color:#ffffff; font-weight:bold;" | SECONDARY ARMAMENT 3 !! style="background-color:#1a3244; color:#ffffff; font-weight:bold;" | |
| | |- |
| | | style="color:inherit;" | • Shell type || style="color:inherit;" | HE |
| | |- |
| | | style="color:inherit;" | • Name || style="color:inherit;" | PGGS002_150mm_SKC_28_RF |
| | |- |
| | | style="color:inherit;" | • Arrangement || style="color:inherit;" | 2x150mm |
| | |- |
| | | style="color:inherit;" | • Rate of fire (shots/min) || style="color:inherit;" | 8.0 |
| | |- |
| | | style="color:inherit;" | • Maximum damage || style="color:inherit;" | 1700 |
| | |- |
| | | style="color:inherit;" | • Shell velocity (m/s) || style="color:inherit;" | 875 |
| | |- |
| | | style="color:inherit;" | • Penetration (mm) || style="color:inherit;" | 38 |
| | |- |
| | | style="color:inherit;" | • Fire chance (%) || style="color:inherit;" | 8.0% |
| | |} |
| | </div> |
|
| |
|
| |Consumables=<!-- write text about selection of Consumables below -->
| | </div></div></div> |
| ''{{#var:ship_name}}'' can equip the following consumables:
| | <div class="b-popup"><div class="b-popup_head js-tech-nav_head"><div><h2>Airstrike</h2></div><span class="b-tech-nav_arrow"></span></div><div class="b-popup_content" style="display: none;"><div> |
| * '''Slot 1:''' {{Damage Control Party}}
| |
| * '''Slot 2:''' {{Repair Party}}
| |
| * '''Slot 3:''' {{Spotting Aircraft}} '''or''' {{Catapult Fighter}}
| |
|
| |
|
| |Camouflage=<!-- write text about useful camouflage below --> | | <div style="border: 2px solid rgba(212,175,55,0.8); border-radius: 3px; margin-bottom: 1em; overflow: hidden;"> |
| {{Prem Ship Camo Insert|shiptier=8}} | | {| class="wikitable" style="margin:0; color:inherit; width:100%" |
| | ! style="background-color:#1a3244; color:#ffffff; font-weight:bold;" | ASW AIRSTRIKE (DEPTH CHARGES) !! style="background-color:#1a3244; color:#ffffff; font-weight:bold;" | |
| | |- |
| | | style="color:inherit;" | • Range (km) || style="color:inherit;" | 10 |
| | |- |
| | | style="color:inherit;" | • Minimum range (km) || style="color:inherit;" | 0.5 |
| | |- |
| | | style="color:inherit;" | • Reload time (sec) || style="color:inherit;" | 30.0 |
| | |- |
| | | style="color:inherit;" | • Number of aircraft || style="color:inherit;" | 1 |
| | |- |
| | | style="color:inherit;" | • Depth charges in payload || style="color:inherit;" | 2 |
| | |- |
| | | style="color:inherit;" | • Damage || style="color:inherit;" | 4200 |
| | |- |
| | | style="color:inherit;" | • Deployment || style="color:inherit;" | Manual |
| | |} |
| | </div> |
| | </div></div></div> |
| | <div class="b-popup"><div class="b-popup_head js-tech-nav_head"><div><h2>AA Defense</h2></div><span class="b-tech-nav_arrow"></span></div><div class="b-popup_content" style="display: none;"><div> |
| | <div style="border: 2px solid rgba(212,175,55,0.8); border-radius: 3px; margin-bottom: 1em; overflow: hidden;"> |
| | {| class="wikitable" style="margin:0 0 0.8em 0; width:100%; color:inherit;" |
| | ! style="background-color:#1a3244; color:#ffffff; font-weight:bold;" | AA ARMAMENT !! style="background-color:#1a3244; color:#ffffff; font-weight:bold;" | MOUNTS × BARRELS |
| | |- |
| | | style="color:inherit;" | 105 mm || style="color:inherit;" | 8 × 2 |
| | |- |
| | | style="color:inherit;" | 37 mm || style="color:inherit;" | 8 × 2 |
| | |- |
| | | style="color:inherit;" | 20 mm || style="color:inherit;" | 8 × 4 + 12 × 1 |
| | |} |
|
| |
|
| |Signals=<!-- write text about best set of signals below --> | | '''Continuous damage''' — average DPS within each action zone |
| | {| class="wikitable" style="margin:0 0 0.8em 0; width:100%; color:inherit;" |
| | ! style="background-color:#1a3244; color:#ffffff; font-weight:bold;" | RANGE !! style="background-color:#1a3244; color:#ffffff; font-weight:bold;" | DPS !! style="background-color:#1a3244; color:#ffffff; font-weight:bold;" | HIT CHANCE !! style="background-color:#1a3244; color:#ffffff; font-weight:bold;" | ACTION ZONE (km) |
| | |- |
| | | style="color:inherit;" | Short-range || style="color:inherit;" | 185.5 || style="color:inherit;" | 70% || style="color:inherit;" | 2.0 |
| | |- |
| | | style="color:inherit;" | Mid-range || style="color:inherit;" | 38.5 || style="color:inherit;" | 75% || style="color:inherit;" | 3.5 |
| | |- |
| | | style="color:inherit;" | Long-range || style="color:inherit;" | 171.5 || style="color:inherit;" | 75% || style="color:inherit;" | 5.2 |
| | |} |
|
| |
|
| {{Signal Flags | | '''Damage by shell explosions''' |
| | November Echo Setteseven = 2 | | {| class="wikitable" style="margin:0 0 0.8em 0; width:100%; color:inherit;" |
| | Mike Yankee Soxisix = 3 | | ! style="background-color:#1a3244; color:#ffffff; font-weight:bold;" | EXPLOSIONS / SALVO !! style="background-color:#1a3244; color:#ffffff; font-weight:bold;" | DAMAGE !! style="background-color:#1a3244; color:#ffffff; font-weight:bold;" | HIT CHANCE !! style="background-color:#1a3244; color:#ffffff; font-weight:bold;" | ACTION ZONE (km) |
| | India X-Ray = 1 | | |- |
| | Juliet Whiskey Unaone = | | | style="color:inherit;" | 7 || style="color:inherit;" | 1600 || style="color:inherit;" | 75% || style="color:inherit;" | 3.5–5.2 |
| | Victor Lima = 1 | | |} |
| | Hotel Yankee = 1 | | </div> |
| | | </div></div></div> |
| | November Foxtrot = 1 | |
| | Sierra Mike = 3 | |
| | India Delta = 3 | |
| | Juliet Yankee Bissotwo = 2 | |
| | India Yankee = 2 | |
| | Juliet Charlie = | |
| | |
| }}
| |
|
| |
|
| |Gallery=<!-- write below list of files without tags. description (if necessary) for each should be separated with | --><gallery>
| |
| File:TirpitzStart.jpg
| |
| File:TirpitzSecondaries.jpg
| |
| File:TirpitzFallenSister.jpg|''Tirpitz'' steams ahead to avenge her fallen sister.
| |
| File:TirpitzTorpArcs.jpg|''Tirpitz'' has superb torpedo arcs. But be careful, as these torpedoes are easily damaged/destroyed.
| |
| File:TirpitzTorps.jpg|''Tirpitz'' unleashes her torpedoes. Combined with excellent secondaries and great armor, she is a strong brawler.
| |
| File:TirpitzScout.png|A scout fighter downs an enemy bomber.
| |
| File:TirpitzHit.jpg|''Tirpitz'' is hit by a bomb as she downs an enemy aircraft.
| |
| File:TirpitzTorpBomber.jpg|An enemy torpedo bomber attempts to flee the area as a squadmate is destroyed.
| |
| File:TirpitzDesparateBomb.jpg|Its' home base aircraft carrier destroyed, one dive bomber makes a final attempt to destroy the ''Tirpitz''... and fails.
| |
| File:Tirpitz_attacked_by_planes.jpg|Tirpitz engaged by planes while dodging incoming shells.
| |
| File:PCEE155_Tirpitz_Flag.png|[[Ship:Flags#List_of_Ship_Flags|Flag]] of ''Tirpitz''. Given to players who purchased a special bundle containing ''Tirpitz''.
| |
| </gallery>
| |
|
| |
|
| |History=<!-- write text below -->
| | <!-- Add the ship code here to populate the upgrade table --> |
| <div class="thumb tright">
| | {{Ship Upgrades Section|code=PGSB002_Tirpiz_1942}} |
| {{AnnoWiki|content= | |
| <h2> ''{{#var:ship_name}}'', 1941</h2>
| |
| ====Construction====
| |
| :Builder: Kriegsmarinewerft Wilhemshaven,<br> Wilhemshaven, Germany
| |
| :Laid down: 2nd November 1936
| |
| :Launched: 1st April 1939
| |
| :Commissioned: 25th February 1941
| |
| ----
| |
| ====Specifications====
| |
| :42,900 tons displacement, standard
| |
| :251m length
| |
| :36m beam
| |
| :9.3m draft
| |
| ----
| |
| ====Machinery====
| |
| :Twelve Wagner high-pressure oil-fired boilers
| |
| :Three Brown Boveri geared steam turbines
| |
| :7,775 tons of oil
| |
| ----
| |
| ====Performance====
| |
| :30.5 knots at 160,796 shaft horsepower
| |
| :10,200nm at 16 knots
| |
| ----
| |
| ====Armor====
| |
| :Main Belt: 320mm-60mm
| |
| :Torpedo Bulkhead: 25mm
| |
| :Decks: 50mm
| |
| :Conning Tower: 350mm
| |
| :Turrets: 360mm-130mm
| |
| :Barbettes: 340mm
| |
| :Fore and Aft Plating: 32mm
| |
| ----
| |
| ====Armament====
| |
| =====Main=====
| |
| :Eight (4x2) 380mm L/52 SK C/34 guns
| |
| =====Secondary=====
| |
| :Twelve (6x2) 150mm L/55 SK C/28 guns
| |
| :Sixteen (8x2) 105mm L/65 SK C/28 dual-purpose guns
| |
| =====Anti-aircraft=====
| |
| :Sixteen (8x2) 37mm SK C/30 AA guns
| |
| :Twelve (12x1) 20mm SK C/30 AA guns
| |
| ====Aircraft Facilities====
| |
| :Four Arado Ar 196A floatplanes
| |
| :1 aircraft catapult
| |
|
| |
|
| ----
| |
| ====Complement====
| |
| :103 officers, 1,962 sailors
| |
| }}
| |
| {{AnnoWiki|content=
| |
| <h2> ''{{#var:ship_name}}'', 1944</h2>
| |
| ====Specifications====
| |
| :46,400 tons displacement, standard
| |
| :251m length
| |
| :36m beam
| |
| :10.6m draft
| |
| ----
| |
| ====Armament====
| |
| =====Main=====
| |
| :Eight (4x2) 380mm L/52 SK C/34 guns
| |
| =====Secondary=====
| |
| :Twelve (6x2) 150mm L/55 SK C/28 guns
| |
| :Sixteen (8x2) 105mm L/65 SK C/28 dual-purpose guns
| |
| =====Anti-aircraft=====
| |
| :Sixteen (8x2) 37mm SK C/30 AA guns
| |
| :Fifty-Eight (10x4, 12x1) 20mm SK C/30 or C/38 AA guns
| |
| =====Torpedoes=====
| |
| :Eight (2x4) 53.3cm G7a T1 torpedoes
| |
| ====Aircraft Facilities====
| |
| :Four Arado Ar 196A floatplanes
| |
| :1 aircraft catapult
| |
| ----
| |
| ====Complement====
| |
| :108 officers, 2,500 sailors
| |
|
| |
|
| | <!-- Consumables have to be tagged individually on a slot by slot basis --> |
| | {{Ship Consumables Section|consumables= |
| | * '''Slot 1:''' {{Damage Control Party}} (15.0s action, 80.0s cooldown) |
| | * '''Slot 2:''' {{Repair Party}} (4 charges, 28.0s action, 80.0s cooldown, 346.5 hp/s) |
| | * '''Slot 3:''' {{Spotting Aircraft}} (4 charges, 100.0s action, 240.0s cooldown) '''or''' {{Patrol Fighter}} (3 charges, 60.0s action, 90.0s cooldown) |
| }} | | }} |
| </div>
| |
|
| |
|
| [[File:Tirpitz_altafjord.jpg|none|thumb|x350px|link=|''Tirpitz'' in the Ofotfjord/Bogenfjord, circa 1942.]]
| |
| ===History===
| |
|
| |
|
| ====Design==== | | ==Gallery== |
| ''Tirpitz'' was the second of two ''[[Bismarck]]''-class battleships built for Nazi Germany's Kriegsmarine (navy) during World War II. Named after Grand Admiral Alfred von Tirpitz, the architect of the Kaiserliche Marine (Imperial Navy), the ship was laid down at the Kriegsmarinewerft Wilhelmshaven in November 1936 and her hull was launched two and a half years later. Work was completed in February 1941, when she was commissioned into the German fleet. Like her sister ship ''Bismarck'', ''Tirpitz'' was armed with a main battery of eight 38-centimeter (15-inch) guns in four twin turrets. After a series of wartime modifications she was 2,000 metric tons (2,000 long tons) heavier than ''Bismarck'', making her the heaviest battleship ever built by a European navy.
| | <div class="b-popup"><div class="b-popup_head js-tech-nav_head"><div><h2>WoWs Gallery</h2></div><span class="b-tech-nav_arrow"></span></div><div class="b-popup_content" style="display: none;"><div> |
|
| |
|
| ====Service====
| | <gallery> |
| After completing sea trials in early 1941, ''Tirpitz'' briefly served as the centerpiece of the Baltic Fleet, which was intended to prevent a possible break-out attempt by the Soviet Baltic Fleet. In early 1942, the ship sailed to Norway to act as a deterrent against an Allied invasion. While stationed in Norway, ''Tirpitz'' was also intended to be used to intercept Allied convoys to the Soviet Union, and two such missions were attempted in 1942. ''Tirpitz'' acted as a fleet in being, forcing the British Royal Navy to retain significant naval forces in the area to contain the battleship.
| | </gallery> |
| | </div></div></div> |
|
| |
|
| In September 1943, ''Tirpitz'', along with the battleship ''[[Scharnhorst]]'', bombarded Allied positions on Spitzbergen, the only time the ship used her main battery in an offensive role. Shortly thereafter, the ship was damaged in an attack by British mini-submarines and subsequently subjected to a series of large-scale air raids. On 12 November 1944, British Lancaster bombers equipped with 12,000-pound (5,400 kg) "Tallboy" bombs scored two direct hits and a near miss which caused the ship to capsize rapidly. A deck fire spread to the ammunition magazine for one of the main battery turrets, which caused a large explosion. Figures for the number of men killed in the attack range from 950 to 1,204. Between 1948 and 1957 the wreck was broken up by a joint Norwegian and German salvage operation.
| | <div class="b-popup"><div class="b-popup_head js-tech-nav_head"><div><h2>Historical Gallery</h2></div><span class="b-tech-nav_arrow"></span></div><div class="b-popup_content" style="display: none;"><div> |
| | |
| ====Historical inaccuracies====
| |
| :''Tirpitz'' — at 253.6 meters — is slightly longer than ''[[Bismarck]]''’s 250.5 meters due to the former's slightly different bow. However in game they are the same length.
| |
| | |
| {{VideoYT|RbAWgqlNBzQ}}
| |
| | |
| |HistoricalGallery=<!-- write below list of files without tags. description (if necessary) for each should be separated with | --><gallery>
| |
| File:Tirpitz.jpeg|A recognition drawing of ''Tirpitz'' prepared by the US Navy
| |
| File:Тирпиц.jpg|''Tirpitz'' sliding down the slipway at her launch, 1 April 1939.
| |
| File:Tirpitz camouflaged.jpg|''Tirpitz'' camouflaged in the Fættenfjord.
| |
| File:Tirpitz early.jpg|''Tirpitz'' under way, probably in 1941.
| |
| File:Tirpitz_gunnery_exercise_-_Rugen_Island_-_June_1941.jpg|''Tirpitz'' fires her main battery during a gunnery exercise off of Rugen Island, June 1941.
| |
| File:Тирпитз.jpeg|''Tirpitz'', escorted by several destroyers, steaming in the Bogenfjord in October 1942.
| |
| File:Tirpitz_history-21.jpg|''Tirpitz'' at anchor in the fjords of Norway, protected by torpedo netting.
| |
| File:Fleet Air Arm attack the battleship Tirpitz.jpg|''Tirpitz'' under attack by British carrier aircraft on 3 April 1944.
| |
| File:Тангстен 1.jpeg|''Tirpitz'' moored in Kaafjord; the smoke is an artificial fog generated to hide the ship.
| |
| File:Tromsö, Royal Air Force Bomber Command, 1942-1945 CL2830.jpg|''Tirpitz'' capsized.
| |
|
| |
|
| | <gallery> |
| </gallery> | | </gallery> |
| | </div></div></div> |
|
| |
|
| |Video=<!-- put below video clips with using template VideoYT. You can use html-tags for formatting. -->
| | [[Category:Ships of Germany]] |
| {{VideoYT|2__rXnwFkZI}}
| | [[Category:Battleships]] |
| {{VideoYT|yjxotHiXVYI}}
| | [[Category:Tier VIII ships]] |
| | | [[Category:Premium ships]]<!-- DO NOT DELETE THIS LINE. DO NOT INSERT ANYTHING BELOW THIS LINE --> |
| |Ref= <!-- write below -->
| |
| # [https://en.wikipedia.org/wiki/German_battleship_Tirpitz German battleship ''Tirpitz'' - Wikipedia]
| |
| # [https://en.wikipedia.org/wiki/Bismarck-class_battleship ''Bismarck''-class battleship - Wikipedia]
| |
| # [https://worldofwarships.com/en/news/general-news/armada-tirpitz/ Armada: Tirpitz - News - World of Warships]
| |
| # [https://worldofwarships.com/en/news/general-news/chieftain-talks-3-trailer/ Chieftain Talks: the Hunt for Tirpitz Trailer - News - World of Warships]
| |
| # [https://worldofwarships.com/en/news/history/chieftain-talks-3/ Chieftain Talks: the Hunt for Tirpitz - News - World of Warships]
| |
| # [https://worldofwarships.com/en/news/general-news/tirpitz-now-available/ Premium Ship Spotlight: Tirpitz - Armada - Tirpitz - News - World of Warships]
| |
| # [https://worldofwarships.com/en/news/general-news/building-tirpitz/ Squall Line: Building the Tirpitz - News - World of Warships]
| |
| # [https://www.youtube.com/watch?v=2__rXnwFkZI Armada - Tirpitz - World of Warships Official Channel - YouTube]
| |
| # [https://www.youtube.com/watch?v=dBIFMhp1gUs Chieftain Talks: The Hunt for Tirpitz. Trailer - World of Warships Official Channel - YouTube]
| |
| # [https://www.youtube.com/watch?v=RbAWgqlNBzQ Chieftain Talks: The Hunt for Tirpitz - World of Warships Official Channel - YouTube]
| |
| <references />
| |
| | |
| {{WoWS Ship Changelog Insert|1=
| |
| *Available for testing by supertesters in the game starting from Update 0.4.0.4 .
| |
| *First on sale in the Premium Store from September 10 to September 25, 2015.
| |
| *Returned to sale in the Premium Store from December 10 to 25, 2015.
| |
| *Added permanently to the Premium Store on March 18, 2016.
| |
| *Update 0.5.0.1:
| |
| **Added Messerschmitt Bf.109 G catapult fighter.
| |
| *Update 0.5.3.2:
| |
| **Slightly changed gun models.
| |
| **Type 8 camouflage renamed to Type 10.
| |
| *Update 0.5.6:
| |
| **AA defenses were slightly improved:
| |
| ***The 2x4 20mm Flakvierling 38 AA mount on top of the main turret that was previously unused is now working. As a result, the average AA damage within the 2km AA engagement area radius increased by 6 points (from 78 to 84 points).
| |
| **Aiming angles of torpedo tubes were readjusted for both sides of the ship. For the port side, the torpedo launch sector was moved one degree towards the bow. For the starboard side, the torpedo launch sector width was extended by one degree.
| |
| **Additional AA defenses can now be mounted on the main turrets, because the technology required for this has become available in the game.
| |
| **Went on sale for doubloons directly in the game client (before it was only available in the Premium Store).
| |
| *Update 0.5.8:
| |
| **The armor model of the hull was refined.
| |
| **The firing angles of the main battery turrets were changed: for the second, third, and fourth turrets, the firing angles expanded on each side by 3, 5, and 1 degrees, respectively.
| |
| *Update 0.5.9:
| |
| **Forward and aft ends armor layout revised. Now the armor runs from one side of the ship to the other, while it previously protected only the citadel. Now it will be impossible to hit its citadel with a shell that bypasses the slopes of the deck and the transverse armor protection of the citadel.
| |
| **Armor penetration of a high-explosive projectile 380-mm Spr.Gr. L / 4.6 increased from 64 to 95 mm.
| |
| **Armor penetration of a high-explosive projectile (secondary battery) 150-mm Spr.Gr. L / 4.5 increased from 25 to 37 mm.
| |
| *Update 0.5.11:
| |
| **The correct display of the float plane on the catapult was enabled.
| |
| **The thickness of the armored deck was increased by 30 mm to correct a historical inconsistency.
| |
| *Update 0.5.13:
| |
| **The thickness of the lower part of the armor belt was recalculated according to the new method, similar to the battleship Bismarck, and is now 240 mm instead of the previous 170 mm.
| |
| *Update 0.5.14:
| |
| **The thickness of the rear armor plate of the main battery turrets was changed from 220 to 320 mm.
| |
| *Update 0.5.16:
| |
| **The appearance was adjusted using special technology to improve the display of subtle elements of the model (mainly rigging).
| |
| *Update 0.6.2:
| |
| **Corrected the position of the aircraft on the catapult.
| |
| *Update 0.6.4:
| |
| **The base range of the secondary battery was increased from 4.5 to 7 km.
| |
| *Update 0.6.7:
| |
| **The rotation of the catapult was enabled when the aircraft is launched.
| |
| *Update 0.6.8:
| |
| **For 105 mm secondary battery shells, the chance of setting fire was reduced from 9% to 5%, and the damage from 1300 to 1200.
| |
| **The range of the secondary battery was increased from 7 to 7.5 km.
| |
| *Update 0.6.12:
| |
| **Detectability when firing main guns in smoke changed to 15.05 km.
| |
| **Detection range of the Arado Ar.196 aircraft was increased from 4 km to 7 km in air, and to 8 km by sea.
| |
| *Update 0.6.15:
| |
| **For permanent camouflages "Type 10", "Tarnanstrich" a bonus was added: a -10% discount to the cost of post-battle service.
| |
| *Update 0.7.0:
| |
| **A rangefinder from Halloween is installed on the special "Magnu-S" camouflage.
| |
| *Update 0.7.8:
| |
| **Improved voice acting for the special permanent camouflage "Magnu-S".
| |
| *Update 0.7.12:
| |
| **Fixed a bug with incorrect armor penetration. The armor penetration of the 150 mm secondary HE shells was increased from 36 mm to 37 mm.
| |
| **The following permanent camouflages were removed from the Camouflages window (as they are now purchasable in the Arsenal): "Special", "Norwegian", and "Magnu-S".
| |
| **The coat of arms was added to the battleship's hull.
| |
| *Update 0.8.5:
| |
| **Minor improvements to geometry and textures.
| |
| *Update 0.8.6:
| |
| **The armor penetration of the 105 mm secondary high-explosive projectiles was increased from 18 to 26 mm.
| |
| *Update 0.8.11:
| |
| **The main battery dispersion ellipse was adjusted to that of American and British battleships.
| |
| *Update 0.9.5:
| |
| **Small changes to geometry and textures.
| |
| *Update 0.9.6:
| |
| **The value of the in-game turning circle radius was changed to 850 m to correct prior discrepancy.
| |
| *Update 0.9.9:
| |
| **Temporarily removed from the tech tree. The ship will still be available for purchase in the Armory.
| |
| *Update 0.10.0:
| |
| **Increased accuracy of secondary battery guns.
| |
| **The firing range of the secondary battery was increased to 7.6 km.
| |
| *Update 0.11.0:
| |
| **Added an alternative camo scheme for the "Special" permanent camouflage.
| |
| *Update 0.11.10:
| |
| **Minor fixes to the geometry and textures of the ship.
| |
| *Update 12.3:
| |
| **Fixed the incorrect display of visual effects on the ship, as well as her Magnu-S permanent camouflage.
| |
| }}
| |
| | |
| }}<!-- DO NOT DELETE THIS LINE. DO NOT INSERT ANYTHING BELOW THIS LINE -->
| |



 (15.0s action, 80.0s cooldown)
 (4 charges, 28.0s action, 80.0s cooldown, 346.5 hp/s)
 (4 charges, 100.0s action, 240.0s cooldown) or Patrol Fighter
  (3 charges, 60.0s action, 90.0s cooldown)