|
|
| Line 1: |
Line 1: |
| {{WoWs_Ship|Ship=PJSD507_Yudachi
| | {{#vardefine:ship_name|Yūdachi}} |
| |Promo=<!-- in case of gift or promo ship write conditions to get it. (optional)-->
| | __NOTOC____NOEDITSECTION__ |
| ''{{#var:ship_name}}'' was first released for sale on 13 September 2019.
| |
|
| |
|
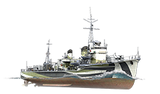
| |Anno=<!-- you can write below short description for the ship. it will replace default once. --> | | <div class="b-description gw-frame-1"><div class="b-description-img b-description-img__indent b-description-img__single"><div style="width:160px; height:102px; opacity:.5; border-radius:2px; position:absolute; left:0; top:0; z-index:1; -webkit-transition:all 0.2s ease-out 0.1s; transition:all 0.2s ease-out 0.1s;">[[File:Wows_anno_flag_japan.png|160px]]</div><div class="l-description-img_class"><span class="b-description-img_type b-description-img_type__Destroyer b-description-img_type__Destroyer-Premium"></span><span class="b-description-img_class">VII</span></div><div class="b-description-img_vehicle">[[File:Ship_PJSD507_Yudachi.png|160px|link=|left]]</div><div class="l-description-img_price"><span class="b-description-img_price b-description-img_price__gold"><span title="''{{#var:ship_name}}'' was first released for sale on DD Month YYYY.">9,000 doubloons</span></span></div></div><p>[[Ship:{{#var:ship_name}}|{{#var:ship_name}}]] — Japan Premium Tier VII [[Ship:Destroyer|Destroyer]].</p><p>Yūdachi, a Shiratsuyu-class destroyer, was laid down in October 1934 and entered service in January 1937. During World War II, she escorted troop transports during the invasions of the Philippines and the Dutch East Indies, and she engaged in the Battles of the Java Sea and off the Santa Cruz Islands. In 1942, the ship delivered reinforcements during the Pacific campaigns. During the First Naval Battle of Guadalcanal, she was damaged by USS Sterett and was subsequently abandoned by her crew. The abandoned hull of Yūdachi was sunk by gunfire from cruiser USS Portland.</p><p> </p></div> |
|
| |
|
| |Performance=<!-- write text about performance in battles below -->
| | ===Pros=== |
| {{AA Sidebar Warning Insert}}
| | * Pro 1 |
| ''{{#var:ship_name}}'' is a ''[[Shiratsuyu]]'' class destroyer representing the Imperial Japanese Navy at Tier VII. Despite visible similarities between herself and her tech tree counterpart, ''{{#var:ship_name}}'' features many improved features, such as increased torpedo range, hit point (HP) pool, and access to the Torpedo Reload Booster consumable without having to sacrifice her smoke generator.
| | * Pro 2 |
|
| |
|
| Overall, ''{{#var:ship_name}}'' represents the essential Japanese destroyer play style, wherein players must engage by delivering patient and deliberate strikes. ''{{#var:ship_name}}'' features long-range torpedoes and excellent concealment, providing her with an enormous window to fire her torpedoes without being spotted. Her main guns exist purely as a last resort and will be primarily ineffective due to slow turret traverse and reload times. In a situation where ''{{#var:ship_name}}'' is spotted, it is recommended that players deploy smoke and return to concealment unless the enemy is at very low health. Even so, with such a small HP pool, it is important to preserve health whenever possible. ''{{#var:ship_name}}'' will excel in stalking and hunting enemy capital ships, but it is recommended that players avoid contesting objectives early in the game or straying far from the fleet when there is a threat of encountering aircraft.
| | ===Cons=== |
| | * Con 1 |
| | * Con 2 |
|
| |
|
| |Pros=<!-- write list of positive points below. use * as in ordinary wiki-list. -->
| |
| * Excellent HE alpha damage
| |
| * Excellent torpedo range
| |
| * Can equip {{Smoke Generator}} and {{Torpedo Reload Booster}} in separate slots
| |
|
| |
|
| |Cons=<!-- write list of negative points below. use * as in ordinary wiki-list. -->
| | ==Ship Stats== |
| * Very poor main battery DPM and turret traverse speed
| | <div class="b-popup"><div class="b-popup_head js-tech-nav_head"><div><h2>Hull Information</h2></div><span class="b-tech-nav_arrow"></span></div><div class="b-popup_content" style="display: none;"><div> |
| * Torpedoes have poor speed and are easily spotted
| | <div style="border: 2px solid rgba(212,175,55,0.8); border-radius: 3px; margin-bottom: 1em; overflow: hidden;"> |
| * Small hitpoint pool
| | {| class="wikitable" style="margin:0; color:inherit; width:100%" |
| * Worse concealment than techtree counterpart ''[[Shiratsuyu]]''
| | ! style="background-color:#1a3244; color:#ffffff; font-weight:bold;" | SURVIVABILITY !! style="background-color:#1a3244; color:#ffffff; font-weight:bold;" | |
| * Abysmal AA defenses, very vulnerable to plane attacks
| | |- |
| | | style="color:inherit;" | • Hit Points || style="color:inherit;" | 13200 |
| | |- |
| | | style="color:inherit;" | • Torpedo protection damage reduction (%) || style="color:inherit;" | — |
| | |} |
| | </div> |
|
| |
|
| |Research=<!-- write text about priority sequence of research below --> | | <div style="border: 2px solid rgba(212,175,55,0.8); border-radius: 3px; margin-bottom: 1em; overflow: hidden;"> |
| As a premium ship, ''{{#var:ship_name}}'' doesn't have any upgrades to research.
| | {| class="wikitable" style="margin:0; color:inherit; width:100%" |
| | ! style="background-color:#1a3244; color:#ffffff; font-weight:bold;" | ARMOR DETAIL !! style="background-color:#1a3244; color:#ffffff; font-weight:bold;" | |
| | |- |
| | | style="color:inherit;" | • Belt (mm) || style="color:inherit;" | — |
| | |- |
| | | style="color:inherit;" | • Deck (mm) || style="color:inherit;" | — |
| | |- |
| | | style="color:inherit;" | • Superstructure (mm) || style="color:inherit;" | — |
| | |- |
| | | style="color:inherit;" | • Extremities (mm) || style="color:inherit;" | — |
| | |} |
| | </div> |
|
| |
|
| |OptimalConfiguration=<!-- write some general text about selection of optimal configuration below (optional)--> | | <div style="border: 2px solid rgba(212,175,55,0.8); border-radius: 3px; margin-bottom: 1em; overflow: hidden;"> |
| | {| class="wikitable" style="margin:0; color:inherit; width:100%" |
| | ! style="background-color:#1a3244; color:#ffffff; font-weight:bold;" | MANEUVERABILITY !! style="background-color:#1a3244; color:#ffffff; font-weight:bold;" | |
| | |- |
| | | style="color:inherit;" | • Maximum speed (kt) || style="color:inherit;" | 34.0 |
| | |- |
| | | style="color:inherit;" | • Turning circle radius (m) || style="color:inherit;" | 570 |
| | |- |
| | | style="color:inherit;" | • Rudder-shift time (sec) || style="color:inherit;" | 4.2 |
| | |} |
| | </div> |
|
| |
|
| |Upgrades=<!-- write text about best upgrades below, add * after upgrade link to designate that another upgrade may be viable --> | | <div style="border: 2px solid rgba(212,175,55,0.8); border-radius: 3px; margin-bottom: 1em; overflow: hidden;"> |
| | {| class="wikitable" style="margin:0; color:inherit; width:100%" |
| | ! style="background-color:#1a3244; color:#ffffff; font-weight:bold;" | CONCEALMENT !! style="background-color:#1a3244; color:#ffffff; font-weight:bold;" | |
| | |- |
| | | style="color:inherit;" | • Detectability by sea (km) || style="color:inherit;" | 6.79 |
| | |- |
| | | style="color:inherit;" | • Detectability by air (km) || style="color:inherit;" | 3.01 |
| | |- |
| | | style="color:inherit;" | • Detectability after firing main guns in smoke (km) || style="color:inherit;" | 2.61 |
| | |- |
| | | style="color:inherit;" | • Detectability by depths (km) || style="color:inherit;" | 3.01 |
| | |} |
| | </div> |
|
| |
|
| The recommended upgrades for ''{{#var:ship_name}}'' are as follows:
| | </div></div></div> |
| * '''Slot 1''': {{Main Armaments Modification 1}}
| | <div class="b-popup"><div class="b-popup_head js-tech-nav_head"><div><h2>Main Battery</h2></div><span class="b-tech-nav_arrow"></span></div><div class="b-popup_content" style="display: none;"><div><div style="border: 2px solid rgba(212,175,55,0.8); border-radius: 3px; margin-bottom: 1em; overflow: hidden;"> |
| * '''Slot 2''': {{Engine Room Protection}}
| | {| class="wikitable" style="margin:0; color:inherit; width:100%" |
| * '''Slot 3''': {{Torpedo Tubes Modification 1}}
| | ! style="background-color:#1a3244; color:#ffffff; font-weight:bold;" | MAIN BATTERY !! style="background-color:#1a3244; color:#ffffff; font-weight:bold;" | |
| * '''Slot 4''': {{Propulsion Modification 1}}
| | |- |
| | | style="color:inherit;" | • Arrangement || style="color:inherit;" | 3×2 127mm |
| | |- |
| | | style="color:inherit;" | • Firing range (km) || style="color:inherit;" | 11.81 |
| | |- |
| | | style="color:inherit;" | • Reload time (sec) || style="color:inherit;" | 9.0 |
| | |- |
| | | style="color:inherit;" | • Rate of fire (shots/min) || style="color:inherit;" | 6.7 |
| | |- |
| | | style="color:inherit;" | • 180° turn time (sec) || style="color:inherit;" | 30.0 |
| | |} |
| | </div> |
|
| |
|
| |CommanderSkills=<!-- write text about best set of Commander Skills below --> | | <div style="border: 2px solid rgba(212,175,55,0.8); border-radius: 3px; margin-bottom: 1em; overflow: hidden;"> |
| Key skills for ''{{#var:ship_name}}'' commanders include Last Stand and Concealment Expert.
| | {| class="wikitable" style="margin:0; color:inherit; width:100%" |
| | ! style="background-color:#1a3244; color:#ffffff; font-weight:bold;" | DISPERSION !! style="background-color:#1a3244; color:#ffffff; font-weight:bold;" | |
| | |- |
| | | style="color:inherit;" | • Dispersion type || style="color:inherit;" | Standard DD dispersion |
| | |- |
| | | style="color:inherit;" | • Dispersion formula || style="color:inherit;" | Dispersion (m) = 7.5 × range(km) + 15 |
| | |- |
| | | style="color:inherit;" | • Sigma || style="color:inherit;" | 2.0 |
| | |- |
| | | style="color:inherit;" | • Maximum dispersion (m) || style="color:inherit;" | 103 |
| | |- |
| | | style="color:inherit;" | • Dispersion at 5 km || style="color:inherit;" | 52 |
| | |- |
| | | style="color:inherit;" | • Dispersion at 10 km || style="color:inherit;" | 90 |
| | |- |
| | | style="color:inherit;" | • Dispersion at 11.81 km || style="color:inherit;" | 104 |
| | |} |
| | </div> |
|
| |
|
| {{Commander Skills 3 DD
| | <div style="border: 2px solid rgba(212,175,55,0.8); border-radius: 3px; margin-bottom: 1em; overflow: hidden;"> |
| <!-- Ratings 1,2,3 are legit. Others are ignored.--> | | {| class="wikitable" style="margin:0; color:inherit; width:100%" |
| | rating11 = <!-- Grease the Gears --> | | ! style="background-color:#1a3244; color:#ffffff; font-weight:bold;" | HE SHELL !! style="background-color:#1a3244; color:#ffffff; font-weight:bold;" | |
| | rating12 = <!-- Liquidator --> | | |- |
| | rating13 = <!-- Consumables Specialist --> | | | style="color:inherit;" | • Name || style="color:inherit;" | 127 mm HE Type1 |
| | rating14 = <!-- Gun Feeder --> | | |- |
| | rating15 = <!-- Incoming Fire Alert --> | | | style="color:inherit;" | • Maximum damage || style="color:inherit;" | 2150 |
| | rating16 = 2 <!-- Preventive Maintenance --> | | |- |
| | | style="color:inherit;" | • Fire chance (%) || style="color:inherit;" | 9.0% |
| | |- |
| | | style="color:inherit;" | • Shell velocity (m/s) || style="color:inherit;" | 915 |
| | |- |
| | | style="color:inherit;" | • Shell weight (kg) || style="color:inherit;" | 23 |
| | |- |
| | | style="color:inherit;" | • Penetration (mm) || style="color:inherit;" | 21 |
| | |} |
| | </div> |
|
| |
|
| | rating21 = <!-- Pyrotechnician -->
| |
| | rating22 = 2 <!-- Swift Fish -->
| |
| | rating23 = 2 <!-- Consumables Enhancements -->
| |
| | rating24 = <!-- Extra-Heavy AP Shells -->
| |
| | rating25 = <!-- Priority Target -->
| |
| | rating26 = 3 <!-- Last Stand -->
| |
|
| |
|
| | rating31 = <!-- Main Battery & AA Specialist --> | | <div style="border: 2px solid rgba(212,175,55,0.8); border-radius: 3px; margin-bottom: 1em; overflow: hidden;"> |
| | rating32 = 2 <!-- Fill the Tubes --> | | {| class="wikitable" style="margin:0; color:inherit; width:100%" |
| | rating33 = 2 <!-- Adrenaline Rush --> | | ! style="background-color:#1a3244; color:#ffffff; font-weight:bold;" | AP SHELL !! style="background-color:#1a3244; color:#ffffff; font-weight:bold;" | |
| | rating34 = <!-- Inertial Fuse for HE Shells -->
| | |- |
| | rating35 = <!-- Superintendent --> | | | style="color:inherit;" | • Name || style="color:inherit;" | 127 mm AP Type0 |
| | rating36 = 1 <!-- Survivability Expert --> | | |- |
| | | style="color:inherit;" | • Maximum damage || style="color:inherit;" | 2200 |
| | |- |
| | | style="color:inherit;" | • Shell velocity (m/s) || style="color:inherit;" | 915 |
| | |- |
| | | style="color:inherit;" | • Shell weight (kg) || style="color:inherit;" | 23 |
| | |- |
| | | style="color:inherit;" | • Fuse time (sec) || style="color:inherit;" | 0.03 |
| | |- |
| | | style="color:inherit;" | • Ricochet start (°) || style="color:inherit;" | 45 |
| | |- |
| | | style="color:inherit;" | • Always ricochet (°) || style="color:inherit;" | 60 |
| | |- |
| | | style="color:inherit;" | • Normalisation (°) || style="color:inherit;" | 10 |
| | |- |
| | | style="color:inherit;" | • Arming threshold (mm) || style="color:inherit;" | 21 |
| | |} |
| | </div> |
| | </div></div></div> |
| | <div class="b-popup"><div class="b-popup_head js-tech-nav_head"><div><h2>Torpedoes</h2></div><span class="b-tech-nav_arrow"></span></div><div class="b-popup_content" style="display: none;"><div> |
| | <div style="border: 2px solid rgba(212,175,55,0.8); border-radius: 3px; margin-bottom: 1em; overflow: hidden;"> |
| | {| class="wikitable" style="margin:0; color:inherit; width:100%" |
| | ! style="background-color:#1a3244; color:#ffffff; font-weight:bold;" | TORPEDO LAUNCHERS !! style="background-color:#1a3244; color:#ffffff; font-weight:bold;" | |
| | |- |
| | | style="color:inherit;" | • Number of launchers || style="color:inherit;" | 1 |
| | |- |
| | | style="color:inherit;" | • Torpedo name || style="color:inherit;" | PJPT037 |
| | |- |
| | | style="color:inherit;" | • Reload time (sec) || style="color:inherit;" | 100.0 |
| | |- |
| | | style="color:inherit;" | • 180° turn time (sec) || style="color:inherit;" | 7.2 |
| | |- |
| | | style="color:inherit;" | • Damage || style="color:inherit;" | 43300 |
| | |- |
| | | style="color:inherit;" | • Range (km) || style="color:inherit;" | 0.5 |
| | |- |
| | | style="color:inherit;" | • Speed (kt) || style="color:inherit;" | 64 |
| | |- |
| | | style="color:inherit;" | • Detectability (km) || style="color:inherit;" | 1.9 |
| | |- |
| | | style="color:inherit;" | • Flooding chance (%) || style="color:inherit;" | 2.59% |
| | |} |
| | </div> |
|
| |
|
| | rating41 = <!-- Main Battery & AA Expert -->
| | </div></div></div> |
| | rating42 = 2 <!-- Swift in Silence -->
| | <div class="b-popup"><div class="b-popup_head js-tech-nav_head"><div><h2>AA Defense</h2></div><span class="b-tech-nav_arrow"></span></div><div class="b-popup_content" style="display: none;"><div> |
| | rating43 = 1 <!-- Radio Location -->
| | <div style="border: 2px solid rgba(212,175,55,0.8); border-radius: 3px; margin-bottom: 1em; overflow: hidden;"> |
| | rating44 = <!-- Fearless Brawler --> | | {| class="wikitable" style="margin:0 0 0.8em 0; width:100%; color:inherit;" |
| | rating45 = 3 <!-- Concealment Expert --> | | ! style="background-color:#1a3244; color:#ffffff; font-weight:bold;" | AA ARMAMENT !! style="background-color:#1a3244; color:#ffffff; font-weight:bold;" | MOUNTS × BARRELS |
| | rating46 = <!-- Dazzle --> | | |- |
| }}
| | | style="color:inherit;" | 40 mm || style="color:inherit;" | 2 × 1 |
| | |} |
|
| |
|
| |Consumables=<!-- write text about selection of Consumables below --> | | '''Continuous damage''' — average DPS within each action zone |
| ''{{#var:ship_name}}'' equips the following consumables:
| | {| class="wikitable" style="margin:0 0 0.8em 0; width:100%; color:inherit;" |
| * '''Slot 1''': {{Damage Control Party}}
| | ! style="background-color:#1a3244; color:#ffffff; font-weight:bold;" | RANGE !! style="background-color:#1a3244; color:#ffffff; font-weight:bold;" | DPS !! style="background-color:#1a3244; color:#ffffff; font-weight:bold;" | HIT CHANCE !! style="background-color:#1a3244; color:#ffffff; font-weight:bold;" | ACTION ZONE (km) |
| * '''Slot 2''': {{Smoke Generator}}
| | |- |
| * '''Slot 3''': {{Engine Boost}}
| | | style="color:inherit;" | Mid-range || style="color:inherit;" | 21 || style="color:inherit;" | 100% || style="color:inherit;" | 2.5 |
| * '''Slot 4''': {{Torpedo Reload Booster}}
| | |} |
| | </div> |
| | </div></div></div> |
| | <div class="b-popup"><div class="b-popup_head js-tech-nav_head"><div><h2>Depth Charges</h2></div><span class="b-tech-nav_arrow"></span></div><div class="b-popup_content" style="display: none;"><div> |
| | <div style="border: 2px solid rgba(212,175,55,0.8); border-radius: 3px; margin-bottom: 1em; overflow: hidden;"> |
| | {| class="wikitable" style="margin:0; color:inherit; width:100%" |
| | ! style="background-color:#1a3244; color:#ffffff; font-weight:bold;" | DEPTH CHARGES !! style="background-color:#1a3244; color:#ffffff; font-weight:bold;" | |
| | |- |
| | | style="color:inherit;" | • Max damage || style="color:inherit;" | 4600 |
| | |- |
| | | style="color:inherit;" | • Number of charges || style="color:inherit;" | 2 |
| | |- |
| | | style="color:inherit;" | • Bombs per charge || style="color:inherit;" | 2 |
| | |- |
| | | style="color:inherit;" | • Reload time (sec) || style="color:inherit;" | 40.0 |
| | |} |
| | </div> |
| | </div></div></div> |
|
| |
|
| |Camouflage=<!-- write text about useful camouflage below -->
| |
| {{Prem Ship Camo Insert|shiptier=}}
| |
|
| |
|
| |Signals=<!-- write text about best set of signals below -->
| | <!-- Add the ship code here to populate the upgrade table --> |
| | {{Ship Upgrades Section|code=PJSD507_Yudachi}} |
|
| |
|
| {{Signal Flags
| |
| | November Echo Setteseven =
| |
| | Mike Yankee Soxisix =
| |
| | India X-Ray =
| |
| | Juliet Whiskey Unaone = 3
| |
| | Victor Lima =
| |
| | Hotel Yankee =
| |
|
| |
|
| | November Foxtrot = 3
| | <!-- Consumables have to be tagged individually on a slot by slot basis --> |
| | Sierra Mike = 3
| | {{Ship Consumables Section|consumables= |
| | India Delta =
| | * '''Slot 1:''' {{Damage Control Party}} (5.0s action, 40.0s cooldown) |
| | Juliet Yankee Bissotwo =
| | * '''Slot 2:''' {{Smoke Generator}} (3 charges, 20.0s action, 160.0s cooldown) |
| | India Yankee =
| | * '''Slot 3:''' {{Engine Boost}} (3 charges, 120.0s action, 120.0s cooldown) |
| | Juliet Charlie = 3
| | * '''Slot 4:''' {{Torpedo Reload Booster}} (3 charges, 1.0s action, 240.0s cooldown) |
| | | }} |
| | X-Ray Papa Unaone =
| |
| | Sierra Bravo =
| |
| | |
| | |
| | X-Ray Papa Unaone =
| |
| | Sierra Bravo = | |
| | |
| | Zulu =
| |
| | India Bravo Terrathree =
| |
| | Equal Speed Charlie London =
| |
| | Zulu Hotel =
| |
| | Papa Papa =
| |
|
| |
|
| | Wyvern =
| |
| | Red Dragon =
| |
| | Dragon Flag =
| |
| | Ouroboros =
| |
| | Hydra =
| |
| | Basilisk =
| |
|
| |
|
| | Leviathan =
| | ==Gallery== |
| | Scylla =
| | <div class="b-popup"><div class="b-popup_head js-tech-nav_head"><div><h2>WoWs Gallery</h2></div><span class="b-tech-nav_arrow"></span></div><div class="b-popup_content" style="display: none;"><div> |
| }}
| |
| |Gallery=<gallery>
| |
| File:YudFront.jpg
| |
| File:YudRear.jpg
| |
| File:YudSalvo.jpg
| |
| File:YudTorps.jpg
| |
| File:YudSpread.jpg
| |
| File:YudDodges.jpg
| |
| File:YudAttacked.jpg
| |
|
| |
|
| | <gallery> |
| </gallery> | | </gallery> |
| | </div></div></div> |
|
| |
|
| |History=<div class="thumb tright">
| | <div class="b-popup"><div class="b-popup_head js-tech-nav_head"><div><h2>Historical Gallery</h2></div><span class="b-tech-nav_arrow"></span></div><div class="b-popup_content" style="display: none;"><div> |
| {{AnnoWiki|content=
| |
| <h2>''{{#var:ship_name}}'', YEAR</h2> | |
| ===Construction=== | |
| :Builder: Yard; City, Country
| |
| :Laid down: DD MONTH YEAR
| |
| :Launched: DD MONTH YEAR
| |
| :Commissioned: DD MONTH YEAR
| |
| ---- | |
| ===Specifications===
| |
| :XX tons displacement, standard
| |
| :XXm length
| |
| :XXm beam
| |
| :XXm draft
| |
| ----
| |
| ====Machinery====
| |
| :
| |
| ----
| |
| ====Performance====
| |
| :XX knots at XX shaft horsepower
| |
| :XX nm at XX knots
| |
| ----
| |
| ====Armor====
| |
| :Main belt:
| |
| :Upper belt:
| |
| :Torpedo bulkhead:
| |
| :Decks:
| |
| :Bulkheads:
| |
| :Barbettes and Turrets:
| |
| :Conning tower:
| |
| ----
| |
| ====Armament====
| |
| =====Main=====
| |
| :
| |
| =====Secondary=====
| |
| :
| |
| =====Anti-aircraft=====
| |
| :
| |
| =====Torpedoes=====
| |
| :
| |
| ----
| |
| ====Aircraft====
| |
| =====Total=====
| |
| :
| |
| =====Fighters=====
| |
| :
| |
| ===== Bombers=====
| |
| :
| |
| }}</div>
| |
| [[File:PICTURE.JPG|none|thumb|x350px|link=|CAPTION.]]
| |
| | |
| ===History===
| |
| ''Yūdachi'' (夕立 "Evening Squall") was the fourth of ten ''[[Shiratsuyu]]''-class destroyers built for the Imperial Japanese Navy under the "Circle One" Program (Maru Ichi Keikaku).
| |
| ====Design====
| |
| | |
| ====Service====
| |
| Ordered in 1931 as part of the 1st Naval Armaments Supplement Program, ''{{#var:ship_name}}'' was the fourth of six ''[[Shiratsuyu]]''-class destroyers ordered under the program. Construction on ''{{#var:ship_name}}'' was a lengthy process – despite being ordered in 1931 she was not laid down until 16 October 1934, and she was finally launched on 21 June 1936. The ship was completed and commissioned into the Imperial Japanese navy on 7 January 1937.
| |
| | |
| Her first taste of action was far from illustrious. On the outbreak of the Sino-Japanese war, ''{{#var:ship_name}}'' was deployed and operated off the Chinese coast near the Yangtze River. In 1939-1940 her 13.2mm machine guns were replaced by two twin 25mm Type 96 AA mounts.
| |
|
| |
|
| Prior to Japan’s declaration of war against the United States, ''{{#var:ship_name}}'' was earmarked for Operation ‘M’, the invasion of the Philippines. She was part of Destroyer Division 2 (hereafter DesDiv 2), of Squadron 4 of the 2nd Fleet, along with her sisters ''Murasame'', ''Harusame'', and ''Samidare''. The destroyer division departed for the Pescadores on 26 November 1941, and on 7 December 1941 departed from there to invade the Philippines. Following that they began moving south, supporting successive invasions, from Lingayen to Tarakan, then Balikpapan in the Dutch East Indies. On 27 February 1942, DesDiv2 took part in the Battle of the Java Sea, but played a minor role. Destroyer Division 2 then steamed north again to aid in the subjugation of the Philippines, spending March and April blockading Manila and also supporting the occupation of Cebu. Finally, on 6 May 1942, they returned to Japan, arriving at Yokosuka for repairs. In June of 1942, the division played a peripheral role in the Battle of Midway, as they were meant to have been part of the force sent to occupy Midway island – but that was scrapped due to the heavy defeat suffered by the carrier forces. In mid-July DesDiv 2 once again departed Japan, this time being sent to Mergui in Burma for raids into the Indian Ocean. However, due to the heavy losses being suffered by the Japanese Navy in the Solomon Islands, this operation was cancelled too, with the division departing on 8 August.
| | <gallery> |
| | |
| DesDiv2 arrived on 30 August 1942, and was immediately assigned to the supply operations dubbed the ‘Tokyo Express’ by the Americans. On the evening of 1 September, ''{{#var:ship_name}}'' departed with destroyer ''Murakumo'', successfully escorting two cargo ships from the Shortlands to Gizo and back again. On the evening of the fourth, she led a troop transport effort (formed of two waves, she lead the first with ''Hatsyuki'' and ''Murakumo'') to Guadalcanal itself, the six destroyers landing a total of 1,000 troops. They then moved to bombard Henderson Field.
| |
| Unbeknownst to the Japanese destroyers, two small American APDs (fast transports converted from WWI ''[[Wickes]]''-class destroyers), ''Gregory'' and ''Little'', were also in the vicinity. They had just finished landing marines on Savo island and were returning to their anchorage when the flashes of gunfire from the Japanese bombardment alerted them to the fact they weren’t as alone as they had thought. Upon gaining radar contact, it was not clear whether it was wise or not to engage – the transports were badly out-gunned – when in a terrible turn of luck, a patrolling American aircraft, also spotting the gunfire, dropped a string of five flares to illuminate the two Japanese ships – directly on top of ''Gregory'' and ''Little''. Immediately spotted by the Japanese, there was little they could do to save themselves, massively outgunned as they were. ''Gregory'' only had time to fire off five rounds before a broadside from ''{{#var:ship_name}}'' pummeled her. The action was finished within minutes, both APDs burning, but the Japanese weren’t done with them yet. The three destroyers swept through the water where the ships were sinking, shelling and machine-gunning the survivors. By some miracle, despite the Japanese expending over 500 rounds of main battery ammunition at the ships and the helpless men in the water, casualties were fairly light.
| |
| | |
| Over the course of the next two months, ''{{#var:ship_name}}'' continued to run Tokyo Express missions, sometimes attempting sweeps for American convoys (although never with success), sometimes delivering supplies, and very often bombarding Henderson field or other American positions. On 25 October, she was forced to scuttle accompanying light cruiser ''Yura'', crippled by American aircraft during a bombardment mission. The day after, she participated in the Battle of Santa Cruz, but again played a negligible role. Three more transport runs would be undertaken before ''{{#var:ship_name}}'' finally got her chance to shine – on 11 November DesDiv 2 departed their base at Shortlands, and joined the bombardment force of Admiral Aba – centered on the battlecruisers ''Kirishima'' and ''Hiei'', light cruiser ''Nagara'', and fourteen destroyers. They departed for Guadalcanal, set to attack on the night of the 12th.
| |
| | |
| What they did not know was that the Americans were at sea as well, and in force. They had spotted the approach of the Japanese force via aerial reconnaissance, and sortied with a force of two heavy cruisers, one light, two anti-aircraft, and eight destroyers. Contact between the two was far from neat – the Japanese force had approached under the cover of a squall, hiding much of their approach, but also greatly confusing their formation. In addition, they arrived in the dead of night. For ''{{#var:ship_name}}'', it would be a night full of costly errors.
| |
| ''{{#var:ship_name}}'' was meant to be part of the scouting vanguard, the eyes of the Japanese force – but coming out of the squall, she had no idea where she was relative to the rest of the Japanese force. Even worse, she would be the instrument of warning not for the Japanese, but rather the Americans, when the radar of light cruiser ''[[Helena]]'' painted her at 0124, range 27,000 yards. At 0128 the American force came around on a heading to intercept the Japanese. Soon more radars began picking up the Japanese ships. Suddenly, at 0141 the ''{{#var:ship_name}}'' ran smack into the American destroyer ''Cushing'' – or, rather, ''Cushing'' nearly ran into her – the two destroyers barely avoided each other, but both were too startled to engage each other, instead radioing their respective forces. For the Americans, who had radar, this was less of a surprise (although the erratic maneuver of ''Cushing'' caused chaos in their formation), but for the Japanese, the random warning of ''{{#var:ship_name}}'' created chaos, as no one, including ''{{#var:ship_name}}'', actually knew where ''{{#var:ship_name}}'' was. A warning as to how close the Americans came, however, came when ''Hiei'' spotted four large shapes – American cruisers – at 10,000 yards. What came next was a maelstrom that consumed both sides. At 0148 Japanese searchlights illuminated the anti-aircraft cruiser ''[[Atlanta]]'', which began pouring 5” salvos at the searchlights in return. The range was not even 2,000 yards. The action collapsed into chaos as the two forces grappled in the dark. Meanwhile, ''{{#var:ship_name}}'' sped off to the northeast, chased away from the action by 8” salvos from one or more of the American heavy cruisers. Her captain, Commander Kiyoshi Kikkawa, related after the battle; ''“We ran for a few minutes and I saw gunfire. I was covered with confusion and shame. I ordered Yudachi about to head back toward the American column. By that time every man in my ship was boiling mad—at our failure to hit the enemy.”''
| |
| | |
| Commander Kikkawa was quick to bring ''{{#var:ship_name}}'' back into action, maneuvering along the starboard side of the rapidly disintegrating American column. He brought her back to a southwest course, and made a torpedo run against the first target he saw – the heavy cruiser ''Portland'', firing off a full salvo of eight torpedoes at 0155. Between three and six minutes later, one of her torpedoes stuck, detonating under the fantail of the heavy cruiser aft and to starboard, jamming her steering in a turn to starboard – a maneuver ''Portland'' was forced to conduct all night as a result. Her aft turret was also jammed as a result. ''{{#var:ship_name}}'' continued on her course, and as a result steamed directly through the American line between the cruiser ''Juneau'' and the destroyer ''Aaron Ward'' at 0159, the latter of which only barely avoided colliding with her. She swapped fire with the American ships, but quickly came off worse, with ''Juneau'' putting a 5” shell into her bridge. It very nearly could have been the end for ''{{#var:ship_name}}'' – but she was saved by the intervention of Kikkawa’s friend, Commander Tameichi Hara of the ''Amatsukaze'', who had fired his own torpedoes minutes before. Two of them passed beneath ''Aaron Ward'', but ''Barton'', behind her, was not so lucky and caught two of the torpedoes amidships at 0159. The unfortunate American destroyer was blown in two and sank almost immediately. At almost the same time ''Juneau'' also took a torpedo hit amidships, either from ''Amatsukaze'' or ''Murasame'', which physically lifted the ship out of the water. This caused a list to port and entirely disabled her gun batteries, forcing the American cruiser to retire from the melee. ''Aaron Ward'' continued to steam north, but managed to attract friendly 8” fire for her efforts. She narrowly dodged another collision with destroyer ''Sterett'' at 0207. At 0210 she encountered ''{{#var:ship_name}}'' again, and the two exchanged gunfire. ''{{#var:ship_name}}'' again failed to score any hits, but ''Aaron Ward'' loosed twenty-five 5” salvos at the Japanese destroyer, putting one shell into her forward fireroom, and damaging her forecastle with another. Additionally, ''Sterett'' fired two torpedoes, but missed. ''{{#var:ship_name}}'' escaped to the west in order to reload her torpedo tubes, before doubling back to rejoin the action at 0220 – and ran back into ''Sterett''. Kikkawa assumed the destroyer was friendly, and flashed a recognition signal. ''Sterett'' assumed the destroyer she was faced with was hostile, and her gun flashes greeted ''{{#var:ship_name}}''. Her opening salvos hit the forecastle and forward fireroom once again, and while '''Yudachi'' returned fire, her gunnery was again ineffective. More 5” shells from ''Sterett'' registered hits on the gun director, the bridge, and the forward engine room.
| |
| | |
| However, before more damage could be racked up by ''Sterett'', another Japanese destroyer came to the rescue of ''{{#var:ship_name}}'' (again). Out of the night came the ''Teruzuki'', her 10cm guns blazing. Rapidly, she pummeled the American destroyer into submission, knocking out her own director, and also disabling her aft guns. ''Sterett'' disengaged and fled to the northeast but lost steering control and by 0235 she was drifting without power, aflame and with a rapidly flooding forward engine room. ''{{#var:ship_name}}'', meanwhile, wasn’t doing much better. She too was drifting without power, having suffered twenty-six dead and thirty-five wounded. Not long after, the destroyer ''Samidare'' came upon the wreck, and after taking off the survivors (some 207 men), fired three torpedoes at the destroyer to finish her off. Two ran deep, diving under the hull of the destroyer, while the third either missed entirely or failed to detonate. ''Samidare'' left the now abandoned wreck to its own devices and retreated, following the rest of the Japanese fleet back up ‘the slot’. Later that morning, at around 0630, of all ships, ''Portland'' happened upon the drifting destroyer. Expending thirty-six 8” shells in six six-gun salvos from 12,500 yards, she finally sank ''{{#var:ship_name}}'', getting a measure of revenge for the torpedo hit she had taken earlier that night – the only damage, in spite of all that had happened that night, that ''{{#var:ship_name}}'' had managed to inflict.
| |
| | |
| | |
| | |
| |HistoricalGallery=<gallery>
| |
| File:Yudachi II.jpg|''Yūdachi'' underway on 30 November 1936
| |
| </gallery> | | </gallery> |
| | </div></div></div> |
|
| |
|
| |Video={{VideoYT|Z0oldFmKJr8}}
| | [[Category:Ships of Japan]] |
| | | [[Category:Destroyers]] |
| |Ref= # [https://en.wikipedia.org/wiki/Japanese_destroyer_Y%C5%ABdachi_(1936) Japanese destroyer ''Yūdachi'' (1936) - Wikipedia]
| | [[Category:Tier VII ships]] |
| # [https://en.wikipedia.org/wiki/Shiratsuyu-class_destroyer ''Shiratsuyu''-class destroyer - Wikipedia]
| | [[Category:Premium ships]]<!-- DO NOT DELETE THIS LINE. DO NOT INSERT ANYTHING BELOW THIS LINE --> |
| # [https://worldofwarships.com/en/news/history/armada-yudachi/ Yūdachi: Crack Open a Cold One with the "Pois" - Armada in 90 seconds: Yudachi - News - World of Warships]
| |
| # [https://www.youtube.com/watch?v=Z0oldFmKJr8 Armada in 90 seconds: Yudachi - World of Warships Official Channel - YouTube]
| |
| | |
| {{WoWS Ship Changelog Insert|1=
| |
| *Available for testing by supertesters in the game starting from Update 0.8.3.
| |
| {{WoWS Ship Testing Changes Insert|1=
| |
| *<span class="plainlinks">[https://www.facebook.com/wowsdevblog/posts/pfbid0BvGjGyHyrsS8gecTm6tZDdm4VZhL65YkhiD6BDXDomuwQfx8uRTtsZoMCvoN9YDHl December 29, 2018]</span>:
| |
| **Preliminary announcement. Characteristics were promised on Facebook at a later date, but delivered on Medium instead.
| |
| *<span class="plainlinks">[https://medium.com/@devblogwows/new-ships-9fab6b188e90 Mar 26, 2019]</span>:
| |
| **Preliminary characteristics.
| |
| *<span class="plainlinks">[https://www.reddit.com/r/WorldOfWarships/comments/bpbnn0/st_changes_to_test_ships/ May 16, 2019]</span>:
| |
| **Torpedo detectability range decreased from 2.5 to 1.9 km.
| |
| **Torpedo reload time decreased from 101 to 91 s.
| |
| *<span class="plainlinks">[https://www.reddit.com/r/WorldOfWarships/comments/c078fj/st_changes_to_test_ships_and_engine_boost_of/ June 13, 2019]</span>:
| |
| **Torpedoes changed:
| |
| *** Damage decreased from 17,233 to 15,633.
| |
| *** Flooding chance decreased from 287% to 259%.
| |
| *<span class="plainlinks">[https://www.reddit.com/r/WorldOfWarships/comments/c39p3s/st_changes_to_test_ships/ June 21, 2019]</span>:
| |
| **Torpedo Reload Booster consumable added to a separate slot.
| |
| **Detectability range by sea increased from 6.48 to 7 km.
| |
| **Detectability range when firing main guns in smoke increased from 2.42 to 2.61 km.
| |
| **Detectability range by air increased from 2.784 to 3.01 km.
| |
| *<span class="plainlinks">[https://www.reddit.com/r/WorldOfWarships/comments/cf6noj/changes_to_test_ships/ July 19, 2019]</span>:
| |
| **Torpedo reload time increased from 91 to 100 s.
| |
| }}
| |
| *First appeared on sale in September 2019.
| |
| *Update 0.9.3:
| |
| **Minor fixes to textures and ship model.
| |
| *Update 12.11:
| |
| **Torpedo speed increased from 57 to 64 knots.
| |
| }}
| |
| | |
| }}<!-- DO NOT DELETE THIS LINE. DO NOT INSERT ANYTHING BELOW THIS LINE -->
| |



 (5.0s action, 40.0s cooldown)
 (3 charges, 20.0s action, 160.0s cooldown)
 (3 charges, 120.0s action, 120.0s cooldown)
 (3 charges, 1.0s action, 240.0s cooldown)