|
|
| Line 1: |
Line 1: |
| <!-- DO NOT EDIT OR DELETE LINES WITH COMMENTS (it's look like as this or next line) -->
| | {{#vardefine:ship_name|Haida}} |
| <!-- Add |Ship=code for manual override -->
| | __NOTOC____NOEDITSECTION__ |
| {{WoWs_Ship | |
| |Promo=<!-- in case of gift or promo ship write conditions to get it. (optional)-->
| |
|
| |
|
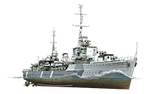
| | <div class="b-description gw-frame-1"><div class="b-description-img b-description-img__indent b-description-img__single"><div style="width:160px; height:102px; opacity:.5; border-radius:2px; position:absolute; left:0; top:0; z-index:1; -webkit-transition:all 0.2s ease-out 0.1s; transition:all 0.2s ease-out 0.1s;">[[File:Wows_anno_flag_commonwealth.png|160px]]</div><div class="l-description-img_class"><span class="b-description-img_type b-description-img_type__Destroyer b-description-img_type__Destroyer-Premium"></span><span class="b-description-img_class">VII</span></div><div class="b-description-img_vehicle">[[File:Ship_PUSD507_Haida.png|160px|link=|left]]</div><div class="l-description-img_price"><span class="b-description-img_price b-description-img_price__gold"><span title="''{{#var:ship_name}}'' was first released for sale on DD Month YYYY.">9,000 doubloons</span></span></div></div><p>[[Ship:{{#var:ship_name}}|{{#var:ship_name}}]] — Commonwealth Premium Tier VII [[Ship:Destroyer|Destroyer]].</p><p>With the outbreak of World War II, Canada started planning to enhance its fleet. The decision was taken to build several destroyers under the British Tribal-class project. One of them, HMCS Haida, was laid down at the Halifax shipyard in 1941. During the war, she was engaged in escorting polar convoys, SAS operations off the French coast, and the Normandy landings. For her excellent service, HMCS Haida earned the nickname "Fightingest Ship in the Royal Canadian Navy." In 1963, the destroyer was put into reserve but then returned again to participate in patrolling operations and escorting aircraft carriers. In 1964–1965, HMCS Haida was transformed into a museum ship in Hamilton.</p><p> </p></div> |
|
| |
|
| |Anno=<!-- you can write below short description for the ship. it will replace default once. -->
| | ===Pros=== |
| [[File:Wows_flag_Canada.png|50px|frameless|right|link=]]A Tribal-class destroyer built for the Royal Canadian Navy. In contrast to British ships of the series that were commissioned before the beginning of World War II, she had stronger AA defenses installed in place of one of the main battery mounts.<br><br>HMCS ''Haida'' is now preserved as a [https://www.pc.gc.ca/en/lhn-nhs/on/haida military museum ship] in Hamilton, Ontario. She was first released for sale worldwide on 1 July 2018 (Canada Day). As of Update 0.10.5 (June 2021), the ship is no longer available.
| | * Pro 1 |
| <!-- <br><br>{{Model3DViewer|9c2f68057a8e4bbeb505faf88c75a628}}-->
| | * Pro 2 |
|
| |
|
| |Performance={{AA Sidebar Warning Insert}}
| | ===Cons=== |
| The first Canadian warship to come to World of Warships, HMCS ''{{#var:ship_name}}'' is a ship that belongs on the front lines. Her play style is that of a forward scout and destroyer-hunter. She is adept at applying pressure to capture points early on, providing forward vision for her team and foiling enemy ships from doing the same. Unique among Tier VII destroyers, she is incredibly stealthy while still having a sizable hit point pool and decent agility.
| | * Con 1 |
| | * Con 2 |
|
| |
|
| ''{{#var:ship_name}}''’s greatest asset is her ability to spot for her team and tightly control which ships spot her in return. Her surface detection is one of the lowest found within her matchmaking spread with just a handful of ships being more stealthy. Of these, most are Japanese destroyers and present little in the way of a threat to this gunship. ''{{#var:ship_name}}'' can out-fight anything that out-spots her and she can out-spot anything that she cannot out-fight. But she has two more tricks to play.
| |
|
| |
|
| ''{{#var:ship_name}}''’s {{Crawling Smoke Generator}} allows her to remain mobile while hidden. This has the obvious benefits of making it more difficult to attack ''{{#var:ship_name}}'' with blind-fire drops of torpedoes, bombs and shells, but it may also be used offensively. Other ships must risk leaving their smoke cover if a battle progresses away from where they initially laid it. Haida doesn't suffer this problem. She can quickly redeploy and then slow down to once again take advantage of her Smoke Generator's concealment and resume attacking. Her flexibility allows her to keep up with the pace of battle either on the attack or the retreat.
| | ==Ship Stats== |
| | <div class="b-popup"><div class="b-popup_head js-tech-nav_head"><div><h2>Hull Information</h2></div><span class="b-tech-nav_arrow"></span></div><div class="b-popup_content" style="display: none;"><div> |
| | <div style="border: 2px solid rgba(212,175,55,0.8); border-radius: 3px; margin-bottom: 1em; overflow: hidden;"> |
| | {| class="wikitable" style="margin:0; color:inherit; width:100%" |
| | ! style="background-color:#1a3244; color:#ffffff; font-weight:bold;" | SURVIVABILITY !! style="background-color:#1a3244; color:#ffffff; font-weight:bold;" | |
| | |- |
| | | style="color:inherit;" | • Hit Points || style="color:inherit;" | 15700 |
| | |- |
| | | style="color:inherit;" | • Torpedo protection damage reduction (%) || style="color:inherit;" | — |
| | |} |
| | </div> |
|
| |
|
| Similarly, her {{Hydroacoustic Search}} has offensive and defensive uses. Though short ranged, the increased warning time provided is more than sufficient to trivialize the dangers of enemy torpedoes. The long run time also facilitates this, ensuring that ''{{#var:ship_name}}'' will have ample warning throughout all stages of an encounter. Finally, it may also be used offensively to dig out enemy ships hiding in smoke. For this role, it's less than ideal. Her Hydroacoustic Search lacks the range of the ones found on German destroyers or the vaunted reach of ''[[Loyang]]''. However, ''{{#var:ship_name}}''’s guns have a very small detection bloom when firing through smoke, allowing her to deliver several salvos before her target can respond.
| | <div style="border: 2px solid rgba(212,175,55,0.8); border-radius: 3px; margin-bottom: 1em; overflow: hidden;"> |
| | {| class="wikitable" style="margin:0; color:inherit; width:100%" |
| | ! style="background-color:#1a3244; color:#ffffff; font-weight:bold;" | ARMOR DETAIL !! style="background-color:#1a3244; color:#ffffff; font-weight:bold;" | |
| | |- |
| | | style="color:inherit;" | • Belt (mm) || style="color:inherit;" | — |
| | |- |
| | | style="color:inherit;" | • Deck (mm) || style="color:inherit;" | — |
| | |- |
| | | style="color:inherit;" | • Superstructure (mm) || style="color:inherit;" | — |
| | |- |
| | | style="color:inherit;" | • Extremities (mm) || style="color:inherit;" | — |
| | |} |
| | </div> |
|
| |
|
| ''{{#var:ship_name}}''’s advantages in stealth largely mitigate her biggest weakness: a lack of striking power. While she does boast some of the best damage-per-minute values with her high explosive shells, the effective range of ''{{#var:ship_name}}''’s weapon systems is very short. Her fire angles are less than ideal and the shell flight times of her guns become very punitive at ranges greater than 7.0 km (even worse than American 127mm/38s). In addition, her penetration values are lackluster and she's not good at starting fires, making it difficult to engage larger targets with her guns. Finally there are ''{{#var:ship_name}}''’s torpedoes. These are individually hard hitting and may be single-launched, but she is limited to a single quadruple launcher with a long, 96-second reload.
| | <div style="border: 2px solid rgba(212,175,55,0.8); border-radius: 3px; margin-bottom: 1em; overflow: hidden;"> |
| | {| class="wikitable" style="margin:0; color:inherit; width:100%" |
| | ! style="background-color:#1a3244; color:#ffffff; font-weight:bold;" | MANEUVERABILITY !! style="background-color:#1a3244; color:#ffffff; font-weight:bold;" | |
| | |- |
| | | style="color:inherit;" | • Maximum speed (kt) || style="color:inherit;" | 36.5 |
| | |- |
| | | style="color:inherit;" | • Turning circle radius (m) || style="color:inherit;" | 630 |
| | |- |
| | | style="color:inherit;" | • Rudder-shift time (sec) || style="color:inherit;" | 4.9 |
| | |} |
| | </div> |
|
| |
|
| ''{{#var:ship_name}}'' is a destroyer that needs to get in close to ensure she lands as many hits as possible, whether that be with her guns in a knife fight or single-firing her torpedoes into an enemy cruiser or battleship. Thankfully, her stealth and consumables give her all the tools needed to ensure she can deliver these attacks on target and to devastating effect.
| | <div style="border: 2px solid rgba(212,175,55,0.8); border-radius: 3px; margin-bottom: 1em; overflow: hidden;"> |
| | {| class="wikitable" style="margin:0; color:inherit; width:100%" |
| | ! style="background-color:#1a3244; color:#ffffff; font-weight:bold;" | CONCEALMENT !! style="background-color:#1a3244; color:#ffffff; font-weight:bold;" | |
| | |- |
| | | style="color:inherit;" | • Detectability by sea (km) || style="color:inherit;" | 6.3 |
| | |- |
| | | style="color:inherit;" | • Detectability by air (km) || style="color:inherit;" | 3.12 |
| | |- |
| | | style="color:inherit;" | • Detectability after firing main guns in smoke (km) || style="color:inherit;" | 2.31 |
| | |- |
| | | style="color:inherit;" | • Detectability by depths (km) || style="color:inherit;" | 3.12 |
| | |} |
| | </div> |
|
| |
|
| |Pros=<!-- write list of positive points below. use * as in ordinary wiki-list. -->
| | </div></div></div> |
| * Good health pool
| | <div class="b-popup"><div class="b-popup_head js-tech-nav_head"><div><h2>Main Battery</h2></div><span class="b-tech-nav_arrow"></span></div><div class="b-popup_content" style="display: none;"><div><div style="border: 2px solid rgba(212,175,55,0.8); border-radius: 3px; margin-bottom: 1em; overflow: hidden;"> |
| * Fast-firing main battery with good range
| | {| class="wikitable" style="margin:0; color:inherit; width:100%" |
| * Best concealment among Tier 7 destroyers
| | ! style="background-color:#1a3244; color:#ffffff; font-weight:bold;" | MAIN BATTERY !! style="background-color:#1a3244; color:#ffffff; font-weight:bold;" | |
| * Has access to a long-lasting {{Hydroacoustic Search}} consumable in a separate slot
| | |- |
| * Has access to the {{Crawling Smoke Generator}} consumable
| | | style="color:inherit;" | • Arrangement || style="color:inherit;" | 3×2 120mm |
| | |- |
| | | style="color:inherit;" | • Firing range (km) || style="color:inherit;" | 12.32 |
| | |- |
| | | style="color:inherit;" | • Reload time (sec) || style="color:inherit;" | 5.0 |
| | |- |
| | | style="color:inherit;" | • Rate of fire (shots/min) || style="color:inherit;" | 12 |
| | |- |
| | | style="color:inherit;" | • 180° turn time (sec) || style="color:inherit;" | 18.0 |
| | |} |
| | </div> |
|
| |
|
| |Cons=<!-- write list of negative points below. use * as in ordinary wiki-list. --> | | <div style="border: 2px solid rgba(212,175,55,0.8); border-radius: 3px; margin-bottom: 1em; overflow: hidden;"> |
| * Poor shell velocity and fairly high firing arcs make hitting targets at range difficult
| | {| class="wikitable" style="margin:0; color:inherit; width:100%" |
| * Abysmal HE fire chance
| | ! style="background-color:#1a3244; color:#ffffff; font-weight:bold;" | DISPERSION !! style="background-color:#1a3244; color:#ffffff; font-weight:bold;" | |
| * Secondary armament is virtually useless due to anemic damage output and penetration
| | |- |
| * Only one quadruple torpedo rack with a lengthy reload
| | | style="color:inherit;" | • Dispersion type || style="color:inherit;" | Standard DD dispersion |
| * Weak AA suite, vulnerable to planes
| | |- |
| * The {{Hydroacoustic Search}} consumable is short ranged
| | | style="color:inherit;" | • Dispersion formula || style="color:inherit;" | Dispersion (m) = 7.5 × range(km) + 15 |
| <br /> | | |- |
| | | style="color:inherit;" | • Sigma || style="color:inherit;" | 2.0 |
| | |- |
| | | style="color:inherit;" | • Maximum dispersion (m) || style="color:inherit;" | 107 |
| | |- |
| | | style="color:inherit;" | • Dispersion at 5 km || style="color:inherit;" | 52 |
| | |- |
| | | style="color:inherit;" | • Dispersion at 10 km || style="color:inherit;" | 90 |
| | |- |
| | | style="color:inherit;" | • Dispersion at 12.32 km || style="color:inherit;" | 107 |
| | |} |
| | </div> |
|
| |
|
| | <div style="border: 2px solid rgba(212,175,55,0.8); border-radius: 3px; margin-bottom: 1em; overflow: hidden;"> |
| | {| class="wikitable" style="margin:0; color:inherit; width:100%" |
| | ! style="background-color:#1a3244; color:#ffffff; font-weight:bold;" | HE SHELL !! style="background-color:#1a3244; color:#ffffff; font-weight:bold;" | |
| | |- |
| | | style="color:inherit;" | • Name || style="color:inherit;" | 120 mm HE |
| | |- |
| | | style="color:inherit;" | • Maximum damage || style="color:inherit;" | 1900 |
| | |- |
| | | style="color:inherit;" | • Fire chance (%) || style="color:inherit;" | 5.0% |
| | |- |
| | | style="color:inherit;" | • Shell velocity (m/s) || style="color:inherit;" | 808 |
| | |- |
| | | style="color:inherit;" | • Shell weight (kg) || style="color:inherit;" | 22.68 |
| | |- |
| | | style="color:inherit;" | • Penetration (mm) || style="color:inherit;" | 20 |
| | |} |
| | </div> |
|
| |
|
| |Research=As a premium ship, ''{{#var:ship_name}}'' has no module upgrades to research.
| |
|
| |
|
| |OptimalConfiguration=<!-- write some general text about selection of optimal configuration below (optional)--> | | <div style="border: 2px solid rgba(212,175,55,0.8); border-radius: 3px; margin-bottom: 1em; overflow: hidden;"> |
| | {| class="wikitable" style="margin:0; color:inherit; width:100%" |
| | ! style="background-color:#1a3244; color:#ffffff; font-weight:bold;" | AP SHELL !! style="background-color:#1a3244; color:#ffffff; font-weight:bold;" | |
| | |- |
| | | style="color:inherit;" | • Name || style="color:inherit;" | 120 mm AP |
| | |- |
| | | style="color:inherit;" | • Maximum damage || style="color:inherit;" | 2100 |
| | |- |
| | | style="color:inherit;" | • Shell velocity (m/s) || style="color:inherit;" | 808 |
| | |- |
| | | style="color:inherit;" | • Shell weight (kg) || style="color:inherit;" | 22.68 |
| | |- |
| | | style="color:inherit;" | • Fuse time (sec) || style="color:inherit;" | 0.01 |
| | |- |
| | | style="color:inherit;" | • Ricochet start (°) || style="color:inherit;" | 45 |
| | |- |
| | | style="color:inherit;" | • Always ricochet (°) || style="color:inherit;" | 60 |
| | |- |
| | | style="color:inherit;" | • Normalisation (°) || style="color:inherit;" | 10 |
| | |- |
| | | style="color:inherit;" | • Arming threshold (mm) || style="color:inherit;" | 20 |
| | |} |
| | </div> |
| | </div></div></div> |
| | <div class="b-popup"><div class="b-popup_head js-tech-nav_head"><div><h2>Torpedoes</h2></div><span class="b-tech-nav_arrow"></span></div><div class="b-popup_content" style="display: none;"><div> |
| | <div style="border: 2px solid rgba(212,175,55,0.8); border-radius: 3px; margin-bottom: 1em; overflow: hidden;"> |
| | {| class="wikitable" style="margin:0; color:inherit; width:100%" |
| | ! style="background-color:#1a3244; color:#ffffff; font-weight:bold;" | TORPEDO LAUNCHERS !! style="background-color:#1a3244; color:#ffffff; font-weight:bold;" | |
| | |- |
| | | style="color:inherit;" | • Number of launchers || style="color:inherit;" | 1 |
| | |- |
| | | style="color:inherit;" | • Torpedo name || style="color:inherit;" | PUPT003 |
| | |- |
| | | style="color:inherit;" | • Reload time (sec) || style="color:inherit;" | 96.0 |
| | |- |
| | | style="color:inherit;" | • 180° turn time (sec) || style="color:inherit;" | 7.2 |
| | |- |
| | | style="color:inherit;" | • Damage || style="color:inherit;" | 47000 |
| | |- |
| | | style="color:inherit;" | • Range (km) || style="color:inherit;" | 0.3 |
| | |- |
| | | style="color:inherit;" | • Speed (kt) || style="color:inherit;" | 62 |
| | |- |
| | | style="color:inherit;" | • Detectability (km) || style="color:inherit;" | 1.4 |
| | |- |
| | | style="color:inherit;" | • Flooding chance (%) || style="color:inherit;" | 2.82% |
| | |} |
| | </div> |
|
| |
|
| |Upgrades=<!-- write text about best upgrades below, add * after upgrade link to designate that another upgrade may be viable -->
| | </div></div></div> |
| The recommended upgrades for ''{{#var:ship_name}}'' are as follows:
| | <div class="b-popup"><div class="b-popup_head js-tech-nav_head"><div><h2>Secondary Battery</h2></div><span class="b-tech-nav_arrow"></span></div><div class="b-popup_content" style="display: none;"><div> |
| * '''Slot 1''': {{Main Armaments Modification 1}}
| | <div style="border: 2px solid rgba(212,175,55,0.8); border-radius: 3px; margin-bottom: 1em; overflow: hidden;"> |
| * '''Slot 2''': {{Engine Room Protection}}
| | {| class="wikitable" style="margin:0; color:inherit; width:100%" |
| * '''Slot 3''': {{Aiming Systems Modification 1}}
| | ! style="background-color:#1a3244; color:#ffffff; font-weight:bold;" | SECONDARY BATTERY !! style="background-color:#1a3244; color:#ffffff; font-weight:bold;" | |
| * '''Slot 4''': {{Propulsion Modification 1}}
| | |- |
| | | style="color:inherit;" | • Secondary battery range (km) || style="color:inherit;" | 4.0 |
| | |} |
| | </div> |
|
| |
|
| Players who have access to it are recommended to install the {{Smoke Generator Modification 1}} upgrade in Slot 3 to extend ''Haida's'' {{Crawling Smoke Generator}}'s activation time.
| | <div style="border: 2px solid rgba(212,175,55,0.8); border-radius: 3px; margin-bottom: 1em; overflow: hidden;"> |
| | {| class="wikitable" style="margin:0; color:inherit; width:100%" |
| | ! style="background-color:#1a3244; color:#ffffff; font-weight:bold;" | SECONDARY ARMAMENT 1 !! style="background-color:#1a3244; color:#ffffff; font-weight:bold;" | |
| | |- |
| | | style="color:inherit;" | • Shell type || style="color:inherit;" | HE |
| | |- |
| | | style="color:inherit;" | • Name || style="color:inherit;" | 102 mm HE 35 lb |
| | |- |
| | | style="color:inherit;" | • Arrangement || style="color:inherit;" | 2x102mm |
| | |- |
| | | style="color:inherit;" | • Rate of fire (shots/min) || style="color:inherit;" | 20.0 |
| | |- |
| | | style="color:inherit;" | • Maximum damage || style="color:inherit;" | 1500 |
| | |- |
| | | style="color:inherit;" | • Shell velocity (m/s) || style="color:inherit;" | 811 |
| | |- |
| | | style="color:inherit;" | • Penetration (mm) || style="color:inherit;" | 17 |
| | |- |
| | | style="color:inherit;" | • Fire chance (%) || style="color:inherit;" | 6.0% |
| | |} |
| | </div> |
|
| |
|
| |CommanderSkills=<!-- write text about best set of Commander Skills below -->
| |
| Key skills for ''{{#var:ship_name}}'' commanders include standard Destroyer skills such as <u>Concealment Expert</u>, <u>Last Stand</u>, and <u>Survivability Expert</u>.
| |
|
| |
|
| {{Commander Skills 3 DD
| |
| <!-- Ratings 1,2,3 are legit. Others are ignored.-->
| |
| | rating11 = <!-- Grease the Gears -->
| |
| | rating12 = <!-- Liquidator -->
| |
| | rating13 = <!-- Consumables Specialist -->
| |
| | rating14 = <!-- Gun Feeder -->
| |
| | rating15 = <!-- Incoming Fire Alert -->
| |
| | rating16 = 2 <!-- Preventive Maintenance -->
| |
|
| |
|
| | rating21 = 2 <!-- Demolition Expert-->
| | </div></div></div> |
| | rating22 = <!-- Swift Fish -->
| | <div class="b-popup"><div class="b-popup_head js-tech-nav_head"><div><h2>AA Defense</h2></div><span class="b-tech-nav_arrow"></span></div><div class="b-popup_content" style="display: none;"><div> |
| | rating23 = <!-- Consumables Enhancements -->
| | <div style="border: 2px solid rgba(212,175,55,0.8); border-radius: 3px; margin-bottom: 1em; overflow: hidden;"> |
| | rating24 = <!-- Extra-Heavy AP Shells --> | | {| class="wikitable" style="margin:0 0 0.8em 0; width:100%; color:inherit;" |
| | rating25 = <!-- Priority Target --> | | ! style="background-color:#1a3244; color:#ffffff; font-weight:bold;" | AA ARMAMENT !! style="background-color:#1a3244; color:#ffffff; font-weight:bold;" | MOUNTS × BARRELS |
| | rating26 = 2 <!-- Last Stand --> | | |- |
| | | style="color:inherit;" | 102 mm || style="color:inherit;" | 1 × 2 |
| | |- |
| | | style="color:inherit;" | 40 mm || style="color:inherit;" | 1 × 4 |
| | |- |
| | | style="color:inherit;" | 20 mm || style="color:inherit;" | 6 × 2 |
| | |} |
|
| |
|
| | rating31 = 2 <!-- Main Battery & AA Specialist --> | | '''Continuous damage''' — average DPS within each action zone |
| | rating32 = <!-- Fill the Tubes --> | | {| class="wikitable" style="margin:0 0 0.8em 0; width:100%; color:inherit;" |
| | rating33 = 2 <!-- Adrenaline Rush --> | | ! style="background-color:#1a3244; color:#ffffff; font-weight:bold;" | RANGE !! style="background-color:#1a3244; color:#ffffff; font-weight:bold;" | DPS !! style="background-color:#1a3244; color:#ffffff; font-weight:bold;" | HIT CHANCE !! style="background-color:#1a3244; color:#ffffff; font-weight:bold;" | ACTION ZONE (km) |
| | rating34 = <!-- Inertial Fuse for HE Shells --> | | |- |
| | rating35 = 2 <!-- Superintendent --> | | | style="color:inherit;" | Short-range || style="color:inherit;" | 119 || style="color:inherit;" | 95% || style="color:inherit;" | 2.0 |
| | rating36 = 2 <!-- Survivability Expert --> | | |- |
| | | style="color:inherit;" | Mid-range || style="color:inherit;" | 35 || style="color:inherit;" | 100% || style="color:inherit;" | 2.5 |
| | |- |
| | | style="color:inherit;" | Long-range || style="color:inherit;" | 17.5 || style="color:inherit;" | 100% || style="color:inherit;" | 5.8 |
| | |} |
|
| |
|
| | rating41 = <!-- Main Battery & AA Expert --> | | '''Damage by shell explosions''' |
| | rating42 = <!-- Swift in Silence --> | | {| class="wikitable" style="margin:0 0 0.8em 0; width:100%; color:inherit;" |
| | rating43 = <!-- Radio Location --> | | ! style="background-color:#1a3244; color:#ffffff; font-weight:bold;" | EXPLOSIONS / SALVO !! style="background-color:#1a3244; color:#ffffff; font-weight:bold;" | DAMAGE !! style="background-color:#1a3244; color:#ffffff; font-weight:bold;" | HIT CHANCE !! style="background-color:#1a3244; color:#ffffff; font-weight:bold;" | ACTION ZONE (km) |
| | rating44 = <!-- Fearless Brawler -->
| | |- |
| | rating45 = 2 <!-- Concealment Expert --> | | | style="color:inherit;" | 1 || style="color:inherit;" | 170 || style="color:inherit;" | 100% || style="color:inherit;" | 3.5–5.8 |
| | rating46 = <!-- Dazzle --> | | |} |
| }}
| | </div> |
| | </div></div></div> |
| | <div class="b-popup"><div class="b-popup_head js-tech-nav_head"><div><h2>Depth Charges</h2></div><span class="b-tech-nav_arrow"></span></div><div class="b-popup_content" style="display: none;"><div> |
| | <div style="border: 2px solid rgba(212,175,55,0.8); border-radius: 3px; margin-bottom: 1em; overflow: hidden;"> |
| | {| class="wikitable" style="margin:0; color:inherit; width:100%" |
| | ! style="background-color:#1a3244; color:#ffffff; font-weight:bold;" | DEPTH CHARGES !! style="background-color:#1a3244; color:#ffffff; font-weight:bold;" | |
| | |- |
| | | style="color:inherit;" | • Max damage || style="color:inherit;" | 5000 |
| | |- |
| | | style="color:inherit;" | • Number of charges || style="color:inherit;" | 2 |
| | |- |
| | | style="color:inherit;" | • Bombs per charge || style="color:inherit;" | 3 |
| | |- |
| | | style="color:inherit;" | • Reload time (sec) || style="color:inherit;" | 40.0 |
| | |} |
| | </div> |
| | </div></div></div> |
|
| |
|
| |Consumables=<!-- write text about selection of Consumables below -->
| |
| ''{{#var:ship_name}}'' equips the following consumables:
| |
| * '''Slot 1:''' {{Damage Control Party}}
| |
| * '''Slot 2:''' {{Crawling Smoke Generator}} – 3 charges
| |
| * '''Slot 3:''' {{Engine Boost}} – 3 charges
| |
| * '''Slot 4:''' {{Hydroacoustic Search}} – 3 charges
| |
|
| |
|
| |Camouflage={{Prem Ship Camo Insert|shiptier=7}}
| | <!-- Add the ship code here to populate the upgrade table --> |
| | {{Ship Upgrades Section|code=PUSD507_Haida}} |
|
| |
|
| |Signals=<!-- write text about best set of signals below -->
| |
|
| |
|
| {{Signal Flags
| | <!-- Consumables have to be tagged individually on a slot by slot basis --> |
| <!-- The usual 1,2,3 rating; others ignored. Zero may be useful to other editors to remind that the signal has no effect on the ship. --> | | {{Ship Consumables Section|consumables= |
| | | * '''Slot 1:''' {{Damage Control Party}} (5.0s action, 40.0s cooldown) |
| | Juliet Charlie = 3 <!-- No Detonate --> | | * '''Slot 2:''' {{Smoke Generator}} (3 charges, 102.0s action, 80.0s cooldown) |
| | India Yankee = <!-- -20% Fire duration -->
| | * '''Slot 3:''' {{Engine Boost}} (3 charges, 120.0s action, 120.0s cooldown) |
| | Juliet Yankee Bissotwo = <!-- -20% flood duration -->
| | * '''Slot 4:''' {{Hydroacoustic Search}} (3 charges, 180.0s action, 120.0s cooldown) |
| | Hotel Yankee = <!-- ram someone -->
| | }} |
| | Victor Lima = 3 <!-- +1/0.5% (160mm) fire, +4% flood -->
| |
| | India X-Ray = 2 <!-- +1/0.5% (160mm) fire, +5% you detonate -->
| |
|
| |
|
| | Juliet Whiskey Unaone = 2 <!-- +15% flood, +5% you detonate -->
| |
| | Mike Yankee Soxisix = <!-- Secondaries: +5% range, -5% reload, -5% dispersion-->
| |
| | November Echo Setteseven = <!-- +5% AA damage -->
| |
| | Sierra Mike = 3 <!-- +5% speed -->
| |
| | November Foxtrot = 3 <!-- -5% Consumables reload -->
| |
| | India Delta = 0 <!-- +20% HP from Repair Party -->
| |
|
| |
|
| | X-Ray Papa Unaone = 2 <!-- +15% Smoke Gen action time -->
| | ==Gallery== |
| | Sierra Bravo = 2 <!-- +10% Hydro action time; -10% DAAF reload time -->
| | <div class="b-popup"><div class="b-popup_head js-tech-nav_head"><div><h2>WoWs Gallery</h2></div><span class="b-tech-nav_arrow"></span></div><div class="b-popup_content" style="display: none;"><div> |
| }}
| |
|
| |
|
| |Gallery=<!-- write below list of files with description (if necessary) separated with | --><gallery>
| | <gallery> |
| File:HaidaStart.jpg
| |
| File:HaidaLeaf.jpg
| |
| File:HaidaSign.jpg
| |
| File:HaidaShoots.jpg
| |
| File:HaidaScores.jpg
| |
| File:HaidaDD.jpg
| |
| File:Haidaeath.jpg
| |
| File:HaidaRIP.jpg
| |
| </gallery> | | </gallery> |
| | </div></div></div> |
|
| |
|
| |History=<!-- write text below -->
| | <div class="b-popup"><div class="b-popup_head js-tech-nav_head"><div><h2>Historical Gallery</h2></div><span class="b-tech-nav_arrow"></span></div><div class="b-popup_content" style="display: none;"><div> |
| <div class="thumb tright"> | |
| {{AnnoWiki|content=
| |
| <h2>HMCS ''{{#var:ship_name}}'', 1943</h2> | |
| ====Construction====
| |
| :Builder: Vickers-Armstrongs Ltd,<br> Newcastle-upon-Tyne, United Kingdom
| |
| :Laid down: 29 September 1941
| |
| :Launched: 25 August 1942
| |
| :Commissioned: 30 August 1943
| |
| ----
| |
| ====Specifications==== | |
| :1,990 tons displacement, standard
| |
| :114.9m length
| |
| :11.4m beam
| |
| :4.0m draft
| |
| ---- | |
| ====Machinery====
| |
| :3 Admiralty triple-drum type oil-fired boilers
| |
| :2 shaft-geared Parsons steam turbines
| |
| ----
| |
| ====Performance====
| |
| :36.5 knots at 44,000 shaft horsepower
| |
| :4950 nm at 15 knots
| |
| ----
| |
| ====Armor====
| |
| :Main belt: 19mm
| |
| :Decks: 10mm-19mm
| |
| :Turrets: 6mm
| |
| :Fore and Aft Plating: 16mm
| |
| ----
| |
| ====Armament====
| |
| =====Main=====
| |
| :Six (3x2) 120mm/45 QF Mark XII guns
| |
| =====Secondary=====
| |
| :Two (1x2) 102mm/45 QF Mark XVI dual-purpose guns
| |
| =====Anti-aircraft=====
| |
| :Four (1x4) 40mm/39 QF Mark VII guns
| |
| :Twelve (6x2) 20mm/70 Oerlikon Mark V guns
| |
| =====Torpedoes=====
| |
| :Four (1x4) 533mm Mark IX Torpedoes
| |
| ----
| |
| ====Complement====
| |
| :14 Officers, 246 Enlisted
| |
| }}
| |
| {{AnnoWiki|content=
| |
| <h2>HMCS ''{{#var:ship_name}}'', 1952</h2>
| |
| ====Specifications====
| |
| :2,000 tons displacement, standard
| |
| :114.9m length
| |
| :11.4m beam
| |
| :2.8m draft
| |
| ----
| |
| ====Armament====
| |
| =====Main=====
| |
| :Four (2x2) 102mm/45 Mark XVI dual-purpose guns
| |
| =====Anti-aircraft=====
| |
| :Two (2x1) 76mm/50 Mark 33 guns
| |
| :Four (1x4) 40mm/56 Bofors Mark 2 guns
| |
| =====Torpedoes=====
| |
| :Four (1x4) 533mm Mark IX Torpedoes
| |
| }}
| |
| </div> | |
| {{VideoYT|BEfg-nMnMxI}}
| |
| | |
| ====Design==== | |
| First thoughts of a new destroyer class percolated within the [[Ship:Ships of U.K.|Royal Navy]] as early as 1934, when became clear that a versatile and powerful destroyer leader design was needed which would displace not more than 1,850 tons to not break the 1930 London Naval Treaty. The intended tasks of such a vessel would range from patrol and guard duties over to escorting convoys, to supporting destroyer flotillas, up to defending fleets, convoys, and ports against air attacks. To fulfill these tasks, it was concluded that a heavy artillery component would be required, so early designs proposed ten (10) 120mm guns in five turrets, several machine guns for air defense, and also torpedo tubes in case of night battles. The idea of installing the 40mm 2-pdr “PomPoms” was quickly discarded, as such installations would only increase the displacement, and they could always be installed later on in case of hostilities, as in those cases the restrictions of any treaty would no longer be a factor.
| |
| | |
| As the design progressed through 1935, it was decided to abandon the idea of five turrets and incorporate the “PomPoms” into the design. This happened in part as a result of the American ''Somers''-class, which also featured four twin turrets, and the British designers did not want to cause a naval arms race by building even stronger ships.
| |
| | |
| The initial configuration displaced 1,854 tons, and had machinery which allowed up to 44,000 shaft horsepower for a maximum speed of 36 knots. However, when fully loaded up to 2,519 tons displacement, this speed would drop to 32.5 knots. Like most destroyers of the British Navy, they had a very impressive cruising range of 5,700 statute miles, exceeding the operating range of many foreign destroyers. The armament consisted of four twin-mounted 120mm guns with a maximum elevation 40°, which were directed by a fire control system that could track both sea and air targets, giving the main armament a theoretical ability to engage low flying aircraft. One quadruple 40mm 2-pdr and two .50-caliber machine guns would ensure close range AA defense, while one quadruple 533mm torpedo launcher provided additional striking power against surface units. The anti-submarine armament consisted of 20 depth charges.
| |
| | |
| In 1936, seven ships were ordered; these began to enter service in 1938. Due to political reasons, and the increasing threat of foreign navies — particularly Germany, which had begun to build very large and combat capable destroyers — nine more were ordered only a few months after the first seven. In 1939, three further vessels were built for the Royal Australian Navy, and four more for the Royal Canadian Navy followed in 1940. Canada also built four more ships in their own shipyards, bringing the final tally to twenty-seven (27) vessels of the class constructed. Christened the Tribal class, all twenty-seven ships were named after indigenous tribes of native peoples found throughout the British Empire (such as ''Sikh'', ''Iroquois'', and ''Warramunga'').
| |
| | |
| After the onset of World War II, aircraft proved to be a very effective counter to destroyers, and two Tribal-class ships were sunk by air attacks (HMS ''Afridi'' and HMS ''Gurkha''). In the interest of increasing their anti-aircraft defenses, the X-turret was removed and replaced by a twin high-angle 102mm dual purpose gun. The light and medium AA was similarly revised and modernized by adding 20mm Oerlikons and the famous 40mm Bofors, which eventually replaced the 2-pdr quadruple and the .50-caliber machine guns. Additionally, the number of depth charges was increased to up to 46 as the ships saw increasing service performing convoy duties during the Battle of the Atlantic. As it became available, members of the class also received radar equipment; however, this only happened from 1944 onwards.
| |
| | |
| The Canadian Tribals built by Vickers had a few design differences compared to the ones built for the Royal Navy. First of all, the quad “pom-pom” was placed just forward of the X-turret, which gave the weapon much greater high-angle firing arcs; it’s original placement was taken over by a searchlight mount. Interestingly for ''Haida'', she was built with a different bridge than the first generation Tribal-class destroyers; she omitted an elevated control tower as its functionality became obsolescent.
| |
| | |
| In the late 1940s, ''Haida'' underwent a massive refit of armaments and equipment. Her two forward twin 4.7-inch guns were replaced by 2 MkXVI mounts sprouting twin 4-inch guns (similar to what was on the X mount). The X-turret was replaced with a twin 3-inch/50 calibre guns, and the aft 4.7-inch twin turret was replaced with a pair of Squid anti-submarine mortars. Furthermore she was equipped with a plethora of new radar and sonar equipment.
| |
| | |
| HMCS ''Haida'' was laid down by the Vickers-Armstrong company at Newcastle-upon-Tyne on 29 September 1941. She was launched 25 August 1942 and commissioned into the Royal Canadian Navy on 30 August 1943 (pennant G63) as the twenty-second Tribal-class destroyer completed.
| |
| | |
| ====Service==== | |
| Following commissioning, ''Haida'' was placed under the command of her legendary commander, H. G. DeWolf, and spent the first leg of her career with the British Home Fleet stationed in Scapa Flow. Her primary role was as a convoy escort for merchant vessels to and from Loch Ewe in Scotland to port cities in the Soviet Union. One notable patrol during this time was her participation as the escort for convoy JW 55B, departing Loch Ewe on 20 December 1943 for Murmansk. This was the very convoy that ''[[Scharnhorst]]'' attempted to intercept in her final sortie. While the stationed cruisers kept the German raider at bay, the destroyers shepherded the merchants away from harm to the awaiting Soviet forces near Murmansk.
| |
| | |
| By January of the following year, ''Haida'' was assigned to the 10th Destroyer Flotilla stationed on the English Channel. Here she partook in a plethora of patrols along the Bay of Biscay and the Channel, contributing to Operations Tunnel and Hostile: operations designed to suppress German forces in preparation for Operation Overlord. It was here where ''Haida'' earned her reputation as a fearsome fighter.
| |
| | |
| On the night of 25-26 April 1944, a force of Canadian Tribal-class destroyers engaged the 4th Torpedoboat Flotilla of the German [[Ship:Ships_of_Germany|Kriegsmarine]]. ''Haida'' managed to sink ''[[T-22|T-29]]'' via shellfire and crippled ''T-24'', while the rest of the force managed to damage ''T-27''.
| |
| | |
| A few nights later, ''Haida'' — along with HMCS ''Athabaskan'' — re-engaged the remnants of the 4th Torpedoboat Flotilla. ''Haida'' finished what she started by running ''T-27'' aground after lighting her ablaze with gunfire, but not before ''T-24'' scored a direct hit on ''Athabaskan'' with a torpedo salvo. In characteristic bravery – and against orders – DeWolf delved back into the inky night to rescue 44 of ''Haida''’s sister ship’s crew.
| |
| | |
| Six weeks later, ''Haida'' found herself providing supporting fire for the amphibious landings of Operation Overlord. Following D-Day, the 10th Destroyer Flotilla engaged the 8th Destroyer Flotilla, north of the landings. ''Haida'' contributed to sinking ''Z-32''. Actions such as this drove the German [[T-22|E-boat]] presence out of the sector, securing 10th Destroyer Flotilla dominance, granting them free reign to seek and destroy Axis shipping.
| |
| | |
| The remainder of the summer summer was fraught with activity. On a routine patrol on 24 June, reports directed ''Haida'' and HMS ''Eskimo'' towards an ongoing submarine hunt; dropping her own depth charges, she managed to force ''U-971'' to the surface. The German raider attempted to flee, but was gunned down by the two destroyers. In mid-July, ''Haida'' and ORP ''[[Błyskawica]]'' intercepted a large German force of surface ships; the two managed to sink a pair of sub-chasers and one merchant ship, while damaging two other merchantmen. In early August, ''Haida'' took part against another raid on a German convoy, and contributed to the sinking of four enemy vessels. Unfortunately, enemy fire incapacitated a turret and their crew, forcing ''Haida'' to return to Halifax, Nova Scotia for refit and repairs.
| |
| | |
| Once ''Haida'' returned to service back at Scapa Flow, she spent the last few months of the war in Europe on convoy and escort duties. Convoy RA 66 was the last official engagement of the Royal Canadian Navy in World War II; as a contributor, ''Haida'' aided in the sinking of two German submarines. She returned to Canada after the German surrender, and was undergoing refurbishment and refit for the warmer climate of the south Pacific when Japan sued for peace, ending the war.
| |
| | |
| In 1947, ''Haida'' was reactivated and underwent a massive overhaul. Her armaments were replaced and she was ungraded with an entire suite of new radars and sonars, and she spent the late 1940's participating in a few naval exercises. When the Korean War initiated in 1950, ''Haida'' returned to active service. She was re-classified as a destroyer escort (pennant DDE 215) and underwent further refit of armaments and systems. With the work done in early 1952, she set sail for the Far East.
| |
| | |
| Her first duties in November 1952 encompassed shore patrol and aircraft carrier screening operations, which were uneventful. In December, she spent her time on further shore patrols and shelling a coastal batteries and a railway yards near Songjin with USS ''Moore''. In her January 1953 patrols, ''Haida'' finally joined the “Trainbusters Club” when she destroyed a train north of Riwon. This was not an easy feat, as it required sniping the locomotive engine while the trains were darting between coastal tunnels at high speed. A second train fell to her guns in late May, as well as a drifting anti-ship mine. She left in June, returning to Halifax in July.
| |
| | |
| Despite the formal declaration of a cease-fire, ''Haida'' returned to the Korean theater in February 1954 due to reports of infractions between China and North Korea, alongside the still uneasy tensions between the two Koreas. Having spent a few months on patrol, she returned home in November 1954.
| |
| | |
| Following the Korean War, ''Haida'' spent the remainder of the decade on anti-submarine operations, hunting Soviet diesel and nuclear boats alongside other NATO forces all across the North Atlantic and West Indies. Slowly, inexorably, her age began to show with a series of equipment failures that required almost annual refits. By 1963, her days of active service were numbered.
| |
| | |
| One of her final duties was to serve on public tours across the Great Lakes. Among the visitors at one such stop was Neil Bruce, a former RCN rating, who decided he would alter ''Haida''’s fate. Along with four other veterans, they formed HAIDA, Inc. and won possession of the vessel with a $20,000 bid following her decommissioning. After restoration, she was towed to Toronto Harbor where she served as an attraction starting in 1965. Due to financial difficulties, possession of ''Haida'' was transferred to the provincial government in a bid of $1. She continued to serve as a Toronto attraction until 2002, when she was purchased by Parks Canada and towed to her current home in Hamilton, Ontario. After a five million dollar refit, she currently serves her final role as a National Historic Site of Canada, preserving her story for generations of Canadians to come. Fortunately, Canadians are not soon to forget her glory; as of February 2018, “Canada’s Fightingest Warship” has the distinction of serving as the ceremonial flagship of the Royal Canadian Navy.
| |
| | |
| |HistoricalGallery=<!-- write below list of files with description (if necessary) separated with | --><gallery>
| |
| File:HaidaWW2.jpg|''Haida'' as she was during World War II.
| |
| File:HaidaMuseum.jpg|''Haida'' as a museum ship in Hamilton, Ontario.
| |
| File:HaidaSuperstructure.jpg|A closer view of ''Haida's'' superstructure.
| |
| File:HaidaMainGun.jpg|''Haida's'' forward 102mm guns.
| |
| File:HaidaAA.jpg|One of the ship's 76mm anti-aircraft gun mounts.
| |
|
| |
|
| | <gallery> |
| </gallery> | | </gallery> |
| | </div></div></div> |
|
| |
|
| |Video=<!-- put below video clips with using template VideoYT. You can use html-tags for formatting. -->
| | [[Category:Ships of Commonwealth]] |
| {{VideoYT|hHFSvScRi_o}}
| | [[Category:Destroyers]] |
| {{VideoYT|IfMNNhsNuz8}}
| | [[Category:Tier VII ships]] |
| {{VideoYT|Dd3HUwRMegs}}
| | [[Category:Premium ships]]<!-- DO NOT DELETE THIS LINE. DO NOT INSERT ANYTHING BELOW THIS LINE --> |
| | |
| |Ref= <!-- write below -->
| |
| # [https://en.wikipedia.org/wiki/HMCS_Haida HMCS ''Haida'' - Wikipedia]
| |
| # [https://en.wikipedia.org/wiki/Tribal-class_destroyer_(1936) Tribal-class destroyer (1936) - Wikipedia]
| |
| # [https://worldofwarships.com/en/news/history/naval-legends-haida/ Naval Legends. Destroyer Haida - News - World of Warships]
| |
| # [https://www.youtube.com/watch?v=BEfg-nMnMxI Naval Legends: HMCS Haida - World of Warships Official Channel - YouTube]
| |
| | |
| {{WoWS Ship Changelog Insert|1=
| |
| {{WoWS Ship Testing Changes Insert|1=
| |
| *<span class="plainlinks">[https://www.facebook.com/wowsdevblog/posts/pfbid02TKPePAcidjoWCnA94JmMAazQSmr1tsSBdQ8ogoH8HYYA5MtUjAnPqbqjHoPkAzaKl May 28, 2018]</span>:
| |
| **Preliminary characteristics.
| |
| *<span class="plainlinks">[https://www.facebook.com/wowsdevblog/posts/pfbid0WbCYbrtHQpscxfcooh5Fd9j9Ftjvp7SH1STkAwKvc7Yos5Xb7i6MPxyPh8BbrjZSl June 7, 2018]</span>:
| |
| **The firing angles of the main battery were adjusted:
| |
| ***27 degrees both ways was added to Turret 1.
| |
| ***Turret 2 was made able to rotate 360 degrees, firing angles were decreased by 4 degrees each way.
| |
| ***Firing and traverse angles of Turret 3 were decreased by 2 degrees.
| |
| **Hydroacoustic Search ship detection range was decreased from 3.21 to 3.12 km.
| |
| **Hydroacoustic Search torpedo detection range was decreased from 2.79 km to 2.13 km.
| |
| **Smoke Generator cooldown time was decreased from 240 (160 s) to 120 s (80 s).
| |
| **Hit points were increased from 14,800 to 15,700.
| |
| **Main battery firing range was increased from 11.89 to 12.32 km.
| |
| **Secondary battery firing range was decreased from 4.5 to 4.0 km.
| |
| **Top speed was increased from 36 to 36.5 knots.
| |
| **Turning circle radius was increased from 610 to 630 m.
| |
| }}
| |
| *Available for testing by supertesters in the game starting from Update 0.7.6.
| |
| *First appeared on sale in July 2018.
| |
| *Update 0.7.9:
| |
| **The characteristics of the Hydroacoustic Search consumable were changed: the detection range of ships was increased from 3.12 to 3.5 km and the detection range of torpedoes was increased from 2.13 to 2.5 km.
| |
| **Minor fixes to geometry and textures.
| |
| *Update 0.8.7:
| |
| **The Smoke Generator consumable was renamed to Crawling Smoke Generator.
| |
| *Update 0.10.5:
| |
| **Haida became unavailable for purchase.
| |
| *Update 0.11.3:
| |
| **Minor fixes to geometry and textures of the ship.
| |
| *Update 12.5:
| |
| **Crawling Smoke Generator consumable action time increased from 90 to 102 seconds.
| |
| *Update 12.10:
| |
| **Fixed a bug that prevented the British Commonwealth permanent camouflage for the ship from being shown in the Captain's Logbook.
| |
| }}
| |
| }}<!-- DO NOT DELETE THIS LINE. DO NOT INSERT ANYTHING BELOW THIS LINE -->
| |



 (5.0s action, 40.0s cooldown)
 (3 charges, 102.0s action, 80.0s cooldown)
 (3 charges, 120.0s action, 120.0s cooldown)
 (3 charges, 180.0s action, 120.0s cooldown)