Ship:Brisbane B
Automated stats update via wiki pipeline |
Pockington (talk | contribs) Added port image, armor values, pros and cons, and torpedo protection, fixed torpedo stats, removed historical gallery |
||
| Line 5: | Line 5: | ||
===Pros=== | ===Pros=== | ||
* | * Large torpedo count per salvo. | ||
* | * Surveillance Radar consumable available. | ||
* High main battery firing rate. | |||
* High AA defense efficiency | |||
===Cons=== | ===Cons=== | ||
* | * Weak armor. | ||
| Line 21: | Line 22: | ||
| style="color:inherit;" | • Hit Points || style="color:inherit;" | 43300 | | style="color:inherit;" | • Hit Points || style="color:inherit;" | 43300 | ||
|- | |- | ||
| style="color:inherit;" | • Torpedo protection damage reduction (%) || style="color:inherit;" | | | style="color:inherit;" | • Torpedo protection damage reduction (%) || style="color:inherit;" | 13 | ||
|} | |} | ||
</div> | </div> | ||
| Line 29: | Line 30: | ||
! style="background-color:#1a3244; color:#ffffff; font-weight:bold;" | ARMOR DETAIL !! style="background-color:#1a3244; color:#ffffff; font-weight:bold;" | | ! style="background-color:#1a3244; color:#ffffff; font-weight:bold;" | ARMOR DETAIL !! style="background-color:#1a3244; color:#ffffff; font-weight:bold;" | | ||
|- | |- | ||
| style="color:inherit;" | • Belt (mm) || style="color:inherit;" | | | style="color:inherit;" | • Belt (mm) || style="color:inherit;" | 101 | ||
|- | |- | ||
| style="color:inherit;" | • Deck (mm) || style="color:inherit;" | | | style="color:inherit;" | • Deck (mm) || style="color:inherit;" | 16 | ||
|- | |- | ||
| style="color:inherit;" | • Superstructure (mm) || style="color:inherit;" | | | style="color:inherit;" | • Superstructure (mm) || style="color:inherit;" | 13 | ||
|- | |- | ||
| style="color:inherit;" | • Extremities (mm) || style="color:inherit;" | | | style="color:inherit;" | • Extremities (mm) || style="color:inherit;" | 16 | ||
|} | |} | ||
</div> | </div> | ||
| Line 152: | Line 153: | ||
! style="background-color:#1a3244; color:#ffffff; font-weight:bold;" | TORPEDO LAUNCHERS !! style="background-color:#1a3244; color:#ffffff; font-weight:bold;" | | ! style="background-color:#1a3244; color:#ffffff; font-weight:bold;" | TORPEDO LAUNCHERS !! style="background-color:#1a3244; color:#ffffff; font-weight:bold;" | | ||
|- | |- | ||
| style="color:inherit;" | • Number of launchers || style="color:inherit;" | | | style="color:inherit;" | • Number of launchers || style="color:inherit;" | 4 | ||
|- | |- | ||
| style="color:inherit;" | • Torpedo name || style="color:inherit;" | | | style="color:inherit;" | • Torpedo name || style="color:inherit;" | 533mm Mk IXM* | ||
|- | |- | ||
| style="color:inherit;" | • Reload time (sec) || style="color:inherit;" | 131.0 | | style="color:inherit;" | • Reload time (sec) || style="color:inherit;" | 131.0 | ||
| Line 160: | Line 161: | ||
| style="color:inherit;" | • 180° turn time (sec) || style="color:inherit;" | 7.2 | | style="color:inherit;" | • 180° turn time (sec) || style="color:inherit;" | 7.2 | ||
|- | |- | ||
| style="color:inherit;" | • Damage || style="color:inherit;" | | | style="color:inherit;" | • Damage || style="color:inherit;" | 16767 | ||
|- | |- | ||
| style="color:inherit;" | • Range (km) || style="color:inherit;" | | | style="color:inherit;" | • Range (km) || style="color:inherit;" | 13.5 | ||
|- | |- | ||
| style="color:inherit;" | • Speed (kt) || style="color:inherit;" | 65 | | style="color:inherit;" | • Speed (kt) || style="color:inherit;" | 65 | ||
| Line 231: | Line 232: | ||
<gallery> | <gallery> | ||
</gallery> | </gallery>[[File:BrisbaneBpermacamo.png|thumb|Brisbane B in her default permanent camouflage.]]</div></div></div> | ||
</div></div></div> | |||
<div class="b-popup"><div class="b-popup_head js-tech-nav_head"><div><h2>Historical Gallery</h2></div><span class="b-tech-nav_arrow"></span></div><div class="b-popup_content" style="display: none;"><div> | <div class="b-popup"><div class="b-popup_head js-tech-nav_head"><div><h2>Historical Gallery</h2></div><span class="b-tech-nav_arrow"></span></div><div class="b-popup_content" style="display: none;"><div> | ||
Revision as of 21:00, 30 June 2026

X
31,000 doubloons
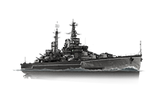
Brisbane B — Commonwealth Special Tier X Cruiser.
After World War II, the Royal Australian Navy started reducing its fleet with the goal of improving the quality of its ships rather than increasing their number. Australia built five modern destroyers and acquired two aircraft carriers from Britain. They also considered purchasing larger ships to escort aircraft carriers. Cruiser Minotaur, equipped with dual-purpose main guns and under development in Britain at that time, could have been a suitable option.
Pros
- Large torpedo count per salvo.
- Surveillance Radar consumable available.
- High main battery firing rate.
- High AA defense efficiency
Cons
- Weak armor.
Ship Stats
Hull Information
Main Battery
Torpedoes
Airstrike
AA Defense
Compatible Upgrades
| Slot 1 |
 |
 |

| |
|---|---|---|---|---|
| Slot 2 |
 |
 |
 |

|
| Slot 3 |
 |
 |
 |

|
| Slot 4 |
 |
 |

| |
| Slot 5 |
 |
 |
 |

|
| Slot 6 |
 |
 |
 |

|
Consumables
- Slot 1: Damage Control Party
 (5.0s action, 60.0s cooldown)
 - Slot 2: Repair Party
 (3 charges, 20.0s action, 80.0s cooldown, 866 hp/s)
 - Slot 3: Hydroacoustic Search
 (3 charges, 100.0s action, 120.0s cooldown)
Gallery
WoWs Gallery

Historical Gallery
Categories:
