Ship:Anhalt
Automated stats update via wiki pipeline |
XDMeloniXD (talk | contribs) No edit summary |
||
| Line 5: | Line 5: | ||
===Pros=== | ===Pros=== | ||
* | * Great damage per salvo | ||
* | * Torpedo armament available | ||
* Improved secondary range | |||
===Cons=== | ===Cons=== | ||
* | * AP shells with low penetration capabilities | ||
* | * Low speed | ||
* Poor AA capability | |||
| Line 21: | Line 24: | ||
| style="color:inherit;" | • Hit Points || style="color:inherit;" | 69500 | | style="color:inherit;" | • Hit Points || style="color:inherit;" | 69500 | ||
|- | |- | ||
| style="color:inherit;" | • Torpedo protection damage reduction (%) || style="color:inherit;" | | | style="color:inherit;" | • Torpedo protection damage reduction (%) || style="color:inherit;" | 20 | ||
|} | |} | ||
</div> | </div> | ||
| Line 29: | Line 32: | ||
! style="background-color:#1a3244; color:#ffffff; font-weight:bold;" | ARMOR DETAIL !! style="background-color:#1a3244; color:#ffffff; font-weight:bold;" | | ! style="background-color:#1a3244; color:#ffffff; font-weight:bold;" | ARMOR DETAIL !! style="background-color:#1a3244; color:#ffffff; font-weight:bold;" | | ||
|- | |- | ||
| style="color:inherit;" | • Belt (mm) || style="color:inherit;" | | | style="color:inherit;" | • Belt (mm) || style="color:inherit;" | 350 | ||
|- | |- | ||
| style="color:inherit;" | • Deck (mm) || style="color:inherit;" | | | style="color:inherit;" | • Deck (mm) || style="color:inherit;" | 50 | ||
|- | |- | ||
| style="color:inherit;" | • Superstructure (mm) || style="color:inherit;" | | | style="color:inherit;" | • Superstructure (mm) || style="color:inherit;" | 19 | ||
|- | |- | ||
| style="color:inherit;" | • Extremities (mm) || style="color:inherit;" | | | style="color:inherit;" | • Extremities (mm) || style="color:inherit;" | 32 | ||
|} | |} | ||
</div> | </div> | ||
| Line 47: | Line 50: | ||
| style="color:inherit;" | • Turning circle radius (m) || style="color:inherit;" | 900 | | style="color:inherit;" | • Turning circle radius (m) || style="color:inherit;" | 900 | ||
|- | |- | ||
| style="color:inherit;" | • Rudder-shift time (sec) || style="color:inherit;" | | | style="color:inherit;" | • Rudder-shift time (sec) || style="color:inherit;" | 16 | ||
|} | |} | ||
</div> | </div> | ||
| Line 154: | Line 157: | ||
! style="background-color:#1a3244; color:#ffffff; font-weight:bold;" | TORPEDO LAUNCHERS !! style="background-color:#1a3244; color:#ffffff; font-weight:bold;" | | ! style="background-color:#1a3244; color:#ffffff; font-weight:bold;" | TORPEDO LAUNCHERS !! style="background-color:#1a3244; color:#ffffff; font-weight:bold;" | | ||
|- | |- | ||
| style="color:inherit;" | • Number of launchers || style="color:inherit;" | | | style="color:inherit;" | • Number of launchers || style="color:inherit;" | 4x1 700 mm | ||
|- | |- | ||
| style="color:inherit;" | • Torpedo name || style="color:inherit;" | | | style="color:inherit;" | • Torpedo name || style="color:inherit;" | J9 | ||
|- | |- | ||
| style="color:inherit;" | • Reload time (sec) || style="color:inherit;" | 45.0 | | style="color:inherit;" | • Reload time (sec) || style="color:inherit;" | 45.0 | ||
| Line 162: | Line 165: | ||
| style="color:inherit;" | • 180° turn time (sec) || style="color:inherit;" | 15.0 | | style="color:inherit;" | • 180° turn time (sec) || style="color:inherit;" | 15.0 | ||
|- | |- | ||
| style="color:inherit;" | • Damage || style="color:inherit;" | | | style="color:inherit;" | • Damage || style="color:inherit;" | 20633 | ||
|- | |- | ||
| style="color:inherit;" | • Range (km) || style="color:inherit;" | | | style="color:inherit;" | • Range (km) || style="color:inherit;" | 6 | ||
|- | |- | ||
| style="color:inherit;" | • Speed (kt) || style="color:inherit;" | 54 | | style="color:inherit;" | • Speed (kt) || style="color:inherit;" | 54 | ||
| Line 170: | Line 173: | ||
| style="color:inherit;" | • Detectability (km) || style="color:inherit;" | 1.7 | | style="color:inherit;" | • Detectability (km) || style="color:inherit;" | 1.7 | ||
|- | |- | ||
| style="color:inherit;" | • Flooding chance (%) || style="color:inherit;" | | | style="color:inherit;" | • Flooding chance (%) || style="color:inherit;" | 343% | ||
|} | |} | ||
</div> | </div> | ||
| Line 192: | Line 195: | ||
| style="color:inherit;" | • Name || style="color:inherit;" | 150 mm HE K Gr 18 | | style="color:inherit;" | • Name || style="color:inherit;" | 150 mm HE K Gr 18 | ||
|- | |- | ||
| style="color:inherit;" | • Arrangement || style="color:inherit;" | | | style="color:inherit;" | • Arrangement || style="color:inherit;" | 8x1 150mm | ||
|- | |- | ||
| style="color:inherit;" | • Rate of fire (shots/min) || style="color:inherit;" | 7.0 | | style="color:inherit;" | • Rate of fire (shots/min) || style="color:inherit;" | 7.0 | ||
| Line 214: | Line 217: | ||
| style="color:inherit;" | • Name || style="color:inherit;" | 105 mm Spr.Gr. Kz. | | style="color:inherit;" | • Name || style="color:inherit;" | 105 mm Spr.Gr. Kz. | ||
|- | |- | ||
| style="color:inherit;" | • Arrangement || style="color:inherit;" | | | style="color:inherit;" | • Arrangement || style="color:inherit;" | 6x2 105mm | ||
|- | |- | ||
| style="color:inherit;" | • Rate of fire (shots/min) || style="color:inherit;" | 17.9 | | style="color:inherit;" | • Rate of fire (shots/min) || style="color:inherit;" | 17.9 | ||
| Line 268: | Line 271: | ||
! style="background-color:#1a3244; color:#ffffff; font-weight:bold;" | RANGE !! style="background-color:#1a3244; color:#ffffff; font-weight:bold;" | DPS !! style="background-color:#1a3244; color:#ffffff; font-weight:bold;" | HIT CHANCE !! style="background-color:#1a3244; color:#ffffff; font-weight:bold;" | ACTION ZONE (km) | ! style="background-color:#1a3244; color:#ffffff; font-weight:bold;" | RANGE !! style="background-color:#1a3244; color:#ffffff; font-weight:bold;" | DPS !! style="background-color:#1a3244; color:#ffffff; font-weight:bold;" | HIT CHANCE !! style="background-color:#1a3244; color:#ffffff; font-weight:bold;" | ACTION ZONE (km) | ||
|- | |- | ||
| style="color:inherit;" | Short-range || style="color:inherit;" | | | style="color:inherit;" | Short-range || style="color:inherit;" | 206 || style="color:inherit;" | 70% || style="color:inherit;" | 2.0 | ||
|- | |- | ||
| style="color:inherit;" | Mid-range || style="color:inherit;" | | | style="color:inherit;" | Mid-range || style="color:inherit;" | 137 || style="color:inherit;" | 75% || style="color:inherit;" | 3.5 | ||
|- | |- | ||
| style="color:inherit;" | Long-range || style="color:inherit;" | | | style="color:inherit;" | Long-range || style="color:inherit;" | 92 || style="color:inherit;" | 75% || style="color:inherit;" | 5.2 | ||
|} | |} | ||
Revision as of 18:52, 2 July 2026

VIII
11,000 doubloons
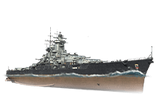
Anhalt — Germany Premium Tier VIII Battleship.
In 1916, Kaiser Wilhelm II received initial drafts for a fresh battleship derived from the design principles embedded in battleship Bayern. One of the projects featured five main-caliber turrets, three of which were located at the ship's rear. To improve stability, it would have been necessary to increase the ship's length and move two turrets to the deck below. Under one of the variants, the ship's armament consisted of five triple-gun turrets housing 350 mm guns. However, their defeat in World War I prevented Germany from laying the new ship down.
Pros
- Great damage per salvo
- Torpedo armament available
- Improved secondary range
Cons
- AP shells with low penetration capabilities
- Low speed
- Poor AA capability
Ship Stats
Hull Information
Main Battery
Torpedoes
Secondary Battery
Airstrike
AA Defense
Compatible Upgrades
| Slot 1 |
 |
 |
 |

| |
|---|---|---|---|---|---|
| Slot 2 |
 |

| |||
| Slot 3 |
 |
 |
 |
 |

|
| Slot 4 |
 |
 |
 |

| |
| Slot 5 |
 |
 |

|
Consumables
- Slot 1: Damage Control Party
 (15.0s action, 80.0s cooldown)
 - Slot 2: Repair Party
 (4 charges, 28.0s action, 80.0s cooldown, 347.5 hp/s)
 - Slot 3: Spotting Aircraft
 (4 charges, 100.0s action, 240.0s cooldown) or Patrol Fighter
  (3 charges, 60.0s action, 90.0s cooldown)
