Ship:Brisbane B
Pockington (talk | contribs) Added port image, armor values, pros and cons, and torpedo protection, fixed torpedo stats, removed historical gallery |
Pockington (talk | contribs) fixed torpedo count, added flak info, and fixed DP mount not appearing, and ruddershift |
||
| Line 48: | Line 48: | ||
| style="color:inherit;" | • Turning circle radius (m) || style="color:inherit;" | 750 | | style="color:inherit;" | • Turning circle radius (m) || style="color:inherit;" | 750 | ||
|- | |- | ||
| style="color:inherit;" | • Rudder-shift time (sec) || style="color:inherit;" | | | style="color:inherit;" | • Rudder-shift time (sec) || style="color:inherit;" | 10.4 | ||
|} | |} | ||
</div> | </div> | ||
| Line 153: | Line 153: | ||
! style="background-color:#1a3244; color:#ffffff; font-weight:bold;" | TORPEDO LAUNCHERS !! style="background-color:#1a3244; color:#ffffff; font-weight:bold;" | | ! style="background-color:#1a3244; color:#ffffff; font-weight:bold;" | TORPEDO LAUNCHERS !! style="background-color:#1a3244; color:#ffffff; font-weight:bold;" | | ||
|- | |- | ||
| style="color:inherit;" | • Number of launchers || style="color:inherit;" | | | style="color:inherit;" | • Number of launchers || style="color:inherit;" | 4x5 | ||
|- | |- | ||
| style="color:inherit;" | • Torpedo name || style="color:inherit;" | 533mm Mk IXM* | | style="color:inherit;" | • Torpedo name || style="color:inherit;" | 533mm Mk IXM* | ||
| Line 169: | Line 169: | ||
| style="color:inherit;" | • Detectability (km) || style="color:inherit;" | 1.3 | | style="color:inherit;" | • Detectability (km) || style="color:inherit;" | 1.3 | ||
|- | |- | ||
| style="color:inherit;" | • Flooding chance (%) || style="color:inherit;" | | | style="color:inherit;" | • Flooding chance (%) || style="color:inherit;" | 282% | ||
|} | |} | ||
</div> | </div> | ||
| Line 200: | Line 200: | ||
{| class="wikitable" style="margin:0 0 0.8em 0; width:100%; color:inherit;" | {| class="wikitable" style="margin:0 0 0.8em 0; width:100%; color:inherit;" | ||
! style="background-color:#1a3244; color:#ffffff; font-weight:bold;" | AA ARMAMENT !! style="background-color:#1a3244; color:#ffffff; font-weight:bold;" | MOUNTS × BARRELS | ! style="background-color:#1a3244; color:#ffffff; font-weight:bold;" | AA ARMAMENT !! style="background-color:#1a3244; color:#ffffff; font-weight:bold;" | MOUNTS × BARRELS | ||
|- | |||
| style="color:inherit;" | 152 mm || style="color:inherit;" | 5 × 2 | |||
|- | |- | ||
| style="color:inherit;" | 76 mm || style="color:inherit;" | 8 × 2 | | style="color:inherit;" | 76 mm || style="color:inherit;" | 8 × 2 | ||
| Line 211: | Line 213: | ||
|- | |- | ||
| style="color:inherit;" | Mid-range || style="color:inherit;" | 588 || style="color:inherit;" | 90% || style="color:inherit;" | 4.0 | | style="color:inherit;" | Mid-range || style="color:inherit;" | 588 || style="color:inherit;" | 90% || style="color:inherit;" | 4.0 | ||
|- | |||
| style="color:inherit;" | Long-range || style="color:inherit;" | 133 || style="color:inherit;" | 90% || style="color:inherit;" | 6.9 | |||
|} | |||
'''Damage by shell explosions''' | |||
{| class="wikitable" style="margin:0 0 0.8em 0; width:100%; color:inherit;" | |||
! style="background-color:#1a3244; color:#ffffff; font-weight:bold;" | EXPLOSIONS / SALVO !! style="background-color:#1a3244; color:#ffffff; font-weight:bold;" | DAMAGE !! style="background-color:#1a3244; color:#ffffff; font-weight:bold;" | HIT CHANCE !! style="background-color:#1a3244; color:#ffffff; font-weight:bold;" | ACTION ZONE (km) | |||
|- | |||
| style="color:inherit;" | 6 || style="color:inherit;" | 1890 || style="color:inherit;" | 90% || style="color:inherit;" | 3.5–6.9 | |||
|} | |} | ||
</div> | </div> | ||
</div></div></div> | </div></div></div> | ||
Revision as of 18:48, 3 July 2026

X
31,000 doubloons
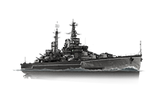
Brisbane B — Commonwealth Special Tier X Cruiser.
After World War II, the Royal Australian Navy started reducing its fleet with the goal of improving the quality of its ships rather than increasing their number. Australia built five modern destroyers and acquired two aircraft carriers from Britain. They also considered purchasing larger ships to escort aircraft carriers. Cruiser Minotaur, equipped with dual-purpose main guns and under development in Britain at that time, could have been a suitable option.
Pros
- Large torpedo count per salvo.
- Surveillance Radar consumable available.
- High main battery firing rate.
- High AA defense efficiency
Cons
- Weak armor.
Ship Stats
Hull Information
Main Battery
Torpedoes
Airstrike
AA Defense
Categories:
