Ship:Blücher
Automated stats update via wiki pipeline |
DinhTuan1206 (talk | contribs) Added pros/cons and adjusted some parameters |
||
| Line 5: | Line 5: | ||
===Pros=== | ===Pros=== | ||
* | * High firing accuracy of the main battery | ||
* | * High AP shell efficiency | ||
* Long firing range | |||
* Enhanced Engine Boost consumable available | |||
===Cons=== | ===Cons=== | ||
* | * HE shells deal low damage per salvo | ||
* | * Low damage per minute | ||
| Line 21: | Line 23: | ||
| style="color:inherit;" | • Hit Points || style="color:inherit;" | 45300 | | style="color:inherit;" | • Hit Points || style="color:inherit;" | 45300 | ||
|- | |- | ||
| style="color:inherit;" | • Torpedo protection damage reduction (%) || style="color:inherit;" | | | style="color:inherit;" | • Torpedo protection damage reduction (%) || style="color:inherit;" | 10% | ||
|} | |} | ||
</div> | </div> | ||
| Line 29: | Line 31: | ||
! style="background-color:#1a3244; color:#ffffff; font-weight:bold;" | ARMOR DETAIL !! style="background-color:#1a3244; color:#ffffff; font-weight:bold;" | | ! style="background-color:#1a3244; color:#ffffff; font-weight:bold;" | ARMOR DETAIL !! style="background-color:#1a3244; color:#ffffff; font-weight:bold;" | | ||
|- | |- | ||
| style="color:inherit;" | • Belt (mm) || style="color:inherit;" | | | style="color:inherit;" | • Belt (mm) || style="color:inherit;" | 80mm | ||
|- | |- | ||
| style="color:inherit;" | • Deck (mm) || style="color:inherit;" | | | style="color:inherit;" | • Deck (mm) || style="color:inherit;" | 27mm | ||
|- | |- | ||
| style="color:inherit;" | • Superstructure (mm) || style="color:inherit;" | | | style="color:inherit;" | • Superstructure (mm) || style="color:inherit;" | 16mm | ||
|- | |- | ||
| style="color:inherit;" | • Extremities (mm) || style="color:inherit;" | | | style="color:inherit;" | • Extremities (mm) || style="color:inherit;" | 27mm | ||
|} | |} | ||
</div> | </div> | ||
| Line 47: | Line 49: | ||
| style="color:inherit;" | • Turning circle radius (m) || style="color:inherit;" | 740 | | style="color:inherit;" | • Turning circle radius (m) || style="color:inherit;" | 740 | ||
|- | |- | ||
| style="color:inherit;" | • Rudder-shift time (sec) || style="color:inherit;" | | | style="color:inherit;" | • Rudder-shift time (sec) || style="color:inherit;" | 8.3s | ||
|} | |} | ||
</div> | </div> | ||
| Line 152: | Line 154: | ||
! style="background-color:#1a3244; color:#ffffff; font-weight:bold;" | TORPEDO LAUNCHERS !! style="background-color:#1a3244; color:#ffffff; font-weight:bold;" | | ! style="background-color:#1a3244; color:#ffffff; font-weight:bold;" | TORPEDO LAUNCHERS !! style="background-color:#1a3244; color:#ffffff; font-weight:bold;" | | ||
|- | |- | ||
| style="color:inherit;" | • Number of launchers || style="color:inherit;" | | | style="color:inherit;" | • Number of launchers || style="color:inherit;" | 4x3 | ||
|- | |- | ||
| style="color:inherit;" | • Torpedo name || style="color:inherit;" | | | style="color:inherit;" | • Torpedo name || style="color:inherit;" | G7a T1 | ||
|- | |- | ||
| style="color:inherit;" | • Reload time (sec) || style="color:inherit;" | 80.0 | | style="color:inherit;" | • Reload time (sec) || style="color:inherit;" | 80.0 | ||
| Line 160: | Line 162: | ||
| style="color:inherit;" | • 180° turn time (sec) || style="color:inherit;" | 7.2 | | style="color:inherit;" | • 180° turn time (sec) || style="color:inherit;" | 7.2 | ||
|- | |- | ||
| style="color:inherit;" | • Damage || style="color:inherit;" | | | style="color:inherit;" | • Damage || style="color:inherit;" | 13700 | ||
|- | |- | ||
| style="color:inherit;" | • Range (km) || style="color:inherit;" | 0 | | style="color:inherit;" | • Range (km) || style="color:inherit;" | 8.0 | ||
|- | |- | ||
| style="color:inherit;" | • Speed (kt) || style="color:inherit;" | 60 | | style="color:inherit;" | • Speed (kt) || style="color:inherit;" | 60 | ||
| Line 168: | Line 170: | ||
| style="color:inherit;" | • Detectability (km) || style="color:inherit;" | 1.3 | | style="color:inherit;" | • Detectability (km) || style="color:inherit;" | 1.3 | ||
|- | |- | ||
| style="color:inherit;" | • Flooding chance (%) || style="color:inherit;" | | | style="color:inherit;" | • Flooding chance (%) || style="color:inherit;" | 227% | ||
|} | |} | ||
</div> | </div> | ||
| Line 190: | Line 192: | ||
| style="color:inherit;" | • Name || style="color:inherit;" | 105 mm Spr.Gr. Kz. | | style="color:inherit;" | • Name || style="color:inherit;" | 105 mm Spr.Gr. Kz. | ||
|- | |- | ||
| style="color:inherit;" | • Arrangement || style="color:inherit;" | | | style="color:inherit;" | • Arrangement || style="color:inherit;" | 6x2 105mm | ||
|- | |- | ||
| style="color:inherit;" | • Rate of fire (shots/min) || style="color:inherit;" | | | style="color:inherit;" | • Rate of fire (shots/min) || style="color:inherit;" | 107.5 | ||
|- | |- | ||
| style="color:inherit;" | • Maximum damage || style="color:inherit;" | 1200 | | style="color:inherit;" | • Maximum damage || style="color:inherit;" | 1200 | ||
| Line 277: | Line 279: | ||
==Gallery== | ==Gallery== | ||
<div class="b-popup"><div class="b-popup_head js-tech-nav_head"><div><h2>WoWs Gallery</h2></div><span class="b-tech-nav_arrow"></span></div><div class="b-popup_content" style="display: none;"><div> | <div class="b-popup"><div class="b-popup_head js-tech-nav_head"><div><h2>WoWs Gallery</h2></div><span class="b-tech-nav_arrow"></span></div>[[File:World of Warships Screenshot 2026.07.05 - 19.16.09.43.png|alt=Blucher in her "Lost in Fjord" camo|left|thumb]]<div class="b-popup_content" style="display: none;"><div> | ||
<gallery> | <gallery> | ||
Revision as of 12:19, 5 July 2026

IX
28,500 doubloons
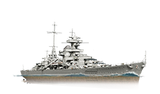
Blücher — Germany Premium Tier IX Cruiser.
An Admiral Hipper-class heavy cruiser and the second ship in this series, Blücher was distinguished by powerful armament and quite an advanced fire control system for her time. In early April 1940, shortly after completing her sea trials, she played a key role in Operation Weserübung—the German invasion of Norway and Denmark. Serving as the flagship of the squadron tasked with capturing Oslo, the cruiser was sunk on April 9, 1940, while attacking Norwegian coastal fortifications.
Pros
- High firing accuracy of the main battery
- High AP shell efficiency
- Long firing range
- Enhanced Engine Boost consumable available
Cons
- HE shells deal low damage per salvo
- Low damage per minute
Ship Stats
Hull Information
Main Battery
Torpedoes
Secondary Battery
Airstrike
AA Defense
Compatible Upgrades
| Slot 1 |
 |
 |
 |

| |
|---|---|---|---|---|---|
| Slot 2 |
 |
 |
 |

| |
| Slot 3 |
 |
 |
 |
 |

|
| Slot 4 |
 |
 |
 |

| |
| Slot 5 |
 |
 |
 |

| |
| Slot 6 |
 |
 |
 |

|
Consumables
- Slot 1: Damage Control Party
 (5.0s action, 60.0s cooldown)
 - Slot 2: Repair Party
 (4 charges, 28.0s action, 80.0s cooldown, 226.5 hp/s)
 - Slot 3: Hydroacoustic Search
 (3 charges, 120.0s action, 120.0s cooldown) or Defensive AA Fire
  (3 charges, 40.0s action, 80.0s cooldown)
 - Slot 4: Spotting Aircraft
 (4 charges, 100.0s action, 240.0s cooldown) or Patrol Fighter
  (3 charges, 60.0s action, 90.0s cooldown)
 - Slot 5: Engine Boost
 (3 charges, 180.0s action, 90.0s cooldown)
Gallery
WoWs Gallery

