Ship:Siegfried
Automated stats update via wiki pipeline |
DinhTuan1206 (talk | contribs) m Added pros/cons and adjusted some parameters |
||
| Line 5: | Line 5: | ||
===Pros=== | ===Pros=== | ||
* | * High survivability | ||
* | * High main battery firing accuracy and armor penetration capabilities | ||
* AP shells deal heavy damage per salvo | |||
* Long firing range | |||
===Cons=== | ===Cons=== | ||
* | * Low damage per minute | ||
| Line 21: | Line 22: | ||
| style="color:inherit;" | • Hit Points || style="color:inherit;" | 62850 | | style="color:inherit;" | • Hit Points || style="color:inherit;" | 62850 | ||
|- | |- | ||
| style="color:inherit;" | • Torpedo protection damage reduction (%) || style="color:inherit;" | | | style="color:inherit;" | • Torpedo protection damage reduction (%) || style="color:inherit;" | 37% | ||
|} | |} | ||
</div> | </div> | ||
| Line 29: | Line 30: | ||
! style="background-color:#1a3244; color:#ffffff; font-weight:bold;" | ARMOR DETAIL !! style="background-color:#1a3244; color:#ffffff; font-weight:bold;" | | ! style="background-color:#1a3244; color:#ffffff; font-weight:bold;" | ARMOR DETAIL !! style="background-color:#1a3244; color:#ffffff; font-weight:bold;" | | ||
|- | |- | ||
| style="color:inherit;" | • Belt (mm) || style="color:inherit;" | | | style="color:inherit;" | • Belt (mm) || style="color:inherit;" | 190mm | ||
|- | |- | ||
| style="color:inherit;" | • Deck (mm) || style="color:inherit;" | | | style="color:inherit;" | • Deck (mm) || style="color:inherit;" | 30mm | ||
|- | |- | ||
| style="color:inherit;" | • Superstructure (mm) || style="color:inherit;" | | | style="color:inherit;" | • Superstructure (mm) || style="color:inherit;" | 16mm | ||
|- | |- | ||
| style="color:inherit;" | • Extremities (mm) || style="color:inherit;" | | | style="color:inherit;" | • Extremities (mm) || style="color:inherit;" | 27mm | ||
|} | |} | ||
</div> | </div> | ||
| Line 47: | Line 48: | ||
| style="color:inherit;" | • Turning circle radius (m) || style="color:inherit;" | 880 | | style="color:inherit;" | • Turning circle radius (m) || style="color:inherit;" | 880 | ||
|- | |- | ||
| style="color:inherit;" | • Rudder-shift time (sec) || style="color:inherit;" | | | style="color:inherit;" | • Rudder-shift time (sec) || style="color:inherit;" | 14.0 | ||
|} | |} | ||
</div> | </div> | ||
| Line 154: | Line 155: | ||
! style="background-color:#1a3244; color:#ffffff; font-weight:bold;" | TORPEDO LAUNCHERS !! style="background-color:#1a3244; color:#ffffff; font-weight:bold;" | | ! style="background-color:#1a3244; color:#ffffff; font-weight:bold;" | TORPEDO LAUNCHERS !! style="background-color:#1a3244; color:#ffffff; font-weight:bold;" | | ||
|- | |- | ||
| style="color:inherit;" | • Number of launchers || style="color:inherit;" | | | style="color:inherit;" | • Number of launchers || style="color:inherit;" | 2.4 | ||
|- | |- | ||
| style="color:inherit;" | • Torpedo name || style="color:inherit;" | | | style="color:inherit;" | • Torpedo name || style="color:inherit;" | G7a T1 | ||
|- | |- | ||
| style="color:inherit;" | • Reload time (sec) || style="color:inherit;" | 90.0 | | style="color:inherit;" | • Reload time (sec) || style="color:inherit;" | 90.0 | ||
| Line 162: | Line 163: | ||
| style="color:inherit;" | • 180° turn time (sec) || style="color:inherit;" | 7.2 | | style="color:inherit;" | • 180° turn time (sec) || style="color:inherit;" | 7.2 | ||
|- | |- | ||
| style="color:inherit;" | • Damage || style="color:inherit;" | | | style="color:inherit;" | • Damage || style="color:inherit;" | 13700 | ||
|- | |- | ||
| style="color:inherit;" | • Range (km) || style="color:inherit;" | 0 | | style="color:inherit;" | • Range (km) || style="color:inherit;" | 6.0 | ||
|- | |- | ||
| style="color:inherit;" | • Speed (kt) || style="color:inherit;" | 65 | | style="color:inherit;" | • Speed (kt) || style="color:inherit;" | 65 | ||
| Line 170: | Line 171: | ||
| style="color:inherit;" | • Detectability (km) || style="color:inherit;" | 1.3 | | style="color:inherit;" | • Detectability (km) || style="color:inherit;" | 1.3 | ||
|- | |- | ||
| style="color:inherit;" | • Flooding chance (%) || style="color:inherit;" | | | style="color:inherit;" | • Flooding chance (%) || style="color:inherit;" | 227% | ||
|} | |} | ||
</div> | </div> | ||
| Line 192: | Line 193: | ||
| style="color:inherit;" | • Name || style="color:inherit;" | 128 mm Spr.Gr. Kz. | | style="color:inherit;" | • Name || style="color:inherit;" | 128 mm Spr.Gr. Kz. | ||
|- | |- | ||
| style="color:inherit;" | • Arrangement || style="color:inherit;" | | | style="color:inherit;" | • Arrangement || style="color:inherit;" | 7x2 128mm | ||
|- | |- | ||
| style="color:inherit;" | • Rate of fire (shots/min) || style="color:inherit;" | | | style="color:inherit;" | • Rate of fire (shots/min) || style="color:inherit;" | 133.3 | ||
|- | |- | ||
| style="color:inherit;" | • Maximum damage || style="color:inherit;" | 1500 | | style="color:inherit;" | • Maximum damage || style="color:inherit;" | 1500 | ||
| Line 278: | Line 279: | ||
==Gallery== | ==Gallery== | ||
<div class="b-popup"><div class="b-popup_head js-tech-nav_head"><div><h2>WoWs Gallery</h2></div><span class="b-tech-nav_arrow"></span></div><div class="b-popup_content" style="display: none;"><div> | <div class="b-popup"><div class="b-popup_head js-tech-nav_head"><div><h2>WoWs Gallery</h2></div><span class="b-tech-nav_arrow"></span></div>[[File:World of Warships Screenshot 2026.07.05 - 19.38.56.45.png|left|thumb]]<div class="b-popup_content" style="display: none;"><div> | ||
<gallery> | <gallery> | ||
Revision as of 13:05, 5 July 2026

IX
21,500 doubloons
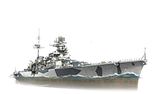
Siegfried — Germany Premium Tier IX Cruiser.
In 1938, a decision prevailed that in addition to raider cruisers, the German Navy needed full-fledged battlecruisers equipped with heavy guns. Under the new project, the ship's hull was enlarged to accommodate three gun mounts, and the caliber was increased to 380 mm. The all-diesel power plant was replaced with a combined one. In 1939, the first of the planned three ships was ordered; however, not a single battlecruiser was ever laid down due to a shortage of materials, which were being used mainly for the construction of submarines at the beginning of World War II.
Pros
- High survivability
- High main battery firing accuracy and armor penetration capabilities
- AP shells deal heavy damage per salvo
- Long firing range
Cons
- Low damage per minute
Ship Stats
Hull Information
Main Battery
Torpedoes
Secondary Battery
Airstrike
AA Defense
Compatible Upgrades
| Slot 1 |
 |
 |
 |

| |
|---|---|---|---|---|---|
| Slot 2 |
 |
 |

| ||
| Slot 3 |
 |
 |
 |
 |

|
| Slot 4 |
 |
 |
 |

| |
| Slot 5 |
 |
 |
 |

| |
| Slot 6 |
 |
 |
 |

|
Consumables
- Slot 1: Damage Control Party
 (5.0s action, 60.0s cooldown)
 - Slot 2: Hydroacoustic Search
 (3 charges, 120.0s action, 120.0s cooldown) or Defensive AA Fire
  (3 charges, 40.0s action, 80.0s cooldown)
 - Slot 3: Spotting Aircraft
 (4 charges, 100.0s action, 240.0s cooldown) or Patrol Fighter
  (3 charges, 60.0s action, 90.0s cooldown)
 - Slot 4: Repair Party
 (3 charges, 28.0s action, 80.0s cooldown, 314.2 hp/s)
Gallery
WoWs Gallery

