Ship:G-101
Automated stats update via wiki pipeline |
Added pros and cons, armor values, change in main battery AA armament with Hull(B), one image to WoWS gallery; made corrections to ruddershift, and torpedoes |
||
| Line 5: | Line 5: | ||
===Pros=== | ===Pros=== | ||
* | * Forward-facing torpedo tubes available | ||
* | * HE shells have high armor penetration capability | ||
===Cons=== | ===Cons=== | ||
* | * Short dispersion time for smokescreen | ||
* | * Low HE shell damage | ||
| Line 29: | Line 31: | ||
! style="background-color:#1a3244; color:#ffffff; font-weight:bold;" | ARMOR DETAIL !! style="background-color:#1a3244; color:#ffffff; font-weight:bold;" | | ! style="background-color:#1a3244; color:#ffffff; font-weight:bold;" | ARMOR DETAIL !! style="background-color:#1a3244; color:#ffffff; font-weight:bold;" | | ||
|- | |- | ||
| style="color:inherit;" | • Belt (mm) || style="color:inherit;" | | | style="color:inherit;" | • Belt (mm) || style="color:inherit;" | 10 | ||
|- | |- | ||
| style="color:inherit;" | • Deck (mm) || style="color:inherit;" | | | style="color:inherit;" | • Deck (mm) || style="color:inherit;" | 10 | ||
|- | |- | ||
| style="color:inherit;" | • Superstructure (mm) || style="color:inherit;" | | | style="color:inherit;" | • Superstructure (mm) || style="color:inherit;" | 6 | ||
|- | |- | ||
| style="color:inherit;" | • Extremities (mm) || style="color:inherit;" | | | style="color:inherit;" | • Extremities (mm) || style="color:inherit;" | 6 | ||
|} | |} | ||
</div> | </div> | ||
| Line 47: | Line 49: | ||
| style="color:inherit;" | • Turning circle radius (m) || style="color:inherit;" | 520 || style="color:inherit;" | 520 | | style="color:inherit;" | • Turning circle radius (m) || style="color:inherit;" | 520 || style="color:inherit;" | 520 | ||
|- | |- | ||
| style="color:inherit;" | • Rudder-shift time (sec) || style="color:inherit;" | | | style="color:inherit;" | • Rudder-shift time (sec) || style="color:inherit;" | 4.1 || style="color:inherit;" | 2.9 | ||
|} | |} | ||
</div> | </div> | ||
| Line 146: | Line 148: | ||
<div style="border: 2px solid rgba(212,175,55,0.8); border-radius: 3px; margin-bottom: 1em; overflow: hidden;"> | <div style="border: 2px solid rgba(212,175,55,0.8); border-radius: 3px; margin-bottom: 1em; overflow: hidden;"> | ||
{| class="wikitable" style="margin:0; color:inherit; width:100%" | {| class="wikitable" style="margin:0; color:inherit; width:100%" | ||
! style="background-color:#1a3244; color:#ffffff; font-weight:bold;" | TORPEDO LAUNCHERS !! style="background-color:#1a3244; color:#ffffff; font-weight:bold;" | | ! style="background-color:#1a3244; color:#ffffff; font-weight:bold;" | TORPEDO LAUNCHERS !! style="background-color:#1a3244; color:#ffffff; font-weight:bold;" | G/6 AV** !! style="background-color:#1a3244; color:#ffffff; font-weight:bold;" | G/6 D | ||
|- | |- | ||
| style="color:inherit;" | • Number of launchers || style="color:inherit;" | | | style="color:inherit;" | • Number of launchers || style="color:inherit;" | 2X1 + 2X2 500mm || style="color:inherit;" | 2x1 + 2x2 500mm | ||
|- | |- | ||
| style="color:inherit;" | • Torpedo name || style="color:inherit;" | | | style="color:inherit;" | • Torpedo name || style="color:inherit;" | G/6 AV** || style="color:inherit;" | G/6 D | ||
|- | |- | ||
| style="color:inherit;" | • Reload time (sec) || style="color:inherit;" | 38.0 || style="color:inherit;" | 38.0 | | style="color:inherit;" | • Reload time (sec) || style="color:inherit;" | 38.0 || style="color:inherit;" | 38.0 | ||
| Line 156: | Line 158: | ||
| style="color:inherit;" | • 180° turn time (sec) || style="color:inherit;" | 7.2 || style="color:inherit;" | 7.2 | | style="color:inherit;" | • 180° turn time (sec) || style="color:inherit;" | 7.2 || style="color:inherit;" | 7.2 | ||
|- | |- | ||
| style="color:inherit;" | • Damage || style="color:inherit;" | | | style="color:inherit;" | • Damage || style="color:inherit;" | 10600 || style="color:inherit;" | 10600 | ||
|- | |- | ||
| style="color:inherit;" | • Range (km) || style="color:inherit;" | 0 | | style="color:inherit;" | • Range (km) || style="color:inherit;" | 6.0 || style="color:inherit;" | 7.0 | ||
|- | |- | ||
| style="color:inherit;" | • Speed (kt) || style="color:inherit;" | 49 || style="color:inherit;" | 52 | | style="color:inherit;" | • Speed (kt) || style="color:inherit;" | 49 || style="color:inherit;" | 52 | ||
| Line 164: | Line 166: | ||
| style="color:inherit;" | • Detectability (km) || style="color:inherit;" | 0.9 || style="color:inherit;" | 1.0 | | style="color:inherit;" | • Detectability (km) || style="color:inherit;" | 0.9 || style="color:inherit;" | 1.0 | ||
|- | |- | ||
| style="color:inherit;" | • Flooding chance (%) || style="color:inherit;" | | | style="color:inherit;" | • Flooding chance (%) || style="color:inherit;" | 173% || style="color:inherit;" | 173% | ||
|} | |} | ||
</div> | </div> | ||
</div></div></div> | |||
<div class="b-popup"><div class="b-popup_head js-tech-nav_head"><div><h2>AA Defense</h2></div><span class="b-tech-nav_arrow"></span></div><div class="b-popup_content" style="display: none;"><div> | |||
<div style="border: 2px solid rgba(212,175,55,0.8); border-radius: 3px; margin-bottom: 1em; overflow: hidden;"> | |||
'''G-101 (B)''' | |||
{| class="wikitable" style="margin:0 0 0.8em 0; width:100%; color:inherit;" | |||
! style="background-color:#1a3244; color:#ffffff; font-weight:bold;" | AA ARMAMENT !! style="background-color:#1a3244; color:#ffffff; font-weight:bold;" | MOUNTS × BARRELS | |||
|- | |||
| style="color:inherit;" | 8 mm || style="color:inherit;" | 2 × 1 | |||
|} | |||
'''Continuous damage''' — average DPS within each action zone | |||
{| class="wikitable" style="margin:0 0 0.8em 0; width:100%; color:inherit;" | |||
! style="background-color:#1a3244; color:#ffffff; font-weight:bold;" | RANGE !! style="background-color:#1a3244; color:#ffffff; font-weight:bold;" | DPS !! style="background-color:#1a3244; color:#ffffff; font-weight:bold;" | HIT CHANCE !! style="background-color:#1a3244; color:#ffffff; font-weight:bold;" | ACTION ZONE (km) | |||
|- | |||
| style="color:inherit;" | Short-range || style="color:inherit;" | 11 || style="color:inherit;" | 95% || style="color:inherit;" | 1.5 | |||
|} | |||
</div> | |||
</div></div></div> | </div></div></div> | ||
| Line 187: | Line 206: | ||
<gallery> | <gallery> | ||
File:G-101_in_Hamburg.png | |||
</gallery> | </gallery> | ||
</div></div></div> | </div></div></div> | ||
Revision as of 13:33, 5 July 2026

III
249,000
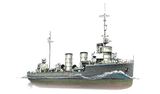
G-101 — Germany Tech Tree Tier III Destroyer.
In 1910 and 1912, Argentina ordered several modern destroyers, some of which were built at the German shipyards of Germaniawerft and Schichau. With the outbreak of World War I, however, the ships were requisitioned and assigned to the 2nd Destroyer Division of the German Navy. SMS G-101, originally laid down as ARA Santiago, entered service in March 1915. The following year, along with the other destroyers of her series, she participated in the Battle of Jutland. After the end of World War I, the ships were interned in Scapa Flow.
Pros
- Forward-facing torpedo tubes available
- HE shells have high armor penetration capability
Cons
- Short dispersion time for smokescreen
- Low HE shell damage
Ship Stats
Hull Information
Main Battery
Torpedoes
AA Defense
Compatible Upgrades
| Slot 1 |
 |
 |

|
|---|---|---|---|
| Slot 2 |
 |
 |

|
Consumables
- Slot 1: Damage Control Party
 (5.0s action, 40.0s cooldown)
 - Slot 2: Smoke Generator
 (3 charges, 20.0s action, 160.0s cooldown)
 - Slot 3: Engine Boost
 (3 charges, 120.0s action, 120.0s cooldown)
Gallery
WoWs Gallery

Historical Gallery
Categories:
