Ship:Montcalm
Automated stats update via wiki pipeline |
added pros and cons, armor values, one photo to WoWS Gallery; made corrections to ruddershift time, secondary battery arrangement and Torpedoes dropdown |
||
| Line 5: | Line 5: | ||
===Pros=== | ===Pros=== | ||
* | * High damage per minute | ||
* | * Long firing range | ||
* Main battery reload booster consumable available | |||
===Cons=== | ===Cons=== | ||
* | * Small HP pool | ||
* | * High detectability | ||
* Low ship speed | |||
| Line 21: | Line 24: | ||
| style="color:inherit;" | • Hit Points || style="color:inherit;" | 27300 | | style="color:inherit;" | • Hit Points || style="color:inherit;" | 27300 | ||
|- | |- | ||
| style="color:inherit;" | • Torpedo protection damage reduction (%) || style="color:inherit;" | | | style="color:inherit;" | • Torpedo protection damage reduction (%) || style="color:inherit;" | 10% | ||
|} | |} | ||
</div> | </div> | ||
| Line 29: | Line 32: | ||
! style="background-color:#1a3244; color:#ffffff; font-weight:bold;" | ARMOR DETAIL !! style="background-color:#1a3244; color:#ffffff; font-weight:bold;" | | ! style="background-color:#1a3244; color:#ffffff; font-weight:bold;" | ARMOR DETAIL !! style="background-color:#1a3244; color:#ffffff; font-weight:bold;" | | ||
|- | |- | ||
| style="color:inherit;" | • Belt (mm) || style="color:inherit;" | | | style="color:inherit;" | • Belt (mm) || style="color:inherit;" | 105 | ||
|- | |- | ||
| style="color:inherit;" | • Deck (mm) || style="color:inherit;" | | | style="color:inherit;" | • Deck (mm) || style="color:inherit;" | 25 | ||
|- | |- | ||
| style="color:inherit;" | • Superstructure (mm) || style="color:inherit;" | | | style="color:inherit;" | • Superstructure (mm) || style="color:inherit;" | 10 | ||
|- | |- | ||
| style="color:inherit;" | • Extremities (mm) || style="color:inherit;" | | | style="color:inherit;" | • Extremities (mm) || style="color:inherit;" | 16 | ||
|} | |} | ||
</div> | </div> | ||
| Line 47: | Line 50: | ||
| style="color:inherit;" | • Turning circle radius (m) || style="color:inherit;" | 650 | | style="color:inherit;" | • Turning circle radius (m) || style="color:inherit;" | 650 | ||
|- | |- | ||
| style="color:inherit;" | • Rudder-shift time (sec) || style="color:inherit;" | | | style="color:inherit;" | • Rudder-shift time (sec) || style="color:inherit;" | 7.7 | ||
|} | |} | ||
</div> | </div> | ||
| Line 70: | Line 73: | ||
! style="background-color:#1a3244; color:#ffffff; font-weight:bold;" | MAIN BATTERY !! style="background-color:#1a3244; color:#ffffff; font-weight:bold;" | | ! style="background-color:#1a3244; color:#ffffff; font-weight:bold;" | MAIN BATTERY !! style="background-color:#1a3244; color:#ffffff; font-weight:bold;" | | ||
|- | |- | ||
| style="color:inherit;" | • Arrangement || style="color:inherit;" | 3×3 | | style="color:inherit;" | • Arrangement || style="color:inherit;" | 3×3 152mm | ||
|- | |- | ||
| style="color:inherit;" | • Firing range (km) || style="color:inherit;" | 18.0 | | style="color:inherit;" | • Firing range (km) || style="color:inherit;" | 18.0 | ||
| Line 152: | Line 155: | ||
! style="background-color:#1a3244; color:#ffffff; font-weight:bold;" | TORPEDO LAUNCHERS !! style="background-color:#1a3244; color:#ffffff; font-weight:bold;" | | ! style="background-color:#1a3244; color:#ffffff; font-weight:bold;" | TORPEDO LAUNCHERS !! style="background-color:#1a3244; color:#ffffff; font-weight:bold;" | | ||
|- | |- | ||
| style="color:inherit;" | • Number of launchers || style="color:inherit;" | | | style="color:inherit;" | • Number of launchers || style="color:inherit;" | 2x2 550mm | ||
|- | |- | ||
| style="color:inherit;" | • Torpedo name || style="color:inherit;" | | | style="color:inherit;" | • Torpedo name || style="color:inherit;" | 550mm 23DT | ||
|- | |- | ||
| style="color:inherit;" | • Reload time (sec) || style="color:inherit;" | 60.0 | | style="color:inherit;" | • Reload time (sec) || style="color:inherit;" | 60.0 | ||
| Line 160: | Line 163: | ||
| style="color:inherit;" | • 180° turn time (sec) || style="color:inherit;" | 7.2 | | style="color:inherit;" | • 180° turn time (sec) || style="color:inherit;" | 7.2 | ||
|- | |- | ||
| style="color:inherit;" | • Damage || style="color:inherit;" | | | style="color:inherit;" | • Damage || style="color:inherit;" | 14833 | ||
|- | |- | ||
| style="color:inherit;" | • Range (km) || style="color:inherit;" | 0 | | style="color:inherit;" | • Range (km) || style="color:inherit;" | 6.0 | ||
|- | |- | ||
| style="color:inherit;" | • Speed (kt) || style="color:inherit;" | 60 | | style="color:inherit;" | • Speed (kt) || style="color:inherit;" | 60 | ||
| Line 168: | Line 171: | ||
| style="color:inherit;" | • Detectability (km) || style="color:inherit;" | 1.3 | | style="color:inherit;" | • Detectability (km) || style="color:inherit;" | 1.3 | ||
|- | |- | ||
| style="color:inherit;" | • Flooding chance (%) || style="color:inherit;" | | | style="color:inherit;" | • Flooding chance (%) || style="color:inherit;" | 246% | ||
|} | |} | ||
</div> | </div> | ||
| Line 190: | Line 193: | ||
| style="color:inherit;" | • Name || style="color:inherit;" | 90 mm HE OEA Mle 1925 | | style="color:inherit;" | • Name || style="color:inherit;" | 90 mm HE OEA Mle 1925 | ||
|- | |- | ||
| style="color:inherit;" | • Arrangement || style="color:inherit;" | | | style="color:inherit;" | • Arrangement || style="color:inherit;" | 4X2 90mm | ||
|- | |- | ||
| style="color:inherit;" | • Rate of fire (shots/min) || style="color:inherit;" | 15.0 | | style="color:inherit;" | • Rate of fire (shots/min) || style="color:inherit;" | 15.0 | ||
| Line 279: | Line 282: | ||
<gallery> | <gallery> | ||
File:Montcalm_in_Marseille.png | |||
</gallery> | </gallery> | ||
</div></div></div> | </div></div></div> | ||
Revision as of 18:37, 5 July 2026

VI
5,500 doubloons
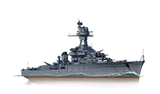
Montcalm — France Premium Tier VI Cruiser.
As one of six light cruisers of the La Galissonnière class, Montcalm stood as the most modern example of her ship type in the French Navy at the onset of World War II. In the initial months of the war, she operated in the North Atlantic and took part in the Norwegian campaign. In 1943, the ship underwent modernization in the U.S. that enhanced her air defenses and radio equipment. In June 1944, Montcalm covered the Allied landings in Normandy in the Omaha sector. Later in the war, the cruiser participated in the liberation of Southern France.
Pros
- High damage per minute
- Long firing range
- Main battery reload booster consumable available
Cons
- Small HP pool
- High detectability
- Low ship speed
Ship Stats
Hull Information
Main Battery
Torpedoes
Secondary Battery
Airstrike
AA Defense
Compatible Upgrades
| Slot 1 |
 |
 |

| ||
|---|---|---|---|---|---|
| Slot 2 |
 |
 |

| ||
| Slot 3 |
 |
 |
 |
 |

|
| Slot 4 |
 |
 |
 |

|
Consumables
- Slot 1: Damage Control Party
 (5.0s action, 60.0s cooldown)
 - Slot 2: Repair Party
 (2 charges, 28.0s action, 80.0s cooldown, 136.5 hp/s)
 - Slot 3: Defensive AA Fire
 (3 charges, 40.0s action, 80.0s cooldown) or Hydroacoustic Search
  (3 charges, 100.0s action, 120.0s cooldown)
 - Slot 4: Main Battery Reload Booster
 (4 charges, 15.0s action, 120.0s cooldown)

