Ship:Kaiser
Automated stats update via wiki pipeline |
DinhTuan1206 (talk | contribs) Added pros/cons and adjusted some parameters |
||
| Line 5: | Line 5: | ||
===Pros=== | ===Pros=== | ||
* | * High survivability | ||
* | * High rate of fire | ||
* High secondary battery gun efficiency | |||
===Cons=== | ===Cons=== | ||
* | * High detectability | ||
* | * Low maneuverability | ||
| Line 21: | Line 22: | ||
| style="color:inherit;" | • Hit Points || style="color:inherit;" | 39900 || style="color:inherit;" | 46400 | | style="color:inherit;" | • Hit Points || style="color:inherit;" | 39900 || style="color:inherit;" | 46400 | ||
|- | |- | ||
| style="color:inherit;" | • Torpedo protection damage reduction (%) || colspan="2" style="color:inherit;" | | | style="color:inherit;" | • Torpedo protection damage reduction (%) || colspan="2" style="color:inherit;" | 22% | ||
|} | |} | ||
</div> | </div> | ||
| Line 29: | Line 30: | ||
! style="background-color:#1a3244; color:#ffffff; font-weight:bold;" | ARMOR DETAIL !! style="background-color:#1a3244; color:#ffffff; font-weight:bold;" | | ! style="background-color:#1a3244; color:#ffffff; font-weight:bold;" | ARMOR DETAIL !! style="background-color:#1a3244; color:#ffffff; font-weight:bold;" | | ||
|- | |- | ||
| style="color:inherit;" | • Belt (mm) || style="color:inherit;" | | | style="color:inherit;" | • Belt (mm) || style="color:inherit;" | 350mm | ||
|- | |- | ||
| style="color:inherit;" | • Deck (mm) || style="color:inherit;" | | | style="color:inherit;" | • Deck (mm) || style="color:inherit;" | 30mm | ||
|- | |- | ||
| style="color:inherit;" | • Superstructure (mm) || style="color:inherit;" | | | style="color:inherit;" | • Superstructure (mm) || style="color:inherit;" | 13mm | ||
|- | |- | ||
| style="color:inherit;" | • Extremities (mm) || style="color:inherit;" | | | style="color:inherit;" | • Extremities (mm) || style="color:inherit;" | 19mm | ||
|} | |} | ||
</div> | </div> | ||
| Line 178: | Line 179: | ||
<div style="border: 2px solid rgba(212,175,55,0.8); border-radius: 3px; margin-bottom: 1em; overflow: hidden;"> | <div style="border: 2px solid rgba(212,175,55,0.8); border-radius: 3px; margin-bottom: 1em; overflow: hidden;"> | ||
{| class="wikitable" style="margin:0; color:inherit; width:100%" | {| class="wikitable" style="margin:0; color:inherit; width:100%" | ||
! style="background-color:#1a3244; color:#ffffff; font-weight:bold;" | SECONDARY ARMAMENT 2 !! style="background-color:#1a3244; color:#ffffff; font-weight:bold;" | | ! style="background-color:#1a3244; color:#ffffff; font-weight:bold;" | SECONDARY ARMAMENT 2 !! style="background-color:#1a3244; color:#ffffff; font-weight:bold;" | Kaiser (A) !! style="background-color:#1a3244; color:#ffffff; font-weight:bold;" | Kaiser (B) | ||
|- | |- | ||
| style="color:inherit;" | • Shell type || style="color:inherit;" | HE | | style="color:inherit;" | • Shell type || colspan="2" style="color:inherit;" | HE | ||
|- | |- | ||
| style="color:inherit;" | • Name || style="color:inherit;" | 88 mm Spr.Gr. | | style="color:inherit;" | • Name || colspan="2" style="color:inherit;" | 88 mm Spr.Gr. | ||
|- | |- | ||
| style="color:inherit;" | • Arrangement || style="color:inherit;" | | | style="color:inherit;" | • Arrangement || style="color:inherit;" | 2x2 88mm || style="color:inherit;" | 4x2 88mm | ||
|- | |- | ||
| style="color:inherit;" | • Rate of fire (shots/min) || style="color:inherit;" | | | style="color:inherit;" | • Rate of fire (shots/min) || style="color:inherit;" | 30.0 || style="color:inherit;" | 60.0 | ||
|- | |- | ||
| style="color:inherit;" | • Maximum damage || style="color:inherit;" | 1000 | | style="color:inherit;" | • Maximum damage || colspan="2" style="color:inherit;" | 1000 | ||
|- | |- | ||
| style="color:inherit;" | • Shell velocity (m/s) || style="color:inherit;" | 950 | | style="color:inherit;" | • Shell velocity (m/s) || colspan="2" style="color:inherit;" | 950 | ||
|- | |- | ||
| style="color:inherit;" | • Penetration (mm) || style="color:inherit;" | 15 | | style="color:inherit;" | • Penetration (mm) || colspan="2" style="color:inherit;" | 15 | ||
|- | |- | ||
| style="color:inherit;" | • Fire chance (%) || style="color:inherit;" | 4.0% | | style="color:inherit;" | • Fire chance (%) || colspan="2" style="color:inherit;" | 4.0% | ||
|} | |} | ||
</div> | </div> | ||
| Line 219: | Line 220: | ||
|- | |- | ||
| style="color:inherit;" | Long-range || style="color:inherit;" | 35 || style="color:inherit;" | 75% || style="color:inherit;" | 4.6 | | style="color:inherit;" | Long-range || style="color:inherit;" | 35 || style="color:inherit;" | 75% || style="color:inherit;" | 4.6 | ||
|} | |} | ||
| Line 273: | Line 278: | ||
==Gallery== | ==Gallery== | ||
<div class="b-popup"><div class="b-popup_head js-tech-nav_head"><div><h2>WoWs Gallery</h2></div><span class="b-tech-nav_arrow"></span></div><div class="b-popup_content" style="display: none;"><div> | <div class="b-popup"><div class="b-popup_head js-tech-nav_head"><div><h2>WoWs Gallery</h2></div><span class="b-tech-nav_arrow"></span></div>[[File:World of Warships Screenshot 2026.07.06 - 03.12.15.23.png|left|thumb]]<div class="b-popup_content" style="display: none;"><div> | ||
<gallery> | <gallery> | ||
Revision as of 20:13, 5 July 2026

IV
774,000
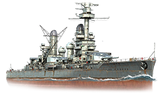
Kaiser — Germany Tech Tree Tier IV Battleship.
The new Kaiser class marked a big leap forward compared with her predecessors: She incorporated steam turbines and a more practical arrangement for her main gun turrets. In particular, Kaiser featured two rear superfiring turrets and two side turrets placed in a diagonal pattern, resulting in one less turret compared to previous designs. SMS Kaiser was launched on March 22, 1911—the birthday of Kaiser Wilhelm. During the Battle of Jutland, Kaiser sank destroyer HMS Nomad and cruiser HMS Defence, and she also heavily damaged battleship Warspite.
Pros
- High survivability
- High rate of fire
- High secondary battery gun efficiency
Cons
- High detectability
- Low maneuverability
Ship Stats
Hull Information
Main Battery
Secondary Battery
AA Defense
Compatible Upgrades
| Slot 1 |
 |
 |

|
|---|---|---|---|
| Slot 2 |
 |

|
Consumables
- Slot 1: Damage Control Party
 (15.0s action, 80.0s cooldown)
 - Slot 2: Repair Party
 (4 charges, 28.0s action, 80.0s cooldown, 199.5 hp/s)
Gallery
WoWs Gallery

Historical Gallery
Categories:
