Ship:Charleston
mNo edit summary |
m Stat additions and images |
||
| Line 5: | Line 5: | ||
===Pros=== | ===Pros=== | ||
* | * High damage per minute | ||
* | * Large HP pool | ||
===Cons=== | ===Cons=== | ||
* | * Low speed | ||
==Ship Stats== | ==Ship Stats== | ||
| Line 21: | Line 19: | ||
| style="color:inherit;" | • Hit Points || style="color:inherit;" | 29500 | | style="color:inherit;" | • Hit Points || style="color:inherit;" | 29500 | ||
|- | |- | ||
| style="color:inherit;" | • Torpedo protection damage reduction (%) || style="color:inherit;" | | | style="color:inherit;" | • Torpedo protection damage reduction (%) || style="color:inherit;" | 0% | ||
|} | |} | ||
</div> | </div> | ||
| Line 29: | Line 27: | ||
! style="background-color:#1a3244; color:#ffffff; font-weight:bold;" | ARMOR DETAIL !! style="background-color:#1a3244; color:#ffffff; font-weight:bold;" | | ! style="background-color:#1a3244; color:#ffffff; font-weight:bold;" | ARMOR DETAIL !! style="background-color:#1a3244; color:#ffffff; font-weight:bold;" | | ||
|- | |- | ||
| style="color:inherit;" | • Belt (mm) || style="color:inherit;" | | | style="color:inherit;" | • Belt (mm) || style="color:inherit;" | 102 | ||
|- | |- | ||
| style="color:inherit;" | • Deck (mm) || style="color:inherit;" | | | style="color:inherit;" | • Deck (mm) || style="color:inherit;" | 13 | ||
|- | |- | ||
| style="color:inherit;" | • Superstructure (mm) || style="color:inherit;" | | | style="color:inherit;" | • Superstructure (mm) || style="color:inherit;" | 6 | ||
|- | |- | ||
| style="color:inherit;" | • Extremities (mm) || style="color:inherit;" | | | style="color:inherit;" | • Extremities (mm) || style="color:inherit;" | 6 | ||
|} | |} | ||
</div> | </div> | ||
| Line 205: | Line 203: | ||
* '''Slot 1:''' {{Damage Control Party}} (5.0s action, 60.0s cooldown) | * '''Slot 1:''' {{Damage Control Party}} (5.0s action, 60.0s cooldown) | ||
}} | }} | ||
==Gallery== | ==Gallery== | ||
| Line 211: | Line 208: | ||
<gallery> | <gallery> | ||
File:CharlestonOcean.png|''Charleston'' | |||
</gallery> | </gallery> | ||
</div>[[File:Charleston3.jpg|left|thumb]]</div></div> | </div>[[File:Charleston3.jpg|left|thumb]]</div></div> | ||
Revision as of 22:44, 5 July 2026

III
2,000 doubloons
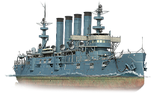
Charleston — U.S.A. Premium Tier III Cruiser.
USS Charleston, the third cruiser of the St. Louis class, served in the Far East until 1910. In 1916 and 1917, she operated as a floating base for submarines. During World War I, the ship was engaged in escorting troop convoys and conducting training exercises for reservists. From 1920 to 1923, the ship served as the floating headquarters for the flagship destroyer of the Pacific Squadron. In 1923, the cruiser was stricken off the Navy's register and subsequently sold in 1930. The ship's hull was repurposed for use as a breakwater in British Columbia. In 1961, it was partially sunk and later towed to Kelsey Bay on Vancouver Island, where it continued its role as a breakwater.
Pros
- High damage per minute
- Large HP pool
Cons
- Low speed
Ship Stats
Hull Information
Main Battery
Secondary Battery
AA Defense
Compatible Upgrades
| Slot 1 |
 |
 |

|
|---|---|---|---|
| Slot 2 |
 |

|
Consumables
- Slot 1: Damage Control Party
 (5.0s action, 60.0s cooldown)


