Ship:Brandenburg
Automated stats update via wiki pipeline |
No edit summary |
||
| Line 5: | Line 5: | ||
===Pros=== | ===Pros=== | ||
* | * Torpedo armament available | ||
* | * High rate of fire | ||
* High secondary battery gun efficiency | |||
===Cons=== | ===Cons=== | ||
* | * AP shells with low armor penetration capabilities | ||
* | * Small HP pool | ||
| Line 21: | Line 22: | ||
| style="color:inherit;" | • Hit Points || style="color:inherit;" | 58800 | | style="color:inherit;" | • Hit Points || style="color:inherit;" | 58800 | ||
|- | |- | ||
| style="color:inherit;" | • Torpedo protection damage reduction (%) || style="color:inherit;" | | | style="color:inherit;" | • Torpedo protection damage reduction (%) || style="color:inherit;" | 23% | ||
|} | |} | ||
</div> | </div> | ||
| Line 29: | Line 30: | ||
! style="background-color:#1a3244; color:#ffffff; font-weight:bold;" | ARMOR DETAIL !! style="background-color:#1a3244; color:#ffffff; font-weight:bold;" | | ! style="background-color:#1a3244; color:#ffffff; font-weight:bold;" | ARMOR DETAIL !! style="background-color:#1a3244; color:#ffffff; font-weight:bold;" | | ||
|- | |- | ||
| style="color:inherit;" | • Belt (mm) || style="color:inherit;" | | | style="color:inherit;" | • Belt (mm) || style="color:inherit;" | 350 | ||
|- | |- | ||
| style="color:inherit;" | • Deck (mm) || style="color:inherit;" | | | style="color:inherit;" | • Deck (mm) || style="color:inherit;" | 50 | ||
|- | |- | ||
| style="color:inherit;" | • Superstructure (mm) || style="color:inherit;" | | | style="color:inherit;" | • Superstructure (mm) || style="color:inherit;" | 19 | ||
|- | |- | ||
| style="color:inherit;" | • Extremities (mm) || style="color:inherit;" | | | style="color:inherit;" | • Extremities (mm) || style="color:inherit;" | 32 | ||
|} | |} | ||
</div> | </div> | ||
| Line 47: | Line 48: | ||
| style="color:inherit;" | • Turning circle radius (m) || style="color:inherit;" | 820 | | style="color:inherit;" | • Turning circle radius (m) || style="color:inherit;" | 820 | ||
|- | |- | ||
| style="color:inherit;" | • Rudder-shift time (sec) || style="color:inherit;" | | | style="color:inherit;" | • Rudder-shift time (sec) || style="color:inherit;" | 15.7 | ||
|} | |} | ||
</div> | </div> | ||
| Line 154: | Line 155: | ||
| style="color:inherit;" | • Number of launchers || style="color:inherit;" | 1 | | style="color:inherit;" | • Number of launchers || style="color:inherit;" | 1 | ||
|- | |- | ||
| style="color:inherit;" | • Torpedo name || style="color:inherit;" | | | style="color:inherit;" | • Torpedo name || style="color:inherit;" | G7a T1 | ||
|- | |- | ||
| style="color:inherit;" | • Reload time (sec) || style="color:inherit;" | 90.0 | | style="color:inherit;" | • Reload time (sec) || style="color:inherit;" | 90.0 | ||
| Line 160: | Line 161: | ||
| style="color:inherit;" | • 180° turn time (sec) || style="color:inherit;" | 7.2 | | style="color:inherit;" | • 180° turn time (sec) || style="color:inherit;" | 7.2 | ||
|- | |- | ||
| style="color:inherit;" | • Damage || style="color:inherit;" | | | style="color:inherit;" | • Damage || style="color:inherit;" | 13700 | ||
|- | |- | ||
| style="color:inherit;" | • Range (km) || style="color:inherit;" | 0 | | style="color:inherit;" | • Range (km) || style="color:inherit;" | 6.0 | ||
|- | |- | ||
| style="color:inherit;" | • Speed (kt) || style="color:inherit;" | 64 | | style="color:inherit;" | • Speed (kt) || style="color:inherit;" | 64 | ||
| Line 168: | Line 169: | ||
| style="color:inherit;" | • Detectability (km) || style="color:inherit;" | 1.3 | | style="color:inherit;" | • Detectability (km) || style="color:inherit;" | 1.3 | ||
|- | |- | ||
| style="color:inherit;" | • Flooding chance (%) || style="color:inherit;" | | | style="color:inherit;" | • Flooding chance (%) || style="color:inherit;" | 227% | ||
|} | |} | ||
</div> | </div> | ||
| Line 190: | Line 191: | ||
| style="color:inherit;" | • Name || style="color:inherit;" | 150 mm Spr.Gr. L/4.5 | | style="color:inherit;" | • Name || style="color:inherit;" | 150 mm Spr.Gr. L/4.5 | ||
|- | |- | ||
| style="color:inherit;" | • Arrangement || style="color:inherit;" | | | style="color:inherit;" | • Arrangement || style="color:inherit;" | 6x 2 150mm | ||
|- | |- | ||
| style="color:inherit;" | • Rate of fire (shots/min) || style="color:inherit;" | 8.0 | | style="color:inherit;" | • Rate of fire (shots/min) || style="color:inherit;" | 8.0 | ||
| Line 212: | Line 213: | ||
| style="color:inherit;" | • Name || style="color:inherit;" | 105 mm Spr.Gr. Kz. | | style="color:inherit;" | • Name || style="color:inherit;" | 105 mm Spr.Gr. Kz. | ||
|- | |- | ||
| style="color:inherit;" | • Arrangement || style="color:inherit;" | | | style="color:inherit;" | • Arrangement || style="color:inherit;" | 10x 2 105mm | ||
|- | |- | ||
| style="color:inherit;" | • Rate of fire (shots/min) || style="color:inherit;" | 17.9 | | style="color:inherit;" | • Rate of fire (shots/min) || style="color:inherit;" | 17.9 | ||
| Line 223: | Line 224: | ||
|- | |- | ||
| style="color:inherit;" | • Fire chance (%) || style="color:inherit;" | 5.0% | | style="color:inherit;" | • Fire chance (%) || style="color:inherit;" | 5.0% | ||
|} | |} | ||
</div> | </div> | ||
| Line 294: | Line 273: | ||
! style="background-color:#1a3244; color:#ffffff; font-weight:bold;" | EXPLOSIONS / SALVO !! style="background-color:#1a3244; color:#ffffff; font-weight:bold;" | DAMAGE !! style="background-color:#1a3244; color:#ffffff; font-weight:bold;" | HIT CHANCE !! style="background-color:#1a3244; color:#ffffff; font-weight:bold;" | ACTION ZONE (km) | ! style="background-color:#1a3244; color:#ffffff; font-weight:bold;" | EXPLOSIONS / SALVO !! style="background-color:#1a3244; color:#ffffff; font-weight:bold;" | DAMAGE !! style="background-color:#1a3244; color:#ffffff; font-weight:bold;" | HIT CHANCE !! style="background-color:#1a3244; color:#ffffff; font-weight:bold;" | ACTION ZONE (km) | ||
|- | |- | ||
| style="color:inherit;" | 8 || style="color:inherit;" | | | style="color:inherit;" | 8 || style="color:inherit;" | 1400 || style="color:inherit;" | 75% || style="color:inherit;" | 3.5–5.2 | ||
|} | |} | ||
</div> | </div> | ||
| Line 318: | Line 297: | ||
</gallery> | </gallery> | ||
</div></div></div> | </div></div></div> | ||
[[File:Brandenburg_ingame_2026.png|400px]] | |||
<div class="b-popup"><div class="b-popup_head js-tech-nav_head"><div><h2>Historical Gallery</h2></div><span class="b-tech-nav_arrow"></span></div><div class="b-popup_content" style="display: none;"><div> | <div class="b-popup"><div class="b-popup_head js-tech-nav_head"><div><h2>Historical Gallery</h2></div><span class="b-tech-nav_arrow"></span></div><div class="b-popup_content" style="display: none;"><div> | ||
Revision as of 22:46, 5 July 2026

VIII
11,000 doubloons
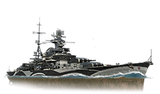
Brandenburg — Germany Premium Tier VIII Battleship.
In 1932, Germany began research for a 35,000-ton battleship project. It was based on the design of World War I battlecruiser Ersatz Yorck. At this time, Britain was inclined to reduce the limit of her battleships' main caliber to 305 mm, viewing this caliber as the main one. Moreover, this caliber implied utilizing a balanced armor scheme for that displacement. However, the project to build a battleship carrying 305 mm guns was eventually abandoned after France laid down her Dunkerque battlecruiser armed with 330 mm guns.
Pros
- Torpedo armament available
- High rate of fire
- High secondary battery gun efficiency
Cons
- AP shells with low armor penetration capabilities
- Small HP pool
Ship Stats
Hull Information
Main Battery
Torpedoes
Secondary Battery
Airstrike
AA Defense
Compatible Upgrades
| Slot 1 |
 |
 |
 |

| |
|---|---|---|---|---|---|
| Slot 2 |
 |

| |||
| Slot 3 |
 |
 |
 |
 |

|
| Slot 4 |
 |
 |
 |

| |
| Slot 5 |
 |
 |

|
Consumables
- Slot 1: Damage Control Party
 (15.0s action, 80.0s cooldown)
 - Slot 2: Repair Party
 (4 charges, 28.0s action, 80.0s cooldown, 294 hp/s)
 - Slot 3: Spotting Aircraft
 (4 charges, 100.0s action, 240.0s cooldown) or Patrol Fighter
  (3 charges, 60.0s action, 90.0s cooldown)
Gallery
WoWs Gallery

