Ship:Kaga B
Automated stats update via wiki pipeline |
WarshipFoxy (talk | contribs) No edit summary |
||
| Line 5: | Line 5: | ||
===Pros=== | ===Pros=== | ||
* | * Large number of aircraft on deck | ||
* | * Heavy aerial torpedo damage | ||
* Low detectability | |||
* Large number of aircraft in an attacking flight | |||
* Large number of aircraft in a squadron | |||
===Cons=== | ===Cons=== | ||
* | * Low aircraft survivability | ||
| Line 21: | Line 25: | ||
| style="color:inherit;" | • Hit Points || style="color:inherit;" | 54200 | | style="color:inherit;" | • Hit Points || style="color:inherit;" | 54200 | ||
|- | |- | ||
| style="color:inherit;" | • Torpedo protection damage reduction (%) || style="color:inherit;" | | | style="color:inherit;" | • Torpedo protection damage reduction (%) || style="color:inherit;" | 22 | ||
|} | |} | ||
</div> | </div> | ||
| Line 29: | Line 33: | ||
! style="background-color:#1a3244; color:#ffffff; font-weight:bold;" | ARMOR DETAIL !! style="background-color:#1a3244; color:#ffffff; font-weight:bold;" | | ! style="background-color:#1a3244; color:#ffffff; font-weight:bold;" | ARMOR DETAIL !! style="background-color:#1a3244; color:#ffffff; font-weight:bold;" | | ||
|- | |- | ||
| style="color:inherit;" | • Belt (mm) || style="color:inherit;" | | | style="color:inherit;" | • Belt (mm) || style="color:inherit;" | 152 | ||
|- | |- | ||
| style="color:inherit;" | • Deck (mm) || style="color:inherit;" | | | style="color:inherit;" | • Deck (mm) || style="color:inherit;" | 21 | ||
|- | |- | ||
| style="color:inherit;" | • Superstructure (mm) || style="color:inherit;" | | | style="color:inherit;" | • Superstructure (mm) || style="color:inherit;" | 13 | ||
|- | |- | ||
| style="color:inherit;" | • Extremities (mm) || style="color:inherit;" | | | style="color:inherit;" | • Extremities (mm) || style="color:inherit;" | 21 | ||
|} | |} | ||
</div> | </div> | ||
| Line 81: | Line 85: | ||
| style="color:inherit;" | • Shell type || colspan="2" style="color:inherit;" | HE | | style="color:inherit;" | • Shell type || colspan="2" style="color:inherit;" | HE | ||
|- | |- | ||
| style="color:inherit;" | • Name || colspan="2" style="color:inherit;" | | | style="color:inherit;" | • Name || colspan="2" style="color:inherit;" | 127 mm HE Type3 | ||
|- | |- | ||
| style="color:inherit;" | • Arrangement || colspan="2" style="color:inherit;" | | | style="color:inherit;" | • Arrangement || colspan="2" style="color:inherit;" | 6x2 127mm | ||
|- | |- | ||
| style="color:inherit;" | • Rate of fire (shots/min) || style="color:inherit;" | 12.0 || style="color:inherit;" | 9.0 | | style="color:inherit;" | • Rate of fire (shots/min) || style="color:inherit;" | 12.0 || style="color:inherit;" | 9.0 | ||
| Line 103: | Line 107: | ||
| style="color:inherit;" | • Shell type || colspan="2" style="color:inherit;" | HE | | style="color:inherit;" | • Shell type || colspan="2" style="color:inherit;" | HE | ||
|- | |- | ||
| style="color:inherit;" | • Name || colspan="2" style="color:inherit;" | | | style="color:inherit;" | • Name || colspan="2" style="color:inherit;" | 200 mm Common Type4 HE | ||
|- | |- | ||
| style="color:inherit;" | • Arrangement || colspan="2" style="color:inherit;" | | | style="color:inherit;" | • Arrangement || colspan="2" style="color:inherit;" | 10x1 200mm | ||
|- | |- | ||
| style="color:inherit;" | • Rate of fire (shots/min) || style="color:inherit;" | 4.0 || style="color:inherit;" | 3.0 | | style="color:inherit;" | • Rate of fire (shots/min) || style="color:inherit;" | 4.0 || style="color:inherit;" | 3.0 | ||
| Line 127: | Line 131: | ||
| style="color:inherit;" | • Name || colspan="2" style="color:inherit;" | 127 mm HE Type3 | | style="color:inherit;" | • Name || colspan="2" style="color:inherit;" | 127 mm HE Type3 | ||
|- | |- | ||
| style="color:inherit;" | • Arrangement || colspan="2" style="color:inherit;" | | | style="color:inherit;" | • Arrangement || colspan="2" style="color:inherit;" | 2x2 127mm | ||
|- | |- | ||
| style="color:inherit;" | • Rate of fire (shots/min) || style="color:inherit;" | 10.0 || style="color:inherit;" | 7.5 | | style="color:inherit;" | • Rate of fire (shots/min) || style="color:inherit;" | 10.0 || style="color:inherit;" | 7.5 | ||
| Line 299: | Line 303: | ||
==Gallery== | ==Gallery== | ||
<div class="b-popup"><div class="b-popup_head js-tech-nav_head"><div><h2>WoWs Gallery</h2></div><span class="b-tech-nav_arrow"></span></div><div class="b-popup_content" style="display: none;"><div> | <div class="b-popup"><div class="b-popup_head js-tech-nav_head"><div><h2>WoWs Gallery</h2></div><span class="b-tech-nav_arrow"></span></div>[[File:Kaga_B.png|400px]]<div class="b-popup_content" style="display: none;"><div> | ||
<gallery> | <gallery> | ||
Revision as of 23:40, 5 July 2026

VIII
11,000 doubloons
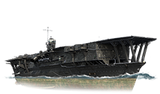
Kaga B — Japan Premium Tier VIII Aircraft Carrier.
After the Great Kanto Earthquake destroyed the aircraft carrier while it was under construction, it was decided to switch to rebuilding Kaga's hull—a process that had stopped amid the Washington Naval Treaty restrictions. The project mirrored aircraft carrier Akagi, except for the location of the funnels and the availability of a short flight deck. Kaga participated in the Shanghai incident and the Sino-Japanese War. After her modernization was completed, she participated in the Pearl Harbor attack, the Battle of Rabaul, the Marshall Islands campaign, and the Darwin bombing.
Pros
- Large number of aircraft on deck
- Heavy aerial torpedo damage
- Low detectability
- Large number of aircraft in an attacking flight
- Large number of aircraft in a squadron
Cons
- Low aircraft survivability
Ship Stats
Hull Information
Secondary Battery
Airstrike
AA Defense
Aircraft
Compatible Upgrades
| Slot 1 |
 |
 |

| ||
|---|---|---|---|---|---|
| Slot 2 |
 |

| |||
| Slot 3 |
 |
 |
 |

| |
| Slot 4 |
 |
 |
 |
 |

|
| Slot 5 |
 |
 |

|
Consumables
- Slot 1: Damage Control Party
 (30.0s action, 70.0s cooldown)
 - Slot 2: Patrol Fighter
 (4 charges, 600.0s action, 40.0s cooldown)
Gallery
WoWs Gallery

