Ship:Uganda
Automated stats update via wiki pipeline |
Added Pros and Cons, TP and armor values, an image. |
||
| Line 5: | Line 5: | ||
===Pros=== | ===Pros=== | ||
* | * Access to long-range Submarine Surveillance consumable and long-range Depth Charge Airstrike | ||
* | * Access to Crawling Smoke Generator and Hydroacoustic Search consumables | ||
* High damage per minute with HE shells | |||
===Cons=== | ===Cons=== | ||
* | * Weak armor | ||
* | * Low gun traverse speed | ||
| Line 21: | Line 22: | ||
| style="color:inherit;" | • Hit Points || style="color:inherit;" | 27100 || style="color:inherit;" | 31400 | | style="color:inherit;" | • Hit Points || style="color:inherit;" | 27100 || style="color:inherit;" | 31400 | ||
|- | |- | ||
| style="color:inherit;" | • Torpedo protection damage reduction (%) || colspan="2" style="color:inherit;" | | | style="color:inherit;" | • Torpedo protection damage reduction (%) || colspan="2" style="color:inherit;" | 0 | ||
|} | |} | ||
</div> | </div> | ||
| Line 29: | Line 30: | ||
! style="background-color:#1a3244; color:#ffffff; font-weight:bold;" | ARMOR DETAIL !! style="background-color:#1a3244; color:#ffffff; font-weight:bold;" | | ! style="background-color:#1a3244; color:#ffffff; font-weight:bold;" | ARMOR DETAIL !! style="background-color:#1a3244; color:#ffffff; font-weight:bold;" | | ||
|- | |- | ||
| style="color:inherit;" | • Belt (mm) || style="color:inherit;" | | | style="color:inherit;" | • Belt (mm) || style="color:inherit;" | 114 | ||
|- | |- | ||
| style="color:inherit;" | • Deck (mm) || style="color:inherit;" | | | style="color:inherit;" | • Deck (mm) || style="color:inherit;" | 51 | ||
|- | |- | ||
| style="color:inherit;" | • Superstructure (mm) || style="color:inherit;" | | | style="color:inherit;" | • Superstructure (mm) || style="color:inherit;" | 10 | ||
|- | |- | ||
| style="color:inherit;" | • Extremities (mm) || style="color:inherit;" | | | style="color:inherit;" | • Extremities (mm) || style="color:inherit;" | 16 | ||
|} | |} | ||
</div> | </div> | ||
| Line 311: | Line 312: | ||
==Gallery== | ==Gallery== | ||
<div class="b-popup"><div class="b-popup_head js-tech-nav_head"><div><h2>WoWs Gallery</h2></div><span class="b-tech-nav_arrow"></span></div><div class="b-popup_content" style="display: none;"><div> | <div class="b-popup"><div class="b-popup_head js-tech-nav_head"><div><h2>WoWs Gallery</h2></div><span class="b-tech-nav_arrow"></span></div><div class="b-popup_content" style="display: none;">[[File:Uganda.png|thumb]]<div> | ||
<gallery> | <gallery> | ||
Revision as of 11:25, 6 July 2026

VII
5,700,000
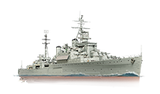
Uganda — Commonwealth Tech Tree Tier VII Cruiser.
Fiji-class light cruisers were built in Great Britain in two groups. The project combined good firepower, long operational range, and decent protection with minimal displacement. The second group of cruisers, to which Uganda belonged, had enhanced AA defenses at the cost of having fewer main battery turrets. During World War II, Uganda took part in the landings of Allied forces in Sicily and Italy. In the fall of 1944, she was transferred to the Royal Canadian Navy and later operated in the Pacific Ocean.
Pros
- Access to long-range Submarine Surveillance consumable and long-range Depth Charge Airstrike
- Access to Crawling Smoke Generator and Hydroacoustic Search consumables
- High damage per minute with HE shells
Cons
- Weak armor
- Low gun traverse speed
Ship Stats
Hull Information
Main Battery
Torpedoes
Secondary Battery
Airstrike
AA Defense
Compatible Upgrades
| Slot 1 |
 |
 |

| ||||
|---|---|---|---|---|---|---|---|
| Slot 2 |
 |
 |
 |

| |||
| Slot 3 |
 |
 |
 |
 |
 |
 |

|
| Slot 4 |
 |
 |
 |

|
Consumables
- Slot 1: Damage Control Party
 (5.0s action, 60.0s cooldown)
 - Slot 2: Defensive AA Fire
 (3 charges, 40.0s action, 80.0s cooldown) or Hydroacoustic Search
  (3 charges, 100.0s action, 120.0s cooldown)
 - Slot 3: Smoke Generator
 (3 charges, 102.0s action, 160.0s cooldown)
 - Slot 4: Submarine Surveillance
 (3 charges, 20.0s action, 120.0s cooldown)
 - Slot 5: Repair Party
 (2 charges, 28.0s action, 80.0s cooldown, 135.5 hp/s)
Gallery
WoWs Gallery

Historical Gallery
Categories:
