Ship:ZF-6 Golden
Automated stats update via wiki pipeline |
XDMeloniXD (talk | contribs) No edit summary |
||
| Line 5: | Line 5: | ||
===Pros=== | ===Pros=== | ||
* | * High damage per minute with AP shells | ||
* | * Main Battery Reload Booster consumable available | ||
===Cons=== | ===Cons=== | ||
* | * Low damage per minute with HE shells | ||
* | * Low ship speed | ||
| Line 21: | Line 21: | ||
| style="color:inherit;" | • Hit Points || style="color:inherit;" | 17000 | | style="color:inherit;" | • Hit Points || style="color:inherit;" | 17000 | ||
|- | |- | ||
| style="color:inherit;" | • Torpedo protection damage reduction (%) || style="color:inherit;" | | | style="color:inherit;" | • Torpedo protection damage reduction (%) || style="color:inherit;" | 0% | ||
|} | |} | ||
</div> | </div> | ||
| Line 29: | Line 29: | ||
! style="background-color:#1a3244; color:#ffffff; font-weight:bold;" | ARMOR DETAIL !! style="background-color:#1a3244; color:#ffffff; font-weight:bold;" | | ! style="background-color:#1a3244; color:#ffffff; font-weight:bold;" | ARMOR DETAIL !! style="background-color:#1a3244; color:#ffffff; font-weight:bold;" | | ||
|- | |- | ||
| style="color:inherit;" | • Belt (mm) || style="color:inherit;" | | | style="color:inherit;" | • Belt (mm) || style="color:inherit;" | 19 | ||
|- | |- | ||
| style="color:inherit;" | • Deck (mm) || style="color:inherit;" | | | style="color:inherit;" | • Deck (mm) || style="color:inherit;" | 19 | ||
|- | |- | ||
| style="color:inherit;" | • Superstructure (mm) || style="color:inherit;" | | | style="color:inherit;" | • Superstructure (mm) || style="color:inherit;" | 13 | ||
|- | |- | ||
| style="color:inherit;" | • Extremities (mm) || style="color:inherit;" | | | style="color:inherit;" | • Extremities (mm) || style="color:inherit;" | 19 | ||
|} | |} | ||
</div> | </div> | ||
| Line 47: | Line 47: | ||
| style="color:inherit;" | • Turning circle radius (m) || style="color:inherit;" | 670 | | style="color:inherit;" | • Turning circle radius (m) || style="color:inherit;" | 670 | ||
|- | |- | ||
| style="color:inherit;" | • Rudder-shift time (sec) || style="color:inherit;" | | | style="color:inherit;" | • Rudder-shift time (sec) || style="color:inherit;" | 3.9 | ||
|} | |} | ||
</div> | </div> | ||
| Line 70: | Line 70: | ||
! style="background-color:#1a3244; color:#ffffff; font-weight:bold;" | MAIN BATTERY !! style="background-color:#1a3244; color:#ffffff; font-weight:bold;" | | ! style="background-color:#1a3244; color:#ffffff; font-weight:bold;" | MAIN BATTERY !! style="background-color:#1a3244; color:#ffffff; font-weight:bold;" | | ||
|- | |- | ||
| style="color:inherit;" | • Arrangement || style="color:inherit;" | | | style="color:inherit;" | • Arrangement || style="color:inherit;" | 3×1 + 1×2 128mm | ||
|- | |- | ||
| style="color:inherit;" | • Firing range (km) || style="color:inherit;" | 11.86 | | style="color:inherit;" | • Firing range (km) || style="color:inherit;" | 11.86 | ||
| Line 150: | Line 150: | ||
! style="background-color:#1a3244; color:#ffffff; font-weight:bold;" | TORPEDO LAUNCHERS !! style="background-color:#1a3244; color:#ffffff; font-weight:bold;" | | ! style="background-color:#1a3244; color:#ffffff; font-weight:bold;" | TORPEDO LAUNCHERS !! style="background-color:#1a3244; color:#ffffff; font-weight:bold;" | | ||
|- | |- | ||
| style="color:inherit;" | • Number of launchers || style="color:inherit;" | | | style="color:inherit;" | • Number of launchers || style="color:inherit;" | 2×4 533 mm | ||
|- | |- | ||
| style="color:inherit;" | • Torpedo name || style="color:inherit;" | | | style="color:inherit;" | • Torpedo name || style="color:inherit;" | G7a T1 Ausf. B | ||
|- | |- | ||
| style="color:inherit;" | • Reload time (sec) || style="color:inherit;" | 90.0 | | style="color:inherit;" | • Reload time (sec) || style="color:inherit;" | 90.0 | ||
| Line 158: | Line 158: | ||
| style="color:inherit;" | • 180° turn time (sec) || style="color:inherit;" | 7.2 | | style="color:inherit;" | • 180° turn time (sec) || style="color:inherit;" | 7.2 | ||
|- | |- | ||
| style="color:inherit;" | • Damage || style="color:inherit;" | | | style="color:inherit;" | • Damage || style="color:inherit;" | 18400 | ||
|- | |- | ||
| style="color:inherit;" | • Range (km) || style="color:inherit;" | 0 | | style="color:inherit;" | • Range (km) || style="color:inherit;" | 8.0 | ||
|- | |- | ||
| style="color:inherit;" | • Speed (kt) || style="color:inherit;" | 75 | | style="color:inherit;" | • Speed (kt) || style="color:inherit;" | 75 | ||
| Line 166: | Line 166: | ||
| style="color:inherit;" | • Detectability (km) || style="color:inherit;" | 1.8 | | style="color:inherit;" | • Detectability (km) || style="color:inherit;" | 1.8 | ||
|- | |- | ||
| style="color:inherit;" | • Flooding chance (%) || style="color:inherit;" | | | style="color:inherit;" | • Flooding chance (%) || style="color:inherit;" | 311% | ||
|} | |} | ||
</div> | </div> | ||
</div></div></div> | </div></div></div> | ||
<div class="b-popup"><div class="b-popup_head js-tech-nav_head"><div><h2>AA Defense</h2></div><span class="b-tech-nav_arrow"></span></div><div class="b-popup_content" style="display: none;"><div> | <div class="b-popup"><div class="b-popup_head js-tech-nav_head"><div><h2>AA Defense</h2></div><span class="b-tech-nav_arrow"></span></div><div class="b-popup_content" style="display: none;"><div><div style="border: 2px solid rgba(212,175,55,0.8); border-radius: 3px; margin-bottom: 1em; overflow: hidden;"> | ||
<div style="border: 2px solid rgba(212,175,55,0.8); border-radius: 3px; margin-bottom: 1em; overflow: hidden;"> | |||
{| class="wikitable" style="margin:0 0 0.8em 0; width:100%; color:inherit;" | {| class="wikitable" style="margin:0 0 0.8em 0; width:100%; color:inherit;" | ||
! style="background-color:#1a3244; color:#ffffff; font-weight:bold;" | AA ARMAMENT !! style="background-color:#1a3244; color:#ffffff; font-weight:bold;" | MOUNTS × BARRELS | ! style="background-color:#1a3244; color:#ffffff; font-weight:bold;" | AA ARMAMENT !! style="background-color:#1a3244; color:#ffffff; font-weight:bold;" | MOUNTS × BARRELS | ||
| Line 179: | Line 178: | ||
|- | |- | ||
| style="color:inherit;" | 30 mm || style="color:inherit;" | 2 × 4 + 2 × 2 | | style="color:inherit;" | 30 mm || style="color:inherit;" | 2 × 4 + 2 × 2 | ||
|- | |||
| style="color:inherit;" | 128 mm || style="color:inherit;" | 3 × 1 + 1 × 2 | |||
|} | |} | ||
| Line 185: | Line 186: | ||
! style="background-color:#1a3244; color:#ffffff; font-weight:bold;" | RANGE !! style="background-color:#1a3244; color:#ffffff; font-weight:bold;" | DPS !! style="background-color:#1a3244; color:#ffffff; font-weight:bold;" | HIT CHANCE !! style="background-color:#1a3244; color:#ffffff; font-weight:bold;" | ACTION ZONE (km) | ! style="background-color:#1a3244; color:#ffffff; font-weight:bold;" | RANGE !! style="background-color:#1a3244; color:#ffffff; font-weight:bold;" | DPS !! style="background-color:#1a3244; color:#ffffff; font-weight:bold;" | HIT CHANCE !! style="background-color:#1a3244; color:#ffffff; font-weight:bold;" | ACTION ZONE (km) | ||
|- | |- | ||
| style="color:inherit;" | Short-range || style="color:inherit;" | | | style="color:inherit;" | Short-range || style="color:inherit;" | 110 || style="color:inherit;" | 95% || style="color:inherit;" | 3.0 | ||
|- | |- | ||
| style="color:inherit;" | Mid-range || style="color:inherit;" | 70 || style="color:inherit;" | 100% || style="color:inherit;" | 4.0 | | style="color:inherit;" | Mid-range || style="color:inherit;" | 70 || style="color:inherit;" | 100% || style="color:inherit;" | 4.0 | ||
|- | |||
| style="color:inherit;" | Long-range || style="color:inherit;" | 53 || style="color:inherit;" | 100% || style="color:inherit;" | 6.0 | |||
|} | |||
'''Damage by shell explosions''' | |||
{| class="wikitable" style="margin:0 0 0.8em 0; width:100%; color:inherit;" | |||
! style="background-color:#1a3244; color:#ffffff; font-weight:bold;" | EXPLOSIONS / SALVO !! style="background-color:#1a3244; color:#ffffff; font-weight:bold;" | DAMAGE !! style="background-color:#1a3244; color:#ffffff; font-weight:bold;" | HIT CHANCE !! style="background-color:#1a3244; color:#ffffff; font-weight:bold;" | ACTION ZONE (km) | |||
|- | |||
| style="color:inherit;" | 3 || style="color:inherit;" | 1540 || style="color:inherit;" | 100% || style="color:inherit;" | 3.5–6.0 | |||
|} | |} | ||
</div> | </div> | ||
| Line 200: | Line 209: | ||
| style="color:inherit;" | • Number of charges || style="color:inherit;" | 2 | | style="color:inherit;" | • Number of charges || style="color:inherit;" | 2 | ||
|- | |- | ||
| style="color:inherit;" | • Bombs per charge || style="color:inherit;" | | | style="color:inherit;" | • Bombs per charge || style="color:inherit;" | 12 | ||
|- | |- | ||
| style="color:inherit;" | • Reload time (sec) || style="color:inherit;" | 40.0 | | style="color:inherit;" | • Reload time (sec) || style="color:inherit;" | 40.0 | ||
| Line 206: | Line 215: | ||
</div> | </div> | ||
</div></div></div> | </div></div></div> | ||
| Line 226: | Line 236: | ||
<gallery> | <gallery> | ||
File:ZF-6_Alpha.png | |||
File:ZF-6_Bravo.png | |||
</gallery> | </gallery> | ||
</div></div></div> | </div></div></div> | ||
[[Category:Ships of Germany]] | [[Category:Ships of Germany]] | ||
Latest revision as of 15:35, 7 July 2026

IX
28,500 doubloons
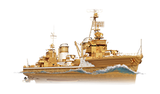
ZF-6 Golden — Germany Premium Tier IX Destroyer.
After conquering France in 1940, the German Navy captured a small number of unfinished French ships. Among them were four Le Hardi-class destroyers, two of which were in the initial stages of construction, L'Opiniâtre and L'Aventurier. The German High Command planned to complete them with German weapons and use them for their own needs; however, the ships were not even launched until the end of the war.
Pros
- High damage per minute with AP shells
- Main Battery Reload Booster consumable available
Cons
- Low damage per minute with HE shells
- Low ship speed
Ship Stats
Hull Information
Main Battery
Torpedoes
AA Defense
Depth Charges
Compatible Upgrades
| Slot 1 |
 |
 |

| ||
|---|---|---|---|---|---|
| Slot 2 |
 |
 |
 |

| |
| Slot 3 |
 |
 |
 |
 |

|
| Slot 4 |
 |
 |
 |

| |
| Slot 5 |
 |
 |
 |

| |
| Slot 6 |
 |
 |
 |

|
Consumables
- Slot 1: Damage Control Party
 (5.0s action, 40.0s cooldown)
 - Slot 2: Smoke Generator
 (3 charges, 20.0s action, 160.0s cooldown)
 - Slot 3: Engine Boost
 (3 charges, 120.0s action, 120.0s cooldown)
 - Slot 4: Main Battery Reload Booster
 (4 charges, 15.0s action, 100.0s cooldown)
 - Slot 5: Defensive AA Fire
 (3 charges, 40.0s action, 80.0s cooldown)


