Ship:Bagration
Automated stats update via wiki pipeline |
Pockington (talk | contribs) added missing information on launch day |
||
| Line 5: | Line 5: | ||
===Pros=== | ===Pros=== | ||
* | * AP shells with reduced chances of ricocheting. | ||
* | * Long firing range. | ||
===Cons=== | ===Cons=== | ||
* | * Small HP pool. | ||
* | * Low damage per minute. | ||
| Line 21: | Line 21: | ||
| style="color:inherit;" | • Hit Points || style="color:inherit;" | 42000 | | style="color:inherit;" | • Hit Points || style="color:inherit;" | 42000 | ||
|- | |- | ||
| style="color:inherit;" | • Torpedo protection damage reduction (%) || style="color:inherit;" | | | style="color:inherit;" | • Torpedo protection damage reduction (%) || style="color:inherit;" | 16 | ||
|} | |} | ||
</div> | </div> | ||
| Line 29: | Line 29: | ||
! style="background-color:#1a3244; color:#ffffff; font-weight:bold;" | ARMOR DETAIL !! style="background-color:#1a3244; color:#ffffff; font-weight:bold;" | | ! style="background-color:#1a3244; color:#ffffff; font-weight:bold;" | ARMOR DETAIL !! style="background-color:#1a3244; color:#ffffff; font-weight:bold;" | | ||
|- | |- | ||
| style="color:inherit;" | • Belt (mm) || style="color:inherit;" | | | style="color:inherit;" | • Belt (mm) || style="color:inherit;" | 152 | ||
|- | |- | ||
| style="color:inherit;" | • Deck (mm) || style="color:inherit;" | | | style="color:inherit;" | • Deck (mm) || style="color:inherit;" | 27 | ||
|- | |- | ||
| style="color:inherit;" | • Superstructure (mm) || style="color:inherit;" | | | style="color:inherit;" | • Superstructure (mm) || style="color:inherit;" | 13 | ||
|- | |- | ||
| style="color:inherit;" | • Extremities (mm) || style="color:inherit;" | | | style="color:inherit;" | • Extremities (mm) || style="color:inherit;" | 25 | ||
|} | |} | ||
</div> | </div> | ||
| Line 47: | Line 47: | ||
| style="color:inherit;" | • Turning circle radius (m) || style="color:inherit;" | 890 | | style="color:inherit;" | • Turning circle radius (m) || style="color:inherit;" | 890 | ||
|- | |- | ||
| style="color:inherit;" | • Rudder-shift time (sec) || style="color:inherit;" | | | style="color:inherit;" | • Rudder-shift time (sec) || style="color:inherit;" | 10.5 | ||
|} | |} | ||
</div> | </div> | ||
| Line 152: | Line 152: | ||
! style="background-color:#1a3244; color:#ffffff; font-weight:bold;" | TORPEDO LAUNCHERS !! style="background-color:#1a3244; color:#ffffff; font-weight:bold;" | | ! style="background-color:#1a3244; color:#ffffff; font-weight:bold;" | TORPEDO LAUNCHERS !! style="background-color:#1a3244; color:#ffffff; font-weight:bold;" | | ||
|- | |- | ||
| style="color:inherit;" | • | | style="color:inherit;" | • Torpedo tubes (launchers × tubes) || style="color:inherit;" | 2 × 5 | ||
|- | |- | ||
| style="color:inherit;" | • Torpedo name || style="color:inherit;" | | | style="color:inherit;" | • Torpedo name || style="color:inherit;" | 53-36 mod. 2 | ||
|- | |- | ||
| style="color:inherit;" | • Reload time (sec) || style="color:inherit;" | 131 | | style="color:inherit;" | • Reload time (sec) || style="color:inherit;" | 131 | ||
|- | |- | ||
| style="color:inherit;" | • 180° turn time (sec) || style="color:inherit;" | 7.2 | | style="color:inherit;" | • 180° turn time (sec) || style="color:inherit;" | 7.2 | ||
|- | |- | ||
| style="color:inherit;" | • Damage || style="color:inherit;" | | | style="color:inherit;" | • Damage || style="color:inherit;" | 14,400 | ||
|- | |- | ||
| style="color:inherit;" | • Range (km) || style="color:inherit;" | 0 | | style="color:inherit;" | • Range (km) || style="color:inherit;" | 8.0 | ||
|- | |- | ||
| style="color:inherit;" | • Speed (kt) || style="color:inherit;" | 55 | | style="color:inherit;" | • Speed (kt) || style="color:inherit;" | 55 | ||
| Line 168: | Line 168: | ||
| style="color:inherit;" | • Detectability (km) || style="color:inherit;" | 1.1 | | style="color:inherit;" | • Detectability (km) || style="color:inherit;" | 1.1 | ||
|- | |- | ||
| style="color:inherit;" | • Flooding chance (%) || style="color:inherit;" | | | style="color:inherit;" | • Flooding chance (%) || style="color:inherit;" | 240 | ||
|} | |} | ||
</div> | </div> | ||
| Line 190: | Line 190: | ||
| style="color:inherit;" | • Name || style="color:inherit;" | HE-55 | | style="color:inherit;" | • Name || style="color:inherit;" | HE-55 | ||
|- | |- | ||
| style="color:inherit;" | • Arrangement || style="color:inherit;" | | | style="color:inherit;" | • Arrangement || style="color:inherit;" | 8x2 100mm | ||
|- | |- | ||
| style="color:inherit;" | • Rate of fire (shots/min) || style="color:inherit;" | 15.0 | | style="color:inherit;" | • Rate of fire (shots/min) || style="color:inherit;" | 15.0 | ||
| Line 234: | Line 234: | ||
! style="background-color:#1a3244; color:#ffffff; font-weight:bold;" | EXPLOSIONS / SALVO !! style="background-color:#1a3244; color:#ffffff; font-weight:bold;" | DAMAGE !! style="background-color:#1a3244; color:#ffffff; font-weight:bold;" | HIT CHANCE !! style="background-color:#1a3244; color:#ffffff; font-weight:bold;" | ACTION ZONE (km) | ! style="background-color:#1a3244; color:#ffffff; font-weight:bold;" | EXPLOSIONS / SALVO !! style="background-color:#1a3244; color:#ffffff; font-weight:bold;" | DAMAGE !! style="background-color:#1a3244; color:#ffffff; font-weight:bold;" | HIT CHANCE !! style="background-color:#1a3244; color:#ffffff; font-weight:bold;" | ACTION ZONE (km) | ||
|- | |- | ||
| style="color:inherit;" | 8 || style="color:inherit;" | | | style="color:inherit;" | 8 || style="color:inherit;" | 1400 || style="color:inherit;" | 90% || style="color:inherit;" | 3.5–5.8 | ||
|} | |} | ||
</div> | </div> | ||
| Line 247: | Line 247: | ||
| style="color:inherit;" | • Number of charges || style="color:inherit;" | 2 | | style="color:inherit;" | • Number of charges || style="color:inherit;" | 2 | ||
|- | |- | ||
| style="color:inherit;" | • Bombs per charge || style="color:inherit;" | | | style="color:inherit;" | • Bombs per charge || style="color:inherit;" | 4 | ||
|- | |- | ||
| style="color:inherit;" | • Reload time (sec) || style="color:inherit;" | 40.0 | | style="color:inherit;" | • Reload time (sec) || style="color:inherit;" | 40.0 | ||
| Line 271: | Line 271: | ||
<gallery> | <gallery> | ||
</gallery> | </gallery>[[File:Bagrationpermacamo.png|thumb|Bagration in her default permanent camouflage.]]</div></div></div> | ||
</div></div></div> | |||
<div class="b-popup"><div class="b-popup_head js-tech-nav_head"><div><h2>Historical Gallery</h2></div><span class="b-tech-nav_arrow"></span></div><div class="b-popup_content" style="display: none;"><div> | <div class="b-popup"><div class="b-popup_head js-tech-nav_head"><div><h2>Historical Gallery</h2></div><span class="b-tech-nav_arrow"></span></div><div class="b-popup_content" style="display: none;"><div> | ||
Latest revision as of 00:53, 9 July 2026

VIII
11,000 doubloons
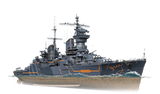
Bagration — U.S.S.R. Premium Tier VIII Cruiser.
Project 65 was under development from 1943 to 1946. A total of 40 draft designs were considered within its framework. The largest of these was a cruiser that had a displacement of 15,000 tons and was armed with three triple-gun mounts housing 180 mm guns and eight 100 mm SM-5-1 twin-gun mounts. In the end, preference was given to the construction of the Project 68K and Project 68bis ships.
Pros
- AP shells with reduced chances of ricocheting.
- Long firing range.
Cons
- Small HP pool.
- Low damage per minute.
Ship Stats
Hull Information
Main Battery
Torpedoes
Secondary Battery
AA Defense
Depth Charges
Compatible Upgrades
| Slot 1 |
 |
 |

| ||
|---|---|---|---|---|---|
| Slot 2 |
 |
 |

| ||
| Slot 3 |
 |
 |
 |
 |

|
| Slot 4 |
 |
 |
 |

| |
| Slot 5 |
 |
 |
 |

|
Consumables
- Slot 1: Damage Control Party
 (5.0s action, 60.0s cooldown)
 - Slot 2: Defensive AA Fire
 (3 charges, 40.0s action, 80.0s cooldown) or Hydroacoustic Search
  (3 charges, 100.0s action, 120.0s cooldown)
 - Slot 3: Repair Party
 (3 charges, 28.0s action, 80.0s cooldown, 210 hp/s)

