Ship:Scarlet Thunder
Automated stats update via wiki pipeline |
Pockington (talk | contribs) added missing information on launch day |
||
| Line 5: | Line 5: | ||
===Pros=== | ===Pros=== | ||
* | * Heavy HE shell damage. | ||
* | * High AA defense efficiency. | ||
* Low detectability. | |||
===Cons=== | ===Cons=== | ||
* | * The citadel is particularly vulnerable to any AP shell striking the ship's side. | ||
* | * Low level of protection against HE shells. | ||
| Line 21: | Line 22: | ||
| style="color:inherit;" | • Hit Points || style="color:inherit;" | 75200 | | style="color:inherit;" | • Hit Points || style="color:inherit;" | 75200 | ||
|- | |- | ||
| style="color:inherit;" | • Torpedo protection damage reduction (%) || style="color:inherit;" | | | style="color:inherit;" | • Torpedo protection damage reduction (%) || style="color:inherit;" | 23 | ||
|} | |} | ||
</div> | </div> | ||
| Line 29: | Line 30: | ||
! style="background-color:#1a3244; color:#ffffff; font-weight:bold;" | ARMOR DETAIL !! style="background-color:#1a3244; color:#ffffff; font-weight:bold;" | | ! style="background-color:#1a3244; color:#ffffff; font-weight:bold;" | ARMOR DETAIL !! style="background-color:#1a3244; color:#ffffff; font-weight:bold;" | | ||
|- | |- | ||
| style="color:inherit;" | • Belt (mm) || style="color:inherit;" | | | style="color:inherit;" | • Belt (mm) || style="color:inherit;" | 356 | ||
|- | |- | ||
| style="color:inherit;" | • Deck (mm) || style="color:inherit;" | | | style="color:inherit;" | • Deck (mm) || style="color:inherit;" | 32 | ||
|- | |- | ||
| style="color:inherit;" | • Superstructure (mm) || style="color:inherit;" | | | style="color:inherit;" | • Superstructure (mm) || style="color:inherit;" | 19 | ||
|- | |- | ||
| style="color:inherit;" | • Extremities (mm) || style="color:inherit;" | | | style="color:inherit;" | • Extremities (mm) || style="color:inherit;" | 32 | ||
|} | |} | ||
</div> | </div> | ||
| Line 47: | Line 48: | ||
| style="color:inherit;" | • Turning circle radius (m) || style="color:inherit;" | 910 | | style="color:inherit;" | • Turning circle radius (m) || style="color:inherit;" | 910 | ||
|- | |- | ||
| style="color:inherit;" | • Rudder-shift time (sec) || style="color:inherit;" | | | style="color:inherit;" | • Rudder-shift time (sec) || style="color:inherit;" | 9.7 | ||
|} | |} | ||
</div> | </div> | ||
| Line 166: | Line 167: | ||
| style="color:inherit;" | • Name || style="color:inherit;" | 133 mm HE Mk IC | | style="color:inherit;" | • Name || style="color:inherit;" | 133 mm HE Mk IC | ||
|- | |- | ||
| style="color:inherit;" | • Arrangement || style="color:inherit;" | | | style="color:inherit;" | • Arrangement || style="color:inherit;" | 6x2 133mm | ||
|- | |- | ||
| style="color:inherit;" | • Rate of fire (shots/min) || style="color:inherit;" | 9.0 | | style="color:inherit;" | • Rate of fire (shots/min) || style="color:inherit;" | 9.0 | ||
| Line 188: | Line 189: | ||
| style="color:inherit;" | • Name || style="color:inherit;" | 113 mm HE 5crh | | style="color:inherit;" | • Name || style="color:inherit;" | 113 mm HE 5crh | ||
|- | |- | ||
| style="color:inherit;" | • Arrangement || style="color:inherit;" | | | style="color:inherit;" | • Arrangement || style="color:inherit;" | 8x2 113mm | ||
|- | |- | ||
| style="color:inherit;" | • Rate of fire (shots/min) || style="color:inherit;" | 12.0 | | style="color:inherit;" | • Rate of fire (shots/min) || style="color:inherit;" | 12.0 | ||
| Line 257: | Line 258: | ||
! style="background-color:#1a3244; color:#ffffff; font-weight:bold;" | EXPLOSIONS / SALVO !! style="background-color:#1a3244; color:#ffffff; font-weight:bold;" | DAMAGE !! style="background-color:#1a3244; color:#ffffff; font-weight:bold;" | HIT CHANCE !! style="background-color:#1a3244; color:#ffffff; font-weight:bold;" | ACTION ZONE (km) | ! style="background-color:#1a3244; color:#ffffff; font-weight:bold;" | EXPLOSIONS / SALVO !! style="background-color:#1a3244; color:#ffffff; font-weight:bold;" | DAMAGE !! style="background-color:#1a3244; color:#ffffff; font-weight:bold;" | HIT CHANCE !! style="background-color:#1a3244; color:#ffffff; font-weight:bold;" | ACTION ZONE (km) | ||
|- | |- | ||
| style="color:inherit;" | | | style="color:inherit;" | 7 || style="color:inherit;" | 1470 || style="color:inherit;" | 75% || style="color:inherit;" | 3.5–6.0 | ||
|} | |} | ||
</div> | </div> | ||
| Line 279: | Line 280: | ||
<gallery> | <gallery> | ||
</gallery> | </gallery>[[File:Sthunderpermacamo.png|thumb|Scarlet Thunder in her default permanent camouflage.]]</div></div></div> | ||
</div></div></div> | |||
<div class="b-popup"><div class="b-popup_head js-tech-nav_head"><div><h2>Historical Gallery</h2></div><span class="b-tech-nav_arrow"></span></div><div class="b-popup_content" style="display: none;"><div> | <div class="b-popup"><div class="b-popup_head js-tech-nav_head"><div><h2>Historical Gallery</h2></div><span class="b-tech-nav_arrow"></span></div><div class="b-popup_content" style="display: none;"><div> | ||
Latest revision as of 02:15, 9 July 2026

IX
21,500 doubloons
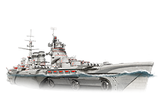
Scarlet Thunder — U.K. Premium Tier IX Battleship.
With its retro-futuristic design, the Scarlet Thunder ship is an engineering marvel that embodies the latest technological advances.
Pros
- Heavy HE shell damage.
- High AA defense efficiency.
- Low detectability.
Cons
- The citadel is particularly vulnerable to any AP shell striking the ship's side.
- Low level of protection against HE shells.
Ship Stats
Hull Information
Main Battery
Secondary Battery
Airstrike
AA Defense
Compatible Upgrades
| Slot 1 |
 |
 |

| |
|---|---|---|---|---|
| Slot 2 |
 |

| ||
| Slot 3 |
 |
 |
 |

|
| Slot 4 |
 |
 |
 |

|
| Slot 5 |
 |
 |

| |
| Slot 6 |
 |
 |

|
Consumables
- Slot 1: Damage Control Party
 (15.0s action, 80.0s cooldown)
 - Slot 2: Repair Party
 (4 charges, 28.0s action, 80.0s cooldown, 376 hp/s)
 - Slot 3: Defensive AA Fire
 (3 charges, 40.0s action, 80.0s cooldown)

