Ship:Azuma
Automated stats update via wiki pipeline |
Pockington (talk | contribs) added missing information on launch day |
||
| Line 5: | Line 5: | ||
===Pros=== | ===Pros=== | ||
* | * Great damage per salvo. | ||
* | * Long firing range. | ||
===Cons=== | ===Cons=== | ||
* | * Low rate of fire. | ||
* | * No torpedo armament. | ||
| Line 21: | Line 21: | ||
| style="color:inherit;" | • Hit Points || style="color:inherit;" | 58350 | | style="color:inherit;" | • Hit Points || style="color:inherit;" | 58350 | ||
|- | |- | ||
| style="color:inherit;" | • Torpedo protection damage reduction (%) || style="color:inherit;" | | | style="color:inherit;" | • Torpedo protection damage reduction (%) || style="color:inherit;" | 22 | ||
|} | |} | ||
</div> | </div> | ||
| Line 29: | Line 29: | ||
! style="background-color:#1a3244; color:#ffffff; font-weight:bold;" | ARMOR DETAIL !! style="background-color:#1a3244; color:#ffffff; font-weight:bold;" | | ! style="background-color:#1a3244; color:#ffffff; font-weight:bold;" | ARMOR DETAIL !! style="background-color:#1a3244; color:#ffffff; font-weight:bold;" | | ||
|- | |- | ||
| style="color:inherit;" | • Belt (mm) || style="color:inherit;" | | | style="color:inherit;" | • Belt (mm) || style="color:inherit;" | 178 | ||
|- | |- | ||
| style="color:inherit;" | • Deck (mm) || style="color:inherit;" | | | style="color:inherit;" | • Deck (mm) || style="color:inherit;" | 27 | ||
|- | |- | ||
| style="color:inherit;" | • Superstructure (mm) || style="color:inherit;" | | | style="color:inherit;" | • Superstructure (mm) || style="color:inherit;" | 16 | ||
|- | |- | ||
| style="color:inherit;" | • Extremities (mm) || style="color:inherit;" | | | style="color:inherit;" | • Extremities (mm) || style="color:inherit;" | 25 | ||
|} | |} | ||
</div> | </div> | ||
| Line 47: | Line 47: | ||
| style="color:inherit;" | • Turning circle radius (m) || style="color:inherit;" | 920 | | style="color:inherit;" | • Turning circle radius (m) || style="color:inherit;" | 920 | ||
|- | |- | ||
| style="color:inherit;" | • Rudder-shift time (sec) || style="color:inherit;" | | | style="color:inherit;" | • Rudder-shift time (sec) || style="color:inherit;" | 13.9 | ||
|} | |} | ||
</div> | </div> | ||
| Line 164: | Line 164: | ||
| style="color:inherit;" | • Name || style="color:inherit;" | 100 mm HE Type 98 | | style="color:inherit;" | • Name || style="color:inherit;" | 100 mm HE Type 98 | ||
|- | |- | ||
| style="color:inherit;" | • Arrangement || style="color:inherit;" | | | style="color:inherit;" | • Arrangement || style="color:inherit;" | 8x2 100mm | ||
|- | |- | ||
| style="color:inherit;" | • Rate of fire (shots/min) || style="color:inherit;" | 20.0 | | style="color:inherit;" | • Rate of fire (shots/min) || style="color:inherit;" | 20.0 | ||
| Line 226: | Line 226: | ||
! style="background-color:#1a3244; color:#ffffff; font-weight:bold;" | EXPLOSIONS / SALVO !! style="background-color:#1a3244; color:#ffffff; font-weight:bold;" | DAMAGE !! style="background-color:#1a3244; color:#ffffff; font-weight:bold;" | HIT CHANCE !! style="background-color:#1a3244; color:#ffffff; font-weight:bold;" | ACTION ZONE (km) | ! style="background-color:#1a3244; color:#ffffff; font-weight:bold;" | EXPLOSIONS / SALVO !! style="background-color:#1a3244; color:#ffffff; font-weight:bold;" | DAMAGE !! style="background-color:#1a3244; color:#ffffff; font-weight:bold;" | HIT CHANCE !! style="background-color:#1a3244; color:#ffffff; font-weight:bold;" | ACTION ZONE (km) | ||
|- | |- | ||
| style="color:inherit;" | 8 || style="color:inherit;" | | | style="color:inherit;" | 8 || style="color:inherit;" | 1470 || style="color:inherit;" | 90% || style="color:inherit;" | 3.5–5.8 | ||
|} | |} | ||
</div> | </div> | ||
| Line 249: | Line 249: | ||
<gallery> | <gallery> | ||
</gallery> | </gallery>[[File:Azumapermacamo.png|thumb|Azuma in her default permanent camouflage.]]</div></div></div> | ||
</div></div></div> | |||
<div class="b-popup"><div class="b-popup_head js-tech-nav_head"><div><h2>Historical Gallery</h2></div><span class="b-tech-nav_arrow"></span></div><div class="b-popup_content" style="display: none;"><div> | <div class="b-popup"><div class="b-popup_head js-tech-nav_head"><div><h2>Historical Gallery</h2></div><span class="b-tech-nav_arrow"></span></div><div class="b-popup_content" style="display: none;"><div> | ||
Latest revision as of 19:06, 9 July 2026

IX
18,000 doubloons
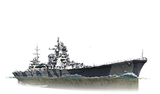
Azuma — Japan Premium Tier IX Cruiser.
Shortly before the beginning of World War II, Japan found out that the U.S. had started designing Alaska-class large cruisers. They almost immediately began designing projects for this type of ship to counter the American cruisers. The ships of this project were similar in architecture to the Yamato-class battleships and carried nine new 310 mm guns in three turrets. The development was stopped in November 1941 and eventually canceled after the Battle of Midway.
Pros
- Great damage per salvo.
- Long firing range.
Cons
- Low rate of fire.
- No torpedo armament.
Ship Stats
Hull Information
Main Battery
Secondary Battery
Airstrike
AA Defense
Compatible Upgrades
| Slot 1 |
 |
 |
 |

|
|---|---|---|---|---|
| Slot 2 |
 |
 |
 |

|
| Slot 3 |
 |
 |
 |

|
| Slot 4 |
 |
 |
 |

|
| Slot 5 |
 |
 |
 |

|
| Slot 6 |
 |
 |

|
Consumables
- Slot 1: Damage Control Party
 (5.0s action, 60.0s cooldown)
 - Slot 2: Defensive AA Fire
 (3 charges, 40.0s action, 80.0s cooldown) or Hydroacoustic Search
  (3 charges, 100.0s action, 120.0s cooldown)
 - Slot 3: Spotting Aircraft
 (4 charges, 100.0s action, 240.0s cooldown)
 - Slot 4: Repair Party
 (4 charges, 28.0s action, 40.0s cooldown, 291.8 hp/s)
Gallery
WoWs Gallery

Historical Gallery
Categories:
