Ship:Monaghan
m Formatting |
Pockington (talk | contribs) added missing information on launch day |
||
| Line 48: | Line 48: | ||
| style="color:inherit;" | • Turning circle radius (m) || style="color:inherit;" | 560 || style="color:inherit;" | 560 | | style="color:inherit;" | • Turning circle radius (m) || style="color:inherit;" | 560 || style="color:inherit;" | 560 | ||
|- | |- | ||
| style="color:inherit;" | • Rudder-shift time (sec) || style="color:inherit;" | 4 | | style="color:inherit;" | • Rudder-shift time (sec) || style="color:inherit;" | 3.4 || style="color:inherit;" | 3.4 | ||
|} | |} | ||
</div> | </div> | ||
| Line 179: | Line 179: | ||
{| class="wikitable" style="margin:0 0 0.8em 0; width:100%; color:inherit;" | {| class="wikitable" style="margin:0 0 0.8em 0; width:100%; color:inherit;" | ||
! style="background-color:#1a3244; color:#ffffff; font-weight:bold;" | AA ARMAMENT !! style="background-color:#1a3244; color:#ffffff; font-weight:bold;" | MOUNTS × BARRELS | ! style="background-color:#1a3244; color:#ffffff; font-weight:bold;" | AA ARMAMENT !! style="background-color:#1a3244; color:#ffffff; font-weight:bold;" | MOUNTS × BARRELS | ||
|- | |||
| style="color:inherit;" | 127 mm || style="color:inherit;" | 4 × 1 | |||
|- | |- | ||
| style="color:inherit;" | 20 mm || style="color:inherit;" | 8 × 1 | | style="color:inherit;" | 20 mm || style="color:inherit;" | 8 × 1 | ||
| Line 188: | Line 190: | ||
|- | |- | ||
| style="color:inherit;" | Short-range || style="color:inherit;" | 87.5 || style="color:inherit;" | 95% || style="color:inherit;" | 2.0 | | style="color:inherit;" | Short-range || style="color:inherit;" | 87.5 || style="color:inherit;" | 95% || style="color:inherit;" | 2.0 | ||
|- | |||
| style="color:inherit;" | Long-range || style="color:inherit;" | 42 || style="color:inherit;" | 100% || style="color:inherit;" | 5.8 | |||
|} | |||
'''Damage by shell explosions''' | |||
{| class="wikitable" style="margin:0 0 0.8em 0; width:100%; color:inherit;" | |||
! style="background-color:#1a3244; color:#ffffff; font-weight:bold;" | EXPLOSIONS / SALVO !! style="background-color:#1a3244; color:#ffffff; font-weight:bold;" | DAMAGE !! style="background-color:#1a3244; color:#ffffff; font-weight:bold;" | HIT CHANCE !! style="background-color:#1a3244; color:#ffffff; font-weight:bold;" | ACTION ZONE (km) | |||
|- | |||
| style="color:inherit;" | 1 || style="color:inherit;" | 1120 || style="color:inherit;" | 100% || style="color:inherit;" | 3.5–5.8 | |||
|} | |} | ||
| Line 194: | Line 205: | ||
{| class="wikitable" style="margin:0 0 0.8em 0; width:100%; color:inherit;" | {| class="wikitable" style="margin:0 0 0.8em 0; width:100%; color:inherit;" | ||
! style="background-color:#1a3244; color:#ffffff; font-weight:bold;" | AA ARMAMENT !! style="background-color:#1a3244; color:#ffffff; font-weight:bold;" | MOUNTS × BARRELS | ! style="background-color:#1a3244; color:#ffffff; font-weight:bold;" | AA ARMAMENT !! style="background-color:#1a3244; color:#ffffff; font-weight:bold;" | MOUNTS × BARRELS | ||
|- | |||
| style="color:inherit;" | 127 mm || style="color:inherit;" | 2 × 1 | |||
|- | |- | ||
| style="color:inherit;" | 40 mm || style="color:inherit;" | 1 × 4 + 3 × 2 | | style="color:inherit;" | 40 mm || style="color:inherit;" | 1 × 4 + 3 × 2 | ||
| Line 207: | Line 220: | ||
|- | |- | ||
| style="color:inherit;" | Mid-range || style="color:inherit;" | 115.5 || style="color:inherit;" | 100% || style="color:inherit;" | 3.5 | | style="color:inherit;" | Mid-range || style="color:inherit;" | 115.5 || style="color:inherit;" | 100% || style="color:inherit;" | 3.5 | ||
|- | |||
| style="color:inherit;" | Long-range || style="color:inherit;" | 10.5 || style="color:inherit;" | 100% || style="color:inherit;" | 5.8 | |||
|} | |||
'''Damage by shell explosions''' | |||
{| class="wikitable" style="margin:0 0 0.8em 0; width:100%; color:inherit;" | |||
! style="background-color:#1a3244; color:#ffffff; font-weight:bold;" | EXPLOSIONS / SALVO !! style="background-color:#1a3244; color:#ffffff; font-weight:bold;" | DAMAGE !! style="background-color:#1a3244; color:#ffffff; font-weight:bold;" | HIT CHANCE !! style="background-color:#1a3244; color:#ffffff; font-weight:bold;" | ACTION ZONE (km) | |||
|- | |||
| style="color:inherit;" | 1 || style="color:inherit;" | 1190 || style="color:inherit;" | 100% || style="color:inherit;" | 3.5–5.8 | |||
|} | |} | ||
</div> | </div> | ||
| Line 219: | Line 241: | ||
| style="color:inherit;" | • Number of charges || style="color:inherit;" | 2 | | style="color:inherit;" | • Number of charges || style="color:inherit;" | 2 | ||
|- | |- | ||
| style="color:inherit;" | • Bombs per charge || style="color:inherit;" | | | style="color:inherit;" | • Bombs per charge || style="color:inherit;" | 8 | ||
|- | |- | ||
| style="color:inherit;" | • Reload time (sec) || style="color:inherit;" | 40.0 | | style="color:inherit;" | • Reload time (sec) || style="color:inherit;" | 40.0 | ||
Revision as of 21:31, 9 July 2026

VI
4,500 doubloons
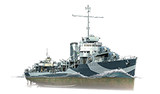
Monaghan — U.S.A. Premium Tier VI Destroyer.
USS Monaghan, a Farragut-class destroyer, was the duty ship during the raid on Pearl Harbor, and she was one of the first to open fire on Japanese aircraft. The destroyer participated in the Battle of the Coral Sea, Battle of Midway, and Battle of the Commander Islands. Monaghan escorted aircraft carriers participating in the landing on the Marshall Islands, Saipan, and Guam. On December 17, 1944, the destroyer was sunk by Typhoon Cobra east of the Philippines. Over the course of World War II, the ship was awarded 12 battle stars.
This ship gets a choice of hull module, which drastically alters the performance of the ship.
Pros
- Heavy torpedo damage
- Torpedo Reload Booster consumable available
- (Hull B) Long range torpedoes
Cons
- High detectability
- (Hull B) Lacks rear-facing main battery armament
Ship Stats
Hull Information
Main Battery
Torpedoes
AA Defense
Depth Charges
Compatible Upgrades
| Slot 1 |
 |
 |

| ||
|---|---|---|---|---|---|
| Slot 2 |
 |
 |

| ||
| Slot 3 |
 |
 |
 |
 |

|
| Slot 4 |
 |
 |
 |

|
Consumables
- Slot 1: Damage Control Party
 (5.0s action, 40.0s cooldown)
 - Slot 2: Smoke Generator
 (3 charges, 20.0s action, 160.0s cooldown)
 - Slot 3: Engine Boost
 (3 charges, 120.0s action, 120.0s cooldown)
 - Slot 4: Defensive AA Fire
 (4 charges, 40.0s action, 80.0s cooldown) or Torpedo Reload Booster
  (3 charges, 1.0s action, 240.0s cooldown)


