Ship:Sims
m Page repair |
Pockington (talk | contribs) added missing information on launch day |
||
| Line 46: | Line 46: | ||
| style="color:inherit;" | • Turning circle radius (m) || style="color:inherit;" | 500 | | style="color:inherit;" | • Turning circle radius (m) || style="color:inherit;" | 500 | ||
|- | |- | ||
| style="color:inherit;" | • Rudder-shift time (sec) || style="color:inherit;" | | | style="color:inherit;" | • Rudder-shift time (sec) || style="color:inherit;" | 2.7 | ||
|} | |} | ||
</div> | </div> | ||
| Line 69: | Line 69: | ||
! style="background-color:#1a3244; color:#ffffff; font-weight:bold;" | MAIN BATTERY !! style="background-color:#1a3244; color:#ffffff; font-weight:bold;" | | ! style="background-color:#1a3244; color:#ffffff; font-weight:bold;" | MAIN BATTERY !! style="background-color:#1a3244; color:#ffffff; font-weight:bold;" | | ||
|- | |- | ||
| style="color:inherit;" | • Arrangement || style="color:inherit;" | 4×1 | | style="color:inherit;" | • Arrangement || style="color:inherit;" | 4×1 127mm | ||
|- | |- | ||
| style="color:inherit;" | • Firing range (km) || style="color:inherit;" | 12.88 | | style="color:inherit;" | • Firing range (km) || style="color:inherit;" | 12.88 | ||
| Line 174: | Line 174: | ||
{| class="wikitable" style="margin:0 0 0.8em 0; width:100%; color:inherit;" | {| class="wikitable" style="margin:0 0 0.8em 0; width:100%; color:inherit;" | ||
! style="background-color:#1a3244; color:#ffffff; font-weight:bold;" | AA ARMAMENT !! style="background-color:#1a3244; color:#ffffff; font-weight:bold;" | MOUNTS × BARRELS | ! style="background-color:#1a3244; color:#ffffff; font-weight:bold;" | AA ARMAMENT !! style="background-color:#1a3244; color:#ffffff; font-weight:bold;" | MOUNTS × BARRELS | ||
|- | |||
| style="color:inherit;" | 127 mm || style="color:inherit;" | 4 × 1 | |||
|- | |- | ||
| style="color:inherit;" | 20 mm || style="color:inherit;" | 4 × 1 | | style="color:inherit;" | 20 mm || style="color:inherit;" | 4 × 1 | ||
| Line 183: | Line 185: | ||
|- | |- | ||
| style="color:inherit;" | Short-range || style="color:inherit;" | 63 || style="color:inherit;" | 95% || style="color:inherit;" | 2.0 | | style="color:inherit;" | Short-range || style="color:inherit;" | 63 || style="color:inherit;" | 95% || style="color:inherit;" | 2.0 | ||
|- | |||
| style="color:inherit;" | Long-range || style="color:inherit;" | 70 || style="color:inherit;" | 100% || style="color:inherit;" | 5.8 | |||
|} | |||
'''Damage by shell explosions''' | |||
{| class="wikitable" style="margin:0 0 0.8em 0; width:100%; color:inherit;" | |||
! style="background-color:#1a3244; color:#ffffff; font-weight:bold;" | EXPLOSIONS / SALVO !! style="background-color:#1a3244; color:#ffffff; font-weight:bold;" | DAMAGE !! style="background-color:#1a3244; color:#ffffff; font-weight:bold;" | HIT CHANCE !! style="background-color:#1a3244; color:#ffffff; font-weight:bold;" | ACTION ZONE (km) | |||
|- | |||
| style="color:inherit;" | 2 || style="color:inherit;" | 1400 || style="color:inherit;" | 100% || style="color:inherit;" | 3.5–5.8 | |||
|} | |} | ||
</div> | </div> | ||
</div></div></div> | </div></div></div> | ||
<div class="b-popup"><div class="b-popup_head js-tech-nav_head"><div><h2>Depth Charges</h2></div><span class="b-tech-nav_arrow"></span></div><div class="b-popup_content" style="display: none;"><div> | <div class="b-popup"><div class="b-popup_head js-tech-nav_head"><div><h2>Depth Charges</h2></div><span class="b-tech-nav_arrow"></span></div><div class="b-popup_content" style="display: none;"><div> | ||
<div style="border: 2px solid rgba(212,175,55,0.8); border-radius: 3px; margin-bottom: 1em; overflow: hidden;"> | <div style="border: 2px solid rgba(212,175,55,0.8); border-radius: 3px; margin-bottom: 1em; overflow: hidden;"> | ||
| Line 195: | Line 207: | ||
| style="color:inherit;" | • Number of charges || style="color:inherit;" | 2 | | style="color:inherit;" | • Number of charges || style="color:inherit;" | 2 | ||
|- | |- | ||
| style="color:inherit;" | • Bombs per charge || style="color:inherit;" | | | style="color:inherit;" | • Bombs per charge || style="color:inherit;" | 10 | ||
|- | |- | ||
| style="color:inherit;" | • Reload time (sec) || style="color:inherit;" | 40.0 | | style="color:inherit;" | • Reload time (sec) || style="color:inherit;" | 40.0 | ||
Latest revision as of 21:36, 9 July 2026

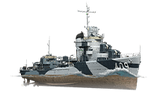
Sims — U.S.A. Premium Tier VII Destroyer.
The new destroyer design was similar to the Mahan class, but she was larger than her predecessor, and her main guns were mounted on a ring-shaped base instead of the central pin. When construction was complete, overloading was detected, which led to removing one torpedo launcher and transferring the second one to the center. With the entry of the United States into World War II, USS Sims joined the same strike group as aircraft carrier Yorktown. On May 7, 1942, during the Battle of the Coral Sea, the destroyer sank as a result of an attack by Japanese dive bombers.
Sims gains the ability to choose between a set of fast, high-damage, short-range torpedoes or a set of slow, low-damage, long-range torpedoes.
Pros
- High rate of fire
- Improved Base XP earnings
Cons
- Shooting accurately over long ranges is challenging
Ship Stats
Hull Information
Main Battery
Torpedoes
AA Defense
Depth Charges
Compatible Upgrades
| Slot 1 |
 |
 |

| ||
|---|---|---|---|---|---|
| Slot 2 |
 |
 |
 |

| |
| Slot 3 |
 |
 |
 |
 |

|
| Slot 4 |
 |
 |
 |

|
Consumables
- Slot 1: Damage Control Party
 (5.0s action, 40.0s cooldown)
 - Slot 2: Smoke Generator
 (3 charges, 30.0s action, 160.0s cooldown)
 - Slot 3: Engine Boost
 (3 charges, 120.0s action, 120.0s cooldown) or Defensive AA Fire
  (4 charges, 40.0s action, 80.0s cooldown)


