Ship:Helena
Automated stats update via wiki pipeline |
Pockington (talk | contribs) added missing information on launch day |
||
| Line 5: | Line 5: | ||
===Pros=== | ===Pros=== | ||
* | * High damage per minute | ||
* | * Access to Defensive AA Fire and Hydroacoustic Search consumables in separate slots | ||
* Small citadel size | |||
===Cons=== | ===Cons=== | ||
* | * Low main battery range | ||
* | * Poor main battery ballistics | ||
| Line 21: | Line 21: | ||
| style="color:inherit;" | • Hit Points || style="color:inherit;" | 28700 || style="color:inherit;" | 33300 | | style="color:inherit;" | • Hit Points || style="color:inherit;" | 28700 || style="color:inherit;" | 33300 | ||
|- | |- | ||
| style="color:inherit;" | • Torpedo protection damage reduction (%) || colspan="2" style="color:inherit;" | | | style="color:inherit;" | • Torpedo protection damage reduction (%) || colspan="2" style="color:inherit;" | 4 | ||
|} | |} | ||
</div> | </div> | ||
| Line 29: | Line 29: | ||
! style="background-color:#1a3244; color:#ffffff; font-weight:bold;" | ARMOR DETAIL !! style="background-color:#1a3244; color:#ffffff; font-weight:bold;" | | ! style="background-color:#1a3244; color:#ffffff; font-weight:bold;" | ARMOR DETAIL !! style="background-color:#1a3244; color:#ffffff; font-weight:bold;" | | ||
|- | |- | ||
| style="color:inherit;" | • Belt (mm) || style="color:inherit;" | | | style="color:inherit;" | • Belt (mm) || style="color:inherit;" | 127 | ||
|- | |- | ||
| style="color:inherit;" | • Deck (mm) || style="color:inherit;" | | | style="color:inherit;" | • Deck (mm) || style="color:inherit;" | 25 | ||
|- | |- | ||
| style="color:inherit;" | • Superstructure (mm) || style="color:inherit;" | | | style="color:inherit;" | • Superstructure (mm) || style="color:inherit;" | 13 | ||
|- | |- | ||
| style="color:inherit;" | • Extremities (mm) || style="color:inherit;" | | | style="color:inherit;" | • Extremities (mm) || style="color:inherit;" | 16 | ||
|} | |} | ||
</div> | </div> | ||
| Line 47: | Line 47: | ||
| style="color:inherit;" | • Turning circle radius (m) || style="color:inherit;" | 680 || style="color:inherit;" | 680 | | style="color:inherit;" | • Turning circle radius (m) || style="color:inherit;" | 680 || style="color:inherit;" | 680 | ||
|- | |- | ||
| style="color:inherit;" | • Rudder-shift time (sec) || style="color:inherit;" | | | style="color:inherit;" | • Rudder-shift time (sec) || style="color:inherit;" | 12.8 || style="color:inherit;" | 9.1 | ||
|} | |} | ||
</div> | </div> | ||
| Line 162: | Line 162: | ||
| style="color:inherit;" | • Name || style="color:inherit;" | 127 mm HE Mk32 | | style="color:inherit;" | • Name || style="color:inherit;" | 127 mm HE Mk32 | ||
|- | |- | ||
| style="color:inherit;" | • Arrangement || style="color:inherit;" | | | style="color:inherit;" | • Arrangement || style="color:inherit;" | 8x1 127mm | ||
|- | |- | ||
| style="color:inherit;" | • Rate of fire (shots/min) || style="color:inherit;" | 10.0 | | style="color:inherit;" | • Rate of fire (shots/min) || style="color:inherit;" | 10.0 | ||
| Line 230: | Line 230: | ||
! style="background-color:#1a3244; color:#ffffff; font-weight:bold;" | EXPLOSIONS / SALVO !! style="background-color:#1a3244; color:#ffffff; font-weight:bold;" | DAMAGE !! style="background-color:#1a3244; color:#ffffff; font-weight:bold;" | HIT CHANCE !! style="background-color:#1a3244; color:#ffffff; font-weight:bold;" | ACTION ZONE (km) | ! style="background-color:#1a3244; color:#ffffff; font-weight:bold;" | EXPLOSIONS / SALVO !! style="background-color:#1a3244; color:#ffffff; font-weight:bold;" | DAMAGE !! style="background-color:#1a3244; color:#ffffff; font-weight:bold;" | HIT CHANCE !! style="background-color:#1a3244; color:#ffffff; font-weight:bold;" | ACTION ZONE (km) | ||
|- | |- | ||
| style="color:inherit;" | 3 || style="color:inherit;" | | | style="color:inherit;" | 3 || style="color:inherit;" | 1400 || style="color:inherit;" | 90% || style="color:inherit;" | 3.5–5.8 | ||
|} | |} | ||
| Line 260: | Line 260: | ||
! style="background-color:#1a3244; color:#ffffff; font-weight:bold;" | EXPLOSIONS / SALVO !! style="background-color:#1a3244; color:#ffffff; font-weight:bold;" | DAMAGE !! style="background-color:#1a3244; color:#ffffff; font-weight:bold;" | HIT CHANCE !! style="background-color:#1a3244; color:#ffffff; font-weight:bold;" | ACTION ZONE (km) | ! style="background-color:#1a3244; color:#ffffff; font-weight:bold;" | EXPLOSIONS / SALVO !! style="background-color:#1a3244; color:#ffffff; font-weight:bold;" | DAMAGE !! style="background-color:#1a3244; color:#ffffff; font-weight:bold;" | HIT CHANCE !! style="background-color:#1a3244; color:#ffffff; font-weight:bold;" | ACTION ZONE (km) | ||
|- | |- | ||
| style="color:inherit;" | 3 || style="color:inherit;" | | | style="color:inherit;" | 3 || style="color:inherit;" | 1400 || style="color:inherit;" | 90% || style="color:inherit;" | 3.5–5.8 | ||
|} | |} | ||
</div> | </div> | ||
| Line 284: | Line 284: | ||
<gallery> | <gallery> | ||
</gallery> | </gallery>[[File:Helenainport.png|thumb]]</div></div></div> | ||
</div></div></div> | |||
<div class="b-popup"><div class="b-popup_head js-tech-nav_head"><div><h2>Historical Gallery</h2></div><span class="b-tech-nav_arrow"></span></div><div class="b-popup_content" style="display: none;"><div> | <div class="b-popup"><div class="b-popup_head js-tech-nav_head"><div><h2>Historical Gallery</h2></div><span class="b-tech-nav_arrow"></span></div><div class="b-popup_content" style="display: none;"><div> | ||
Latest revision as of 00:23, 10 July 2026

VII
5,800,000
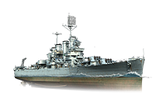
Helena — U.S.A. Tech Tree Tier VII Cruiser.
The Brooklyn-class design, based on the hull of cruiser New Orleans, was developed taking into account the limitations of the London Naval Treaty and the characteristics of the Mogami class under construction in Japan. Later, two cruisers of an improved design were ordered, one of which was USS Helena. At the beginning of World War II, she served in the Pacific Ocean. Helena sustained damage during the raid on Pearl Harbor but went on to take part in significant engagements such as the Battle of Cape Esperance and the fighting at Guadalcanal; however, the ship was ultimately lost on July 6, 1943, during the Battle of Kula Gulf.
Pros
- High damage per minute
- Access to Defensive AA Fire and Hydroacoustic Search consumables in separate slots
- Small citadel size
Cons
- Low main battery range
- Poor main battery ballistics
Ship Stats
Hull Information
Main Battery
Secondary Battery
Airstrike
AA Defense
Compatible Upgrades
| Slot 1 |
 |
 |

| |
|---|---|---|---|---|
| Slot 2 |
 |
 |

| |
| Slot 3 |
 |
 |
 |

|
| Slot 4 |
 |
 |
 |

|
Consumables
- Slot 1: Damage Control Party
 (5.0s action, 60.0s cooldown)
 - Slot 2: Defensive AA Fire
 (4 charges, 40.0s action, 80.0s cooldown)
 - Slot 3: Patrol Fighter
 (3 charges, 60.0s action, 90.0s cooldown)
 - Slot 4: Hydroacoustic Search
 (3 charges, 100.0s action, 120.0s cooldown)
 - Slot 5: Repair Party
 (2 charges, 28.0s action, 80.0s cooldown, 143.5 hp/s)
Gallery
WoWs Gallery

Historical Gallery
Categories:
