Ship:Worcester
Automated stats update via wiki pipeline |
Pockington (talk | contribs) added missing information on launch day |
||
| Line 5: | Line 5: | ||
===Pros=== | ===Pros=== | ||
* | * High damage per minute | ||
* | * Access to Defensive AA Fire, Hydroacoustic Search and Surveillance Radar consumables in separate slots | ||
* Low detectability | |||
===Cons=== | ===Cons=== | ||
* | * Poor main battery ballistics | ||
* | * Poor survivability | ||
| Line 21: | Line 22: | ||
| style="color:inherit;" | • Hit Points || style="color:inherit;" | 45400 | | style="color:inherit;" | • Hit Points || style="color:inherit;" | 45400 | ||
|- | |- | ||
| style="color:inherit;" | • Torpedo protection damage reduction (%) || style="color:inherit;" | | | style="color:inherit;" | • Torpedo protection damage reduction (%) || style="color:inherit;" | 19 | ||
|} | |} | ||
</div> | </div> | ||
| Line 29: | Line 30: | ||
! style="background-color:#1a3244; color:#ffffff; font-weight:bold;" | ARMOR DETAIL !! style="background-color:#1a3244; color:#ffffff; font-weight:bold;" | | ! style="background-color:#1a3244; color:#ffffff; font-weight:bold;" | ARMOR DETAIL !! style="background-color:#1a3244; color:#ffffff; font-weight:bold;" | | ||
|- | |- | ||
| style="color:inherit;" | • Belt (mm) || style="color:inherit;" | | | style="color:inherit;" | • Belt (mm) || style="color:inherit;" | 127 | ||
|- | |- | ||
| style="color:inherit;" | • Deck (mm) || style="color:inherit;" | | | style="color:inherit;" | • Deck (mm) || style="color:inherit;" | 30 | ||
|- | |- | ||
| style="color:inherit;" | • Superstructure (mm) || style="color:inherit;" | | | style="color:inherit;" | • Superstructure (mm) || style="color:inherit;" | 13 | ||
|- | |- | ||
| style="color:inherit;" | • Extremities (mm) || style="color:inherit;" | | | style="color:inherit;" | • Extremities (mm) || style="color:inherit;" | 25 | ||
|} | |} | ||
</div> | </div> | ||
| Line 47: | Line 48: | ||
| style="color:inherit;" | • Turning circle radius (m) || style="color:inherit;" | 740 | | style="color:inherit;" | • Turning circle radius (m) || style="color:inherit;" | 740 | ||
|- | |- | ||
| style="color:inherit;" | • Rudder-shift time (sec) || style="color:inherit;" | | | style="color:inherit;" | • Rudder-shift time (sec) || style="color:inherit;" | 8.1 | ||
|} | |} | ||
</div> | </div> | ||
| Line 173: | Line 174: | ||
{| class="wikitable" style="margin:0 0 0.8em 0; width:100%; color:inherit;" | {| class="wikitable" style="margin:0 0 0.8em 0; width:100%; color:inherit;" | ||
! style="background-color:#1a3244; color:#ffffff; font-weight:bold;" | AA ARMAMENT !! style="background-color:#1a3244; color:#ffffff; font-weight:bold;" | MOUNTS × BARRELS | ! style="background-color:#1a3244; color:#ffffff; font-weight:bold;" | AA ARMAMENT !! style="background-color:#1a3244; color:#ffffff; font-weight:bold;" | MOUNTS × BARRELS | ||
|- | |||
| style="color:inherit;" | 152 mm || style="color:inherit;" | 6 × 2 | |||
|- | |- | ||
| style="color:inherit;" | 76 mm || style="color:inherit;" | 11 × 2 + 2 × 1 | | style="color:inherit;" | 76 mm || style="color:inherit;" | 11 × 2 + 2 × 1 | ||
| Line 186: | Line 189: | ||
|- | |- | ||
| style="color:inherit;" | Mid-range || style="color:inherit;" | 434 || style="color:inherit;" | 90% || style="color:inherit;" | 4.0 | | style="color:inherit;" | Mid-range || style="color:inherit;" | 434 || style="color:inherit;" | 90% || style="color:inherit;" | 4.0 | ||
|- | |||
| style="color:inherit;" | Long-range || style="color:inherit;" | 136.5 || style="color:inherit;" | 90% || style="color:inherit;" | 6.9 | |||
|} | |||
'''Damage by shell explosions''' | |||
{| class="wikitable" style="margin:0 0 0.8em 0; width:100%; color:inherit;" | |||
! style="background-color:#1a3244; color:#ffffff; font-weight:bold;" | EXPLOSIONS / SALVO !! style="background-color:#1a3244; color:#ffffff; font-weight:bold;" | DAMAGE !! style="background-color:#1a3244; color:#ffffff; font-weight:bold;" | HIT CHANCE !! style="background-color:#1a3244; color:#ffffff; font-weight:bold;" | ACTION ZONE (km) | |||
|- | |||
| style="color:inherit;" | 6 || style="color:inherit;" | 1890 || style="color:inherit;" | 90% || style="color:inherit;" | 3.5–6.9 | |||
|} | |} | ||
</div> | </div> | ||
| Line 209: | Line 221: | ||
<gallery> | <gallery> | ||
</gallery> | </gallery>[[File:Worcesterinport.png|thumb]]</div></div></div> | ||
</div></div></div> | |||
<div class="b-popup"><div class="b-popup_head js-tech-nav_head"><div><h2>Historical Gallery</h2></div><span class="b-tech-nav_arrow"></span></div><div class="b-popup_content" style="display: none;"><div> | <div class="b-popup"><div class="b-popup_head js-tech-nav_head"><div><h2>Historical Gallery</h2></div><span class="b-tech-nav_arrow"></span></div><div class="b-popup_content" style="display: none;"><div> | ||
Latest revision as of 01:24, 10 July 2026

X
19,900,000
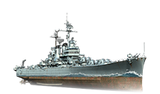
Worcester — U.S.A. Tech Tree Tier X Cruiser.
At the beginning of World War II, the U.S. was working on cruisers with an armored deck capable of withstanding aerial bomb attacks. The ship was to have six twin-gun turrets placed at the fore and aft in a super-firing position. It soon became clear that the biggest threat came not from "conventional" bombers but from dive bombers and guided bombs. As a result, the thickness of the armor deck could be reduced. In January 1945, the first ship of the class, USS Worcester, was laid down. Although plans were initially made to construct ten ships, only two of them were actually completed as World War II was drawing to a close.
Pros
- High damage per minute
- Access to Defensive AA Fire, Hydroacoustic Search and Surveillance Radar consumables in separate slots
- Low detectability
Cons
- Poor main battery ballistics
- Poor survivability
Ship Stats
Hull Information
Main Battery
Airstrike
AA Defense
Compatible Upgrades
| Slot 1 |
 |
 |
 |

| |
|---|---|---|---|---|---|
| Slot 2 |
 |
 |
 |
 |

|
| Slot 3 |
 |
 |

| ||
| Slot 4 |
 |
 |
 |

| |
| Slot 5 |
 |
 |
 |

| |
| Slot 6 |
 |
 |
 |

|
Consumables
- Slot 1: Damage Control Party
 (5.0s action, 60.0s cooldown)
 - Slot 2: Defensive AA Fire
 (4 charges, 40.0s action, 80.0s cooldown)
 - Slot 3: Patrol Fighter
 (3 charges, 60.0s action, 90.0s cooldown) or Spotting Aircraft
  (4 charges, 100.0s action, 240.0s cooldown)
 - Slot 4: Hydroacoustic Search
 (3 charges, 100.0s action, 120.0s cooldown)
 - Slot 5: Repair Party
 (3 charges, 28.0s action, 80.0s cooldown, 227 hp/s)
Gallery
WoWs Gallery

Historical Gallery
Categories:
