Ship:Hornet
WarshipFoxy (talk | contribs) No edit summary |
Pockington (talk | contribs) corrected info |
||
| Line 50: | Line 50: | ||
| style="color:inherit;" | • Turning circle radius (m) || style="color:inherit;" | 1060 | | style="color:inherit;" | • Turning circle radius (m) || style="color:inherit;" | 1060 | ||
|- | |- | ||
| style="color:inherit;" | • Rudder-shift time (sec) || style="color:inherit;" | | | style="color:inherit;" | • Rudder-shift time (sec) || style="color:inherit;" | 12.3 | ||
|} | |} | ||
</div> | </div> | ||
| Line 150: | Line 150: | ||
! style="background-color:#1a3244; color:#ffffff; font-weight:bold;" | EXPLOSIONS / SALVO !! style="background-color:#1a3244; color:#ffffff; font-weight:bold;" | DAMAGE !! style="background-color:#1a3244; color:#ffffff; font-weight:bold;" | HIT CHANCE !! style="background-color:#1a3244; color:#ffffff; font-weight:bold;" | ACTION ZONE (km) | ! style="background-color:#1a3244; color:#ffffff; font-weight:bold;" | EXPLOSIONS / SALVO !! style="background-color:#1a3244; color:#ffffff; font-weight:bold;" | DAMAGE !! style="background-color:#1a3244; color:#ffffff; font-weight:bold;" | HIT CHANCE !! style="background-color:#1a3244; color:#ffffff; font-weight:bold;" | ACTION ZONE (km) | ||
|- | |- | ||
| style="color:inherit;" | 4 || style="color:inherit;" | | | style="color:inherit;" | 4 || style="color:inherit;" | 1400 || style="color:inherit;" | 100% || style="color:inherit;" | 3.5–5.8 | ||
|} | |} | ||
</div> | </div> | ||
| Line 222: | Line 222: | ||
</div> | </div> | ||
<div style="border: 2px solid rgba(212,175,55,0.8); border-radius: 3px; margin-bottom: 1em; overflow: hidden;"> | |||
{| class="wikitable" style="margin:0; color:inherit; width:100%" | |||
! style="background-color:#1a3244; color:#ffffff; font-weight:bold;" | TACTICAL BOMBERS !! style="background-color:#1a3244; color:#ffffff; font-weight:bold;" | | |||
|- | |||
| style="color:inherit;" | • Hit points || style="color:inherit;" | 4890 | |||
|- | |||
| style="color:inherit;" | • Speed (kt) || style="color:inherit;" | 105 | |||
|- | |||
| style="color:inherit;" | • Squadron size || style="color:inherit;" | 6 | |||
|- | |||
| style="color:inherit;" | • Size of attacking flight || style="color:inherit;" | 6 | |||
|- | |||
| style="color:inherit;" | • Aircraft on deck || style="color:inherit;" | 6 | |||
|- | |||
| style="color:inherit;" | • Preparation time (sec) || style="color:inherit;" | 180.0 | |||
|- | |||
| style="color:inherit;" | • Detectability (km) || style="color:inherit;" | 10.0 | |||
|- | |||
| style="color:inherit;" | • Bomb name || style="color:inherit;" | AN-M64 Mod. 1 | |||
|- | |||
| style="color:inherit;" | • Bomb type || style="color:inherit;" | High Explosive (HE) Bomb | |||
|- | |||
| style="color:inherit;" | • Bombs in payload || style="color:inherit;" | 4 | |||
|- | |||
| style="color:inherit;" | • Bomb damage || style="color:inherit;" | 8000 | |||
|- | |||
| style="color:inherit;" | • Squadrons || style="color:inherit;" | 1 | |||
|} | |||
</div> | |||
</div></div></div> | </div></div></div> | ||
Revision as of 02:05, 10 July 2026

VIII
11,000 doubloons
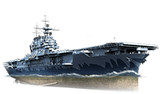
Hornet — U.S.A. Premium Tier VIII Aircraft Carrier.
USS Hornet, the third Yorktown-class aircraft carrier, participated in the renowned Doolittle Raid and fought at Midway and in the Solomon Islands campaign. During the Battle of the Santa Cruz Islands, Hornet damaged aircraft carrier Shōkaku but also suffered several hits from air attacks. The carrier's power plant was knocked out, and a decision was made to abandon the ship. Despite nine torpedoes and several hundred 127 mm shells being fired at her by American destroyers, the aircraft carrier stayed afloat, but only until Japanese destroyers dealt the final blow.
Pros
- Large number of aircraft in an attacking flight
- Bomber tactical squadron available
Cons
- Low number of attacking flights in a squadron
- Low aircraft speed
- No attack aircraft
Ship Stats
Hull Information
Secondary Battery
Airstrike
AA Defense
Aircraft
Compatible Upgrades
| Slot 1 |
 |
 |

| |
|---|---|---|---|---|
| Slot 2 |
 |

| ||
| Slot 3 |
 |
 |

| |
| Slot 4 |
 |
 |
 |

|
| Slot 5 |
 |
 |

|
Consumables
- Slot 1: Damage Control Party
 (30.0s action, 70.0s cooldown)
 - Slot 2: Patrol Fighter
 (4 charges, 600.0s action, 40.0s cooldown)
Gallery
WoWs Gallery


