Ship:Hobart
Added Pros and Cons, TP and armor values, an image. |
Pockington (talk | contribs) corrected info |
||
| Line 47: | Line 47: | ||
| style="color:inherit;" | • Turning circle radius (m) || style="color:inherit;" | 640 || style="color:inherit;" | 640 | | style="color:inherit;" | • Turning circle radius (m) || style="color:inherit;" | 640 || style="color:inherit;" | 640 | ||
|- | |- | ||
| style="color:inherit;" | • Rudder-shift time (sec) || style="color:inherit;" | | | style="color:inherit;" | • Rudder-shift time (sec) || style="color:inherit;" | 10.6 || style="color:inherit;" | 7.6 | ||
|} | |} | ||
</div> | </div> | ||
| Line 148: | Line 148: | ||
<div style="border: 2px solid rgba(212,175,55,0.8); border-radius: 3px; margin-bottom: 1em; overflow: hidden;"> | <div style="border: 2px solid rgba(212,175,55,0.8); border-radius: 3px; margin-bottom: 1em; overflow: hidden;"> | ||
{| class="wikitable" style="margin:0; color:inherit; width:100%" | {| class="wikitable" style="margin:0; color:inherit; width:100%" | ||
! style="background-color:#1a3244; color:#ffffff; font-weight:bold;" | TORPEDO LAUNCHERS !! style="background-color:#1a3244; color:#ffffff; font-weight:bold;" | | ! style="background-color:#1a3244; color:#ffffff; font-weight:bold;" | TORPEDO LAUNCHERS !! style="background-color:#1a3244; color:#ffffff; font-weight:bold;" | 533 mm Mk IX | ||
|- | |- | ||
| style="color:inherit;" | • | | style="color:inherit;" | • Torpedo tubes (launchers × tubes) || style="color:inherit;" | 2 × 4 | ||
|- | |- | ||
| style="color:inherit;" | • Torpedo name || style="color:inherit;" | | | style="color:inherit;" | • Torpedo name || style="color:inherit;" | 533 mm Mk IX | ||
|- | |- | ||
| style="color:inherit;" | • Reload time (sec) || style="color:inherit;" | 96 | | style="color:inherit;" | • Reload time (sec) || style="color:inherit;" | 96 | ||
|- | |- | ||
| style="color:inherit;" | • 180° turn time (sec) || style="color:inherit;" | 7.2 | | style="color:inherit;" | • 180° turn time (sec) || style="color:inherit;" | 7.2 | ||
|- | |- | ||
| style="color:inherit;" | • Damage || style="color:inherit;" | | | style="color:inherit;" | • Damage || style="color:inherit;" | 15,433 | ||
|- | |- | ||
| style="color:inherit;" | • Range (km) || style="color:inherit;" | 0 | | style="color:inherit;" | • Range (km) || style="color:inherit;" | 10.0 | ||
|- | |- | ||
| style="color:inherit;" | • Speed (kt) || style="color:inherit;" | 62 | | style="color:inherit;" | • Speed (kt) || style="color:inherit;" | 62 | ||
| Line 166: | Line 166: | ||
| style="color:inherit;" | • Detectability (km) || style="color:inherit;" | 1.3 | | style="color:inherit;" | • Detectability (km) || style="color:inherit;" | 1.3 | ||
|- | |- | ||
| style="color:inherit;" | • Flooding chance (%) || style="color:inherit;" | | | style="color:inherit;" | • Flooding chance (%) || style="color:inherit;" | 257 | ||
|} | |} | ||
</div> | </div> | ||
| Line 188: | Line 188: | ||
| style="color:inherit;" | • Name || style="color:inherit;" | 102 mm HE 35 lb | | style="color:inherit;" | • Name || style="color:inherit;" | 102 mm HE 35 lb | ||
|- | |- | ||
| style="color:inherit;" | • Arrangement || style="color:inherit;" | | | style="color:inherit;" | • Arrangement || style="color:inherit;" | 4x2 102mm | ||
|- | |- | ||
| style="color:inherit;" | • Rate of fire (shots/min) || style="color:inherit;" | 20.0 | | style="color:inherit;" | • Rate of fire (shots/min) || style="color:inherit;" | 20.0 | ||
| Line 258: | Line 258: | ||
! style="background-color:#1a3244; color:#ffffff; font-weight:bold;" | EXPLOSIONS / SALVO !! style="background-color:#1a3244; color:#ffffff; font-weight:bold;" | DAMAGE !! style="background-color:#1a3244; color:#ffffff; font-weight:bold;" | HIT CHANCE !! style="background-color:#1a3244; color:#ffffff; font-weight:bold;" | ACTION ZONE (km) | ! style="background-color:#1a3244; color:#ffffff; font-weight:bold;" | EXPLOSIONS / SALVO !! style="background-color:#1a3244; color:#ffffff; font-weight:bold;" | DAMAGE !! style="background-color:#1a3244; color:#ffffff; font-weight:bold;" | HIT CHANCE !! style="background-color:#1a3244; color:#ffffff; font-weight:bold;" | ACTION ZONE (km) | ||
|- | |- | ||
| style="color:inherit;" | 2 || style="color:inherit;" | | | style="color:inherit;" | 2 || style="color:inherit;" | 1120 || style="color:inherit;" | 90% || style="color:inherit;" | 3.5–5.8 | ||
|} | |} | ||
| Line 288: | Line 288: | ||
! style="background-color:#1a3244; color:#ffffff; font-weight:bold;" | EXPLOSIONS / SALVO !! style="background-color:#1a3244; color:#ffffff; font-weight:bold;" | DAMAGE !! style="background-color:#1a3244; color:#ffffff; font-weight:bold;" | HIT CHANCE !! style="background-color:#1a3244; color:#ffffff; font-weight:bold;" | ACTION ZONE (km) | ! style="background-color:#1a3244; color:#ffffff; font-weight:bold;" | EXPLOSIONS / SALVO !! style="background-color:#1a3244; color:#ffffff; font-weight:bold;" | DAMAGE !! style="background-color:#1a3244; color:#ffffff; font-weight:bold;" | HIT CHANCE !! style="background-color:#1a3244; color:#ffffff; font-weight:bold;" | ACTION ZONE (km) | ||
|- | |- | ||
| style="color:inherit;" | 2 || style="color:inherit;" | | | style="color:inherit;" | 2 || style="color:inherit;" | 1120 || style="color:inherit;" | 90% || style="color:inherit;" | 3.5–5.8 | ||
|} | |} | ||
</div> | </div> | ||
Latest revision as of 22:45, 10 July 2026

VI
3,000,000
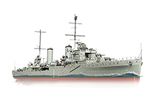
Hobart — Commonwealth Tech Tree Tier VI Cruiser.
Originally named Apollo, this warship was one of three ships constructed in Britain following the "improved Leander" design. She deviated from the prototype in her different powerplant layout and silhouette. In 1939, she joined the Royal Australian Navy and was renamed HMAS Hobart. During World War II, the cruiser participated in the Mediterranean campaign, in combat operations off the coast of Somalia, and in operations in the Indian and Pacific Oceans. HMAS Hobart was also present at the signing ceremony of Japan's surrender in Tokyo Bay.
Pros
- Access to long-range Submarine Surveillance consumable and long-range Depth Charge Airstrike
- Access to Crawling Smoke Generator and Hydroacoustic Search consumables
Cons
- Weak armor
- Low gun traverse speed
Ship Stats
Hull Information
Main Battery
Torpedoes
Secondary Battery
Airstrike
AA Defense
Compatible Upgrades
| Slot 1 |
 |
 |

| ||||
|---|---|---|---|---|---|---|---|
| Slot 2 |
 |
 |
 |

| |||
| Slot 3 |
 |
 |
 |
 |
 |
 |

|
| Slot 4 |
 |
 |
 |

|
Consumables
- Slot 1: Damage Control Party
 (5.0s action, 60.0s cooldown)
 - Slot 2: Defensive AA Fire
 (3 charges, 40.0s action, 80.0s cooldown) or Hydroacoustic Search
  (3 charges, 100.0s action, 120.0s cooldown)
 - Slot 3: Smoke Generator
 (3 charges, 102.0s action, 160.0s cooldown)
 - Slot 4: Submarine Surveillance
 (3 charges, 20.0s action, 120.0s cooldown)
 - Slot 5: Repair Party
 (2 charges, 28.0s action, 80.0s cooldown, 121 hp/s)
Gallery
WoWs Gallery

Historical Gallery
Categories:
