Ship:Lepanto
Pro Con |
No edit summary |
||
| Line 23: | Line 23: | ||
| style="color:inherit;" | • Hit Points || style="color:inherit;" | 72100 || style="color:inherit;" | 75900 | | style="color:inherit;" | • Hit Points || style="color:inherit;" | 72100 || style="color:inherit;" | 75900 | ||
|- | |- | ||
| style="color:inherit;" | • Torpedo protection damage reduction (%) || colspan="2" style="color:inherit;" | | | style="color:inherit;" | • Torpedo protection damage reduction (%) || colspan="2" style="color:inherit;" | 47 | ||
|} | |} | ||
</div> | </div> | ||
| Line 31: | Line 31: | ||
! style="background-color:#1a3244; color:#ffffff; font-weight:bold;" | ARMOR DETAIL !! style="background-color:#1a3244; color:#ffffff; font-weight:bold;" | | ! style="background-color:#1a3244; color:#ffffff; font-weight:bold;" | ARMOR DETAIL !! style="background-color:#1a3244; color:#ffffff; font-weight:bold;" | | ||
|- | |- | ||
| style="color:inherit;" | • Belt (mm) || style="color:inherit;" | | | style="color:inherit;" | • Belt (mm) || style="color:inherit;" | 350 | ||
|- | |- | ||
| style="color:inherit;" | • Deck (mm) || style="color:inherit;" | | | style="color:inherit;" | • Deck (mm) || style="color:inherit;" | 55 | ||
|- | |- | ||
| style="color:inherit;" | • Superstructure (mm) || style="color:inherit;" | | | style="color:inherit;" | • Superstructure (mm) || style="color:inherit;" | 19 | ||
|- | |- | ||
| style="color:inherit;" | • Extremities (mm) || style="color:inherit;" | | | style="color:inherit;" | • Extremities (mm) || style="color:inherit;" | 80 | ||
|} | |} | ||
</div> | </div> | ||
| Line 49: | Line 49: | ||
| style="color:inherit;" | • Turning circle radius (m) || style="color:inherit;" | 910 || style="color:inherit;" | 910 | | style="color:inherit;" | • Turning circle radius (m) || style="color:inherit;" | 910 || style="color:inherit;" | 910 | ||
|- | |- | ||
| style="color:inherit;" | • Rudder-shift time (sec) || style="color:inherit;" | | | style="color:inherit;" | • Rudder-shift time (sec) || style="color:inherit;" | 20.9 || style="color:inherit;" | 14.9 | ||
|} | |} | ||
</div> | </div> | ||
| Line 111: | Line 111: | ||
! style="background-color:#1a3244; color:#ffffff; font-weight:bold;" | SAP SHELL !! style="background-color:#1a3244; color:#ffffff; font-weight:bold;" | | ! style="background-color:#1a3244; color:#ffffff; font-weight:bold;" | SAP SHELL !! style="background-color:#1a3244; color:#ffffff; font-weight:bold;" | | ||
|- | |- | ||
| style="color:inherit;" | • Name || style="color:inherit;" | | | style="color:inherit;" | • Name || style="color:inherit;" | 381 mm proiettili CS | ||
|- | |- | ||
| style="color:inherit;" | • Maximum damage || style="color:inherit;" | 12000 | | style="color:inherit;" | • Maximum damage || style="color:inherit;" | 12000 | ||
| Line 224: | Line 224: | ||
| style="color:inherit;" | • Reload time (sec) || style="color:inherit;" | 30.0 | | style="color:inherit;" | • Reload time (sec) || style="color:inherit;" | 30.0 | ||
|- | |- | ||
| style="color:inherit;" | • Number of aircraft || style="color:inherit;" | | | style="color:inherit;" | • Number of aircraft || style="color:inherit;" | 2 | ||
|- | |- | ||
| style="color:inherit;" | • Depth charges in payload || style="color:inherit;" | 2 | | style="color:inherit;" | • Depth charges in payload || style="color:inherit;" | 2 | ||
| Line 256: | Line 256: | ||
| style="color:inherit;" | Mid-range || style="color:inherit;" | 336 || style="color:inherit;" | 75% || style="color:inherit;" | 3.5 | | style="color:inherit;" | Mid-range || style="color:inherit;" | 336 || style="color:inherit;" | 75% || style="color:inherit;" | 3.5 | ||
|- | |- | ||
| style="color:inherit;" | Long-range || style="color:inherit;" | | | style="color:inherit;" | Long-range || style="color:inherit;" | 193 || style="color:inherit;" | 75% || style="color:inherit;" | 4.6 | ||
|} | |} | ||
| Line 263: | Line 263: | ||
! style="background-color:#1a3244; color:#ffffff; font-weight:bold;" | EXPLOSIONS / SALVO !! style="background-color:#1a3244; color:#ffffff; font-weight:bold;" | DAMAGE !! style="background-color:#1a3244; color:#ffffff; font-weight:bold;" | HIT CHANCE !! style="background-color:#1a3244; color:#ffffff; font-weight:bold;" | ACTION ZONE (km) | ! style="background-color:#1a3244; color:#ffffff; font-weight:bold;" | EXPLOSIONS / SALVO !! style="background-color:#1a3244; color:#ffffff; font-weight:bold;" | DAMAGE !! style="background-color:#1a3244; color:#ffffff; font-weight:bold;" | HIT CHANCE !! style="background-color:#1a3244; color:#ffffff; font-weight:bold;" | ACTION ZONE (km) | ||
|- | |- | ||
| style="color:inherit;" | 8 || style="color:inherit;" | | | style="color:inherit;" | 8 || style="color:inherit;" | 1330 || style="color:inherit;" | 75% || style="color:inherit;" | 3.5–4.6 | ||
|} | |} | ||
| Line 293: | Line 293: | ||
! style="background-color:#1a3244; color:#ffffff; font-weight:bold;" | EXPLOSIONS / SALVO !! style="background-color:#1a3244; color:#ffffff; font-weight:bold;" | DAMAGE !! style="background-color:#1a3244; color:#ffffff; font-weight:bold;" | HIT CHANCE !! style="background-color:#1a3244; color:#ffffff; font-weight:bold;" | ACTION ZONE (km) | ! style="background-color:#1a3244; color:#ffffff; font-weight:bold;" | EXPLOSIONS / SALVO !! style="background-color:#1a3244; color:#ffffff; font-weight:bold;" | DAMAGE !! style="background-color:#1a3244; color:#ffffff; font-weight:bold;" | HIT CHANCE !! style="background-color:#1a3244; color:#ffffff; font-weight:bold;" | ACTION ZONE (km) | ||
|- | |- | ||
| style="color:inherit;" | 8 || style="color:inherit;" | | | style="color:inherit;" | 8 || style="color:inherit;" | 1330 || style="color:inherit;" | 75% || style="color:inherit;" | 3.5–4.6 | ||
|} | |} | ||
</div> | </div> | ||
| Line 315: | Line 315: | ||
<div class="b-popup"><div class="b-popup_head js-tech-nav_head"><div><h2>WoWs Gallery</h2></div><span class="b-tech-nav_arrow"></span></div><div class="b-popup_content" style="display: none;"><div> | <div class="b-popup"><div class="b-popup_head js-tech-nav_head"><div><h2>WoWs Gallery</h2></div><span class="b-tech-nav_arrow"></span></div><div class="b-popup_content" style="display: none;"><div> | ||
[[File:Lepanto.png|thumb]] | |||
[[Category:Ships of Italy]] | [[Category:Ships of Italy]] | ||
Revision as of 00:10, 11 July 2026

IX
15,500,000
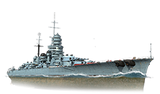
Lepanto — Italy Tech Tree Tier IX Battleship.
The project for a battleship with a displacement of 42,000 tons was prepared by Italian engineers under an order from the U.S.S.R. The ship should have been equipped with nine 406 mm guns in three turrets. If such a ship had been built in Italy, she would have been ready by 1940 or 1941. Since the 406 mm gun was not developed in Italy, an increase in firepower would only be possible by increasing the number of guns per turret. Quadruple-gun turrets with 381 mm guns were developed for battleship projects in the late 1910s and early 1920s.
Pros
- Great damage per salvo
- Exhaust Smoke Generator consumable available
- Quick shell type switching time
Cons
- Small HP pool
- Short firing range
- Low firing accuracy
Ship Stats
Hull Information
Main Battery
Secondary Battery
Airstrike
AA Defense
Compatible Upgrades
| Slot 1 |
 |
 |

| ||
|---|---|---|---|---|---|
| Slot 2 |
 |

| |||
| Slot 3 |
 |
 |
 |
 |

|
| Slot 4 |
 |
 |
 |

| |
| Slot 5 |
 |
 |

| ||
| Slot 6 |
 |

|
Consumables
- Slot 1: Damage Control Party
 (15.0s action, 80.0s cooldown)
 - Slot 2: Repair Party
 (4 charges, 28.0s action, 80.0s cooldown, 360.5 hp/s)
 - Slot 3: Smoke Generator
 (3 charges, 45.0s action, 180.0s cooldown)
 - Slot 4: Patrol Fighter
 (3 charges, 60.0s action, 90.0s cooldown)
Gallery
WoWs Gallery

Categories:
