Ship:Fenyang
No edit summary |
Pockington (talk | contribs) corrected info |
||
| Line 46: | Line 46: | ||
| style="color:inherit;" | • Turning circle radius (m) || style="color:inherit;" | 730 | | style="color:inherit;" | • Turning circle radius (m) || style="color:inherit;" | 730 | ||
|- | |- | ||
| style="color:inherit;" | • Rudder-shift time (sec) || style="color:inherit;" | 5 | | style="color:inherit;" | • Rudder-shift time (sec) || style="color:inherit;" | 4.5 | ||
|} | |} | ||
</div> | </div> | ||
| Line 147: | Line 147: | ||
<div style="border: 2px solid rgba(212,175,55,0.8); border-radius: 3px; margin-bottom: 1em; overflow: hidden;"> | <div style="border: 2px solid rgba(212,175,55,0.8); border-radius: 3px; margin-bottom: 1em; overflow: hidden;"> | ||
{| class="wikitable" style="margin:0; color:inherit; width:100%" | {| class="wikitable" style="margin:0; color:inherit; width:100%" | ||
! style="background-color:#1a3244; color:#ffffff; font-weight:bold;" | TORPEDO LAUNCHERS !! style="background-color:#1a3244; color:#ffffff; font-weight:bold;" | | ! style="background-color:#1a3244; color:#ffffff; font-weight:bold;" | TORPEDO LAUNCHERS !! style="background-color:#1a3244; color:#ffffff; font-weight:bold;" | Type90 mod. 1 | ||
|- | |- | ||
| style="color:inherit;" | • | | style="color:inherit;" | • Torpedo tubes (launchers × tubes) || style="color:inherit;" | 1 × 4 | ||
|- | |- | ||
| style="color:inherit;" | • Torpedo name || style="color:inherit;" | Type90 mod. 1 | | style="color:inherit;" | • Torpedo name || style="color:inherit;" | Type90 mod. 1 | ||
|- | |- | ||
| style="color:inherit;" | • Reload time (sec) || style="color:inherit;" | 122 | | style="color:inherit;" | • Reload time (sec) || style="color:inherit;" | 122 | ||
|- | |- | ||
| style="color:inherit;" | • 180° turn time (sec) || style="color:inherit;" | 7.2 | | style="color:inherit;" | • 180° turn time (sec) || style="color:inherit;" | 7.2 | ||
|- | |- | ||
| style="color:inherit;" | • Damage || style="color:inherit;" | | | style="color:inherit;" | • Damage || style="color:inherit;" | 20,967 | ||
|- | |- | ||
| style="color:inherit;" | • Range (km) || style="color:inherit;" | 0 | | style="color:inherit;" | • Range (km) || style="color:inherit;" | 12.0 | ||
|- | |- | ||
| style="color:inherit;" | • Speed (kt) || style="color:inherit;" | 67 | | style="color:inherit;" | • Speed (kt) || style="color:inherit;" | 67 | ||
| Line 165: | Line 165: | ||
| style="color:inherit;" | • Detectability (km) || style="color:inherit;" | 0.8 | | style="color:inherit;" | • Detectability (km) || style="color:inherit;" | 0.8 | ||
|- | |- | ||
| style="color:inherit;" | • Flooding chance (%) || style="color:inherit;" | | | style="color:inherit;" | • Flooding chance (%) || style="color:inherit;" | 355 | ||
|} | |} | ||
</div> | </div> | ||
| Line 174: | Line 174: | ||
{| class="wikitable" style="margin:0 0 0.8em 0; width:100%; color:inherit;" | {| class="wikitable" style="margin:0 0 0.8em 0; width:100%; color:inherit;" | ||
! style="background-color:#1a3244; color:#ffffff; font-weight:bold;" | AA ARMAMENT !! style="background-color:#1a3244; color:#ffffff; font-weight:bold;" | MOUNTS × BARRELS | ! style="background-color:#1a3244; color:#ffffff; font-weight:bold;" | AA ARMAMENT !! style="background-color:#1a3244; color:#ffffff; font-weight:bold;" | MOUNTS × BARRELS | ||
||- | |||
| style="color:inherit;" | 100 mm || style="color:inherit;" | 4 × 2 | |||
|- | |- | ||
| style="color:inherit;" | 40 mm || style="color:inherit;" | 5 × 2 + 2 × 1 | | style="color:inherit;" | 40 mm || style="color:inherit;" | 5 × 2 + 2 × 1 | ||
| Line 183: | Line 185: | ||
|- | |- | ||
| style="color:inherit;" | Mid-range || style="color:inherit;" | 133 || style="color:inherit;" | 100% || style="color:inherit;" | 3.5 | | style="color:inherit;" | Mid-range || style="color:inherit;" | 133 || style="color:inherit;" | 100% || style="color:inherit;" | 3.5 | ||
|- | |||
| style="color:inherit;" | Long-range || style="color:inherit;" | 112 || style="color:inherit;" | 100% || style="color:inherit;" | 5.8 | |||
|} | |||
'''Damage by shell explosions''' | |||
{| class="wikitable" style="margin:0 0 0.8em 0; width:100%; color:inherit;" | |||
! style="background-color:#1a3244; color:#ffffff; font-weight:bold;" | EXPLOSIONS / SALVO !! style="background-color:#1a3244; color:#ffffff; font-weight:bold;" | DAMAGE !! style="background-color:#1a3244; color:#ffffff; font-weight:bold;" | HIT CHANCE !! style="background-color:#1a3244; color:#ffffff; font-weight:bold;" | ACTION ZONE (km) | |||
|- | |||
| style="color:inherit;" | 5 || style="color:inherit;" | 1400 || style="color:inherit;" | 100% || style="color:inherit;" | 3.5–5.8 | |||
|} | |} | ||
</div> | </div> | ||
| Line 195: | Line 206: | ||
| style="color:inherit;" | • Number of charges || style="color:inherit;" | 2 | | style="color:inherit;" | • Number of charges || style="color:inherit;" | 2 | ||
|- | |- | ||
| style="color:inherit;" | • Bombs per charge || style="color:inherit;" | | | style="color:inherit;" | • Bombs per charge || style="color:inherit;" | 16 | ||
|- | |- | ||
| style="color:inherit;" | • Reload time (sec) || style="color:inherit;" | 40.0 | | style="color:inherit;" | • Reload time (sec) || style="color:inherit;" | 40.0 | ||
Latest revision as of 00:44, 11 July 2026

VIII
11,000 doubloons
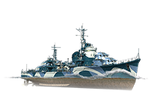
Fenyang — Pan-Asia Premium Tier VIII Destroyer.
Yoizuki, an Akizuki-class destroyer, was built at the Uraga Docks. She participated in the war in the Pacific Ocean. In June 1945, she hit a mine and spent the remainder of the war under repairs. After the war, the ship was used to transport Japanese soldiers back home. In August 1947, she was transferred to China as part of war reparations. While part of the Chinese fleet, the ship was named Fenyang and was sent to the Republic of China Navy in 1949.
Pros
- High AA defense efficiency
- AP shells with reduced chances of ricocheting
Cons
- Small torpedo count per salvo
- Low speed
Ship Stats
Hull Information
Main Battery
Torpedoes
AA Defense
Depth Charges
Compatible Upgrades
| Slot 1 |
 |
 |

| ||
|---|---|---|---|---|---|
| Slot 2 |
 |
 |

| ||
| Slot 3 |
 |
 |
 |
 |

|
| Slot 4 |
 |
 |
 |

| |
| Slot 5 |
 |
 |
 |

|
Consumables
- Slot 1: Damage Control Party
 (5.0s action, 40.0s cooldown)
 - Slot 2: Smoke Generator
 (5 charges, 30.0s action, 100.0s cooldown)
 - Slot 3: Engine Boost
 (3 charges, 120.0s action, 120.0s cooldown)
 - Slot 4: Torpedo Reload Booster
 (3 charges, 1.0s action, 160.0s cooldown)
 - Slot 5: Defensive AA Fire
 (4 charges, 40.0s action, 80.0s cooldown)

