Ship:Friesland
No edit summary |
Pockington (talk | contribs) corrected info |
||
| Line 22: | Line 22: | ||
| style="color:inherit;" | • Hit Points || style="color:inherit;" | 17600 | | style="color:inherit;" | • Hit Points || style="color:inherit;" | 17600 | ||
|- | |- | ||
| style="color:inherit;" | • Torpedo protection damage reduction (%) || style="color:inherit;" | | | style="color:inherit;" | • Torpedo protection damage reduction (%) || style="color:inherit;" | 0 | ||
|} | |} | ||
</div> | </div> | ||
| Line 30: | Line 30: | ||
! style="background-color:#1a3244; color:#ffffff; font-weight:bold;" | ARMOR DETAIL !! style="background-color:#1a3244; color:#ffffff; font-weight:bold;" | | ! style="background-color:#1a3244; color:#ffffff; font-weight:bold;" | ARMOR DETAIL !! style="background-color:#1a3244; color:#ffffff; font-weight:bold;" | | ||
|- | |- | ||
| style="color:inherit;" | • Belt (mm) || style="color:inherit;" | | | style="color:inherit;" | • Belt (mm) || style="color:inherit;" | 19 | ||
|- | |- | ||
| style="color:inherit;" | • Deck (mm) || style="color:inherit;" | | | style="color:inherit;" | • Deck (mm) || style="color:inherit;" | 19 | ||
|- | |- | ||
| style="color:inherit;" | • Superstructure (mm) || style="color:inherit;" | | | style="color:inherit;" | • Superstructure (mm) || style="color:inherit;" | 13 | ||
|- | |- | ||
| style="color:inherit;" | • Extremities (mm) || style="color:inherit;" | | | style="color:inherit;" | • Extremities (mm) || style="color:inherit;" | 19 | ||
|} | |} | ||
</div> | </div> | ||
| Line 48: | Line 48: | ||
| style="color:inherit;" | • Turning circle radius (m) || style="color:inherit;" | 620 | | style="color:inherit;" | • Turning circle radius (m) || style="color:inherit;" | 620 | ||
|- | |- | ||
| style="color:inherit;" | • Rudder-shift time (sec) || style="color:inherit;" | | | style="color:inherit;" | • Rudder-shift time (sec) || style="color:inherit;" | 4.0 | ||
|} | |} | ||
</div> | </div> | ||
| Line 160: | Line 160: | ||
! style="background-color:#1a3244; color:#ffffff; font-weight:bold;" | RANGE !! style="background-color:#1a3244; color:#ffffff; font-weight:bold;" | DPS !! style="background-color:#1a3244; color:#ffffff; font-weight:bold;" | HIT CHANCE !! style="background-color:#1a3244; color:#ffffff; font-weight:bold;" | ACTION ZONE (km) | ! style="background-color:#1a3244; color:#ffffff; font-weight:bold;" | RANGE !! style="background-color:#1a3244; color:#ffffff; font-weight:bold;" | DPS !! style="background-color:#1a3244; color:#ffffff; font-weight:bold;" | HIT CHANCE !! style="background-color:#1a3244; color:#ffffff; font-weight:bold;" | ACTION ZONE (km) | ||
|- | |- | ||
| style="color:inherit;" | Mid-range || style="color:inherit;" | | | style="color:inherit;" | Mid-range || style="color:inherit;" | 283.5 || style="color:inherit;" | 100% || style="color:inherit;" | 3.5 | ||
|- | |- | ||
| style="color:inherit;" | Long-range || style="color:inherit;" | 147 || style="color:inherit;" | 100% || style="color:inherit;" | 6.0 | | style="color:inherit;" | Long-range || style="color:inherit;" | 147 || style="color:inherit;" | 100% || style="color:inherit;" | 6.0 | ||
| Line 171: | Line 171: | ||
| style="color:inherit;" | 6 || style="color:inherit;" | 1820 || style="color:inherit;" | 100% || style="color:inherit;" | 3.5–6.0 | | style="color:inherit;" | 6 || style="color:inherit;" | 1820 || style="color:inherit;" | 100% || style="color:inherit;" | 3.5–6.0 | ||
|} | |} | ||
</div> | </div> | ||
</div></div></div> | </div></div></div> | ||
| Line 183: | Line 182: | ||
| style="color:inherit;" | • Number of charges || style="color:inherit;" | 2 | | style="color:inherit;" | • Number of charges || style="color:inherit;" | 2 | ||
|- | |- | ||
| style="color:inherit;" | • Bombs per charge || style="color:inherit;" | | | style="color:inherit;" | • Bombs per charge || style="color:inherit;" | 8 | ||
|- | |- | ||
| style="color:inherit;" | • Reload time (sec) || style="color:inherit;" | 40.0 | | style="color:inherit;" | • Reload time (sec) || style="color:inherit;" | 40.0 | ||
Latest revision as of 15:14, 11 July 2026

IX
18,000 doubloons
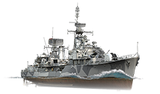
Friesland — Europe Premium Tier IX Destroyer.
Despite the heavy losses sustained by the Dutch Navy during World War II and colonial revolts in the East Indies, the process of designing new ships started immediately after the war. Wartime experience showed the Dutch experts that submarines would become one of the main strike forces in future conflicts. For this reason, project Onderzeebootjager 1949—which subsequently became the Friesland class—incorporated improved anti-submarine armament and AA defenses, as well as a powerful propulsion system. During the period from 1951 to 1958, eight ships of this class were built, and Friesland was the lead ship.
Pros
- High damage per minute
- Access to the Hydroacoustic Search consumable
- High AA defense efficiency
- Enhanced Smoke Generator consumable
Cons
- No torpedo armament
Ship Stats
Hull Information
Main Battery
AA Defense
Depth Charges
Compatible Upgrades
| Slot 1 |
 |
 |

| |
|---|---|---|---|---|
| Slot 2 |
 |
 |
 |

|
| Slot 3 |
 |
 |
 |

|
| Slot 4 |
 |
 |
 |

|
| Slot 5 |
 |
 |
 |

|
| Slot 6 |
 |
 |

|
Consumables
- Slot 1: Damage Control Party
 (5.0s action, 40.0s cooldown)
 - Slot 2: Smoke Generator
 (3 charges, 30.0s action, 160.0s cooldown)
 - Slot 3: Defensive AA Fire
 (3 charges, 40.0s action, 80.0s cooldown)
 - Slot 4: Hydroacoustic Search
 (3 charges, 100.0s action, 120.0s cooldown)

