Ship:Orkan
No edit summary |
Pockington (talk | contribs) corrected info |
||
| Line 47: | Line 47: | ||
| style="color:inherit;" | • Turning circle radius (m) || style="color:inherit;" | 590 | | style="color:inherit;" | • Turning circle radius (m) || style="color:inherit;" | 590 | ||
|- | |- | ||
| style="color:inherit;" | • Rudder-shift time (sec) || style="color:inherit;" | | | style="color:inherit;" | • Rudder-shift time (sec) || style="color:inherit;" | 3.7 | ||
|} | |} | ||
</div> | </div> | ||
| Line 148: | Line 148: | ||
<div style="border: 2px solid rgba(212,175,55,0.8); border-radius: 3px; margin-bottom: 1em; overflow: hidden;"> | <div style="border: 2px solid rgba(212,175,55,0.8); border-radius: 3px; margin-bottom: 1em; overflow: hidden;"> | ||
{| class="wikitable" style="margin:0; color:inherit; width:100%" | {| class="wikitable" style="margin:0; color:inherit; width:100%" | ||
! style="background-color:#1a3244; color:#ffffff; font-weight:bold;" | TORPEDO LAUNCHERS !! style="background-color:#1a3244; color:#ffffff; font-weight:bold;" | | ! style="background-color:#1a3244; color:#ffffff; font-weight:bold;" | TORPEDO LAUNCHERS !! style="background-color:#1a3244; color:#ffffff; font-weight:bold;" | Torped M1943 mod 1 | ||
|- | |- | ||
| style="color:inherit;" | • | | style="color:inherit;" | • Torpedo tubes (launchers × tubes) || style="color:inherit;" | 1 × 4 | ||
|- | |- | ||
| style="color:inherit;" | • Torpedo name || style="color:inherit;" | Torped M1943 | | style="color:inherit;" | • Torpedo name || style="color:inherit;" | Torped M1943 mod 1 | ||
|- | |- | ||
| style="color:inherit;" | • Reload time (sec) || style="color:inherit;" | 70 | | style="color:inherit;" | • Reload time (sec) || style="color:inherit;" | 70 | ||
|- | |- | ||
| style="color:inherit;" | • 180° turn time (sec) || style="color:inherit;" | 7.2 | | style="color:inherit;" | • 180° turn time (sec) || style="color:inherit;" | 7.2 | ||
|- | |- | ||
| style="color:inherit;" | • Damage || style="color:inherit;" | | | style="color:inherit;" | • Damage || style="color:inherit;" | 10,700 | ||
|- | |- | ||
| style="color:inherit;" | • Range (km) || style="color:inherit;" | 0 | | style="color:inherit;" | • Range (km) || style="color:inherit;" | 12.0 | ||
|- | |- | ||
| style="color:inherit;" | • Speed (kt) || style="color:inherit;" | 76 | | style="color:inherit;" | • Speed (kt) || style="color:inherit;" | 76 | ||
| Line 166: | Line 166: | ||
| style="color:inherit;" | • Detectability (km) || style="color:inherit;" | 1.6 | | style="color:inherit;" | • Detectability (km) || style="color:inherit;" | 1.6 | ||
|- | |- | ||
| style="color:inherit;" | • Flooding chance (%) || style="color:inherit;" | | | style="color:inherit;" | • Flooding chance (%) || style="color:inherit;" | 173 | ||
|} | |} | ||
</div> | </div> | ||
| Line 188: | Line 188: | ||
| style="color:inherit;" | • Name || style="color:inherit;" | 102 mm HE 35 lb | | style="color:inherit;" | • Name || style="color:inherit;" | 102 mm HE 35 lb | ||
|- | |- | ||
| style="color:inherit;" | • Arrangement || style="color:inherit;" | | | style="color:inherit;" | • Arrangement || style="color:inherit;" | 1x1 102mm | ||
|- | |- | ||
| style="color:inherit;" | • Rate of fire (shots/min) || style="color:inherit;" | 15.0 | | style="color:inherit;" | • Rate of fire (shots/min) || style="color:inherit;" | 15.0 | ||
| Line 207: | Line 207: | ||
<div class="b-popup"><div class="b-popup_head js-tech-nav_head"><div><h2>AA Defense</h2></div><span class="b-tech-nav_arrow"></span></div><div class="b-popup_content" style="display: none;"><div> | <div class="b-popup"><div class="b-popup_head js-tech-nav_head"><div><h2>AA Defense</h2></div><span class="b-tech-nav_arrow"></span></div><div class="b-popup_content" style="display: none;"><div> | ||
<div style="border: 2px solid rgba(212,175,55,0.8); border-radius: 3px; margin-bottom: 1em; overflow: hidden;"> | <div style="border: 2px solid rgba(212,175,55,0.8); border-radius: 3px; margin-bottom: 1em; overflow: hidden;"> | ||
{| class="wikitable" style="margin:0 0 0.8em 0; width:100%; color:inherit;" | {| class="wikitable" style="margin:0 0 0.8em 0; width:100%; color:inherit;" | ||
! style="background-color:#1a3244; color:#ffffff; font-weight:bold;" | AA ARMAMENT !! style="background-color:#1a3244; color:#ffffff; font-weight:bold;" | MOUNTS × BARRELS | ! style="background-color:#1a3244; color:#ffffff; font-weight:bold;" | AA ARMAMENT !! style="background-color:#1a3244; color:#ffffff; font-weight:bold;" | MOUNTS × BARRELS | ||
| Line 245: | Line 234: | ||
! style="background-color:#1a3244; color:#ffffff; font-weight:bold;" | EXPLOSIONS / SALVO !! style="background-color:#1a3244; color:#ffffff; font-weight:bold;" | DAMAGE !! style="background-color:#1a3244; color:#ffffff; font-weight:bold;" | HIT CHANCE !! style="background-color:#1a3244; color:#ffffff; font-weight:bold;" | ACTION ZONE (km) | ! style="background-color:#1a3244; color:#ffffff; font-weight:bold;" | EXPLOSIONS / SALVO !! style="background-color:#1a3244; color:#ffffff; font-weight:bold;" | DAMAGE !! style="background-color:#1a3244; color:#ffffff; font-weight:bold;" | HIT CHANCE !! style="background-color:#1a3244; color:#ffffff; font-weight:bold;" | ACTION ZONE (km) | ||
|- | |- | ||
| style="color:inherit;" | 1 || style="color:inherit;" | | | style="color:inherit;" | 1 || style="color:inherit;" | 1260 || style="color:inherit;" | 100% || style="color:inherit;" | 3.5–5.2 | ||
|} | |} | ||
</div> | </div> | ||
</div></div></div> | </div></div></div> | ||
| Line 265: | Line 248: | ||
| style="color:inherit;" | • Number of charges || style="color:inherit;" | 2 | | style="color:inherit;" | • Number of charges || style="color:inherit;" | 2 | ||
|- | |- | ||
| style="color:inherit;" | • Bombs per charge || style="color:inherit;" | | | style="color:inherit;" | • Bombs per charge || style="color:inherit;" | 8 | ||
|- | |- | ||
| style="color:inherit;" | • Reload time (sec) || style="color:inherit;" | 40.0 | | style="color:inherit;" | • Reload time (sec) || style="color:inherit;" | 40.0 | ||
| Line 282: | Line 265: | ||
* '''Slot 2:''' {{Engine Boost}} (3 charges, 120.0s action, 120.0s cooldown) | * '''Slot 2:''' {{Engine Boost}} (3 charges, 120.0s action, 120.0s cooldown) | ||
* '''Slot 3:''' {{Repair Party}} (3 charges, 10.0s action, 80.0s cooldown, 157 hp/s) | * '''Slot 3:''' {{Repair Party}} (3 charges, 10.0s action, 80.0s cooldown, 157 hp/s) | ||
* '''Slot 4:''' {{Surveillance Radar}} (7.5km, 3 charges, 20.0s action, 120.0s cooldown) | |||
}} | }} | ||
Latest revision as of 16:45, 11 July 2026

VIII
11,000 doubloons
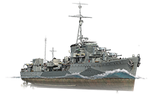
Orkan — Europe Premium Tier VIII Destroyer.
M-class destroyer HMS Myrmidon was laid down at the Fairfield shipyard in Scotland in December 1939, launched in March 1942, and commissioned on November 18, 1942. On the day of her commissioning, the ship was solemnly handed over to a Polish crew, and the destroyer received the name of "ORP Orkan." The ship served in the Arctic, participating in the escort of northern convoys. On October 8, 1943, while escorting convoy SC-143, Orkan was hit by a torpedo from German submarine U-378 and sank within minutes.
Pros
- Good fire-starter with a high fire-chance per shell and decent rate of fire.
- Torpedoes are long ranged, very fast with a short reload timer.
- Access to Surveillance Radar & a limited Repair Party.
Cons
- Awkward rearward firing angles.
- Poor AA Defense
Ship Stats
Hull Information
Main Battery
Torpedoes
Secondary Battery
AA Defense
Depth Charges
Compatible Upgrades
| Slot 1 |
 |
 |

| |
|---|---|---|---|---|
| Slot 2 |
 |
 |
 |

|
| Slot 3 |
 |
 |
 |

|
| Slot 4 |
 |
 |
 |

|
| Slot 5 |
 |
 |
 |

|
Consumables
- Slot 1: Damage Control Party
 (5.0s action, 40.0s cooldown)
 - Slot 2: Engine Boost
 (3 charges, 120.0s action, 120.0s cooldown)
 - Slot 3: Repair Party
 (3 charges, 10.0s action, 80.0s cooldown, 157 hp/s)
 - Slot 4: Surveillance Radar
 (7.5km, 3 charges, 20.0s action, 120.0s cooldown)

