Ship:Satsuma
imported>Ahskance:na m Protected "Ship:Satsuma" ([Edit=Allow only administrators] (indefinite) [Move=Allow only administrators] (indefinite)) [cascading] |
InterconKW (talk | contribs) Revert Tag: Manual revert |
||
| (7 intermediate revisions by 2 users not shown) | |||
| Line 1: | Line 1: | ||
{{#vardefine:ship_name|Satsuma}} | |||
__NOTOC____NOEDITSECTION__ | |||
<div class="b-description gw-frame-1"><div class="b-description-img b-description-img__indent b-description-img__single"><div style="width:160px; height:102px; opacity:.5; border-radius:2px; position:absolute; left:0; top:0; z-index:1; -webkit-transition:all 0.2s ease-out 0.1s; transition:all 0.2s ease-out 0.1s;">[[File:Wows_anno_flag_japan.png|160px]]</div><div class="l-description-img_class"><span class="b-description-img_type b-description-img_type__Battleship b-description-img_type__Battleship-Tech Tree"></span><span class="b-description-img_class">11</span></div><div class="b-description-img_vehicle">[[File:Ship_PJSB111_Satsuma.png|160px|link=|left]]</div><div class="l-description-img_price"><span class="b-description-img_price b-description-img_price__gold"><span title="''{{#var:ship_name}}'' was first released for sale on DD Month YYYY.">57,000,000</span></span></div></div><p>[[Ship:{{#var:ship_name}}|{{#var:ship_name}}]] — Japan Tech Tree Tier 11 [[Ship:Battleship|Battleship]].</p><p>The plans for the Yamato-class battleships included the construction of eight ships before 1950. In early 1941, the program was adjusted: Using the intelligence data on the construction of capital ships in the U.S., the Imperial Japanese Navy General Staff gave the order to build more battleships, some of which were to be based on an improved project with 510 mm main guns.</p><p> </p></div> | |||
< | |||
===Pros=== | |||
* Powerful and long-ranged heavy guns: 510mm guns overmatch all standard extremity plating in the game, have high sigma and immense armor penetration capability | |||
* Access to Combat Instructions: Immediate Main Battery Fire Adjustment briefly increases main battery accuracy dramatically | |||
* Respectable survivability: Especially at longer ranges, her armor is improved from that of [[Yamato]] and similar in layout | |||
* | |||
===Cons=== | |||
* Low Manuverability: Low top speed, slow rudder shift, large turning circle | |||
* Very slow turret traverse: Enemies at closer ranges are likely to outpace your guns | |||
* Highly vulnerable citadel: Similar to that of [[Yamato]] | |||
==Ship Stats== | |||
<div class="b-popup"><div class="b-popup_head js-tech-nav_head"><div><h2>Hull Information</h2></div><span class="b-tech-nav_arrow"></span></div><div class="b-popup_content" style="display: none;"><div> | |||
<div style="border: 2px solid rgba(212,175,55,0.8); border-radius: 3px; margin-bottom: 1em; overflow: hidden;"> | |||
{| class="wikitable" style="margin:0; color:inherit; width:100%" | |||
! style="background-color:#1a3244; color:#ffffff; font-weight:bold;" | SURVIVABILITY !! style="background-color:#1a3244; color:#ffffff; font-weight:bold;" | | |||
|- | |||
| style="color:inherit;" | • Hit Points || style="color:inherit;" | 119200 | |||
|- | |||
| style="color:inherit;" | • Torpedo protection damage reduction (%) || style="color:inherit;" | 59 | |||
|} | |||
</div> | |||
<div style="border: 2px solid rgba(212,175,55,0.8); border-radius: 3px; margin-bottom: 1em; overflow: hidden;"> | |||
{| class="wikitable" style="margin:0; color:inherit; width:100%" | |||
! style="background-color:#1a3244; color:#ffffff; font-weight:bold;" | ARMOR DETAIL !! style="background-color:#1a3244; color:#ffffff; font-weight:bold;" | | |||
|- | |||
| style="color:inherit;" | • Belt (mm) || style="color:inherit;" | 460 | |||
|- | |||
| style="color:inherit;" | • Deck (mm) || style="color:inherit;" | 45-57 | |||
|- | |||
| style="color:inherit;" | • Superstructure (mm) || style="color:inherit;" | 19 | |||
|- | |||
| style="color:inherit;" | • Extremities (mm) || style="color:inherit;" | 32 | |||
|} | |||
</div> | |||
< | <div style="border: 2px solid rgba(212,175,55,0.8); border-radius: 3px; margin-bottom: 1em; overflow: hidden;"> | ||
{| class="wikitable" style="margin:0; color:inherit; width:100%" | |||
! style="background-color:#1a3244; color:#ffffff; font-weight:bold;" | MANEUVERABILITY !! style="background-color:#1a3244; color:#ffffff; font-weight:bold;" | | |||
|- | |||
| style="color:inherit;" | • Maximum speed (kt) || style="color:inherit;" | 27.0 | |||
|- | |||
| style="color:inherit;" | • Turning circle radius (m) || style="color:inherit;" | 1020 | |||
|- | |||
| style="color:inherit;" | • Rudder-shift time (sec) || style="color:inherit;" | 22.4 | |||
|} | |||
</div> | |||
<div style="border: 2px solid rgba(212,175,55,0.8); border-radius: 3px; margin-bottom: 1em; overflow: hidden;"> | |||
{| class="wikitable" style="margin:0; color:inherit; width:100%" | |||
! style="background-color:#1a3244; color:#ffffff; font-weight:bold;" | CONCEALMENT !! style="background-color:#1a3244; color:#ffffff; font-weight:bold;" | | |||
|- | |||
| style="color:inherit;" | • Detectability by sea (km) || style="color:inherit;" | 17.95 | |||
|- | |||
| style="color:inherit;" | • Detectability by air (km) || style="color:inherit;" | 10.0 | |||
|- | |||
| style="color:inherit;" | • Detectability after firing main guns in smoke (km) || style="color:inherit;" | 21.5 | |||
|- | |||
| style="color:inherit;" | • Detectability by depths (km) || style="color:inherit;" | 10.0 | |||
|} | |||
</div> | |||
</div></div></div> | |||
<div class="b-popup"><div class="b-popup_head js-tech-nav_head"><div><h2>Main Battery</h2></div><span class="b-tech-nav_arrow"></span></div><div class="b-popup_content" style="display: none;"><div><div style="border: 2px solid rgba(212,175,55,0.8); border-radius: 3px; margin-bottom: 1em; overflow: hidden;"> | |||
{| class="wikitable" style="margin:0; color:inherit; width:100%" | |||
! style="background-color:#1a3244; color:#ffffff; font-weight:bold;" | MAIN BATTERY !! style="background-color:#1a3244; color:#ffffff; font-weight:bold;" | | |||
|- | |||
| style="color:inherit;" | • Arrangement || style="color:inherit;" | 4×2 510mm | |||
|- | |||
| style="color:inherit;" | • Firing range (km) || style="color:inherit;" | 27.0 | |||
|- | |||
| style="color:inherit;" | • Reload time (sec) || style="color:inherit;" | 35.0 | |||
|- | |||
| style="color:inherit;" | • Rate of fire (shots/min) || style="color:inherit;" | 1.7 | |||
|- | |||
| style="color:inherit;" | • 180° turn time (sec) || style="color:inherit;" | 60.0 | |||
|} | |||
</div> | |||
<div style="border: 2px solid rgba(212,175,55,0.8); border-radius: 3px; margin-bottom: 1em; overflow: hidden;"> | |||
{| class="wikitable" style="margin:0; color:inherit; width:100%" | |||
! style="background-color:#1a3244; color:#ffffff; font-weight:bold;" | DISPERSION !! style="background-color:#1a3244; color:#ffffff; font-weight:bold;" | | |||
|- | |||
| style="color:inherit;" | • Dispersion type || style="color:inherit;" | IJN BB dispersion | |||
|- | |||
| style="color:inherit;" | • Dispersion formula || style="color:inherit;" | Dispersion (m) = 7.2 × range(km) + 84 | |||
|- | |||
| style="color:inherit;" | • Sigma || style="color:inherit;" | 2.1 | |||
|- | |||
| style="color:inherit;" | • Maximum dispersion (m) || style="color:inherit;" | 278 | |||
|- | |||
| style="color:inherit;" | • Dispersion at 5 km || style="color:inherit;" | 120 | |||
|- | |||
| style="color:inherit;" | • Dispersion at 10 km || style="color:inherit;" | 156 | |||
|- | |||
| style="color:inherit;" | • Dispersion at 15 km || style="color:inherit;" | 192 | |||
|- | |||
| style="color:inherit;" | • Dispersion at 20 km || style="color:inherit;" | 228 | |||
|- | |||
| style="color:inherit;" | • Dispersion at 25 km || style="color:inherit;" | 264 | |||
|- | |||
| style="color:inherit;" | • Dispersion at 27 km || style="color:inherit;" | 278 | |||
|} | |||
</div> | |||
<div style="border: 2px solid rgba(212,175,55,0.8); border-radius: 3px; margin-bottom: 1em; overflow: hidden;"> | |||
{| class="wikitable" style="margin:0; color:inherit; width:100%" | |||
! style="background-color:#1a3244; color:#ffffff; font-weight:bold;" | HE SHELL !! style="background-color:#1a3244; color:#ffffff; font-weight:bold;" | | |||
|- | |||
| style="color:inherit;" | • Name || style="color:inherit;" | 510 mm HE Type 98 | |||
|- | |||
| style="color:inherit;" | • Maximum damage || style="color:inherit;" | 8100 | |||
|- | |||
| style="color:inherit;" | • Fire chance (%) || style="color:inherit;" | 40.0% | |||
|- | |||
| style="color:inherit;" | • Shell velocity (m/s) || style="color:inherit;" | 765 | |||
|- | |||
| style="color:inherit;" | • Shell weight (kg) || style="color:inherit;" | 2620 | |||
|- | |||
| style="color:inherit;" | • Penetration (mm) || style="color:inherit;" | 85 | |||
|} | |||
</div> | |||
< | <div style="border: 2px solid rgba(212,175,55,0.8); border-radius: 3px; margin-bottom: 1em; overflow: hidden;"> | ||
{| class="wikitable" style="margin:0; color:inherit; width:100%" | |||
! style="background-color:#1a3244; color:#ffffff; font-weight:bold;" | AP SHELL !! style="background-color:#1a3244; color:#ffffff; font-weight:bold;" | | |||
|- | |||
| style="color:inherit;" | • Name || style="color:inherit;" | 510 mm AP Type 98 | |||
|- | |||
| style="color:inherit;" | • Maximum damage || style="color:inherit;" | 19400 | |||
|- | |||
| style="color:inherit;" | • Shell velocity (m/s) || style="color:inherit;" | 765 | |||
|- | |||
| style="color:inherit;" | • Shell weight (kg) || style="color:inherit;" | 2620 | |||
|- | |||
| style="color:inherit;" | • Fuse time (sec) || style="color:inherit;" | 0.033 | |||
|- | |||
| style="color:inherit;" | • Ricochet start (°) || style="color:inherit;" | 45 | |||
|- | |||
| style="color:inherit;" | • Always ricochet (°) || style="color:inherit;" | 60 | |||
|- | |||
| style="color:inherit;" | • Normalisation (°) || style="color:inherit;" | 6 | |||
|- | |||
| style="color:inherit;" | • Arming threshold (mm) || style="color:inherit;" | 85 | |||
|} | |||
</div> | |||
</div></div></div> | |||
<div class="b-popup"><div class="b-popup_head js-tech-nav_head"><div><h2>Secondary Battery</h2></div><span class="b-tech-nav_arrow"></span></div><div class="b-popup_content" style="display: none;"><div> | |||
<div style="border: 2px solid rgba(212,175,55,0.8); border-radius: 3px; margin-bottom: 1em; overflow: hidden;"> | |||
{| class="wikitable" style="margin:0; color:inherit; width:100%" | |||
! style="background-color:#1a3244; color:#ffffff; font-weight:bold;" | SECONDARY BATTERY !! style="background-color:#1a3244; color:#ffffff; font-weight:bold;" | | |||
|- | |||
| style="color:inherit;" | • Secondary battery range (km) || style="color:inherit;" | 7.3 | |||
|} | |||
</div> | |||
<div style="border: 2px solid rgba(212,175,55,0.8); border-radius: 3px; margin-bottom: 1em; overflow: hidden;"> | |||
{| class="wikitable" style="margin:0; color:inherit; width:100%" | |||
! style="background-color:#1a3244; color:#ffffff; font-weight:bold;" | SECONDARY ARMAMENT 1 !! style="background-color:#1a3244; color:#ffffff; font-weight:bold;" | | |||
|- | |||
| style="color:inherit;" | • Shell type || style="color:inherit;" | HE | |||
|- | |||
| style="color:inherit;" | • Name || style="color:inherit;" | 100 mm HE Type 98 | |||
|- | |||
| style="color:inherit;" | • Arrangement || style="color:inherit;" | 8x2 100mm | |||
|- | |||
| style="color:inherit;" | • Rate of fire (shots/min) || style="color:inherit;" | 8.6 | |||
|- | |||
| style="color:inherit;" | • Maximum damage || style="color:inherit;" | 1700 | |||
|- | |||
| style="color:inherit;" | • Shell velocity (m/s) || style="color:inherit;" | 1000 | |||
|- | |||
| style="color:inherit;" | • Penetration (mm) || style="color:inherit;" | 30 | |||
|- | |||
| style="color:inherit;" | • Fire chance (%) || style="color:inherit;" | 6.0% | |||
|} | |||
</div> | |||
<div style="border: 2px solid rgba(212,175,55,0.8); border-radius: 3px; margin-bottom: 1em; overflow: hidden;"> | |||
{| class="wikitable" style="margin:0; color:inherit; width:100%" | |||
! style="background-color:#1a3244; color:#ffffff; font-weight:bold;" | SECONDARY ARMAMENT 2 !! style="background-color:#1a3244; color:#ffffff; font-weight:bold;" | | |||
|- | |||
| style="color:inherit;" | • Shell type || style="color:inherit;" | HE | |||
|- | |||
| style="color:inherit;" | • Name || style="color:inherit;" | 100 mm HE Type 98 | |||
|- | |||
| style="color:inherit;" | • Arrangement || style="color:inherit;" | 6x2 100mm | |||
|- | |||
| style="color:inherit;" | • Rate of fire (shots/min) || style="color:inherit;" | 8.6 | |||
|- | |||
| style="color:inherit;" | • Maximum damage || style="color:inherit;" | 1700 | |||
|- | |||
| style="color:inherit;" | • Shell velocity (m/s) || style="color:inherit;" | 1000 | |||
|- | |||
| style="color:inherit;" | • Penetration (mm) || style="color:inherit;" | 30 | |||
|- | |||
| style="color:inherit;" | • Fire chance (%) || style="color:inherit;" | 6.0% | |||
|} | |||
</div> | |||
< | <div style="border: 2px solid rgba(212,175,55,0.8); border-radius: 3px; margin-bottom: 1em; overflow: hidden;"> | ||
{| class="wikitable" style="margin:0; color:inherit; width:100%" | |||
! style="background-color:#1a3244; color:#ffffff; font-weight:bold;" | SECONDARY ARMAMENT 3 !! style="background-color:#1a3244; color:#ffffff; font-weight:bold;" | | |||
|- | |||
| style="color:inherit;" | • Shell type || style="color:inherit;" | HE | |||
|- | |||
| style="color:inherit;" | • Name || style="color:inherit;" | 203 mm HE Type0 | |||
|- | |||
| style="color:inherit;" | • Arrangement || style="color:inherit;" | 4x2 203mm | |||
|- | |||
| style="color:inherit;" | • Rate of fire (shots/min) || style="color:inherit;" | 5.0 | |||
|- | |||
| style="color:inherit;" | • Maximum damage || style="color:inherit;" | 3300 | |||
|- | |||
| style="color:inherit;" | • Shell velocity (m/s) || style="color:inherit;" | 840 | |||
|- | |||
| style="color:inherit;" | • Penetration (mm) || style="color:inherit;" | 34 | |||
|- | |||
| style="color:inherit;" | • Fire chance (%) || style="color:inherit;" | 17.0% | |||
|} | |||
</div> | |||
</div></div></div> | |||
<div class="b-popup"><div class="b-popup_head js-tech-nav_head"><div><h2>Airstrike</h2></div><span class="b-tech-nav_arrow"></span></div><div class="b-popup_content" style="display: none;"><div> | |||
< | <div style="border: 2px solid rgba(212,175,55,0.8); border-radius: 3px; margin-bottom: 1em; overflow: hidden;"> | ||
{| class="wikitable" style="margin:0; color:inherit; width:100%" | |||
! style="background-color:#1a3244; color:#ffffff; font-weight:bold;" | ASW AIRSTRIKE (DEPTH CHARGES) !! style="background-color:#1a3244; color:#ffffff; font-weight:bold;" | | |||
|- | |||
| style="color:inherit;" | • Range (km) || style="color:inherit;" | 11 | |||
|- | |||
| style="color:inherit;" | • Minimum range (km) || style="color:inherit;" | 0.5 | |||
|- | |||
| style="color:inherit;" | • Reload time (sec) || style="color:inherit;" | 30.0 | |||
|- | |||
| style="color:inherit;" | • Number of aircraft || style="color:inherit;" | 1 | |||
|- | |||
| style="color:inherit;" | • Depth charges in payload || style="color:inherit;" | 2 | |||
|- | |||
| style="color:inherit;" | • Damage || style="color:inherit;" | 4900 | |||
|- | |||
| style="color:inherit;" | • Deployment || style="color:inherit;" | Manual | |||
|} | |||
</div> | |||
</div></div></div> | |||
<div class="b-popup"><div class="b-popup_head js-tech-nav_head"><div><h2>AA Defense</h2></div><span class="b-tech-nav_arrow"></span></div><div class="b-popup_content" style="display: none;"><div> | |||
<div style="border: 2px solid rgba(212,175,55,0.8); border-radius: 3px; margin-bottom: 1em; overflow: hidden;"> | |||
{| class="wikitable" style="margin:0 0 0.8em 0; width:100%; color:inherit;" | |||
! style="background-color:#1a3244; color:#ffffff; font-weight:bold;" | AA ARMAMENT !! style="background-color:#1a3244; color:#ffffff; font-weight:bold;" | MOUNTS × BARRELS | |||
|- | |||
| style="color:inherit;" | 100 mm || style="color:inherit;" | 14 × 2 | |||
|- | |||
| style="color:inherit;" | 40 mm || style="color:inherit;" | 20 × 2 | |||
|- | |||
| style="color:inherit;" | 25 mm || style="color:inherit;" | 30 × 3 | |||
|} | |||
'' | '''Continuous damage''' — average DPS within each action zone | ||
{| class="wikitable" style="margin:0 0 0.8em 0; width:100%; color:inherit;" | |||
! style="background-color:#1a3244; color:#ffffff; font-weight:bold;" | RANGE !! style="background-color:#1a3244; color:#ffffff; font-weight:bold;" | DPS !! style="background-color:#1a3244; color:#ffffff; font-weight:bold;" | HIT CHANCE !! style="background-color:#1a3244; color:#ffffff; font-weight:bold;" | ACTION ZONE (km) | |||
|- | |||
'' | | style="color:inherit;" | Short-range || style="color:inherit;" | 196 || style="color:inherit;" | 85% || style="color:inherit;" | 2.5 | ||
|- | |||
| style="color:inherit;" | Mid-range || style="color:inherit;" | 371 || style="color:inherit;" | 75% || style="color:inherit;" | 3.5 | |||
|- | |||
| style="color:inherit;" | Long-range || style="color:inherit;" | 161 || style="color:inherit;" | 75% || style="color:inherit;" | 5.8 | |||
|} | |||
| | |||
| | |||
'''Damage by shell explosions''' | |||
{| class="wikitable" style="margin:0 0 0.8em 0; width:100%; color:inherit;" | |||
! style="background-color:#1a3244; color:#ffffff; font-weight:bold;" | EXPLOSIONS / SALVO !! style="background-color:#1a3244; color:#ffffff; font-weight:bold;" | DAMAGE !! style="background-color:#1a3244; color:#ffffff; font-weight:bold;" | HIT CHANCE !! style="background-color:#1a3244; color:#ffffff; font-weight:bold;" | ACTION ZONE (km) | |||
|- | |||
| style="color:inherit;" | 7 || style="color:inherit;" | 1600 || style="color:inherit;" | 75% || style="color:inherit;" | 3.5–5.8 | |||
|} | |||
</div> | |||
</div></div></div> | |||
<!-- Add the ship code here to populate the upgrade table --> | |||
{{Ship Upgrades Section|code=PJSB111_Satsuma}} | |||
<!-- Consumables have to be tagged individually on a slot by slot basis --> | |||
{{Ship Consumables Section|consumables= | |||
* '''Slot | * '''Slot 1:''' {{Damage Control Party}} (10.0s action, 80.0s cooldown) | ||
* '''Slot | * '''Slot 2:''' {{Repair Party}} (4 charges, 28.0s action, 80.0s cooldown, 596 hp/s) | ||
* '''Slot | * '''Slot 3:''' {{Spotting Aircraft}} (4 charges, 100.0s action, 240.0s cooldown) '''or''' {{Patrol Fighter}} (3 charges, 60.0s action, 90.0s cooldown) | ||
}} | }} | ||
==Gallery== | |||
<div class="b-popup"><div class="b-popup_head js-tech-nav_head"><div><h2>WoWs Gallery</h2></div><span class="b-tech-nav_arrow"></span></div><div class="b-popup_content" style="display: none;"><div> | |||
<gallery> | |||
Satsuma Port IKW.jpeg|Satsuma in Zipangu Port, with her default permanant camouflage | |||
</gallery> | </gallery> | ||
</div></div></div> | |||
<div class="b-popup"><div class="b-popup_head js-tech-nav_head"><div><h2>Historical Gallery</h2></div><span class="b-tech-nav_arrow"></span></div><div class="b-popup_content" style="display: none;"><div> | |||
<div class=" | |||
<h2> | |||
= | |||
-- | |||
</div> | |||
<gallery> | |||
</gallery> | </gallery> | ||
</div></div></div> | |||
<div class="b-popup"><div class="b-popup_head js-tech-nav_head"><div><div class="mw-heading mw-heading2"><h2 id="Ship_Change_Log">Ship Change Log</h2></div></div><span class="b-tech-nav_arrow"></span></div><div class="b-popup_content" style="display: none;"><div> | |||
*Preliminary characteristics. | |||
*New set of Preliminary characteristics following original testing. | |||
*Main battery reload time decreased from 32 to 30 s. | |||
*Action time of combat instructions decreased from 50 to 25 s. | |||
*Available for testing by all players in the Grand Battles temporary game mode during Update 0.10.5. | *Update 0.10.5: | ||
*Returned in testing for all players in Ranked and Co-op battles in Update 0.10.10. | **Available for testing by all players in the Grand Battles temporary game mode during Update 0.10.5. | ||
* | *Update 0.10.10: | ||
**Returned in testing for all players in Ranked and Co-op battles in Update 0.10.10. | |||
*Update 0.11.0: | |||
**Fixed an error that caused the acceleration time not to change if the engine was damaged. | **Fixed an error that caused the acceleration time not to change if the engine was damaged. | ||
* | **From Update 0.11.0 also available for testing in Random battles. | ||
*Update 0.11.1: | |||
**Main battery reload time increased from 30 to 33 s. | **Main battery reload time increased from 30 to 33 s. | ||
**Minor fixes to geometry and textures of the ship. | **Minor fixes to geometry and textures of the ship. | ||
* | *Update 0.11.2: | ||
**Main battery reload time increased from 33 to 35 s. | **Main battery reload time increased from 33 to 35 s. | ||
**Adjustment firing bar rate of decay increased from 1 to 2 units per cycle? | **Adjustment firing bar rate of decay increased from 1 to 2 units per cycle? | ||
*Update 0.11.3: | *Update 0.11.3: | ||
**Added to the Japanese tech tree as a special ship unlocked once the player researches Tier 10 Battleship Yamato, then purchased for 57,000,000 credits. | **Added to the Japanese tech tree as a special ship unlocked once the player researches Tier 10 Battleship Yamato, then purchased for 57,000,000 credits. | ||
| Line 259: | Line 335: | ||
**Amount of time spent without firing on target until adjustment firing progress begins to decay reduced from 50 to 45 s. | **Amount of time spent without firing on target until adjustment firing progress begins to decay reduced from 50 to 45 s. | ||
**Rate of decay of adjustment firing progress increased from 16.7% per tick to 20% | **Rate of decay of adjustment firing progress increased from 16.7% per tick to 20% | ||
*Update 14.0: | |||
**Combat Instructions parameters changed: | |||
***Removed current progress conditions. | |||
**Added new progress condition: | |||
***Hit an enemy ship with a main battery shell: 8%. | |||
</div></div></div> | |||
[[Category:Ships of Japan]] | |||
[[Category:Battleships]] | |||
[[Category:Tier 11 ships]] | |||
<!-- DO NOT DELETE THIS LINE. DO NOT INSERT ANYTHING BELOW THIS LINE --> | |||
Latest revision as of 16:34, 5 August 2026

11
57,000,000
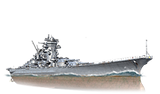
Satsuma — Japan Tech Tree Tier 11 Battleship.
The plans for the Yamato-class battleships included the construction of eight ships before 1950. In early 1941, the program was adjusted: Using the intelligence data on the construction of capital ships in the U.S., the Imperial Japanese Navy General Staff gave the order to build more battleships, some of which were to be based on an improved project with 510 mm main guns.
Pros
- Powerful and long-ranged heavy guns: 510mm guns overmatch all standard extremity plating in the game, have high sigma and immense armor penetration capability
- Access to Combat Instructions: Immediate Main Battery Fire Adjustment briefly increases main battery accuracy dramatically
- Respectable survivability: Especially at longer ranges, her armor is improved from that of Yamato and similar in layout
Cons
- Low Manuverability: Low top speed, slow rudder shift, large turning circle
- Very slow turret traverse: Enemies at closer ranges are likely to outpace your guns
- Highly vulnerable citadel: Similar to that of Yamato
Ship Stats
Hull Information
Main Battery
Secondary Battery
Airstrike
AA Defense
Compatible Upgrades
| Slot 1 |
 |
 |
 |

|
|---|---|---|---|---|
| Slot 2 |
 |

| ||
| Slot 3 |
 |
 |
 |

|
| Slot 4 |
 |
 |
 |

|
| Slot 5 |
 |
 |

| |
| Slot 6 |
 |
 |

|
Consumables
- Slot 1: Damage Control Party
 (10.0s action, 80.0s cooldown)
 - Slot 2: Repair Party
 (4 charges, 28.0s action, 80.0s cooldown, 596 hp/s)
 - Slot 3: Spotting Aircraft
 (4 charges, 100.0s action, 240.0s cooldown) or Patrol Fighter
  (3 charges, 60.0s action, 90.0s cooldown)
Gallery
WoWs Gallery

Historical Gallery
Ship Change Log
Categories:
