Ship:Fusō
Automated stats update via wiki pipeline Tag: Removed redirect |
InterconKW (talk | contribs) m Bolding removed |
||
| (2 intermediate revisions by the same user not shown) | |||
| Line 5: | Line 5: | ||
===Pros=== | ===Pros=== | ||
* | * Powerful main battery firepower: Very high main battery output at her tier, with 12 long ranged and quick reloading 356mm guns providing over 262000 AP and 146500 HE DPM | ||
* | * Great survivability: High HP pool and torpedo protection for the tier. Her distributed armor, with a 152mm upper belt, 35mm deck and relatively sparse superstructure (despite its height) make her resilient to both enemy AP and HE fire. | ||
* Combining her comprehensive protection with firepower output that matches her higher tier counterparts, Fuso can be effective across her entire map and tier spread | |||
===Cons=== | ===Cons=== | ||
* | * Unreliable gunnery: Two amidships turrets cannot fire perfectly ahead or behind, low sigma and inability to overmatch other Tier VI and VII battleships | ||
* | * Questionable armour layout: Her distributed armour works when angled, but renders Fuso vulnerable to citadel hits or heavy damage when not, and in general is vulnerable to heavy damage from air attack | ||
* Very poor concealment: Her default detectability by sea is 18.3km. Of all the pagoda masts, this one is by far the hardest to hide | |||
==Ship Stats== | ==Ship Stats== | ||
| Line 21: | Line 22: | ||
| style="color:inherit;" | • Hit Points || style="color:inherit;" | 44900 || style="color:inherit;" | 57100 | | style="color:inherit;" | • Hit Points || style="color:inherit;" | 44900 || style="color:inherit;" | 57100 | ||
|- | |- | ||
| style="color:inherit;" | • Torpedo protection damage reduction (%) || colspan="2" style="color:inherit;" | | | style="color:inherit;" | • Torpedo protection damage reduction (%) || colspan="2" style="color:inherit;" | 34 | ||
|} | |} | ||
</div> | </div> | ||
| Line 29: | Line 30: | ||
! style="background-color:#1a3244; color:#ffffff; font-weight:bold;" | ARMOR DETAIL !! style="background-color:#1a3244; color:#ffffff; font-weight:bold;" | | ! style="background-color:#1a3244; color:#ffffff; font-weight:bold;" | ARMOR DETAIL !! style="background-color:#1a3244; color:#ffffff; font-weight:bold;" | | ||
|- | |- | ||
| style="color:inherit;" | • Belt (mm) || style="color:inherit;" | | | style="color:inherit;" | • Belt (mm) || style="color:inherit;" | 229-305 | ||
|- | |- | ||
| style="color:inherit;" | • Deck (mm) || style="color:inherit;" | | | style="color:inherit;" | • Deck (mm) || style="color:inherit;" | 35 | ||
|- | |- | ||
| style="color:inherit;" | • Superstructure (mm) || style="color:inherit;" | | | style="color:inherit;" | • Superstructure (mm) || style="color:inherit;" | 16 | ||
|- | |- | ||
| style="color:inherit;" | • Extremities (mm) || style="color:inherit;" | | | style="color:inherit;" | • Extremities (mm) || style="color:inherit;" | 26 | ||
|} | |} | ||
</div> | </div> | ||
| Line 47: | Line 48: | ||
| style="color:inherit;" | • Turning circle radius (m) || style="color:inherit;" | 740 || style="color:inherit;" | 740 | | style="color:inherit;" | • Turning circle radius (m) || style="color:inherit;" | 740 || style="color:inherit;" | 740 | ||
|- | |- | ||
| style="color:inherit;" | • Rudder-shift time (sec) || style="color:inherit;" | | | style="color:inherit;" | • Rudder-shift time (sec) || style="color:inherit;" | 17.1 || style="color:inherit;" | 14.9 | ||
|} | |} | ||
</div> | </div> | ||
| Line 164: | Line 165: | ||
| style="color:inherit;" | • Name || style="color:inherit;" | 152 mm HE Type4 | | style="color:inherit;" | • Name || style="color:inherit;" | 152 mm HE Type4 | ||
|- | |- | ||
| style="color:inherit;" | • Arrangement || style="color:inherit;" | | | style="color:inherit;" | • Arrangement || style="color:inherit;" | 14x1 152mm | ||
|- | |- | ||
| style="color:inherit;" | • Rate of fire (shots/min) || style="color:inherit;" | 6.0 | | style="color:inherit;" | • Rate of fire (shots/min) || style="color:inherit;" | 6.0 | ||
| Line 186: | Line 187: | ||
| style="color:inherit;" | • Name || style="color:inherit;" | 127 mm HE Type0 | | style="color:inherit;" | • Name || style="color:inherit;" | 127 mm HE Type0 | ||
|- | |- | ||
| style="color:inherit;" | • Arrangement || style="color:inherit;" | | | style="color:inherit;" | • Arrangement || style="color:inherit;" | 4x2 127mm | ||
|- | |- | ||
| style="color:inherit;" | • Rate of fire (shots/min) || style="color:inherit;" | 12.0 | | style="color:inherit;" | • Rate of fire (shots/min) || style="color:inherit;" | 12.0 | ||
| Line 299: | Line 300: | ||
==Gallery== | ==Gallery== | ||
<div class="b-popup"><div class="b-popup_head js-tech-nav_head"><div><h2>WoWs Gallery</h2></div><span class="b-tech-nav_arrow"></span></div><div class="b-popup_content" style="display: none;"><div> | <div class="b-popup"><div class="b-popup_head js-tech-nav_head"><div><h2>WoWs Gallery</h2></div><span class="b-tech-nav_arrow"></span></div><div class="b-popup_content" style="display: none;"><div> | ||
<gallery> | <gallery> | ||
Fuso Port IKW.jpeg|Fusō in Zipangu Port, with the Wayfinder permanant camouflage (Christmas 2016) | |||
</gallery> | </gallery> | ||
</div></div></div> | </div></div></div> | ||
Latest revision as of 14:46, 6 July 2026

VI
3,490,000
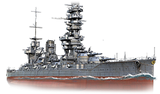
Fusō — Japan Tech Tree Tier VI Battleship.
Battlecruiser Kongō was used as the basis for the design of a new battleship. To surpass the New York-class dreadnoughts being built in the U.S., Japanese shipbuilders raised the number of 356 mm guns to 12 in six turrets, preferring twin-gun turrets to triple-gun ones to boost survivability. During World War II, the ship covered the Pearl Harbor raid, as well as participated in the Aleutian Islands campaign and the Battle of Surigao Strait. On October 25, 1944, the battleship was hit by torpedoes from U.S. destroyers and sank, breaking into several pieces.
Pros
- Powerful main battery firepower: Very high main battery output at her tier, with 12 long ranged and quick reloading 356mm guns providing over 262000 AP and 146500 HE DPM
- Great survivability: High HP pool and torpedo protection for the tier. Her distributed armor, with a 152mm upper belt, 35mm deck and relatively sparse superstructure (despite its height) make her resilient to both enemy AP and HE fire.
- Combining her comprehensive protection with firepower output that matches her higher tier counterparts, Fuso can be effective across her entire map and tier spread
Cons
- Unreliable gunnery: Two amidships turrets cannot fire perfectly ahead or behind, low sigma and inability to overmatch other Tier VI and VII battleships
- Questionable armour layout: Her distributed armour works when angled, but renders Fuso vulnerable to citadel hits or heavy damage when not, and in general is vulnerable to heavy damage from air attack
- Very poor concealment: Her default detectability by sea is 18.3km. Of all the pagoda masts, this one is by far the hardest to hide
Ship Stats
Hull Information
Main Battery
Secondary Battery
Airstrike
AA Defense
Compatible Upgrades
| Slot 1 |
 |
 |
 |

|
|---|---|---|---|---|
| Slot 2 |
 |

| ||
| Slot 3 |
 |
 |
 |

|
| Slot 4 |
 |
 |
 |

|
Consumables
- Slot 1: Damage Control Party
 (10.0s action, 80.0s cooldown)
 - Slot 2: Repair Party
 (4 charges, 28.0s action, 80.0s cooldown, 224.5 hp/s)
 - Slot 3: Spotting Aircraft
 (4 charges, 100.0s action, 240.0s cooldown)
Gallery
WoWs Gallery

Historical Gallery
Categories:
