Ship:ARP Haruna
Automated stats update via wiki pipeline |
InterconKW (talk | contribs) Changelog, fixed gallery format, fixed typo in pros/cons |
||
| (One intermediate revision by one other user not shown) | |||
| Line 6: | Line 6: | ||
===Pros=== | ===Pros=== | ||
* | * Large HP pool | ||
* | * Long firing range | ||
* High top speed | |||
* Clone of [[Kongō]] with premium ship benefits | |||
===Cons=== | ===Cons=== | ||
* | * High detectability | ||
* | * Low damage per salvo | ||
==Ship Stats== | ==Ship Stats== | ||
| Line 18: | Line 19: | ||
<div style="border: 2px solid rgba(212,175,55,0.8); border-radius: 3px; margin-bottom: 1em; overflow: hidden;"> | <div style="border: 2px solid rgba(212,175,55,0.8); border-radius: 3px; margin-bottom: 1em; overflow: hidden;"> | ||
{| class="wikitable" style="margin:0; color:inherit; width:100%" | {| class="wikitable" style="margin:0; color:inherit; width:100%" | ||
! style="background-color:#1a3244; color:#ffffff; font-weight:bold;" | SURVIVABILITY !! style="background-color:#1a3244; color:#ffffff; font-weight:bold;" | | ! style="background-color:#1a3244; color:#ffffff; font-weight:bold;" | SURVIVABILITY !! style="background-color:#1a3244; color:#ffffff; font-weight:bold;" | Kongō (A) !! style="background-color:#1a3244; color:#ffffff; font-weight:bold;" | Kongō (B) | ||
|- | |- | ||
| style="color:inherit;" | • Hit Points || style="color:inherit;" | 54100 | | style="color:inherit;" | • Hit Points || style="color:inherit;" | 49500 || style="color:inherit;" | 54100 | ||
|- | |- | ||
| style="color:inherit;" | • Torpedo protection damage reduction (%) || style="color:inherit;" | | | style="color:inherit;" | • Torpedo protection damage reduction (%) || colspan="2" style="color:inherit;" | 25 | ||
|} | |} | ||
</div> | </div> | ||
| Line 30: | Line 31: | ||
! style="background-color:#1a3244; color:#ffffff; font-weight:bold;" | ARMOR DETAIL !! style="background-color:#1a3244; color:#ffffff; font-weight:bold;" | | ! style="background-color:#1a3244; color:#ffffff; font-weight:bold;" | ARMOR DETAIL !! style="background-color:#1a3244; color:#ffffff; font-weight:bold;" | | ||
|- | |- | ||
| style="color:inherit;" | • Belt (mm) || style="color:inherit;" | | | style="color:inherit;" | • Belt (mm) || style="color:inherit;" | 203 | ||
|- | |- | ||
| style="color:inherit;" | • Deck (mm) || style="color:inherit;" | | | style="color:inherit;" | • Deck (mm) || style="color:inherit;" | 38 | ||
|- | |- | ||
| style="color:inherit;" | • Superstructure (mm) || style="color:inherit;" | | | style="color:inherit;" | • Superstructure (mm) || style="color:inherit;" | 13 | ||
|- | |- | ||
| style="color:inherit;" | • Extremities (mm) || style="color:inherit;" | | | style="color:inherit;" | • Extremities (mm) || style="color:inherit;" | 19 | ||
|} | |} | ||
</div> | </div> | ||
| Line 42: | Line 43: | ||
<div style="border: 2px solid rgba(212,175,55,0.8); border-radius: 3px; margin-bottom: 1em; overflow: hidden;"> | <div style="border: 2px solid rgba(212,175,55,0.8); border-radius: 3px; margin-bottom: 1em; overflow: hidden;"> | ||
{| class="wikitable" style="margin:0; color:inherit; width:100%" | {| class="wikitable" style="margin:0; color:inherit; width:100%" | ||
! style="background-color:#1a3244; color:#ffffff; font-weight:bold;" | MANEUVERABILITY !! style="background-color:#1a3244; color:#ffffff; font-weight:bold;" | | ! style="background-color:#1a3244; color:#ffffff; font-weight:bold;" | MANEUVERABILITY !! style="background-color:#1a3244; color:#ffffff; font-weight:bold;" | Kongō (A) !! style="background-color:#1a3244; color:#ffffff; font-weight:bold;" | Kongō (B) | ||
|- | |- | ||
| style="color:inherit;" | • Maximum speed (kt) || style="color:inherit;" | 30.0 | | style="color:inherit;" | • Maximum speed (kt) || style="color:inherit;" | 30.0 || style="color:inherit;" | 30.0 | ||
|- | |- | ||
| style="color:inherit;" | • Turning circle radius (m) || style="color:inherit;" | 770 | | style="color:inherit;" | • Turning circle radius (m) || style="color:inherit;" | 770 || style="color:inherit;" | 770 | ||
|- | |- | ||
| style="color:inherit;" | • Rudder-shift time (sec) || style="color:inherit;" | | | style="color:inherit;" | • Rudder-shift time (sec) || style="color:inherit;" | 17.2 || style="color:inherit;" | 14.9 | ||
|} | |} | ||
</div> | </div> | ||
| Line 54: | Line 55: | ||
<div style="border: 2px solid rgba(212,175,55,0.8); border-radius: 3px; margin-bottom: 1em; overflow: hidden;"> | <div style="border: 2px solid rgba(212,175,55,0.8); border-radius: 3px; margin-bottom: 1em; overflow: hidden;"> | ||
{| class="wikitable" style="margin:0; color:inherit; width:100%" | {| class="wikitable" style="margin:0; color:inherit; width:100%" | ||
! style="background-color:#1a3244; color:#ffffff; font-weight:bold;" | CONCEALMENT !! style="background-color:#1a3244; color:#ffffff; font-weight:bold;" | | ! style="background-color:#1a3244; color:#ffffff; font-weight:bold;" | CONCEALMENT !! style="background-color:#1a3244; color:#ffffff; font-weight:bold;" | Kongō (A) !! style="background-color:#1a3244; color:#ffffff; font-weight:bold;" | Kongō (B) | ||
|- | |- | ||
| style="color:inherit;" | • Detectability by sea (km) || style="color:inherit;" | 15.71 | | style="color:inherit;" | • Detectability by sea (km) || style="color:inherit;" | 15.71 || style="color:inherit;" | 15.71 | ||
|- | |- | ||
| style="color:inherit;" | • Detectability by air (km) || style="color:inherit;" | 9.36 | | style="color:inherit;" | • Detectability by air (km) || style="color:inherit;" | 9.36 || style="color:inherit;" | 9.36 | ||
|- | |- | ||
| style="color:inherit;" | • Detectability after firing main guns in smoke (km) || style="color:inherit;" | 14.17 | | style="color:inherit;" | • Detectability after firing main guns in smoke (km) || colspan="2" style="color:inherit;" | 14.17 | ||
|- | |- | ||
| style="color:inherit;" | • Detectability by depths (km) || style="color:inherit;" | 9.36 | | style="color:inherit;" | • Detectability by depths (km) || style="color:inherit;" | 9.36 || style="color:inherit;" | 9.36 | ||
|} | |} | ||
</div> | </div> | ||
| Line 69: | Line 70: | ||
<div class="b-popup"><div class="b-popup_head js-tech-nav_head"><div><h2>Main Battery</h2></div><span class="b-tech-nav_arrow"></span></div><div class="b-popup_content" style="display: none;"><div><div style="border: 2px solid rgba(212,175,55,0.8); border-radius: 3px; margin-bottom: 1em; overflow: hidden;"> | <div class="b-popup"><div class="b-popup_head js-tech-nav_head"><div><h2>Main Battery</h2></div><span class="b-tech-nav_arrow"></span></div><div class="b-popup_content" style="display: none;"><div><div style="border: 2px solid rgba(212,175,55,0.8); border-radius: 3px; margin-bottom: 1em; overflow: hidden;"> | ||
{| class="wikitable" style="margin:0; color:inherit; width:100%" | {| class="wikitable" style="margin:0; color:inherit; width:100%" | ||
! style="background-color:#1a3244; color:#ffffff; font-weight:bold;" | MAIN BATTERY !! style="background-color:#1a3244; color:#ffffff; font-weight:bold;" | | ! style="background-color:#1a3244; color:#ffffff; font-weight:bold;" | MAIN BATTERY !! style="background-color:#1a3244; color:#ffffff; font-weight:bold;" | Type5 mod. 1 !! style="background-color:#1a3244; color:#ffffff; font-weight:bold;" | Type5 mod. 2 | ||
|- | |- | ||
| style="color:inherit;" | • Arrangement || style="color:inherit;" | 4×2 356mm | | style="color:inherit;" | • Arrangement || colspan="2" style="color:inherit;" | 4×2 356mm | ||
|- | |- | ||
| style="color:inherit;" | • Firing range (km) || style="color:inherit;" | 21.2 | | style="color:inherit;" | • Firing range (km) || style="color:inherit;" | 19.27 || style="color:inherit;" | 21.2 | ||
|- | |- | ||
| style="color:inherit;" | • Reload time (sec) || style="color:inherit;" | | | style="color:inherit;" | • Reload time (sec) || colspan="2" style="color:inherit;" | 31.0 | ||
|- | |- | ||
| style="color:inherit;" | • Rate of fire (shots/min) || style="color:inherit;" | | | style="color:inherit;" | • Rate of fire (shots/min) || colspan="2" style="color:inherit;" | 1.9 | ||
|- | |- | ||
| style="color:inherit;" | • 180° turn time (sec) || style="color:inherit;" | 54.5 | | style="color:inherit;" | • 180° turn time (sec) || colspan="2" style="color:inherit;" | 54.5 | ||
|} | |} | ||
</div> | </div> | ||
| Line 93: | Line 94: | ||
| style="color:inherit;" | • Sigma || style="color:inherit;" | 2.0 | | style="color:inherit;" | • Sigma || style="color:inherit;" | 2.0 | ||
|- | |- | ||
| style="color:inherit;" | • Maximum dispersion (m) || style="color:inherit;" | | | style="color:inherit;" | • Maximum dispersion (m) || style="color:inherit;" | 222 | ||
|- | |- | ||
| style="color:inherit;" | • Dispersion at 5 km || style="color:inherit;" | 120 | | style="color:inherit;" | • Dispersion at 5 km || style="color:inherit;" | 120 | ||
| Line 101: | Line 102: | ||
| style="color:inherit;" | • Dispersion at 15 km || style="color:inherit;" | 192 | | style="color:inherit;" | • Dispersion at 15 km || style="color:inherit;" | 192 | ||
|- | |- | ||
| style="color:inherit;" | • Dispersion at | | style="color:inherit;" | • Dispersion at 19.27 km || style="color:inherit;" | 223 | ||
|} | |} | ||
</div> | </div> | ||
| Line 130: | Line 129: | ||
! style="background-color:#1a3244; color:#ffffff; font-weight:bold;" | AP SHELL !! style="background-color:#1a3244; color:#ffffff; font-weight:bold;" | | ! style="background-color:#1a3244; color:#ffffff; font-weight:bold;" | AP SHELL !! style="background-color:#1a3244; color:#ffffff; font-weight:bold;" | | ||
|- | |- | ||
| style="color:inherit;" | • Name || style="color:inherit;" | 356 mm AP | | style="color:inherit;" | • Name || style="color:inherit;" | 356 mm AP Type5 | ||
|- | |- | ||
| style="color:inherit;" | • Maximum damage || style="color:inherit;" | | | style="color:inherit;" | • Maximum damage || style="color:inherit;" | 9000 | ||
|- | |- | ||
| style="color:inherit;" | • Shell velocity (m/s) || style="color:inherit;" | | | style="color:inherit;" | • Shell velocity (m/s) || style="color:inherit;" | 790 | ||
|- | |- | ||
| style="color:inherit;" | • Shell weight (kg) || style="color:inherit;" | | | style="color:inherit;" | • Shell weight (kg) || style="color:inherit;" | 635.5 | ||
|- | |- | ||
| style="color:inherit;" | • Fuse time (sec) || style="color:inherit;" | 0.033 | | style="color:inherit;" | • Fuse time (sec) || style="color:inherit;" | 0.033 | ||
| Line 167: | Line 166: | ||
| style="color:inherit;" | • Name || style="color:inherit;" | 152 mm HE Type4 | | style="color:inherit;" | • Name || style="color:inherit;" | 152 mm HE Type4 | ||
|- | |- | ||
| style="color:inherit;" | • Arrangement || style="color:inherit;" | | | style="color:inherit;" | • Arrangement || style="color:inherit;" | 14x1 152mm | ||
|- | |- | ||
| style="color:inherit;" | • Rate of fire (shots/min) || style="color:inherit;" | 6.0 | | style="color:inherit;" | • Rate of fire (shots/min) || style="color:inherit;" | 6.0 | ||
| Line 189: | Line 188: | ||
| style="color:inherit;" | • Name || style="color:inherit;" | 127 mm HE Type0 | | style="color:inherit;" | • Name || style="color:inherit;" | 127 mm HE Type0 | ||
|- | |- | ||
| style="color:inherit;" | • Arrangement || style="color:inherit;" | | | style="color:inherit;" | • Arrangement || style="color:inherit;" | 4x2 127mm | ||
|- | |- | ||
| style="color:inherit;" | • Rate of fire (shots/min) || style="color:inherit;" | 12.0 | | style="color:inherit;" | • Rate of fire (shots/min) || style="color:inherit;" | 12.0 | ||
| Line 229: | Line 228: | ||
<div class="b-popup"><div class="b-popup_head js-tech-nav_head"><div><h2>AA Defense</h2></div><span class="b-tech-nav_arrow"></span></div><div class="b-popup_content" style="display: none;"><div> | <div class="b-popup"><div class="b-popup_head js-tech-nav_head"><div><h2>AA Defense</h2></div><span class="b-tech-nav_arrow"></span></div><div class="b-popup_content" style="display: none;"><div> | ||
<div style="border: 2px solid rgba(212,175,55,0.8); border-radius: 3px; margin-bottom: 1em; overflow: hidden;"> | <div style="border: 2px solid rgba(212,175,55,0.8); border-radius: 3px; margin-bottom: 1em; overflow: hidden;"> | ||
'''Kongō (A)''' | |||
{| class="wikitable" style="margin:0 0 0.8em 0; width:100%; color:inherit;" | |||
! style="background-color:#1a3244; color:#ffffff; font-weight:bold;" | AA ARMAMENT !! style="background-color:#1a3244; color:#ffffff; font-weight:bold;" | MOUNTS × BARRELS | |||
|- | |||
| style="color:inherit;" | 127 mm || style="color:inherit;" | 4 × 2 | |||
|- | |||
| style="color:inherit;" | 13 mm || style="color:inherit;" | 12 × 2 | |||
|} | |||
'''Continuous damage''' — average DPS within each action zone | |||
{| class="wikitable" style="margin:0 0 0.8em 0; width:100%; color:inherit;" | |||
! style="background-color:#1a3244; color:#ffffff; font-weight:bold;" | RANGE !! style="background-color:#1a3244; color:#ffffff; font-weight:bold;" | DPS !! style="background-color:#1a3244; color:#ffffff; font-weight:bold;" | HIT CHANCE !! style="background-color:#1a3244; color:#ffffff; font-weight:bold;" | ACTION ZONE (km) | |||
|- | |||
| style="color:inherit;" | Short-range || style="color:inherit;" | 70 || style="color:inherit;" | 85% || style="color:inherit;" | 1.5 | |||
|- | |||
| style="color:inherit;" | Long-range || style="color:inherit;" | 70 || style="color:inherit;" | 75% || style="color:inherit;" | 5.8 | |||
|} | |||
'''Damage by shell explosions''' | |||
{| class="wikitable" style="margin:0 0 0.8em 0; width:100%; color:inherit;" | |||
! style="background-color:#1a3244; color:#ffffff; font-weight:bold;" | EXPLOSIONS / SALVO !! style="background-color:#1a3244; color:#ffffff; font-weight:bold;" | DAMAGE !! style="background-color:#1a3244; color:#ffffff; font-weight:bold;" | HIT CHANCE !! style="background-color:#1a3244; color:#ffffff; font-weight:bold;" | ACTION ZONE (km) | |||
|- | |||
| style="color:inherit;" | 2 || style="color:inherit;" | 340 || style="color:inherit;" | 75% || style="color:inherit;" | 3.5–5.8 | |||
|} | |||
'''Kongō (B)''' | |||
{| class="wikitable" style="margin:0 0 0.8em 0; width:100%; color:inherit;" | {| class="wikitable" style="margin:0 0 0.8em 0; width:100%; color:inherit;" | ||
! style="background-color:#1a3244; color:#ffffff; font-weight:bold;" | AA ARMAMENT !! style="background-color:#1a3244; color:#ffffff; font-weight:bold;" | MOUNTS × BARRELS | ! style="background-color:#1a3244; color:#ffffff; font-weight:bold;" | AA ARMAMENT !! style="background-color:#1a3244; color:#ffffff; font-weight:bold;" | MOUNTS × BARRELS | ||
| Line 261: | Line 288: | ||
<!-- Add the ship code here to populate the upgrade table --> | <!-- Add the ship code here to populate the upgrade table --> | ||
{{Ship Upgrades Section|code= | {{Ship Upgrades Section|code=PJSB007_Kongo_1942}} | ||
| Line 267: | Line 294: | ||
{{Ship Consumables Section|consumables= | {{Ship Consumables Section|consumables= | ||
* '''Slot 1:''' {{Damage Control Party}} (10.0s action, 80.0s cooldown) | * '''Slot 1:''' {{Damage Control Party}} (10.0s action, 80.0s cooldown) | ||
* '''Slot 2:''' {{Repair Party}} (4 charges, 28.0s action, 80.0s cooldown, | * '''Slot 2:''' {{Repair Party}} (4 charges, 28.0s action, 80.0s cooldown, 247.5 hp/s) | ||
* '''Slot 3:''' {{Spotting Aircraft}} (4 charges, 100.0s action, 240.0s cooldown) | * '''Slot 3:''' {{Spotting Aircraft}} (4 charges, 100.0s action, 240.0s cooldown) | ||
}} | }} | ||
| Line 274: | Line 301: | ||
==Gallery== | ==Gallery== | ||
<div class="b-popup"><div class="b-popup_head js-tech-nav_head"><div><h2>WoWs Gallery</h2></div><span class="b-tech-nav_arrow"></span></div><div class="b-popup_content" style="display: none;"><div> | <div class="b-popup"><div class="b-popup_head js-tech-nav_head"><div><h2>WoWs Gallery</h2></div><span class="b-tech-nav_arrow"></span></div><div class="b-popup_content" style="display: none;"><div> | ||
<gallery> | <gallery> | ||
ARPHaruna.png | |||
</gallery> | </gallery> | ||
</div></div></div> | </div></div></div> | ||
<div class="b-popup"><div class="b- | <div class="b-popup"><div class="b-popup_head js-tech-nav_head"><div><div class="mw-heading mw-heading2"><h2 id="Ship_Change_Log">Ship Change Log</h2></div></div><span class="b-tech-nav_arrow"></span></div><div class="b-popup_content" style="display: none;"><div> | ||
*Update 14.2: | |||
**Main Battery parameters changed: | |||
***Maximum HE shell damage reduced: 5700 to 5100 | |||
***Researchable Maximum AP shell damage reduced: 10,200 to 9200 | |||
***Sigma value increased: 1.8 to 2.0 | |||
***Secondary Battery Shell ballistic parameters changed. The firing arcs will now be flatter | |||
</div></div></div> | </div></div></div> | ||
Latest revision as of 16:18, 6 August 2026

V
4,000 doubloons
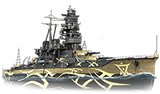
ARP Haruna — Japan Premium Tier V Battleship.
A Fleet of Fog battleship modeled after the Imperial Japanese Navy's 3rd Kongō-class battleship, Haruna. First seen engaging I-401 in combat alongside Kirishima, she was defeated by the superior tactics of Gunzo Chihaya, commander of I-401. Her Mental Model—Haruna—always wears a large overcoat and has a keen interest in the human language, "collecting" word samples as she hears them. This warship has been modeled after Haruna as she appears in "ARPEGGIO OF BLUE STEEL -ARS NOVA-.".
Pros
- Large HP pool
- Long firing range
- High top speed
- Clone of Kongō with premium ship benefits
Cons
- High detectability
- Low damage per salvo
Ship Stats
Hull Information
Main Battery
Secondary Battery
Airstrike
AA Defense
Compatible Upgrades
| Slot 1 |
 |
 |
 |

|
|---|---|---|---|---|
| Slot 2 |
 |

| ||
| Slot 3 |
 |
 |
 |

|
Consumables
- Slot 1: Damage Control Party
 (10.0s action, 80.0s cooldown)
 - Slot 2: Repair Party
 (4 charges, 28.0s action, 80.0s cooldown, 247.5 hp/s)
 - Slot 3: Spotting Aircraft
 (4 charges, 100.0s action, 240.0s cooldown)

