Ship:Tirpitz B
Automated stats update via wiki pipeline |
InterconKW (talk | contribs) Stat fixes |
||
| Line 5: | Line 5: | ||
===Pros=== | ===Pros=== | ||
* | * High level of citadel protection | ||
* | * High secondary battery gun accuracy | ||
* Torpedo armament available | |||
===Cons=== | ===Cons=== | ||
* | * Low level of anti-torpedo protection | ||
* | * Low AA defense efficiency | ||
* No access to Hydroacoustic Search consumable | |||
| Line 21: | Line 23: | ||
| style="color:inherit;" | • Hit Points || style="color:inherit;" | 69300 | | style="color:inherit;" | • Hit Points || style="color:inherit;" | 69300 | ||
|- | |- | ||
| style="color:inherit;" | • Torpedo protection damage reduction (%) || style="color:inherit;" | | | style="color:inherit;" | • Torpedo protection damage reduction (%) || style="color:inherit;" | 22 | ||
|} | |} | ||
</div> | </div> | ||
| Line 29: | Line 31: | ||
! style="background-color:#1a3244; color:#ffffff; font-weight:bold;" | ARMOR DETAIL !! style="background-color:#1a3244; color:#ffffff; font-weight:bold;" | | ! style="background-color:#1a3244; color:#ffffff; font-weight:bold;" | ARMOR DETAIL !! style="background-color:#1a3244; color:#ffffff; font-weight:bold;" | | ||
|- | |- | ||
| style="color:inherit;" | • Belt (mm) || style="color:inherit;" | | | style="color:inherit;" | • Belt (mm) || style="color:inherit;" | 315 | ||
|- | |- | ||
| style="color:inherit;" | • Deck (mm) || style="color:inherit;" | | | style="color:inherit;" | • Deck (mm) || style="color:inherit;" | 50 | ||
|- | |- | ||
| style="color:inherit;" | • Superstructure (mm) || style="color:inherit;" | | | style="color:inherit;" | • Superstructure (mm) || style="color:inherit;" | 19 | ||
|- | |- | ||
| style="color:inherit;" | • Extremities (mm) || style="color:inherit;" | | | style="color:inherit;" | • Extremities (mm) || style="color:inherit;" | 32 | ||
|} | |} | ||
</div> | </div> | ||
| Line 47: | Line 49: | ||
| style="color:inherit;" | • Turning circle radius (m) || style="color:inherit;" | 850 | | style="color:inherit;" | • Turning circle radius (m) || style="color:inherit;" | 850 | ||
|- | |- | ||
| style="color:inherit;" | • Rudder-shift time (sec) || style="color:inherit;" | | | style="color:inherit;" | • Rudder-shift time (sec) || style="color:inherit;" | 16.0 | ||
|} | |} | ||
</div> | </div> | ||
| Line 154: | Line 156: | ||
! style="background-color:#1a3244; color:#ffffff; font-weight:bold;" | TORPEDO LAUNCHERS !! style="background-color:#1a3244; color:#ffffff; font-weight:bold;" | | ! style="background-color:#1a3244; color:#ffffff; font-weight:bold;" | TORPEDO LAUNCHERS !! style="background-color:#1a3244; color:#ffffff; font-weight:bold;" | | ||
|- | |- | ||
| style="color:inherit;" | • Number of launchers || style="color:inherit;" | | | style="color:inherit;" | • Number of launchers || style="color:inherit;" | 2x4 | ||
|- | |- | ||
| style="color:inherit;" | • Torpedo name || style="color:inherit;" | | | style="color:inherit;" | • Torpedo name || style="color:inherit;" | G7a T1 | ||
|- | |- | ||
| style="color:inherit;" | • Reload time (sec) || style="color:inherit;" | 90.0 | | style="color:inherit;" | • Reload time (sec) || style="color:inherit;" | 90.0 | ||
| Line 162: | Line 164: | ||
| style="color:inherit;" | • 180° turn time (sec) || style="color:inherit;" | 7.2 | | style="color:inherit;" | • 180° turn time (sec) || style="color:inherit;" | 7.2 | ||
|- | |- | ||
| style="color:inherit;" | • Damage || style="color:inherit;" | | | style="color:inherit;" | • Damage || style="color:inherit;" | 13700 | ||
|- | |- | ||
| style="color:inherit;" | • Range (km) || style="color:inherit;" | 0 | | style="color:inherit;" | • Range (km) || style="color:inherit;" | 6.0 | ||
|- | |- | ||
| style="color:inherit;" | • Speed (kt) || style="color:inherit;" | 64 | | style="color:inherit;" | • Speed (kt) || style="color:inherit;" | 64 | ||
| Line 170: | Line 172: | ||
| style="color:inherit;" | • Detectability (km) || style="color:inherit;" | 1.3 | | style="color:inherit;" | • Detectability (km) || style="color:inherit;" | 1.3 | ||
|- | |- | ||
| style="color:inherit;" | • Flooding chance (%) || style="color:inherit;" | | | style="color:inherit;" | • Flooding chance (%) || style="color:inherit;" | 227% | ||
|} | |} | ||
</div> | </div> | ||
| Line 192: | Line 194: | ||
| style="color:inherit;" | • Name || style="color:inherit;" | 150 mm Spr.Gr. L/4.5 | | style="color:inherit;" | • Name || style="color:inherit;" | 150 mm Spr.Gr. L/4.5 | ||
|- | |- | ||
| style="color:inherit;" | • Arrangement || style="color:inherit;" | | | style="color:inherit;" | • Arrangement || style="color:inherit;" | 6x 2 150mm | ||
|- | |- | ||
| style="color:inherit;" | • Rate of fire (shots/min) || style="color:inherit;" | 8.0 | | style="color:inherit;" | • Rate of fire (shots/min) || style="color:inherit;" | 8.0 | ||
| Line 214: | Line 216: | ||
| style="color:inherit;" | • Name || style="color:inherit;" | 105 mm Spr.Gr. Kz. | | style="color:inherit;" | • Name || style="color:inherit;" | 105 mm Spr.Gr. Kz. | ||
|- | |- | ||
| style="color:inherit;" | • Arrangement || style="color:inherit;" | | | style="color:inherit;" | • Arrangement || style="color:inherit;" | 8x 2 105mm | ||
|- | |- | ||
| style="color:inherit;" | • Rate of fire (shots/min) || style="color:inherit;" | 17.9 | | style="color:inherit;" | • Rate of fire (shots/min) || style="color:inherit;" | 17.9 | ||
| Line 225: | Line 227: | ||
|- | |- | ||
| style="color:inherit;" | • Fire chance (%) || style="color:inherit;" | 5.0% | | style="color:inherit;" | • Fire chance (%) || style="color:inherit;" | 5.0% | ||
|} | |} | ||
</div> | </div> | ||
Revision as of 14:52, 7 July 2026

VIII
11,000 doubloons
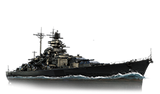
Tirpitz B — Germany Premium Tier VIII Battleship.
The second Bismarck-class battleship, Tirpitz, was built in Wilhelmshaven. A shortage of fuel and the fear of losing another large ship after the sinking of Bismarck were the reasons why this battleship wasn't very active during the war. Tirpitz attempted to attack Arctic convoys but encountered resistance. In autumn 1944, the battleship was struck twice by 6-ton bombs that almost incapacitated her, and then she was ultimately sunk by British Lancaster-type bombers.
Pros
- High level of citadel protection
- High secondary battery gun accuracy
- Torpedo armament available
Cons
- Low level of anti-torpedo protection
- Low AA defense efficiency
- No access to Hydroacoustic Search consumable
Ship Stats
Hull Information
Main Battery
Torpedoes
Secondary Battery
Airstrike
AA Defense
Compatible Upgrades
| Slot 1 |
 |
 |
 |

| |
|---|---|---|---|---|---|
| Slot 2 |
 |

| |||
| Slot 3 |
 |
 |
 |
 |

|
| Slot 4 |
 |
 |
 |

| |
| Slot 5 |
 |
 |

|
Consumables
- Slot 1: Damage Control Party
 (15.0s action, 80.0s cooldown)
 - Slot 2: Repair Party
 (4 charges, 28.0s action, 80.0s cooldown, 346.5 hp/s)
 - Slot 3: Spotting Aircraft
 (4 charges, 100.0s action, 240.0s cooldown) or Patrol Fighter
  (3 charges, 60.0s action, 90.0s cooldown)
