Ship:Stalingrad

 |
Purchase priceSpecial  |
| Hit Points72,450 |
| 305 mm/61 SM-33 on an SM-31 mount3 х 3 pcs. |
| Rate of Fire2.9 shots/min |
| Reload Time21 sec |
| Rotation Speed5 deg/sec |
| 180 Degree Turn Time36 sec |
| Firing Range20.4 km |
| Maximum Dispersion218 m |
| HE Shell305 mm HE Model 1928 |
| Maximum HE Damage4,500 |
| Chance of Fire33 % |
| Initial HE Velocity950 m/s |
| HE Shell Weight374.7 kg |
| AP Shell305 mm AP Model 1928 |
| Maximum AP Shell Damage9,200 |
| Initial AP Shell Velocity950 m/s |
| AP Shell Weight467 kg |
| Maximum Speed35 knot |
| Turning Circle Radius1130 m |
| Rudder Shift Time12.5 sec |
| Surface Detectability Range17.6 km |
| Air Detectability Range10 km |

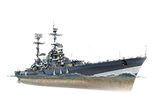
Stalingrad — Soviet special premium Tier X cruiser.
One of the few heavy artillery ships developed after the end of World War II. She had a very high speed for her size and her armament consisted of specially designed 305 mm guns, unrivaled in terms of her maximum firing range and ballistics.
Stalingrad first went on sale on 23 August 2018 via the Armory for 28,000 Steel .
.
Modules
 | Rate of Fire (shots/min) | 180° Turn Time (sec) | Maximum Dispersion (m) | Maximum HE Shell Damage (HP) | Chances of HE shells causing a fire on target (%) | Maximum AP Shell Damage (HP) | Research price (exp) | Purchase price (  ) ) | |
|---|---|---|---|---|---|---|---|---|---|
| 305 mm/61 SM-33 on an SM-31 mount | 2.9 | 36 | 218 | 4,500 | 33 | 9,200 | 0 | 0 |
 | Hit Points (HP) | Armor (mm) | Armor (mm) | Main Turrets (pcs.) | Secondary Gun Turrets (pcs.) | AA Mounts (pcs.) | Torpedo Tubes (pcs.) | Hangar Capacity (pcs.) | Research price (exp) | Purchase price ( ) | |
|---|---|---|---|---|---|---|---|---|---|---|---|
| Stalingrad | 72,450 | 6 | 617 | 3 | 6 | 10/6/6 | 0 | 0 |
 | IDS_SHIP_PARAM_SUO_INCREASE_DIST (%) | Maximum Firing Range (km) | Research price (exp) | Purchase price ( ) | |
|---|---|---|---|---|---|
| GFCS X mod. 1 | 0 | 0 | 0 |
 | Maximum Speed (knot) | Research price (exp) | Purchase price ( ) | |
|---|---|---|---|---|
| Propulsion: 280,000 hp | 35 | 0 | 0 |
Compatible Upgrades
| Slot 1 |
 |
 |

| |
|---|---|---|---|---|
| Slot 2 |
 |
 |
 |

|
| Slot 3 |
 |
 |
 |

|
| Slot 4 |
 |
 |
 |

|
| Slot 5 |
 |
 |
 |

|
| Slot 6 |
 |
 |

|
Player Opinion
Performance
Refer to the in-game Port screens for more useful data.
Tier X Premium cruiser Stalingrad is a ship that behaves very similar to her Premium cousin Moskva. Both are very strong at locking down a position and are equipped with accurate and hard hitting AP shells that travel across the map quickly. However, Stalingrad is more polarized and less flexible than her tech tree counterpart. Worse maneuverability and concealment make mistakes in positioning and relocating attempts risky, and can result in very painful salvos coming in. Stalingrad makes up for this by having even more hit points than Moskva, and having a more powerful main battery armament.
Stalingrad’s strongest feature is her main battery. Carrying three triple turrets with 305mm/61 rifles in an AB-X layout, she will be able to deliver devastating salvos against many targets. Her accuracy is a rather weird case. With a dispersion ellipse similar to the German heavy cruiser Admiral Graf Spee married to the highest sigma value in the game at 2.65, there are two extremes meeting when shells are being fired. The chance for shells to land closer to the center is higher than on other cruisers, but it remains possible for the shells to land further off the target than on any other cruiser. The reload time her guns is very long: twenty-one (21) seconds before applying modifications or skills. Thus, Main Battery Modification 3  is highly recommended to bring the reload down to 18.48 seconds, with Adrenaline Rush reducing the reload further as Stalingrad takes damage. With a comfortable range of 20.4 km, Stalingrad can inflict damage to her opponents from far away.
Stalingrad boasts a robust health pool for a cruiser. With 72,450 hit point, she beats out Tier IX Premium Kronshtadt to claim the mantle of largest health pool of any cruiser in World of Warships. With a torpedo protection system of 25%, she can handle incoming torpedoes better than most other cruisers. Similar to Kronshtadt, a fire on the Stalingrad will burn for 60 seconds base duration.
Her armor is an almost identical scheme compared to her tech tree counterpart. Her citadel, just like Moskva’s, has been widened from the historical plans which creates a weak spot in her armor scheme. The citadel touches the outer hull slightly above the waterline, and is protected by a 180mm strong belt. Below this, the citadel protection becomes stronger. The outer belt of 180mm inclined armor continues, but behind that there are additional bulkheads with the same incline protecting the magazines. This can result in shells getting armed but exploding before penetrating the citadel. Also similar to Moskva, Stalingrad features 50mm hull plating. This will mostly benefit the ship when it's being angled properly, as it can make all AP shells bounce off and most HE shells will just shatter against it. However, not every part is covered in this plating. Half of the bow and a lot of the stern area is not protected by this and only has a 25mm plating, which will get overmatched by every battleship Stalingrad will face. Angling is essential to maximizing Stalingrad’s survivability; once an opponent has shots at her side she will fall apart just as quickly as any other cruiser.
Armor-piercing shells are the more powerful shell type to sling from Stalingrad’s barrels. They feature good ballistics, a strong penetration and also a high base damage of 9,200. On top of that, these shells have improved autobounce angles similar to American heavy cruisers; Stalingrad’s AP shells will not automatically ricochet off enemy armor until striking at an angle of greater than 65 degrees. This is significantly better than on most other cruisers. The caliber of the guns provides another bonus: her 305mm armor piercing shells have the ability to overmatch 21mm of armor. That means that Stalingrad can citadel British light cruisers from all angles, and that against destroyers she can also just stick to AP for the first salvo, since the shells will not bounce and deal 10% if the listed Alpha Damage per hit. The HE shells appear strong, but the relatively low rate of fire makes HE a rather unattractive choice of ammo as it's not enough to rack up high damage numbers. The amount of shells she can throw out is not enough to make her a reliable fire starter like Zao or Henri IV; subsequently, the HE shells should be seen as the secondary shells, with the main focus being on the AP to deal damage. However, when facing destroyers exclusively using HE shells is recommended.
In terms of maneuverability, the Stalingrad is very similar to the Moskva. When sailing in a straight line she can be very fast, up to 36.8 knots when using the Sierra Mike signal flag. However once she has to maneuver problems will arise. With a turning circle of more than 1100 meters she has a larger turning circle than the German Tier X battleship Großer Kurfürst, which is already known for needing a lot of room to maneuver. On top of that, Stalingrad’s rudder shift is slow at 12.5 seconds, which is the worst value of any Tier X cruiser. Additionally, her concealment is the worst among all cruisers. With a stock detection radius of 18.1 km, this is not an easy ship to hide; extreme caution is advised when attempting to relocate.
The capabilities of Stalingrad in a brawl are very limited, owning to her large citadel which is easy to penetrate at close ranges and her lack of maneuverability. The absence of Hydroacoustic Search  among her available consumables only strengthens this weakness, as does the lack of torpedoes. Her targets of choice are broadside targets at all ranges, and destroyers that wander too close. The accurate and fast shells will allow for punishing salvos, regardless of the target, while the ship itself will be able to take a lot of punishment. However, all of these things rely on two key factors: situational awareness and positioning. Stalingrad is not able to survive in unfavorable circumstances, and her ability to get into better positions throughout the battle is severely hampered. Only capable hands will be able to get the most out of Stalingrad.
Pros:
- Largest hit point pool of any cruiser.
- Very fast, at 35 knots top speed.
- Guns are accurate, with a sigma value of 2.65.
- Fantastic AP shells, with improved autobounce angles and reduced shell arming time.
- Has access to Defensive AA Fire
 , though it operates differently to the standard version, lasting an increased amount of time at the sacrifice of reduced damage enhancement and much longer cooldown
 - Surveillance Radar
 is included on the ship with a great 12 kilometer range, warding away many of her torpedo threats.
Cons:
- High citadel makes brawling a challenge, and showing broadside would be a death sentence if not for her large health pool
- Relatively ineffective if forced to use HE.
- Worse concealment than most tier 10 battleships.
- Among the worst handling of all tier 10 ships
- Lacks Hydroacoustic Search , and when combined with her handling makes torpedoes a large threat
- Poor reload, which means she loses many opportunities that other cruisers could take
- Fires set on Stalingrad will last twice as long as those on many cruisers.
Research
Optimal Configuration
Upgrades
The recommended upgrades for Stalingrad are as follows:
- Slot 1: Main Armaments Modification 1
 *
* - Slot 2: Surveillance Radar Modification 1
 *
* - Slot 3: Aiming Systems Modification 1
 *
* - Slot 4: Damage Control System Modification 2
 *
* - Slot 5: Concealment System Modification 1
 *
* - Slot 6: Main Battery Modification 3 *
Upgrade Slot 1 provides players with two viable choices. Main Armaments Modification 1 is generally recommended; however, for anti-aircraft duties, players should take Auxiliary Armaments Modification 1  .
.
Upgrade Slot 2 allows players to extend the duration of the Surveillance Radar consumable if they have the appropriate special module available in the Arsenal.
Upgrade Slot 3 allows for further specialization in a role. Players wishing to decrease shell dispersion should mount Aiming Systems Modification 1 . For anti-aircraft duties, AA Guns Modification 1  should be chosen. For increased brawling capabilities, some players may opt to mount Main Battery Modification 2
  to increase turret traverse speed.
Upgrade Slot 4 provides two viable options. For increased survivability, Damage Control System Modification 2 is a good choice. However, many players utilize Steering Gears Modification 1  or Propulsion Modification 1
  to increase the maneuverability of the ship. Choosing between these upgrades will be determined by the intended play style.
Upgrade Slot 5 gives players a choice between Steering Gears Modification 2  for increased maneuverability and Concealment System Modification 1 to reduce the detection range of the ship. If Steering Gears Modification 1 was not mounted in Slot 4, it is highly recommended to mount Steering Gears Modification 2 to improve the ship's handling.
Upgrade Slot 6 provides the most options for specialization. Main Battery Modification 3 should be mounted to increase the rate of fire of the main guns. For more passive players, Gun Fire Control System Modification 2  is a good option to increase the firing range of the main guns. Players seeking to finalize an anti-aircraft build should mount Auxiliary Armaments Modification 2
  .
.
Commander Skills
Key skills for Stalingrad commanders include Heavy AP Shells, Superintendent, and Concealment Expert.
Recommended Commander Skills 
| ||||||
|---|---|---|---|---|---|---|
| Cost (points) |
Attack | Defense | ||||
1 |
 ★★★ |

|
 ★ |
 ★★★ |
 ★ |

|
2 |

|

|
 ★★★ |

|
 ★ |

|
3 |

|

|
 ★★★ |
 ★★★ |
 ★★★ |

|
4 |
 ★★★ |

|

|

|
 ★★★ |

|
| Key: ★★★ - Extremely Useful ★★ - Frequently Useful ★ - Occasionally Useful No stars - Not Useful | ||||||
Consumables
Stalingrad can equip the following consumables:
- Slot 1: Damage Control Party

- Slot 2: Surveillance Radar
- Slot 3: Repair Party

- Slot 4: Defensive AA Fire Note: This version of the consumable acts differently to the standard. The action time is 60s instead of the standard 40s and the damage multiplier is +25% as opposed to the standard +50%. The cooldown is also longer, at 180s instead of the standard 80s.
Camouflage
As a premium ship, Stalingrad comes with Default permanent camouflage and a set of permanent combat bonuses.
Signals
Stalingrad is a unique ship, but her signal load out is fairly standard for a cruiser; only difference being in the relative uselessness of the two fire chance flags, as she already possesses a 33% burn chance. Being a Tier X Premium ship, economic signals are a good option to increase the various currency gains.
Recommended Signal Flags 
| |||||
|---|---|---|---|---|---|
| Combat | |||||

|
 ★★ |
 ★★★ |
 ★ |
 ★ |
 ★ |

|

|
 ★ |
 ★ |
 ★★★ |
 ★★★ |

|

| ||||

Gallery


Historical Info
Historical Gallery


Video
References
- 1:42 Scale: Stalingrad - World of Warships - YouTube
- Building Stalingrad - News - World of Warships
- Monthly Wiki Spotlight - Stalingrad - News - World of Warships
- 1:42 Scale: Stalingrad - World of Warships Official Channel - YouTube
- Developer Diaries: How We Made Stalingrad - World of Warships Official Channel - YouTube
- Gardiner, R. (1995). Conway’s All the World’s Fighting Ships: 1946-1995. London UK: Conway Maritime Press.
- [Russian text] Vasiliev, A.M., Morin, A.B. (2008). Stalin's Super Battleships: «Sovetsky Soyuz», «Kronshtadt», «Stalingrad». Moscow, Russia: Eksmo Press.
