Ship:Hobart

 |
 |
 |
|
 |
| Research price36000 exp |
Purchase price3,000,000  |
| Hit Points24,200 |
| 152 mm/50 BL Mk.XXIII on a Mk.XXI mount4 х 2 pcs. |
| Rate of Fire8 shots/min |
| Reload Time7 sec |
| Rotation Speed6 deg/sec |
| 180 Degree Turn Time30 sec |
| Firing Range13.1 km |
| Maximum Dispersion123 m |
| HE Shell152 mm HE 6crh Mk IV |
| Maximum HE Damage2,100 |
| Chance of Fire8 % |
| Initial HE Velocity841 m/s |
| HE Shell Weight44.445 kg |
| AP Shell152 mm AP 6crh Mk IV |
| Maximum AP Shell Damage2,850 |
| Initial AP Shell Velocity841 m/s |
| AP Shell Weight44.45 kg |
| 533 mm QR Mk IV2 х 4 pcs. |
| Rate of Fire0.6 shots/min |
| Reload Time96 sec |
| Rotation Speed deg/sec |
| 180 Degree Turn Time7.2 sec |
| Torpedo533 mm Mk IX |
| Maximum Damage15,433 |
| Torpedo Speed62 knot |
| Torpedo Range10 km |
| Maximum Speed32.5 knot |
| Turning Circle Radius640 m |
| Rudder Shift Time10.6 sec |
| Surface Detectability Range10.8 km |
| Air Detectability Range6.4 km |

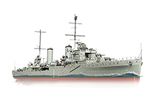
Hobart — Commonwealth Tier VI cruiser.
Originally named Apollo, this warship was one of three ships constructed in Britain following the "improved Leander" design. She deviated from the prototype in her different powerplant layout and silhouette. In 1939, she joined the Royal Australian Navy and was renamed HMAS Hobart. During World War II, the cruiser participated in the Mediterranean campaign, in combat operations off the coast of Somalia, and in operations in the Indian and Pacific Oceans. HMAS Hobart was also present at the signing ceremony of Japan's surrender in Tokyo Bay.
Modules
 | Rate of Fire (shots/min) | 180° Turn Time (sec) | Maximum Dispersion (m) | Maximum HE Shell Damage (HP) | Chances of HE shells causing a fire on target (%) | Maximum AP Shell Damage (HP) | Research price (exp) | Purchase price ( ) | |
|---|---|---|---|---|---|---|---|---|---|
| 152 mm/50 BL Mk.XXIII on a Mk.XXI mount | 8 | 30 | 123 | 2,100 | 8 | 2,850 | 0 | 300,000 |
 | Hit Points (HP) | Armor (mm) | Armor (mm) | Main Turrets (pcs.) | Secondary Gun Turrets (pcs.) | AA Mounts (pcs.) | Torpedo Tubes (pcs.) | Hangar Capacity (pcs.) | Research price (exp) | Purchase price ( ) | |
|---|---|---|---|---|---|---|---|---|---|---|---|
| Hobart (A) | 24,200 | 10 | 100 | 4 | 4 | 3/4/2/4 | 2 | 0 | 450,000 | ||
| Hobart (B) | 27,400 | 10 | 100 | 4 | 4 | 4/3 | 2 | 13,500 | 810,000 |
 | Rate of Fire (shots/min) | Torpedo Tubes Reload Time (sec) | 180° Turn Time (sec) | Maximum Damage (HP) | Torpedo Speed (knot) | Torpedo Range (km) | Research price (exp) | Purchase price ( ) | |
|---|---|---|---|---|---|---|---|---|---|
| 533 mm Mk IX | 0.6 | 96 | 7.2 | 15,433 | 62 | 10 | 0 | 300,000 |
 | IDS_SHIP_PARAM_SUO_INCREASE_DIST (%) | Maximum Firing Range (km) | Research price (exp) | Purchase price ( ) | |
|---|---|---|---|---|---|
| Mk VI mod. 1 | 0 | 0 | 300,000 | ||
| Mk VI mod. 2 | 0 | 9,000 | 540,000 |
 | Maximum Speed (knot) | Research price (exp) | Purchase price ( ) | |
|---|---|---|---|---|
| Propulsion: 72,000 hp | 32.5 | 0 | 300,000 |
Compatible Upgrades
| Slot 1 |
 |
 |

| ||||
|---|---|---|---|---|---|---|---|
| Slot 2 |
 |
 |

| ||||
| Slot 3 |
 |
 |
 |
 |
 |
 |

|
| Slot 4 |
 |
 |
 |

|
Player Opinion
Performance
Refer to the in-game Port screens for more useful data.
The Ship
Tier VI Hobart is an evolution of Tier V Delhi. She also shares many similarities with her sister ship, Perth.
Hobart is on the slower end of the scale for a Tier VI cruiser. A top speed of 32.5 knots means that she can struggle to escape from tricky situations and is at risk of being chased down by faster opponents. A 7.7 second rudder shift and 640 meter turning circle mean that she is maneuverable for a cruiser, although she lacks the improved energy retention of Perth.
Hobart mounts a standard cruiser Damage Control Party  , which is active for 5 seconds with a 60 second cool down. She is equipped with a Crawling Smoke Generator
  with a long emission time of 102 seconds, although each individual puff will disperse after just 10 seconds. When moving at ¼ speed this allows Hobart to maneuver while remaining in smoke. This has a 160 second cool down between uses. Her Submarine Surveillance
  consumable will detect submerged submarines up to 6 km away. This is active for 20 seconds, and has three uses as standard with 120 seconds between uses. She also has the choice between Hydroacoustic Search
  or Defensive AA Fire
  consumables. Her Hydroacoustic Search will detect torpedoes at 3 km and ships at 4 km for 100 seconds and comes with three uses as standard. The Defensive AA Fire consumable is active for 40 seconds and provides a 50% increase to continuous AA DPM and a 300% increase to damage caused by her flak clouds.
Survivability
Hobart has fairly typical armor for a light cruiser; her citadel is protected by a 100 mm thick belt stretching from the forward funnel to her rear superstructure. Although the main part of her citadel sits fairly low in the water, she has a raised section of auxiliary room armor between the funnels. Behind this area, her citadel roof is just 10 mm thick, rounds which penetrate her 100 mm armor can potentially overmatch this thinner armor. Her bow and stern are 16 mm thick, allowing Hobart to bounce cruiser AP, with the exception of Graf Spee. A badly timed turn or showing broadside at the wrong time can easily result in receiving serious amounts of damage.
Armament
Hobart mounts eight 152 mm guns in four twin turrets with a rather quick reload of 7.5 seconds. Her firing range of 14.4 km is one of the longest for a smoke screen equipped cruiser, although it can feel uncomfortably short without cover from smoke or islands. Her main battery DPM sits comfortably in the middle of the pack. Her turret rotation is slow, with a similar traverse speed to Japanese cruisers, making close range battles feel uncomfortable. At longer ranges there is the usual tendency for her shells to float, although this is not as pronounced as ships like Dallas or even Perth.
In common with many Tier VI light cruisers, her AP penetration drops off as the range exceeds 10 km. At 12 km range she can potentially penetrate the belt armor of many Tier VI cruisers, although the impact angle will reduce this. Finally, her AP shells have some of the lowest damage per shell for their tier.
Her HE shells also do some of the lowest damage for a Tier VI 152 mm gun. These shells have a fairly low fire chance of 8%, leaving Hobart trailing behind most cruisers at her tier. In ideal conditions, players can expect to set roughly 5 fires per minute.
Hobart mounts a quad torpedo launcher on each side. These have a good damage per weapon with a long 10 km range which potentially allows a small window that they can be launched from stealth. However, a reload time of 96 seconds is rather long meaning that she is unable to zone out large areas with her torpedoes.
Anti-Air
Hobart’s AA can bring down some attacking aircraft but they will not prevent a determined strike from a Tier VI carrier. Her flak reaches out to 5.8km and creates 2 clouds per salvo. Her medium range AA guns are rather short ranged, reaching out to 2.5 km - only 500 meters further than her short range guns. Overall, her AA is mainly for self defense.
Anti-Submarine
Hobart is one of the better ASW platforms at her tier due to her combination of ASW airstrike, submarine surveillance, and hydroacoustic search. Her ASW airstrike can have two uses stored, which drops a single charge. Each attack has a range of 7 km, an extra 1 km over the standard for a Tier VI cruiser. Unfortunately, her depth charges are somewhat weaker than those of other nations.
Her submarine surveillance reaches out to 6 km, like her ASW airstrike this is a full kilometer further than standard. With a 20 second action time this allows 2 aimed airstrikes as well as a potential third strike based on the information gained.
Battle Performance
Hobart works best at medium ranges where she can lend her support to friendly ships. Her ASW equipment means that she can pose a serious threat to any submarines in the area. With her slow turret traverse, close range brawls are ill advised as players can easily find themselves out-turning their turrets. Rather than engage in solo fights, she should use her concealment to reach a position to support team mates where she is less likely to become a target herself. Effective use of island cover and smoke screens will reduce incoming fire and preserve health to remain in the battle.
Her crawling smoke allows sustained firing from relative safety or to disengage from a tricky situation. Although it is not intended to be used in such a way, moving at full speed and laying down a smoke screen between Hobart and an enemy can allow her to break contact. However, the long cool down of her smoke generator means that players who are not aware of their surroundings may find themselves out of position and spotted with no way to escape.
Pros:
- Long range torpedoes
- Increased ASW airstrike range.
- Low concealment.
- Crawling smoke consumable.
- Access to Hydroacoustic Search and Submarine Surveillance consumables.
Cons:
- Slow turret traverse
- Low health pool
- Poor fire starting potential
- Rather low top speed
Research
Researchable upgrades for Hobart:
- Hull: Upgrade to Hull (B) for improved survivability and maneuverability. Research of this module unlocks progression to Uganda.
- Gun Fire Control System: Upgrade to Mk VI mod. 2 for an extra 10% range on the main battery.
Optimal Configuration
Upgrades
The recommended upgrades are:
- Slot 1: Main Armaments Modification 1

- Slot 2: Engine Room Protection
 or Hydroacoustic Search Modification 1
- Slot 3: Main Battery Modification 2

- Slot 4: Propulsion Modification 1

Commander Skills
Recommended Commander Skills 
| ||||||
|---|---|---|---|---|---|---|
| Cost (points) |
Attack | Defense | ||||
1 |
 ★★★ |
 ★ |

|

|

|
 ★★ |
2 |

|
 ★ |
 ★★ |

|
 ★★★ |

|
3 |

|

|
 ★★★ |

|

|
 ★★ |
4 |

|

|

|
 ★★ |
 ★★★ |
 ★ |
| Key: ★★★ - Extremely Useful ★★ - Frequently Useful ★ - Occasionally Useful No stars - Not Useful | ||||||

Consumables
Hobart equips the following consumables:
- Slot 1: Damage Control Party
- Slot 2: Defensive AA Fire – 3 charges or Hydroacoustic Search – 3 charges
- Slot 3: Crawling Smoke Generator – 3 charges
- Slot 4: Submarine Surveillance – 3 charges
Signals
Recommended Signal Flags 
| |||||
|---|---|---|---|---|---|
| Combat | |||||

|

|

|

|

|

|

|

|

|

|

|

|

|

| ||||

Gallery
Historical Info
Historical Gallery
References
Ship Change Log
| Destroyers | III Vampire  • VII Haida • VII Huron • X Vampire II • VII Haida • VII Huron • X Vampire II
|
| Cruisers | I Sutlej • II Port Jackson • III Caradoc • IV Dunedin • V Delhi • VI Hobart • VI Perth • VI Mysore • VII Uganda • VII Gambia • VIII Auckland • IX Encounter • IX Hector • X Cerberus • X Brisbane • X Pioneer • X Brisbane B
|
| Battleships | VII Yukon • X Irresistible
|
