Ship:Salem

 |
Purchase priceSpecial  |
| Hit Points49,700 |
| 203 mm/55 RF Mk.16 in a turret3 х 3 pcs. |
| Rate of Fire10.9 shots/min |
| Reload Time5 sec |
| Rotation Speed6 deg/sec |
| 180 Degree Turn Time30 sec |
| Firing Range15.8 km |
| Maximum Dispersion142 m |
| HE Shell203 mm HE/HC Mk25 |
| Maximum HE Damage2,800 |
| Chance of Fire14 % |
| Initial HE Velocity823 m/s |
| HE Shell Weight118 kg |
| AP Shell203 mm AP Mk21 |
| Maximum AP Shell Damage5,000 |
| Initial AP Shell Velocity762 m/s |
| AP Shell Weight152 kg |
| Maximum Speed33 knot |
| Turning Circle Radius770 m |
| Rudder Shift Time8.6 sec |
| Surface Detectability Range13.4 km |
| Air Detectability Range7.9 km |

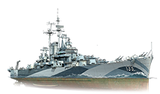
Salem — American special premium Tier X cruiser.
USS Salem, a Des Moines-class cruiser, served mainly in the Mediterranean from 1950 to 1956, serving as the flagship of the U.S. 6th and 2nd Fleets on a regular basis. In 1956, she "starred" as German cruiser Admiral Graf Spee in the "Pursuit of the Graf Spee" film. In 1994, the cruiser was decommissioned and converted into a museum ship, which is now located in Quincy, Massachusetts.
Salem was first released for sale with Update 0.7.6 and is available exclusively in the Armory for  Coal.
Coal.
Modules
 | Rate of Fire (shots/min) | 180° Turn Time (sec) | Maximum Dispersion (m) | Maximum HE Shell Damage (HP) | Chances of HE shells causing a fire on target (%) | Maximum AP Shell Damage (HP) | Research price (exp) | Purchase price (  ) ) | |
|---|---|---|---|---|---|---|---|---|---|
| 203 mm/55 RF Mk.16 in a turret | 10.9 | 30 | 142 | 2,800 | 14 | 5,000 | 0 | 0 |
 | Hit Points (HP) | Armor (mm) | Armor (mm) | Main Turrets (pcs.) | Secondary Gun Turrets (pcs.) | AA Mounts (pcs.) | Torpedo Tubes (pcs.) | Hangar Capacity (pcs.) | Research price (exp) | Purchase price ( ) | |
|---|---|---|---|---|---|---|---|---|---|---|---|
| Salem | 49,700 | 6 | 203 | 3 | 6 | 12/6 | 0 | 0 |
 | IDS_SHIP_PARAM_SUO_INCREASE_DIST (%) | Maximum Firing Range (km) | Research price (exp) | Purchase price ( ) | |
|---|---|---|---|---|---|
| Mk10 mod. 1 | 0 | 0 | 0 |
 | Maximum Speed (knot) | Research price (exp) | Purchase price ( ) | |
|---|---|---|---|---|
| Propulsion: 120,000 hp | 33 | 0 | 0 |
Compatible Upgrades
| Slot 1 |
 |
 |

| ||
|---|---|---|---|---|---|
| Slot 2 |
 |
 |
 |
 |

|
| Slot 3 |
 |
 |
 |

| |
| Slot 4 |
 |
 |
 |

| |
| Slot 5 |
 |
 |
 |

| |
| Slot 6 |
 |
 |

|
Player Opinion
Performance
Refer to the in-game Port screens for more useful data.
The first non-tech tree Tier X ship[1] in the game, Salem plays much like her tech tree sister Des Moines, albeit with more survivability at the trade off of less utility. Captains familiar with the American heavy cruiser branch should adapt to Salem’s minor quirks fairly quickly.
The largest difference between the two comes in the form of consumable choices. Des Moines can choose between Surveillance Radar  (with a 10.0 km range), Catapult Fighter
  , or Spotting Aircraft
  for her Slot 3 consumable, and equips the standard version of Repair Party
  ; Salem — who wasn't completed with her aircraft catapults installed — eschews aircraft entirely and has access to either Surveillance Radar (with a 8.5 km range) or Hydroacoustic Search
  in Slot 3, and equips a specialized repair teams consumable similar to those on Royal Navy cruisers. Most other vital statistics remain identical — or roughly comparable — between the two.
The primary trait of Salem is her absurd rate of fire for a heavy cruiser: each of her barrels loads a fresh 203mm round every 5.5 seconds. The speed at which she pummels enemy targets is a sight to behold, whether she is punishing an enemy destroyer caught by her radar, or pumping super-heavy American armor-piercing shells into the sides of enemy cruisers and battleships.
Enemy aircraft carriers don't enjoy seeing a Salem on the other team either; her adequate AA suite[2] is only a touch worse than Des Moines’, as Salem here is rendered without her short-range 20mm Oerlikons.
With the handling characteristics befitting her size and the utility offered by her consumables, Salem is an excellent support ship and a late-game terror. She serves equally well as both an anti-air and anti-destroyer screening vessel; however, unlike Des Moines, Salem’s radar is not as useful in assisting in the detection of enemy destroyers due to it's shorter range.
Like her sister ship, learning to use Salem's main battery guns to their fullest requires a bit of time and adaptation. The high shell arcs and long flight times at medium to long range give her both advantages and disadvantages that other Tier X cruisers lack. She is capable of sitting behind an island and using her high shell arcs to lob shells at distant targets from cover, or — more commonly — snuggle up to an island and point her bow at the enemy, while presenting a relatively small target profile. Exploiting this technique allows her captain to turn a disadvantage into an advantage. Lobbing armor-piercing shells at bigger targets such as battleships can deal a surprising amount of damage in a short time. And the high rate of fire of her HE shells can burn any battleship to the waterline.
Salem possesses a stronger repair consumable than Des Moines, functioning identically to that of British cruisers of Tiers VIII-X. When it comes to taking fire damage, Salem is functionally immune: her heal can repair up to four full duration fires (damage from the HE shells that triggered the fires not withstanding). While the enhanced repair gives her more flexibility and survivability in the event of positioning mistakes, captains should not be relying it to keep them alive in situations that Des Moines couldn't survive.
Unlike most other Tier X cruisers, Salem cannot effectively fight as an anti-surface combatant in open water, and her slower shells prevent her from faring well in ranged firefights. Instead, captains should focus on playing defensively during the initial stages of a game, and choose areas of the map that provide hard cover and allow them to fight enemies on their own terms at short and medium range. Despite lacking a torpedo armament, the closer Salem gets to a target, the more dangerous she becomes. It should not come as a surprise that if played well, Salem can dictate the early flow of a battle, then become more aggressive in the mid- and late-game stages, quickly mopping up the enemy team with her withering rate of fire. This isn't the only way to play Salem, of course, but it's a common one; captains should adjust their play style depending on the situation to give their team the best chance of winning. Knowing when to go defensive or aggressive is key to conning Salem to victory.
Pros:
- An insane rate of fire for such heavy guns.
- High shell arcs make firing over islands easier.
- AP SHS (super-heavy shells) retain penetration at range, and with superior ricochet angles (60-67.5°) can tear up all but the most heavily armored targets, especially in close.
- A fair-to-good AA suite that turns solid when the Defensive AA Fire consumable is activated.
- Contrary to the sidebar data on this page, Salem's long-range AA artillery reaches out to 5.8km.
- 27mm of armor protects against 15-inch guns, 30mm of midsection protects against 16-inch guns; citadel is protected by a thick 152mm belt and a 127mm transverse bulkhead.
- Specialized Repair Teams
 with up to 48% of the health pool restored per charge (with the India Delta
  signal mounted).
Cons:
- Short ranged main battery with a stock reach of 15.8km.
- High shell arcs make hitting targets at range tricksy.
- Slow turret rotation for a cruiser.
- No torpedoes.
- Citadel is above water and easy to hit when showing broadside, and all 431mm or larger guns can overmatch her armor.
- Poor torpedo defense (7%).
- Mediocre agility.
- Surveillance Radar has a relatively short range (8.5 km).
- No Unique Upgrade (the first Tier X ship without one).
Research
Optimal Configuration
The primary build for Salem is for the role of gunship to take advantage of her great strength: her main battery firepower. She can be built for long range, usually coupled with an open-water emphasis. Or more usually, as a shorter-range area control fighter.
Her AA suite does support a reasonable anti-aircraft build, though this build is somewhat situational unless divisioning with an aircraft carrier.
Upgrades
The recommended upgrades for a Long Range Gunship build. The longer range makes open water play more viable.
- Slot 1: Main Armaments Modification 1

- Slot 2: Engine Room Protection
 *
* - Slot 3: Aiming Systems Modification 1

- Slot 4: Steering Gears Modification 1
 ; Propulsion Modification 1
  is a viable alternative.
 - Slot 5: Concealment System Modification 1
 *
* - Slot 6: Gun Fire Control System Modification 2

Playing Salem farther from the action, radar (especially her shorter range set) becomes less important. Slot 2 could better be used for Hydroacoustic Search Modification 1  .
.
For Slot 5, another viable build for open water maneuver is to select Propulsion Mod 1 in Slot 4 and Steering Gears Modification 2  in Slot 5. Torpedo Lookout System
  is also worth considering, particularly with SGM1 in Slot 4.
The recommended upgrades for a Short Range Gunship build. This build somewhat supposes the heavy use of terrain.
- Slot 1: Main Armaments Modification 1
- Slot 2: Engine Room Protection *
- Slot 3: Aiming Systems Modification 1 *
- Slot 4: Propulsion Modification 1
- Slot 5: Concealment System Modification 1
- Slot 6: Main Battery Modification 3

Slot 2 – Although Salem's radar has shorter range than others, it is still a useful tool so Surveillance Radar Modification 1  may be the better choice here.
Slot 3 – For close-in work, where quick targeting can be critical, accuracy may be less important than the time to get the battery on target. Thus many captains may prefer Main Battery Modification 2  , particularly since Main Battery Modification 3 in Slot 6 slows the turrets significantly.
The recommended upgrades for a maximum Anti-aircraft build:
- Slot 1: Auxiliary Armaments Modification 1

- Slot 2: Defensive AA Fire Modification 1
 – Special Upgrade
 - Slot 3: AA Guns Modification 1
 *
* - Slot 5: Concealment System Modification 1 – 6.4km detection by air with all modifiers
- Slot 6: Auxiliary Armaments Modification 2


AA Guns Modification 1 for Slot 3 lowers the priority sector prep time (cooldown) from 10 seconds to 8 seconds, so another choice in this slot is justifiable.
Commander Skills
Consider Outnumbered for a flank holding role. Because serious damage to Salem tends to be catastrophic, i.e. from unseen torpedoes or heavy battleship guns, the extra heal from Superintendent is not as powerful as it first appears.
Recommended Commander Skills 
| ||||||
|---|---|---|---|---|---|---|
| Cost (points) |
Attack | Defense | ||||
1 |
 ★★★ |

|
 ★ |

|
 ★ |
 ★ |
2 |
 ★★ |

|

|

|
 ★★ |
 ★★ |
3 |

|

|
 ★★★ |
 ★★ |
 ★ |
 ★ |
4 |
 ★★ |
 ★ |
 ★ |

|
 ★★★ |
 ★ |
| Key: ★★★ - Extremely Useful ★★ - Frequently Useful ★ - Occasionally Useful No stars - Not Useful | ||||||
Consumables
Salem can equip the following consumables:
- Slot 1: Damage Control Party

- Slot 2: Defensive AA Fire

- Slot 3: Surveillance Radar or Hydroacoustic Search *
- Slot 4: Specialized Repair Teams
In Slot 3, choose Surveillance Radar for a Short Range gunship build. and Hydroacoustic Search for a Long Range gunship or AA support build.
Camouflage
As a premium ship, Salem comes with Default permanent camouflage and a set of permanent combat bonuses.
Signals
Salem captains should mount standard signal flags to improve the ship's performance in battle. Charlie Kilo  , India Delta
  and November Foxtrot
  flags are highly recommended to improve the ship's survivability. Sierra Mike
  is also recommended to increase the ship's top speed. India X-Ray
  and Victor Lima (
 ) signal flags can be mounted to make the main battery more lethal.
Recommended Signal Flags 
| |||||
|---|---|---|---|---|---|
| Combat | |||||
 ★★★ |
 ★ |
 ★★ |
 ★ |
 ★★★ |
 ★★ |

|

|
 ★★ |
 ★★★ |
 ★★ |
 ★★★ |

|
 ★ | ||||

Gallery


Historical Info
Historical Gallery
_underway_in_May_1949.jpg)


Video
References
- ↑ "Special" ships generally are those that are available for resources rather than cash. Special ships do not have the credit earning bonuses of true premiums. In all other relevant ways, they are treated as premium ships.
- ↑ While the 8-inch Mk.16 guns of the Des Moines class are dual purpose, they were never used in that role and are not represented as such in World of Warships.
- USS Salem (CA-139) - Wikipedia
- Des Moines-class cruiser - Wikipedia
- Monthly Wiki Spotlight - Salem - News - World of Warships Nov 2018
- Naval Legends: USS Salem - News - World of Warships June 2015
- The 8in Automatic Guns of USS Salem - Tour of the ship's main battery. Nov 2021
