Ship:Edinburgh

 |
 |
 |
|
 |
| Research price108000 exp |
Purchase price8,800,000  |
| Hit Points31,800 |
| 152 mm/50 BL Mk.XXIII on a Mk.XXIII mount4 х 3 pcs. |
| Rate of Fire7.8 shots/min |
| Reload Time7 sec |
| Rotation Speed7 deg/sec |
| 180 Degree Turn Time25.7 sec |
| Firing Range14 km |
| Maximum Dispersion129 m |
| AP Shell152 mm AP 6crh Mk IV |
| Maximum AP Shell Damage3,100 |
| Initial AP Shell Velocity841 m/s |
| AP Shell Weight50.8 kg |
| 533 mm TR Mk IV2 х 3 pcs. |
| Rate of Fire0.8 shots/min |
| Reload Time72 sec |
| Rotation Speed deg/sec |
| 180 Degree Turn Time7.2 sec |
| Torpedo533 mm Mk IX* |
| Maximum Damage15,866 |
| Torpedo Speed61 knot |
| Torpedo Range8 km |
| Maximum Speed32.5 knot |
| Turning Circle Radius730 m |
| Rudder Shift Time13.4 sec |
| Surface Detectability Range11.4 km |
| Air Detectability Range7.2 km |

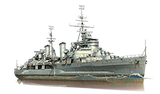
Edinburgh — British Tier VIII cruiser.
The most powerful light cruiser in the Royal Navy during World War II. Outrivaled most other same-type ships in terms of armor protection. She inherited powerful main guns from her predecessors. Among other Royal Navy cruisers of the 1930s, Edinburgh carried more powerful AA weapons.
Modules
 | Rate of Fire (shots/min) | 180° Turn Time (sec) | Maximum Dispersion (m) | Maximum HE Shell Damage (HP) | Chances of HE shells causing a fire on target (%) | Maximum AP Shell Damage (HP) | Research price (exp) | Purchase price ( ) | |
|---|---|---|---|---|---|---|---|---|---|
| 152 mm/50 BL Mk.XXIII on a Mk.XXIII mount | 7.8 | 25.7 | 129 | 3,100 | 0 | 600,000 |
 | Hit Points (HP) | Armor (mm) | Armor (mm) | Main Turrets (pcs.) | Secondary Gun Turrets (pcs.) | AA Mounts (pcs.) | Torpedo Tubes (pcs.) | Hangar Capacity (pcs.) | Research price (exp) | Purchase price ( ) | |
|---|---|---|---|---|---|---|---|---|---|---|---|
| Edinburgh (A) | 31,800 | 6 | 114 | 4 | 6 | 8/5/3/6 | 2 | 0 | 900,000 | ||
| Edinburgh (B) | 36,400 | 6 | 114 | 4 | 6 | 14/3/6 | 2 | 28,000 | 2,200,000 |
 | Rate of Fire (shots/min) | Torpedo Tubes Reload Time (sec) | 180° Turn Time (sec) | Maximum Damage (HP) | Torpedo Speed (knot) | Torpedo Range (km) | Research price (exp) | Purchase price ( ) | |
|---|---|---|---|---|---|---|---|---|---|
| 533 mm Mk IX* | 0.8 | 72 | 7.2 | 15,866 | 61 | 8 | 0 | 1,000,000 | |
| 533 mm Mk IX** | 0.8 | 72 | 7.2 | 15,533 | 62 | 10 | 12,000 | 1,200,000 |
 | IDS_SHIP_PARAM_SUO_INCREASE_DIST (%) | Maximum Firing Range (km) | Research price (exp) | Purchase price ( ) | |
|---|---|---|---|---|---|
| Mk VIII mod. 1 | 0 | 0 | 700,000 | ||
| Mk VIII mod. 2 | 0 | 15,000 | 1,500,000 |
 | Maximum Speed (knot) | Research price (exp) | Purchase price ( ) | |
|---|---|---|---|---|
| Propulsion: 80,000 hp | 32.5 | 0 | 500,000 |
Compatible Upgrades
| Slot 1 |
 |
 |
 |

| ||
|---|---|---|---|---|---|---|
| Slot 2 |
 |
 |
 |

| ||
| Slot 3 |
 |
 |
 |
 |
 |

|
| Slot 4 |
 |
 |

| |||
| Slot 5 |
 |
 |
 |

|
Player Opinion
Performance
Refer to the in-game Port screens for more useful data.
Tier VIII Edinburgh is a further refinement of Fiji, although she was actually built earlier. She retains the main features of Fiji, but improves the concealment and comes with the option of stealth radar.
The Ship
Edinburgh will feel familiar to players who have experienced Fiji. She retains many of the characteristics of her predecessor, making the transition a relatively easy one. Her rather low top speed of 32.5 knots will be familiar, as is her improved acceleration and energy retention in turns. Although she is slower than many cruisers, she is able to reach her top speed more quickly and maintain a faster speed when turning. Her rudder shift of 9.6 seconds and turning circle of 730 meters are fairly typical for a Tier VIII cruiser, but her energy retention and improved acceleration mean she feels far more nimble when maneuvering.
Edinburgh carries a standard cruiser Damage Control Party  with a 5 second action time and 60 seconds between uses. In her second consumable slot Edinburgh has a Specialized Repair Teams
  . This can repair up to 40% of her total HP, including all fire or flood damage received as well as an impressive 50% of citadel damage received. With 3 charges as standard, Edinburgh can recover up to 43,680 HP if all her charges are used to their best effect.
Her third slot features a Hydroacoustic Search
. This can repair up to 40% of her total HP, including all fire or flood damage received as well as an impressive 50% of citadel damage received. With 3 charges as standard, Edinburgh can recover up to 43,680 HP if all her charges are used to their best effect.
Her third slot features a Hydroacoustic Search  with three uses. This will detect enemy ships at 4 km, torpedoes at 3.5 km, and submerged submarines at 2 km. It has an action time of 100 seconds and a cooldown of 120 seconds. Her Hydroacoustic Search can aid in hunting destroyers, or to provide advance warning of unwelcome attention if firing from smoke.
Edinburgh has several options in her fourth consumable slot. Spotting Aircraft
with three uses. This will detect enemy ships at 4 km, torpedoes at 3.5 km, and submerged submarines at 2 km. It has an action time of 100 seconds and a cooldown of 120 seconds. Her Hydroacoustic Search can aid in hunting destroyers, or to provide advance warning of unwelcome attention if firing from smoke.
Edinburgh has several options in her fourth consumable slot. Spotting Aircraft  and Catapult Fighter
  are niche, and wasteful, options that do not play to Edinburgh’s strengths. Her fighters will launch three aircraft which will patrol around the ship for up to 60 seconds while an enemy CV is allowed to attack unhindered. Spotting Aircraft will provide a 20% boost to her main battery range for 100 seconds. Although the extra range may be welcome, Edinburgh’s ballistics do not lend herself to long range gunnery.
The more typical choices are the familiar Smoke Generator
are niche, and wasteful, options that do not play to Edinburgh’s strengths. Her fighters will launch three aircraft which will patrol around the ship for up to 60 seconds while an enemy CV is allowed to attack unhindered. Spotting Aircraft will provide a 20% boost to her main battery range for 100 seconds. Although the extra range may be welcome, Edinburgh’s ballistics do not lend herself to long range gunnery.
The more typical choices are the familiar Smoke Generator  or the new Surveillance Radar
  . These consumables offer the choice of two different gameplay styles. Taking the Smoke Generator will continue the familiar play style of Fiji and her predecessors. This creates a series of large smoke clouds which take 99 seconds to disperse. Players will need to remember that Edinburgh takes longer to slow down from full speed and can easily slide through her smoke before she has come to a stop.
Using the Surveillance Radar will allow Edinburgh to take a more aggressive role. If she is built for stealth, she will have an 800 meter buffer between her detection range and her radar range which allows her to act as a radar trap. Her radar lasts for 30 seconds, allowing her to fire up to four salvos at a detected target.
. These consumables offer the choice of two different gameplay styles. Taking the Smoke Generator will continue the familiar play style of Fiji and her predecessors. This creates a series of large smoke clouds which take 99 seconds to disperse. Players will need to remember that Edinburgh takes longer to slow down from full speed and can easily slide through her smoke before she has come to a stop.
Using the Surveillance Radar will allow Edinburgh to take a more aggressive role. If she is built for stealth, she will have an 800 meter buffer between her detection range and her radar range which allows her to act as a radar trap. Her radar lasts for 30 seconds, allowing her to fire up to four salvos at a detected target.
Armor and Survivability
Edinburgh is rather lightly armored and vulnerable to enemy fire. Her citadel armor is 114 mm thick, comparable to most light cruisers at her tier, but her citadel extends along the entire hull between front and rear turrets. Additionally, she has a raised section of armor beneath her funnels. This is also 114 mm thick, but it covers the citadel roof which is only 6 mm thick here; any shells that get through the main belt can easily overmatch the citadel roof. Her bow and stern plating is 16 mm thick; this is sufficient to bounce up to 220 mm AP rounds if correctly angled, but is vulnerable to HE penetration from any enemies within her matchmaking spread. Edinburgh’s health pool is below average for a Tier VIII cruiser. Although she has an improved heal, her relatively small HP and thin armor leave her vulnerable to receiving critical damage. If players are able to avoid receiving devastating strikes, Edinburgh can prove to be surprisingly resilient with her Specialized Repair Party consumable.
Armament
Edinburgh mounts a main battery of twelve 152 mm guns in four triple turrets. By now these weapons should be familiar to players, as they have been using them since Leander. Her short-fuse AP has improved ricochet angles and reduced arming threshold. When engaging lightly armored targets, players can expect less overpenetration results and fewer ricochets. Armored or angled targets are a trickier proposition, and Edinburgh can struggle to wear these targets down on her own. Although her potential main battery DPM is good, fully utilizing her main battery requires exposing her citadel to return fire.
Edinburgh mounts a triple torpedo launcher on each side, with the ability to individually fire her torpedoes. Her torpedoes have a good range of 10 km; they can be launched from stealth, although the chance of hits at this range is low. Her torpedoes are a useful deterrent to prevent ships pushing into her position, but Edinburgh does not have enough torpedoes to make them a truly threatening weapon.
Anti-Air
Edinburgh’s anti-air defenses, while not terrible, are not strong enough to deter a carrier attack. Her long-range guns reach out to 5.8 km and create 5 flak clouds, which can cause serious damage to a distracted enemy CV. However, her short and medium-range weapons are weaker than most of her peers, with 44% of her DPM limited to just 2 km. A lone Edinburgh presents little serious threat to a carrier.
Anti-Submarine
Edinburgh uses depth charges for ASW attacks, which means she must be in close proximity in order to attack a submerged submarine. She drops a small pattern of three depth charges with each attack. She can have two attacks ready at a time, with each one taking 40 seconds to reload. Although she drops a small pattern, each individual charge is powerful, causing 5000 damage on a direct hit with a good chance of causing floods or fires.
Battle Performance
Edinburgh is best suited to supporting friendly ships from short to medium range. Her stealth and agility mean she can operate close to friendly destroyers to help them deal with lighter enemy ships. But, like Fiji, players must take care not to overextend and end up in a position they cannot escape from.
The addition of Surveillance Radar gives players a gameplay choice compared to previous ships in the line. The traditional, and safer, approach is to use the Smoke Generator to create cover for sustained firing. Players must remember that she takes a long time to slow down, which can leave her vulnerable if not already in a smoke screen. Slowing down to create a smokescreen in full view of the enemy is not advised; this is often a fast way to end her participation in the battle. The combination of Hydroacoustic Search and improved acceleration means that players should be able to safely avoid any torpedoes fired at her smoke clouds.
The alternative option is to utilize Surveillance Radar to turn Edinburgh into a more aggressive destroyer hunter. However, this will leave her without her smokescreen, so players will either need to carefully manage their engagements or rely on friendly ships to provide cover. A radar-equipped Edinburgh can come as a nasty surprise for enemy destroyers who will not be aware of her presence until they are already inside the radar range.
Once enemy destroyers are cleared out, Edinburgh will need to rely on flanking enemies and supporting friendly ships. She lacks any serious tools to bring down armored targets without the ability to set fires. Fighting from open water can be difficult due to her thin armor and relatively small health pool. Her guns also lack the range and ballistics to make open water fighting a serious option.
Pros:
- Has access to Specialized Repair Teams that allow her to regenerate large amounts health.
- Highly flexible ship; mounts Hydroacoustic Search by default, then can choose between Spotting Aircraft , Catapult Fighter , Smoke Generator , and Surveillance Radar .
- Good maneuverability; above average turning circle radius and rudder shift times.
Cons:
- Thin armor.
- Really only effective against lighter enemy units, such as destroyers and other cruisers.
- Lightly-armored turrets.
- Short main battery range.
Research
Optimal Configuration
There are a three key choices that dictate how Edinburgh will play: the upgrades in Slots 1 and 3, and which consumable she chooses to go along with Hydroacoustic Search .
Upgrades
The recommended upgrades for Edinburgh are as follows:
- Slot 1: Main Armaments Modification 1

- Slot 2: Engine Room Protection

- Slot 3: Main Battery Modification 2

- Slot 4: Steering Gears Modification 1

- Slot 5: Concealment System Modification 1

For players using Surveillance Radar , the Surveillance Radar Modification 1  available from the armory for 17,000
  will provide a 6 second boost to her radar active time.
Commander Skills
Edinburgh does not require many captain skills in order to create a viable build. With only 152 mm AP rounds to worry about, many ammunition-related skills are not needed. A starting 10 point build would be Last Stand, Priority Target, Survivability Expert, and Concealment Expert. Following this, almost any combination of skills can be used as players prefer. As she does not need many ammunition skills and her torpedoes are not worth building into, Edinburgh captains may have the option to use multiple 4 point skills without sacrificing other areas. Additionally, confident captains may wish to forgo Priority Target and take Consumable Enhancement instead.
For players using radar, the Consumables Enhancement and Top Grade Gunner skills are more useful as Edinburgh will be operating inside her detection radius more frequently and using her radar.
Recommended Commander Skills 
| ||||||
|---|---|---|---|---|---|---|
| Cost (points) |
Attack | Defense | ||||
1 |

|

|
 ★ |

|

|
 ★★★ |
2 |

|

|
 ★★ |

|
 ★★★ |

|
3 |

|

|
 ★ |

|
 ★★ |
 ★★★ |
4 |
 ★ |

|
 ★ |

|
 ★★★ |

|
| Key: ★★★ - Extremely Useful ★★ - Frequently Useful ★ - Occasionally Useful No stars - Not Useful | ||||||

Consumables
Edinburgh can equip the following consumables:
- Slot 1: Damage Control Party
- Slot 2: Specialized Repair Teams – 3 charges
- Slot 3: Hydroacoustic Search – 3 charges
- Slot 4: Smoke Generator – 3 charges or Spotting Aircraft – 4 charges or Catapult Fighter – 3 charges or Surveillance Radar – 3 charges
Signals
Recommended Signal Flags 
| |||||
|---|---|---|---|---|---|
| Combat | |||||

|
 ★ |
 ★ |
 ★ |

|

|

|

|

|
 ★★ |
 ★★★ |
 ★★★ |
 ★★ |
 ★★★ | ||||

Gallery
-
 Moving into position.
 -
 Edinburgh engages an enemy destroyer at close range, landing the killing blow.
 -
 Edinburgh fires torpedoes individually at an enemy Yamato class battleship.
 -
 An enemy Yamato class battleship falls victim to a coordinated assault.
 -
 Edinburgh utilizes island cover to maintain concealment.
 -
 Torpedo bombers from an enemy Shokaku commit the attack.
 -
 A Shokaku torpedo attack is partially thwarted by Edinburgh's anti-air guns.
 -
 Edinburgh desperately dodges incoming fire.
 -
 Edinburgh takes a salvo of armor penetrating shells and dies.


Historical Info
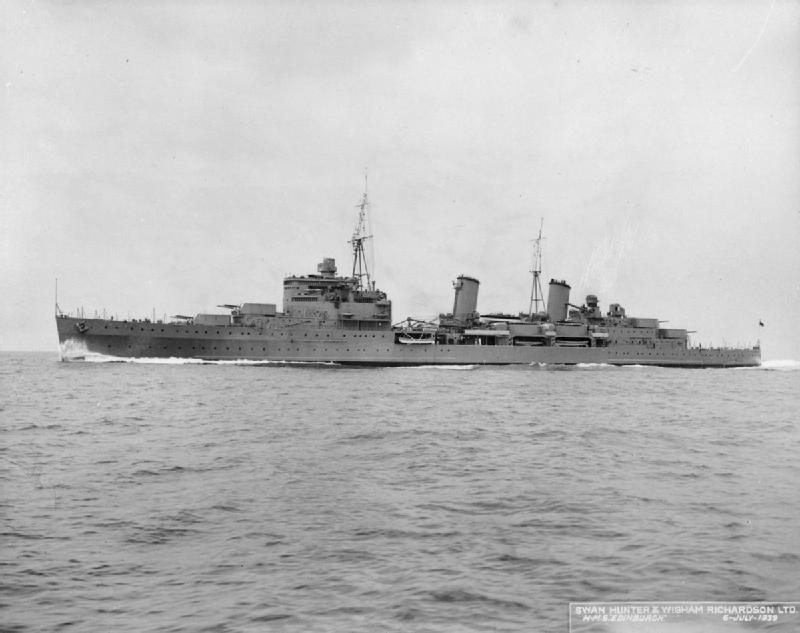
Historical Gallery
.jpeg)
.jpeg)
.png)
.jpeg)
.jpeg)


.jpeg)

.jpeg)

Video
References
- HMS Edinburgh (16) - Wikipedia
- Town-class cruiser (1936) - Wikipedia
- Armada 2.0: Edinburgh - News - World of Warships
- Armada - Edinburgh - World of Warships Official Channel - YouTube

