Ship:Yodo

 |
 |
 |
| Research price240000 exp |
Purchase price20,000,000  |
| Hit Points55,300 |
| 150 mm/60 5th Year Type in a triple-gun turret6 х 3 pcs. |
| Rate of Fire4.8 shots/min |
| Reload Time12 sec |
| Rotation Speed30 deg/sec |
| 180 Degree Turn Time6 sec |
| Firing Range18 km |
| Maximum Dispersion157 m |
| HE Shell150 mm HE Type0* |
| Maximum HE Damage2,850 |
| Chance of Fire12 % |
| Initial HE Velocity930 m/s |
| HE Shell Weight41 kg |
| AP Shell150 mm AP Type 0 |
| Maximum AP Shell Damage2,850 |
| Initial AP Shell Velocity930 m/s |
| AP Shell Weight41 kg |
| 610 mm Quad4 х 4 pcs. |
| Rate of Fire0.6 shots/min |
| Reload Time100 sec |
| Rotation Speed deg/sec |
| 180 Degree Turn Time7.2 sec |
| TorpedoType 93 |
| Maximum Damage23,766 |
| Torpedo Speed60 knot |
| Torpedo Range15 km |
| Maximum Speed34 knot |
| Turning Circle Radius930 m |
| Rudder Shift Time9 sec |
| Surface Detectability Range12.4 km |
| Air Detectability Range8.5 km |

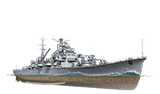
Yodo — Japanese Tier X cruiser.
The archive of the Japanese Navy has preserved a project of a cruiser with a displacement of 10,000 tons, armed with six triple-gun turrets housing 150 mm dual-purpose guns. The ship was supposed to carry aviation and was probably the project of a cruiser designed to lead a submarine flotilla.
Modules
 | Rate of Fire (shots/min) | 180° Turn Time (sec) | Maximum Dispersion (m) | Maximum HE Shell Damage (HP) | Chances of HE shells causing a fire on target (%) | Maximum AP Shell Damage (HP) | Research price (exp) | Purchase price ( ) | |
|---|---|---|---|---|---|---|---|---|---|
| 150 mm/60 5th Year Type in a triple-gun turret | 4.8 | 6 | 157 | 2,850 | 12 | 2,850 | 0 | 2,000,000 |
 | Hit Points (HP) | Armor (mm) | Armor (mm) | Main Turrets (pcs.) | Secondary Gun Turrets (pcs.) | AA Mounts (pcs.) | Torpedo Tubes (pcs.) | Hangar Capacity (pcs.) | Research price (exp) | Purchase price ( ) | |
|---|---|---|---|---|---|---|---|---|---|---|---|
| Yodo | 55,300 | 13 | 180 | 6 | 4 | 20/12/12/4/6 | 4 | 0 | 3,000,000 |
 | Rate of Fire (shots/min) | Torpedo Tubes Reload Time (sec) | 180° Turn Time (sec) | Maximum Damage (HP) | Torpedo Speed (knot) | Torpedo Range (km) | Research price (exp) | Purchase price ( ) | |
|---|---|---|---|---|---|---|---|---|---|
| Type 93 | 0.6 | 100 | 7.2 | 23,766 | 60 | 15 | 0 | 2,000,000 |
 | IDS_SHIP_PARAM_SUO_INCREASE_DIST (%) | Maximum Firing Range (km) | Research price (exp) | Purchase price ( ) | |
|---|---|---|---|---|---|
| Type10 mod. 1 | 0 | 0 | 2,000,000 |
 | Maximum Speed (knot) | Research price (exp) | Purchase price ( ) | |
|---|---|---|---|---|
| Propulsion: 190,000 hp | 34 | 0 | 2,000,000 |
Compatible Upgrades
| Slot 1 |
 |
 |

| |||
|---|---|---|---|---|---|---|
| Slot 2 |
 |
 |
 |

| ||
| Slot 3 |
 |
 |
 |
 |
 |

|
| Slot 4 |
 |
 |
 |

| ||
| Slot 5 |
 |
 |
 |

| ||
| Slot 6 |
 |
 |
 |

|
Player Opinion
Performance
Refer to the in-game Port screens for more useful data.
Yodo is the pinnacle of the Japanese light cruiser line. Armed with an impressive 18 barrels mounted in 6 turrets, she boasts the greatest number of main battery guns in a broadside of any ship in the game. She also has a heavy torpedo armament in a 4x4 configuration capable of launching sixteen torpedoes at once. Yodo will need to use both weapon types to maximize her otherwise low battle impact.
Survivability
When it comes to survivability, Yodo is severely lacking. Every shell, regardless of caliber and type, will hurt. Relatively thin hull plating makes her susceptible to overmatch by large-caliber guns almost everywhere, and smaller-caliber HE and SAP will achieve full penetration damage. Her deck armor is 30mm thick, and everything else (her bow, stern, and hull side plating) is a measly 25mm thick. Her citadel is large and easy to penetrate when she shows even the slightest hint of broadside, but does benefit from the plating being thick enough to ricochet any AP shell in the game, provided that it impacts the citadel at a sharp enough angle. It should be noted that Yodo’s citadel does have a partial turtleback armor scheme and sits low in the ship, although this won’t really provide much effective protection. While she does have better armor than the likes of the British light cruisers, there are some destroyers in-game with thicker upper belt armor than Yodo has, and they don’t have a citadel to worry about losing massive amounts of chunk damage. Captains must do everything possible to avoid/mitigate the amount of fire they draw throughout the entire course of the battle. It should also be noted that Yodo’s turret armor is also very thin, making her main battery turrets highly susceptible to being incapacitated when hit by enemy shells. This can be somewhat alleviated through the use of upgrades such as Main Armaments Modification 1. She does benefit from an unusually high hitpoint pool for a light cruiser (55,300), but with such a weak armor scheme this benefit is basically negated. Fortunately, Yodo has access to the standard Repair Party  consumable to recover some of her lost hitpoints (including up to 33% of citadel damage received). This ship cannot withstand concentrated fire for any length of time, and captains must plan their engagements accordingly.
Maneuverability
For a light cruiser, Yodo is highly un-maneuverable. Although she has a good rudder shift of 9.1 s, her top speed of 34 knots is average for a Tier X cruiser, together with a large turning radius of 930 meters (one of the worst of all Tier X cruisers) make her feel downright clumsy. In addition, she has mediocre acceleration, making it difficult to dodge incoming fire.
Armament
Main Battery Guns:
Yodo is unique in that she carries the highest number of main battery guns mounted on any ship in the game, and an impressive firing range to match. To compensate for her heavy broadside, she is saddled with a long reload of 12.5 seconds (longer than some heavy cruisers), has high initial but low shell impact velocity, and a high shell drag coefficient, meaning that her shell trajectories are extremely floaty, especially at maximum range. This in turn makes leading targets at range (where Yodo should be played) difficult, but not impossible. Captains who are comfortable with long-range gunboats and have good aim will be rewarded for their marksmanship. Her quick turret traverse speed of 30 degrees/second will help with her gunnery. In common with standard light cruisers, Yodo benefits from one-fifth-caliber high explosive shell penetration, allowing her to penetrate 30mm plating base. Taking the Inertia Fuse for HE Shells skill will allow her to cross the 32mm threshold to penetrate the deck plating of high-tier battleships (but not the 38mm deck plating commonly found on American battleships) at the expense of fire-starting capabilities. Her armor-piercing (AP) ammunition has some of the lowest alpha damage (2800 HP) for a tech tree Tier X cruiser, a high initial shell velocity (930m/s), and an average shell drag coefficient, meaning that aiming with AP shells is as difficult as with her HE shells, but HE should still be her primary choice of ammunition.
Fun fact: Yodo’s reload is so long that her main battery turrets can rotate a full 360 degrees between salvos.
Torpedo Armament:
Similar to her Japanese heavy-cruiser counterparts, Yodo carries a heavy torpedo armament. Two quadruple launchers are mounted on each side of the ship, giving her the ability to launch a total of sixteen torpedoes at once. Due to the launchers being mounted in the hull, one might expect their firing trajectories to be poor. Thankfully, that’s not the case thanks to the Torpedo Turning mechanic. The torpedo turning mechanic allows captains to select a firing trajectory within specified firing arcs larger than what would have otherwise been physically possible, and the torpedoes will launch and turn towards their specified heading. This grants Yodo’s torpedoes some much-needed utility. While they boast best-in-class damage per torpedo (23,767 HP), longest range (15km) and an acceptable speed of 60 knots, they are plagued with high detection ranges, granting vigilant opponents plenty of time to react to mitigate the threat. Another bonus to them is their reload when compared to their potential damage - only 100 seconds. This in mind, they can be used to some effect as area denial weapons, slowing the advance of the enemy.
Anti-Aircraft Defenses
Yodo’s anti-aircraft suite is unremarkable, although not poor. She has one of the longest range AA bubbles among researchable Tier X cruisers and decent AA damage-per-second, but that’s where her strong points end. Otherwise, she has average flak output. Captains can also choose to swap out the Hydroacoustic Search  consumable for the Defensive AA Fire
  consumable to temporarily boost her AAA firepower. This is not an anti-aircraft cruiser, and should not be treated as such.
Anti-Submarine Armament
Yodo's main strength comes in her 16 torpedoes, featuring a 15km range and max damage of 23767. When it comes to submarine defense, Yodo is armed with 2 8km ASW planes.
Consumables
Yodo has access to the Damage Control Party  , Catapult Fighter
  , and Repair Party consumables. She uses the standard cruiser Damage Control Party and Repair Party consumables, which should be managed carefully to absorb as much punishment as possible. Captains can also choose between the Hydroacoustic Search consumable to spot torpedoes and enemy vessels, or the Defensive AA Fire consumable to provide a valuable 50% boost to the continuous damage of her AA guns and quadruple her flak damage for 40 seconds. The Catapult Fighter consumable may help to deter air attacks, but can also be used to spot targets over islands.
Battle Performance
Due to her large size, poor survivability, and dreadful handling, Yodo is best played at medium- to long-range. Her recommended playstyle consists of kiting opponents, dropping torpedoes in her wake, and shooting HE at range. Players will struggle with her floaty shells and underwhelming main battery salvoes due to her light cruiser HE pen but heavy cruiser reload time. Yodo is not a ship to be played aggressively. Her AP performance is negligible, so closing distance to a target is of no benefit. The further she is from the ship(s) shooting at her, the more likely they are to miss, which is the ideal outcome. Yodo is a ship that requires patience and masterful micromanagement of all her characteristics to perform decently.
Pros:
- Good turret traverse
- Largest number of guns in a broadside of any ship in-game
- Good torpedo firing angles and reload
- Great main battery range for a light cruiser
Cons:
- Atrociously poor handling. Large turning circle, slow rudder
- Poor main battery performance
- High torpedo detectability coupled with average speed
- Huge, thinly armored target with vulnerable citadel
- Mediocre anti-aircraft firepower
- No staying power in engagements
Research
Optimal Configuration
Upgrades
The recommended upgrades are:
- Slot 1: Main Armaments Modification 1

- Slot 2: Engine Room Protection

- Slot 3: Aiming Systems Modification 1

- Slot 4: Propulsion Modification 1
 or Steering Gears Modification 1
- Slot 5: Concealment System Modification 1

- Slot 6: Main Battery Modification 3

Commander Skills
Recommended Commander Skills 
| ||||||
|---|---|---|---|---|---|---|
| Cost (points) |
Attack | Defense | ||||
1 |

|
 ★★★ |
 ★ |
 ★★ |
 ★ |
 ★★★ |
2 |
 ★ |
 ★★ |
 ★ |

|
 ★★★ |

|
3 |

|
 ★★ |
 ★★★ |

|
 ★★★ |
 ★★ |
4 |
 ★★ |
 ★ |
 ★ |
 ★★ |
 ★★★ |

|
| Key: ★★★ - Extremely Useful ★★ - Frequently Useful ★ - Occasionally Useful No stars - Not Useful | ||||||
Consumables
Yodo equips the following consumables:
- Slot 1: Damage Control Party
- Slot 2: Defensive AA Fire – 3 charges or Hydroacoustic Search – 3 charges
- Slot 3: Catapult Fighter – 3 charges
- Slot 4: Repair Party – 3 charges
- Slot 5: Submarine Surveillance
 – 3 charges
Signals
Recommended Signal Flags 
| |||||
|---|---|---|---|---|---|
| Combat | |||||

|

|

|
 ★ |
 ★★★ |
 ★★★ |
 ★★ |

|
 ★ |
 ★★ |

|
 ★★★ |

|
 ★★ | ||||

Gallery
Historical Info
Historical Gallery
References

