Ship:Kitakami

 |
Purchase priceSpecial  |
| Hit Points28,500 |
| 140 mm/50 3rd Year Type on a single mount4 х 1 pcs. |
| Rate of Fire20 shots/min |
| Reload Time3 sec |
| Rotation Speed8.49 deg/sec |
| 180 Degree Turn Time21.2 sec |
| Firing Range11.2 km |
| Maximum Dispersion110 m |
| HE Shell140 mm HE Type0 |
| Maximum HE Damage2,700 |
| Chance of Fire11 % |
| Initial HE Velocity850 m/s |
| HE Shell Weight38 kg |
| 610 mm Quad10 х 4 pcs. |
| Rate of Fire0.7 shots/min |
| Reload Time81 sec |
| Rotation Speed deg/sec |
| 180 Degree Turn Time7.2 sec |
| TorpedoType90 mod. 5 |
| Maximum Damage11,833 |
| Torpedo Speed86 knot |
| Torpedo Range12 km |
| Maximum Speed36 knot |
| Turning Circle Radius640 m |
| Rudder Shift Time7 sec |
| Surface Detectability Range9.8 km |
| Air Detectability Range5 km |

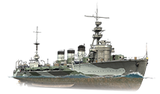
Kitakami — Japanese special premium Tier X cruiser.
At the outbreak of the Sino-Japanese War, Kitakami provided cover for landing operations of Japanese troops. In the second half of 1941, she was armed with ten quadruple-tube 610 mm torpedo launchers for night torpedo attacks. In 1942, the ship was converted into a high-speed transport for escorting troop convoys. In 1944, Kitakami took two torpedo hits from submarine HMS Templar. During repairs, the ship was converted into a Kaiten carrier. In 1945, the cruiser was damaged by Task Force 38 bombers and then used as a tender.
Kitakami was first released on 13 December 2023, as the reward for 80th stage of Update 12.11's Salvage for Victory event.
Modules
 | Rate of Fire (shots/min) | 180° Turn Time (sec) | Maximum Dispersion (m) | Maximum HE Shell Damage (HP) | Chances of HE shells causing a fire on target (%) | Maximum AP Shell Damage (HP) | Research price (exp) | Purchase price (  ) ) | |
|---|---|---|---|---|---|---|---|---|---|
| 140 mm/50 3rd Year Type on a single mount | 20 | 21.2 | 110 | 2,700 | 11 | 0 | 0 |
 | Hit Points (HP) | Armor (mm) | Armor (mm) | Main Turrets (pcs.) | Secondary Gun Turrets (pcs.) | AA Mounts (pcs.) | Torpedo Tubes (pcs.) | Hangar Capacity (pcs.) | Research price (exp) | Purchase price ( ) | |
|---|---|---|---|---|---|---|---|---|---|---|---|
| Kitakami | 28,500 | 13 | 65 | 4 | 2 | 10 | 0 | 0 |
 | Rate of Fire (shots/min) | Torpedo Tubes Reload Time (sec) | 180° Turn Time (sec) | Maximum Damage (HP) | Torpedo Speed (knot) | Torpedo Range (km) | Research price (exp) | Purchase price ( ) | |
|---|---|---|---|---|---|---|---|---|---|
| Type90 | 0.7 | 81 | 7.2 | 11,833 | 86 | 12 | 0 | 0 |
 | IDS_SHIP_PARAM_SUO_INCREASE_DIST (%) | Maximum Firing Range (km) | Research price (exp) | Purchase price ( ) | |
|---|---|---|---|---|---|
| Type10 mod. 1 | 0 | 0 | 0 |
 | Maximum Speed (knot) | Research price (exp) | Purchase price ( ) | |
|---|---|---|---|---|
| Propulsion: 78,000 hp | 36 | 0 | 0 |
Compatible Upgrades
| Slot 1 |
 |
 |

| ||
|---|---|---|---|---|---|
| Slot 2 |
 |
 |

| ||
| Slot 3 |
 |
 |
 |
 |

|
| Slot 4 |
 |
 |

| ||
| Slot 5 |
 |
 |
 |

| |
| Slot 6 |
 |
 |
 |

|
Player Opinion
Performance
Refer to the in-game Port screens for more useful data.
Background
In history, Kitakami was a Kuma-class light cruiser laid down in 1919. The class was given high speed and long range to act as scouts and flotilla leaders. In her pre-war configuration she was armed with fourteen 140mm/50 3rd Year Type naval rifles, though only six could bear in broadside. To increase her lethality, in summer 1941 Kitakami was refitted as a “torpedo cruiser” mounting ten quad launchers aft, sacrificing the three aft gun mounts. This was a novel concept intended to saturate an area with torpedoes to strike or disrupt an opposing fleet. It is this configuration that is modeled in World of Warships.
In Game
Armament
Kitakami is a 'special' Tier X Japanese light cruiser sporting a unique configuration. For artillery she carries four 140mm/50 3rd Year Type naval rifles in single mounts. The base maximum range for each gun is 11.2 km.
What sets Kitakami apart from other cruisers is her ability to fire up to 40 torpedoes without reloading. She carries ten 610mm quad torpedo tubes, five per side. The tubes can fire both Type 90 mod.5 torpedoes with a maximum range of 12.0 km and Type 93 mod.2 deepwater Torpedoes with a 20.0 km range. She is capable of switching between torpedo types quickly while in-game, which is helpful depending on the type of ship she is engaging. To balance her armament, Kitakami reloads one launcher per side consecutively, rather than every launcher concurrently. A full reload takes nearly 7 minutes so captains must learn to balance launches against reloads.
Her anti-aircraft defense armament is lacking, with twin mount 25mm/60 Type 96 guns in a 2x2 layout, effective only out to 2.5 km without modification.
The Hull
Even though her armament is powerful, Kitakami is still an older light cruiser, with a hull that is essentially unarmored yet with a citadel. She has a base health pool of 28,500 HP. She can travel at 36.0 knots with a 640m turning radius supported by a 7.0 second rudder shift time.
Despite her inability to slug it out with other ships of her tier, Kitakami does have some tricks up her sleeve to increase the chances that captains won’t be returning to port the first time she is spotted by enemy ships. First, she’s hard to spot with a base concealment range of 9.8 km. By combining the 4-point Concealment Expert skill with the Concealment System Modification 1 upgrade, this can be reduced to under 8 km. Second is her consumables such as Exhaust Smoke Generator, Engine Boost, and Repair party.
Game Play
Kitakami is most effective in a long-range support style of game play. Captains should be careful to avoid enemy aircraft, as Kitakami can do little to defend herself from airborne attacks. Once spotted, immediate action should be taken to break line of sight with the enemy and return to concealment. This may entail the use of consumables in defensive maneuvers, such as deploying a smoke screen and using Engine Boost to create distance between her position and the threat. Accordingly, positioning is critically important. Good positioning will ensure that consumables are used only when necessary to facilitate retreating and repositioning. Captains will need to take special care to develop a strategy before launching an attack, because it is likely that the enemy team will prioritize Kitakami as a target when spotted. Other ships are incapable of launching the quantity of torpedoes Kitakami carries, so upon her torpedo waves being spotted, the enemy will have a general idea of where Kitakami is with regard to their own position. If Kitakami launches torpedoes when immediately loaded, captains will find themselves waiting for fresh torpedoes regularly. This means that if Kitakami were to engage an enemy Tier X battleship while it has full hit-points, it is unlikely to be able to neutralize it in one engagement. Furthermore, her guns are practically useless in high tier engagements, so Kitakami will more than likely be neutralized if she is caught without loaded torpedoes or consumables to escape.
Kitakami is recommended for intermediate and advanced players due to her reliance on concealment, planning, and the patience of her captain to wait for the right opportunity to attack. Her profile, consumables, and armament make Kitakami play more like a sluggish destroyer with poor concealment. Although she may not fit the traditional profile of a ship designed for competitive game play, her unique traits will assist her ability to find success when properly supported by team or division mates.
With high levels of excitement surrounding a ship such as Kitakami, there will be many players seeking to add her to their collections. Captains of all skill levels can enjoy Kitakami due to her ability to fire a “wall” of torpedoes, which is sure to create unforgettable memories. There can be no doubt, the enemy team will never forget the first time they spot 20 to 40 torpedoes speeding toward their ships!
Pros:
- Battery of ten quadruple torpedo tubes is unmatched by any other ship.
- Carries both standard and deepwater torpedoes, selectable in-game.
- Exhaust smoke generator.
- Low detectability for a cruiser.
- High speed.
Cons:
- Small health pool with almost non-existent armor.
- Weak artillery.
- Torpedoes reload one launcher at a time, making reload management an unprecedented skill requirement.
- Near non-existent AA defenses at 9 DPS.
Research
Optimal Configuration
Information about the Torpedo Armament:


Deepwater Torpedoes


Normal Torpedoes
Upgrades
Kitakami's purpose in life is to launch her torpedoes. They should be strengthened as much as possible. Steering Gears Mod 1 will help with her generally sluggish maneuverability.
The recommended upgrades for Kitakami are:
- Slot 1: Main Armaments Modification 1

- Slot 2: Engine Room Protection

- Slot 3: Torpedo Tubes Modification 1

- Slot 4: Steering Gears Modification 1

- Slot 5: Concealment System Modification 1

- Slot 6: Torpedo Tubes Modification 2

Commander Skills
Spend no point on enhancing her artillery.
Recommended Commander Skills 
| ||||||
|---|---|---|---|---|---|---|
| Cost (points) |
Attack | Defense | ||||
1 |

|
 ★★★ |
 ★★ |

|
 ★★ |
 ★★★ |
2 |

|
 ★★★ |
 ★★ |

|
 ★★ |

|
3 |

|
 ★★★ |
 ★★★ |

|
 ★★ |
 ★★★ |
4 |

|

|
 ★★ |

|
 ★★★ |

|
| Key: ★★★ - Extremely Useful ★★ - Frequently Useful ★ - Occasionally Useful No stars - Not Useful | ||||||
Consumables
Kitakami can equip the following consumables:
- Slot 1: Damage Control Party

- Slot 2: Exhaust Smoke Generator
 – 4 charges
 - Slot 3: Engine Boost
 – 3 charges
 - Slot 4: Repair Party
 – 3 charges
Camouflage
As a premium ship, Kitakami comes with Default permanent camouflage and a set of permanent combat bonuses.
Signals
Recommended Signal Flags 
| |||||
|---|---|---|---|---|---|
| Combat | |||||

|

|

|
 ★ |
 ★★ |

|
 ★★★ |

|

|
 ★★★ |
 ★★★ |
 ★★★ |
 ★★★ |

| ||||


Gallery
Historical Info
Historical Gallery
Video
References
Wargaming
- ST 0.9.7, Kitakami - Development Blog. 6 Jul 2020.
Wikipedia
